GGP ITALY SPA TR 25J User manual

FR
EN
NL
DE
ES
PT
EL
Tagliabordi - MANUALE DI ISTRUZIONI
ATTENZIONE: prima di utilizzare la macchina, leggere
attentamente il presente libretto.
Trimmer - OPERATOR’S MANUAL
WARNING: read thoroughly the instruction booklet before
using this machine.
Coupe-bordures - MANUEL D’UTILISATION
ATTENTION: lire attentivement le manuel avant d'utiliser cette
machine.
Trimmer - GEBRAUCHSANWEISUNG
ACHTUNG: vor Inbetriebnahme des Geräts die
Gebrauchsanleitung aufmerksam lesen.
Cortabordes
- MANUAL DE INSTRUCCIONES
CUIDADO: antes de utilizar esta máquina, lea atentaemente
el manual de instrucciones.
Trimmer - GEBRUIKERSHANDLEIDING
LET OP: Voordat u de bosmaaier gaat gebruiken dient u eerst
deze handleiding aandachtig door te lezen.
Corta-rebordos - MANUAL DE INSTRUÇÕES
ATENCAO! Antes de usar a moto-roçadeira, ler com atenção
este manual de instruções.
ÃÏÔÔÎÔÙÈÎfi - √¢∏°π∂™ Ã∏™∏™
¶ÚÔÛÔ¯‹: ¶ÚÈÓ ¯ÚËÛÈÌÔÔÈ‹ÛÂÙ ÙÔ ı·ÌÓÔÎÔÙÈÎfi, ‰È·‚¿ÛÙÂ
ÚÔÛÂÎÙÈο ÙȘ Ô‰ËÁ›Â˜ ¯Ú‹Û˘
Çalı biçme makinesi - KULLANIM KILAVUZU
Makineyi kullanmadan önce talimatlar içeren kılavuzu dikkatle
okuyun.
Grästrimmer - BRUKSANVISNING
VARNING: Läs igenom hela detta häfte innan du använder
maskinen.
Trimmerit - KÄYTTÖOHJEET
VAROITUS:
lue käyttöopas huolellisesti ennen koneen käyttöä.
Trimmere - BRUGSANVISNING
ADVARSEL: Læs instruktionsbogen omhyggeligt igennem,
før du tager denne maskine i brug.
Trimmere - INSTRUKSJONSBOK
ADVARSEL: Les denne bruksanvisningen nøye før du bruker
maskinen.
Křovinořez - NÁVOD K POUŽITÍ
POZOR: Před použitím stroje si pozorně přečtěte tento návod
k použití.
Wycinarka - INSTRUKCJ OBSŁUGI
UW G : Przed użyciem urządzenia przeczytaj uważnie
niniejsząinstrukcję.
Rezalnica grmov - PRIROČNIK ZA UPORABO
POZOR: Preden uporabite stroj, pažljivo preberite priročnik
z navodili.
ìÒÚÓÈÒÚ‚Ó ‰Îfl ‚˚Û·ÍË ÍÛÒÚ‡ÌËÍÓ‚ - PìäéÇéÑëíÇé ë àçëíêìäñà åà
ÇçàåÄçàÖ: èÂʉ ˜ÂÏ ÔÓθÁÓ‚‡Ú¸Òfl Ó·ÓÛ‰Ó‚‡ÌËÂÏ,
‚ÌËχÚÂθÌÓ ÔÓ˜ÚËÚ ÁÚÓ Û Ó‚Ó‰ÒÚ‚Ó ÔÓ Á ÒÔÎÛ‡Ú‡ˆËË.
Čistačica šikara - PRIRUČNIK ZA UPORABO
POZOR: Prije nego pristupite uporabi stroja, pažljivo pročitajte
upute.
IT
SL
PL
CS
RU
HR
NO
SV
FI
DA
TR

2
1
3
65
7 9
12 1411
E2
10
13
2/1 B A
B
C D
E
E
F
G
G4
Start
1
3
2
4
5
8
Stop
T

3
15
E
1716 A
B
A
B
FA
18
19 20

4

EN
PRESENTATION 21
Dear Customer,
Firstly, we wish to thank you for having chosen our products and hope that the use of this machine will
be extremely satisfying for you and fully meet your expectations.
This manual has been drawn up to allow your to get to know your machine well and use it in safe and
efficient conditions; please do not forget that it is an integral part of the machine and keep it to hand
to be consulted at all times and consign it with the machine if you should sell or lend it to others.
Your new machine has been designed and manufactured to current standards and is safe and reliable
if used in full respect of the instructions contained in this manual (forecast use); any other use or fail-
ure to comply with the instructions for safe use, maintenance and repair shall be considered as
“improper use”, cause the warranty to become null and void and relieve the Manufacturer from all
responsibility, with the user becoming responsible for charges for damages or personal or third party
injury.
If any slight differences are found between the description herein and the machine you own, please
bear in mind that due to continual product improvement, the information contained in this manual is
subject to modification without prior notice or obligatory updating, although the essential features for
the purposes of safety and operation remain unchanged. In the event of doubt, please contact your
dealer. Enjoy your work!

22 IDENTIFICATION OF THE MACHINE AND PARTS
EN
IDENTIFICATION OF THE MACHINE AND PARTS
1) Motor
2) Spark plug
3) Starter handle
4) Starter lever
5) Primer
6) Air filter
7) Fuel tank cap
8) Rear handgrip
9) Throttle lever
10) Safety lever
11) Start/Stop switch
11a) Accelerator stop
lever
12) Safety spacer
13) Front handgrip
14) Drive shaft
15) Front guard
16) Cutting head with
nylon line
17) Ratings plate
The brush cutter you
have purchased is sup-
plied with the following
accessories:
1) user and mainte-
nance guide
2) spark plug / torx key
3) steel rod
RATINGS PLATE
1) Conformity mark to the directive 98/37/EC
2) Name and address of the manufacturer
3) Sound power level LWA in accordance with
Directive 2000/14/EC
4) Manufacturer’s model of reference
5) Machine model
6) Serial number
7) Certification Body mark
11) Year of manufacture
1
LWA
dB
PRODUCT SERVICE
2
6 4
57
11
3

1) Warning! Danger
2) Read the instruction booklet before using this
machine.
3) Your hearing is at risk of irreparable damage.
Anyone operating this machine under normal
conditions during continuous daily use may be
exposed to a noise level equal to or exceeding
85 dB (A).
The operator must wear Personal Protective
Equipment (PPE). Whenever the machine is in
use, safety goggles must be worn to safeguard
against flying objects, as must ear protectors,
such as a soundproof helmet, in order to protect
the operator’s hearing. If the operator is working
in an area where there is a risk of falling objects,
a safety helmet must also be worn.
4) Danger: objects thrown up by machine!
Keep people or animals at least 15 m away from
the machine during operation!
5) Use heads with nylon line only. Do not use
metal tools.
6) Maximum revolution frequency of the drive
shaft to which the cutting tools are fitted.
7) Air
8) Choke
SYMBOLS 23
EN
SYMBOLS
WARNING: The brush cutter purchased by you has been manufactured for home use.
1 3 4 5
6 8
2
7
-1
min

Each element of this machine is a potential safe-
ty hazard if used improperly or poorly main-
tained.
We recommend that special attention is paid to
the sections starting with the following headings:
or
These give details or further
information on what has already been said, and
are aimed at preventing damage to the machine
or causing damage.
Non-observance will
result in the risk of injury to oneself or others.
Non-observance will
result in the risk of serious injury or death to
oneself or others.
A) TRAINING
1. Read the instructions in this manual carefully.
Before using the trimmer, the operator must be
familiar with the controls and know how to stop
the motor quickly. The operator must also know
how to use it correctly.
2. Use the trimmer for the purpose it was
designed for, i.e.:
–Cutting grass with a Nylon line (e.g. around the
edges of lawns, flower beds, walls, fences and
small grassy areas to tidy the areas that have
been cut with a lawnmower).
Any other use may be dangerous or result in the
deterioration of the machine.
Do not replace the head with nylon line with
other parts such as metal lines, disks, etc…
3. Never let children or people who have not
read the instructions use the trimmer.
Locals laws may set a minimum age for the user.
4. Do not use the trimmer:
–When animals or especially children are in the
vicinity. Always ensure that any other people
present are at least 15 metres away from the
machine. The trimmer is designed for use by
one person at a time.
–If the user has taken medicine, alcohol or
drugs that may slow reflexes, impair alertness
and/or vision.
–If the operator is tired or unwell.
!DANGER!
!WARNING!
IMPORTANT
NOTE
–If any of the safety devices, such as the head
or exhaust silencer guard are not in place or
are damaged.
–If the safety device is not the specific device
for that cutting machine. If a head with a nylon
line is used, ensure that the line-cutting blade
is in place so that the line is cut to the correct
length.
–For shoulder-mounted trimmers: with a sys-
tem or an accessory other than the flexible
shaft that comes with the trimmer.
5. Do not modify the trimmer: this may jeopar-
dise operator safety by exposing him/her to
accidents and serious injury.
6. The owner or user is responsible for any acci-
dents or risks run by third parties or their pos-
sessions.
B) PREPARATION
1. Do not use the trimmer when barefoot or
wearing sandals. Do not use the trimmer with
baggy clothes that could get caught on branch-
es or in the rotating tool.
While the machine is in use, the operator must
wear long trousers, boots or safety shoes with
slip-proof soles, goggles or a protective visor to
protect against flying objects, gloves, (preferably
in leather) and earmuffs or a soundproof helmet.
To protect the head, a safety helmet must be
worn in areas at risk from falling objects (branch-
es, stones etc.).
2. The area to be cut must be inspected metic-
ulously so that all foreign bodies that could be
thrown up by the machine (stones, pieces of
iron, bones, etc.) can be removed.
3. Petrol is highly inflammable.
–Store the fuel in purpose-made canisters.
–Fill up the tank outdoors only. Do not smoke
either when performing this operation or any
other that involves handling fuel.
–Never remove the petrol tank cap or fill it up
while the motor is in operation or while it is still
hot.
–Do not start the machine if the tank is over-
flowing with fuel: if fuel is spilt, remove the
trimmer from the area and do not light flames
until the fuel has evaporated and the vapours
have dissipated.
–Move at least 3 metres from the filling point
before starting up the machine.
–Close the tank and the container properly by
ensuring that the caps are on tight.
24 SAFETY MEASURES
EN
SAFETY MEASURES

4. Replace the exhaust silencers if they are
faulty.
5. Each time the brush cutter is used, a general
check must be carried out on the condition of
the equipment, cutting unit, guards and fasten-
ing elements before switching it on, to ensure
that the parts are not worn, damaged or loose.
Always check that the throttle lever and “STOP”
button work correctly.
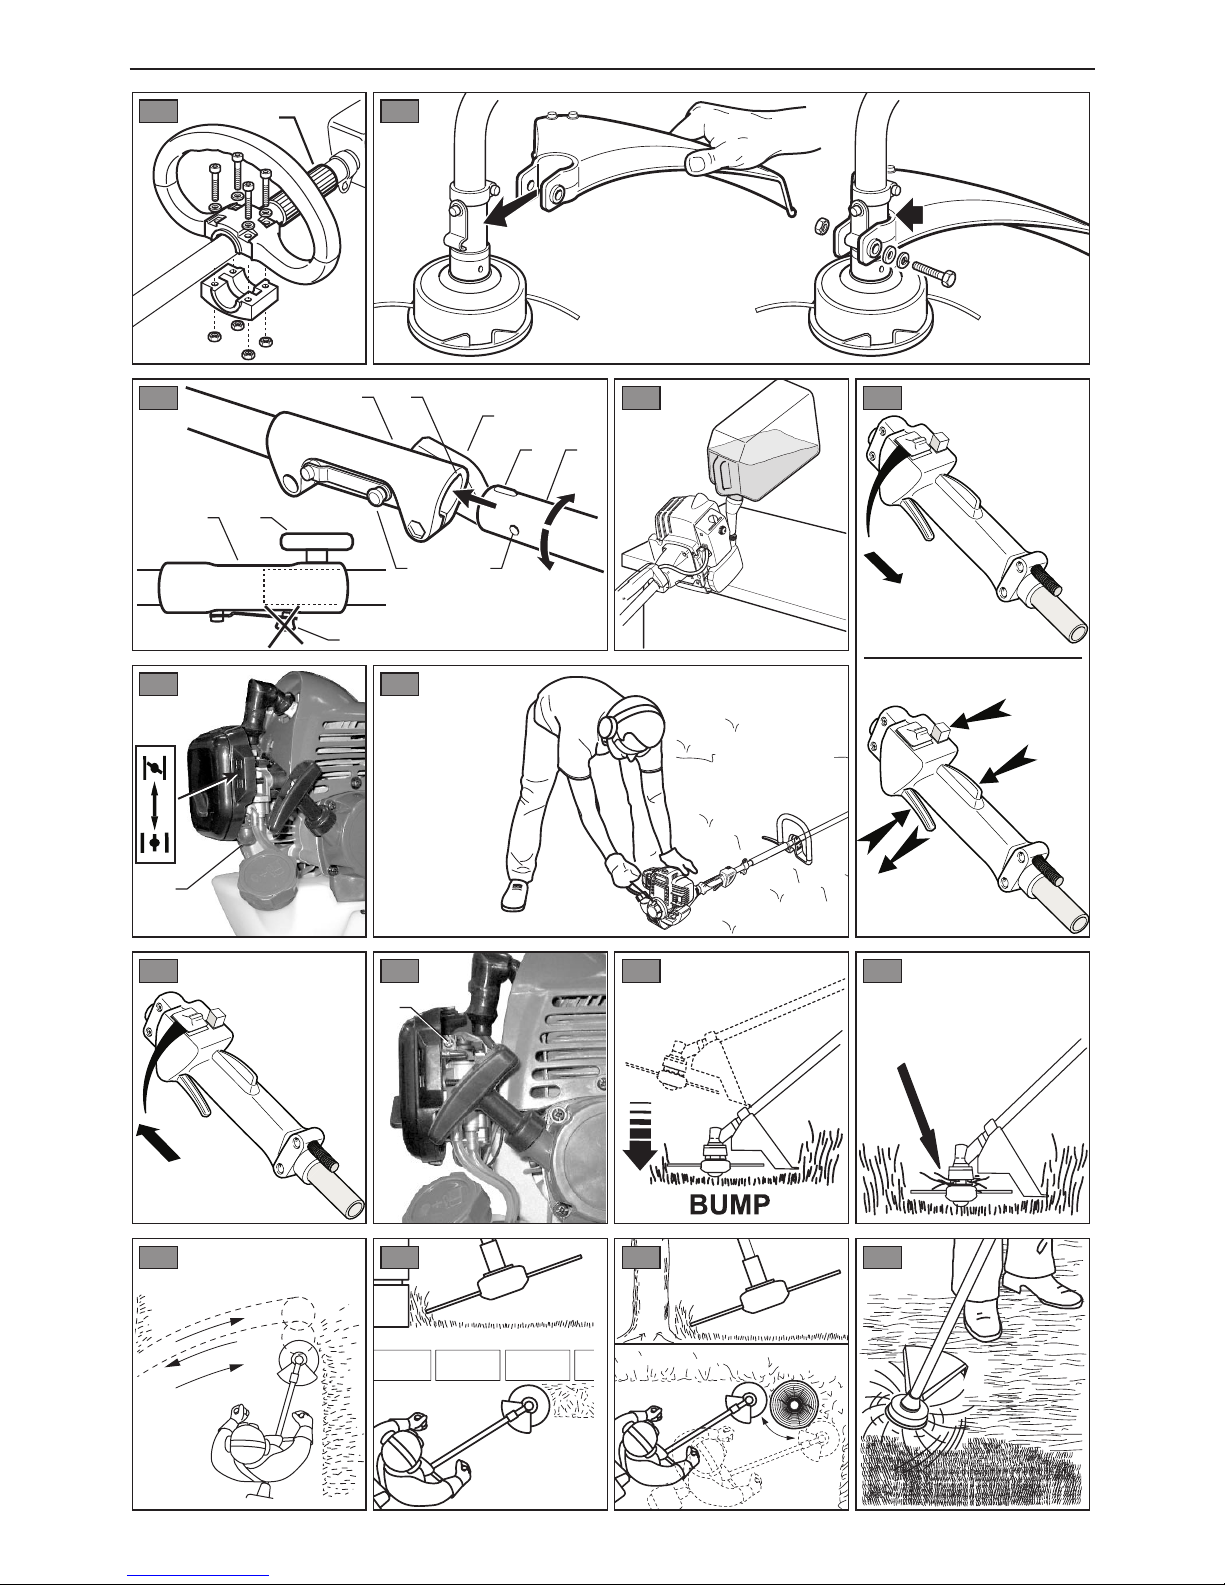
Check that the lever that blocks the throttle
(safety lever) works correctly; the throttle should
only work when the safety lever on the upper
side of the handgrip is pressed simultaneously.
6. Check that the handles and the harness
attachment are in the correct position and that
the machine is well balanced.
7. Ensure that the “minimum revs”speed is set
correctly so that the machine stops running
when the throttle is released.
C) USE
1. Do not start the motor indoors or in poorly
ventilated areas where toxic carbon monoxide
fumes can accumulate.
2. Work in daylight only.
3. Wherever possible, do not use the machine
on wet ground.
4. While working, remain at a safe distance
away from the cutting tool. This distance
depends on the harness connection point.
5. Always walk. Never run or stand in an unsta-
ble position. Be careful of obstacles such as
stones, tree stumps etc. which the operator
could trip over.
6. Do not use the machine on slopes that could
put the operator at risk. Mind your step when
working on a slope and always work in a stable
position. Always use the cutter on the flat. Never
use it while walking up or down a slope.
7. It is the user’s responsibility to assess the
potential risks of the work area and to take all the
necessary precautions to ensure his/her safety.
This is especially important when working on
slopes, unstable, slippery or moving ground.
8. Never adjust the motor timing so that it
exceeds its standard running speed.
9. Before starting the motor, ensure that anyone
in the vicinity is at a safe distance away (at least
15 metres) from the machine, that the cutting
tool is not touching the ground and that the
machine is stable.
10. When the tool rotates, it may throw up
objects from the ground. Keep a safe distance of
at least 15 metres between the machine and
people or animals.
Do not use the trimmer near vehicles or anything
else that might be damaged by flying objects.
11. Start up the motor carefully in accordance
with the user’s instructions, keeping well away
from the cutting tool.
12. Stop the engine and disconnect the spark
plug wire in the following cases:
–Before carrying out any work on the cutting
system.
–Before cleaning, checking, adjusting or repair-
ing the edge trimmer.
Only adjustments to the carburettor and the min-
imum setting are made with the engine running.
During these operations, work with the drive
shaft fitted. Also ensure that the equipment does
not come into contact with any object and that
the edge trimmer is in a stable position.
–After hitting a foreign object, inspect the cut-
ting system and the drive shaft to check that
there is no damage. Make any repairs neces-
sary before using the edge trimmer again.
–If the edge trimmer starts to shake in an irreg-
ular manner, look for the cause of the vibra-
tions and find a solution.
13. Stop the engine in the following cases:
–Each time the edge trimmer has to be left
unsupervised.
–Before filling with fuel.
–During movement from one work area to
another.
14. Do not use the edge trimmer continuously,
for lengthy times.
Pause now and again, switching off the engine.
D) MAINTENANCE AND STORAGE
1. Ensure that all screws and bolts are tightly
fastened so that the machine can be used in
safety. Regular maintenance is essential for safe-
ty and a consistently high performance.
2. Do not use the machine if any parts are dam-
aged or worn. These parts must be replaced, not
repaired. Use original spare parts.
The cutting tools must always bear the manu-
facturer’s mark as well as the maximum working
SAFETY MEASURES 25
EN

speed. Spare parts that are not the same quality
may damage the machine and jeopardise safety.
3. Wear thick gloves to remove and refit the cut-
ting tools.
4. Never store the trimmer with fuel in the tank
in an environment where petrol fumes could
come into contact with a flame, spark or sources
of extreme heat.
5. Store the trimmer in a clean and dry environ-
ment, out of the reach of children.
6. Let the motor cool down before it is stored in
any environment.
7. To reduce the risk of fire, clean any leaves,
grass or excess oil from the trimmer, especially
its motor, cooling fins, exhaust pipe and fuel
tank.
8. If the fuel tank has to be drained, do so out-
doors when the motor is cold.
9. Do not add, remove or modify any machine
components.
This could cause:
–injuries to the operator and other people pres-
ent
–damage to the machine. Moreover, this invali-
dates the warranty.
10. To respect the environment do not dispose
of oil or petrol by pouring it into the drainage sys-
tem, gutters or into the ground. A local service
station can have oil and fuel recycled in total
safety.
26 SAFETY MEASURES
EN

In order to ensure correct
and safe use of the edge trimmer, the assem-
bly instructions for protection and safety
components must be followed meticulously.
The manufacturer shall not be held liable if
the edge trimmer is used without the afore-
mentioned protection and safety devices.
FRONT HANDGRIP (fig. 1)
Edge trimmers are normally supplied with the
front handgrip disassembled inside the packag-
ing.
Therefore, it must be attached following the pro-
cedure indicated below.
The front handgrip must be attached. A plastic
spacer (E) is positioned on the drive tube, ensur-
ing a minimum distance between the rear and
front handgrips. The front handgrip must be
positioned on the drive tube in front of this spac-
er. Fit the square nuts in the specific seats in the
handgrip, then fit the screws with washers.
Tighten the screws gradually and uniformly.
Before fully tightening, adjust the position of the
front handgrip.
Terminate by tightening the screws to the same
degree.
Do not modify or damage
the plastic spacer. Comply with the minimum
distance between handgrips. Always work in
safety.
Never work with hand-
grips that are not correctly fastened or loose.
FRONT GUARD (fig. 2)
The guard must be fitted
so as to comply with the correct position of
the line cutting blade and to protect the oper-
ator.
Never work without the guard.
The guard must be fitted using the specific
screws and washers provided.
The guard must be the correct type both for the
model of edge trimmer and for the cutting tool
used.
!WARNING!
!WARNING!
!WARNING!
!WARNING! MOUNTING ROAD (Models with separate rod
–fig. 2/1)
Line up the slot (A) on the joint (B) with the raised
notch (C) on the lower part of the rod (D).
Pull out the stop pin (E) and push the lower part
of the rod (D) right down until the stop pin E)
slots in the hole (F) on the rod.
This is easier to do if you rotate the bottom of the
rod (D) slightly in both directions. The pin (E) is in
place when it is completely lodged in the hole.
Lastly, tighten the knob (G) securely.
CUTTING TOOLS
The use of cutting tools
other than the 2-line heads may cause premature
wear or damage to the edge trimmer.
The use of metal disks of
any type is strictly prohibited on this edge
trimmer.
!DANGER!
IMPORTANT
ASSEMBLY INSTRUCTIONS 27
EN
ASSEMBLY INSTRUCTIONS

In order to use the edge trimmer, clothes must
be worn that protect against objects thrown up
by the tool (e.g. stones). Wear safety shoes with
a slip-proof sole, gloves, safety goggles (the
visor used on its own does not protect the eyes
sufficiently), tight-fitting clothes. Do not wear
loose-fitting clothes, scarves, ties, jewellery or
other dangling objects that could get caught on
branches. Long hair must be tied up and pro-
tected. Equipment to protect hearing such as ear
defenders must be worn.
INSPECTING THE EDGE TRIMMER
Check that all screws are fastened tightly and
that the mechanical parts are sufficiently lubri-
cated. Check that the air filter is clean. Dirty air
filters may jeopardise performance.
FUEL
This saw has a two-stroke engine. Therefore, fuel
composed of petrol and lubricating oil for 2-
stroke engines must be used.
Only use high quality fuels
and lubricants to maintain engine performance
and maximize the life of mechanical parts.
NEVER USE petrol alone in
the brush cutter. This would cause permanent
damage to the engine and invalidate the product
Warranty. NEVER USE fuels that have been
mixed for more than 60 days.
Some conventional petrols are mixed with oxy-
genating agents such as alcohol, ether com-
pounds, or other products suitable to reduce air
pollution. Your engine has been designed to run
with any petrol for motor propulsion, including
oxygenated petrols.
Use unleaded fuel.
ENGINE OIL
Only use top quality synthetic oil for 2-stroke
engines.
Your dealer stocks high quality oils specifically
designed to guarantee a high level of protection
to mechanical parts and maximize engine effi-
ciency.
Contact your local dealer.
IMPORTANT
IMPORTANT
FUEL COMPOSITION
USE A FUEL COMPOSED OF PETROL AND
SPECIFIC HIGH QUALITY SYNTHETIC OIL
FOR 2-STROKE ENGINES IN A PERCENTAGE
OF 2%
PETROL-TO-OIL RATIO 50:1 = 2% oil.
(SYNTETIC OIL 2T)
If synthetic oil for 2-stroke
engines is not available to prepare the fuel and
you use a mineral oil specific for lubricating 2-
stroke engines a fuel with 4% oil must be pre-
pared.
PETROL-TO-OIL RATIO 25:1 = 4% oil.
Flammable liquid!
Store fuel in appropriate containers in safe
places far from sources of heat or naked
flames. Keep the container out of children’s
reach.
MIXING THE FUEL
Add oil to a container suitable to contain petrol
and oil, then add the petrol. Shake the container
to mix well.
Fuel is subject to ageing. This means that it
gradually loses its specifications. Do not prepare
large amounts of fuel, but supplies to last about
one month. Always use excellent quality fuel with
high performance levels.
Before filling, shake the can well to help to mix
the oil and petrol.
Take care over pressure
that forms inside the container.
!WARNING!
!DANGER!
IMPORTANT
28 PREPARATION FOR USE
EN
PREPARATION FOR USE

REFILLING THE FUEL TANK
Pressure may increase in
recipients containing petrol due to ambient
temperature.
Open the cap carefully to avoid it flying off.
Store the fuel in a cool place; never leave it in
the sun.
–Place the brush cutter in a stable position with
the tank aperture facing upwards (fig. 3).
–Clean the tank cap and the surrounding area
to prevent foreign bodies entering the tank.
–Fill the tank, using a suitable container that
prevents accidental fuel spillage.
–Highly flammable and in certain conditions
explosive.
–Refill the tank in a well ventilated area with
the engine switched off. Do not smoke, do
not light flames or make sparks in the fill-
ing area and in the fuel storage area.
–Do not overfill the tank. After filling make
sure the tank cap is properly and securely
closed.
–Take care not to spill any fuel while filling
the tank. Spilt fuel and its vapours may
catch fire. If any fuel has been spilt, make
sure the area is dry before starting up the
engine.
–Avoid prolonged skin contact with the fuel
and breathing its vapours.
–Keep fuel out of children’s reach.
START UP
Before starting up the
engine, ensure that the range of action of the
brush cutter is free of people or objects that
could be exposed to danger.
Start the engine with the brush cutter in a flat
and stable position.
To prevent the throttle starting accidentally, the
throttle lever is provided with a safety switch: the
throttle lever will not work unless the safety lever
on the opposite side of the handgrip is pressed.
Before starting the brush cutter, always ensure
that that safety lever works.
STARTING UP (WITH ENGINE COLD)
–Set the start/stop switch, located on the hand-
grip housing the throttle lever to «START»(fig.
4).
!WARNING!
!DANGER!
!WARNING!
–Pressing both the safety lever (ref.1) and the
accelerator (ref.2) simultaneously, press the
ACCELERATOR STOP button (ref.3) Keep
pressing the accelerator stop button and
release the accelerator lever until it locks. This
operation allows pre-acceleration of the carbu-
rettor (fig.4) .
–Turn the choke lever (ref. 4) on the carburettor
(rotate towards the engine body). (fig. 5).
Do not touch the accelerator
lever. By accelerating in fact the accelerator stop
will be enabled.
–Press the plastic primer (ref. 5) located on the
lower part of the carburettor 6-7 times. This
operation brings fresh fuel to the carburettor to
aid starting (fig. 5).
–Your machine has 2 position indications for the
choke: CLOSE “--”and RUN "I". Move the
choke to the CLOSE position fig. 5).
–Hold the engine firmly in place with your left
hand. With your right hand grip the starter han-
dle (fig.6).
–Firmly pull the starter handle until the engine
shows signs of starting.
–Then move the choke to the RUN “I”position.
Pull the starter handle again to start the engine.
(fig.5).
Always pull the handle firm-
ly when starting up the brush cutter.
When the engine starts, the
trimmer tool starts rotating immediately. Press
then release the accelerator lever. The accelera-
tor stop button will be released and the engine
will start ticking over at minimum power.
–The engine runs at minimum speed. Allow it to
idle for a few moments to gradually warm up
the engine.
–Never pull the starter handle to the full extent
of the cord (end of travel).
–Always pull the cord out straight towards the
outside. Pulling the starting cord at a different
angle causes it to rub against the bushing. This
friction causes the cord to fray and wear out
more rapidly.
–Always grip the starter handle during release.
Never allow the handle from the extended
position to knock against the starter seat. This
IMPORTANT
NOTE
NOTE
NOTE
PREPARATION FOR USE 29
EN

could cause the cord to become caught up or
wear or damage to the starter assembly.
–Never hold the brush cutter still by placing
your foot or knee on the drive tube; this could
deform the transmission shaft making it unus-
able.
When the engine is start-
ed, the cutting tool starts to rotate immedi-
ately. Take the brush cutter to minimum
speed by pressing and releasing the throttle
lever. Check that the cutting tool stops turn-
ing when the engine is running at minimum
speed.
If the engine does not start
up after having repeated the operations, see the
paragraph on Troubleshooting.
STARTING UP (WITH ENGINE WARM)
The start-up procedure with the engine warm is
identical to the one with the engine cold, except
for the fact that it is not necessary to use the
choke lever positioned on the carburettor.
STOPPING THE ENGINE (fig. 7)
Release the throttle trigger. Allow the engine to
return to minimum speed. Position the switch to
STOP until the engine stops.
ADJUSTING THE CARBURETTOR
Carburation of all brush cutters produced is per-
formed by the manufacturer.
Check that the air filter is clean and fitted cor-
rectly.
The “shutter”adjustment screw (mechanical
screw) is set so that the cutting tool does not
rotate when the engine is at minimum speed.
If the cutting tool rotates with the engine at min-
imum speed, turn the adjustment screw of the
shutter (positioned at the side of the choke lever
on the carburettor) (fig. 8, ref. T) counter-clock-
wise until the tool stops.
In this situation the engine must in any case con-
tinue to run and rotation must be regular.
If the brush cutter requires other adjust-
ments, we recommend you contact your
Dealer or an Authorised Service Centre.
NOTE
!WARNING!
30 PREPARATION FOR USE
EN

–IF YOU ARE NOT FAMILIAR with use of the
brush cutter, practise the procedures with
the engine switched off and the switch in
the OFF “STOP”position.
–ALWAYS FREE THE WORK AREA of objects
such as cans, bottles, stones, etc.. Hitting
these objects can cause serious injury to
the operator or others present and damage
the brush cutter. If you accidentally knock
against an object, SWITCH OFF THE
ENGINE IMMEDIATELY and inspect the
cutter. Never work with a damaged or
faulty brush cutter.
–ALWAYS CUT OR MOW AT FULL SPEED.
Never work at low speed, either at the start
of or during operations.
–DO NOT USE the brush cutter for purposes
other than to cut grass. DO NOT CUT
above knee level.
–DO NOT USE the brush cutter with other
people or animals nearby. Keep a minimum
distance of 15 metres between the opera-
tor and other people or animals when cut-
ting or moving around. During more diffi-
cult mowing operations keep a minimum
distance of 30 metres between the opera-
tor and other people or animals.
–IF THE BRUSH CUTTER IS USED ON
SLOPES remain below the cutting unit. DO
NOT USE THE BRUSH CUTTER if there is
even the minimum risk of slipping or over-
balancing.
–DO NOT USE the brush cutter CONTINU-
OUSLY, for lengthy times. PAUSE NOW
AND AGAIN, switching off the engine.
LINE HEAD
DO NOT USE lines other
than nylon (i.e. metal wire, plasticated metal
wire) and/or that are unsuitable for the head
in use. This could cause serious injuries and
lesions.
When you use the line
head, the front guard must be fitted with a
line-cutting blade. Fit the bottom band pro-
vided with the line-cutting blade to the guard.
Do not use very worn heads: some compo-
nents could become detached and endanger
the operator.
The brush cutter you have purchased is
equipped with a “Tap & Go”head.
To release new line: with the engine at full speed,
!WARNING!
!WARNING!
tap the line head against the ground (fig. 9). Line
is automatically released. The blade cuts excess
line.
Periodically remove any
grass wound around the brush cutter to prevent
overheating of the drive shaft. Grass caught
around the shaft can become wound under the
guard of the grass cutting head, reducing the
tool rotation speed (fig. 10). Remove any grass
caught up using a screwdriver or other similar
tool to allow the shaft to cool correctly and the
tool to rotate freely.
When the brush cutter is correctly equipped with
the guard and line head, it can eliminate tall
grass and unsightly weeds in front of fences,
walls, foundations, pavements, around trees,
etc.. This brush cutter may also be used to elim-
inate unwanted vegetation from fields, for easy
preparation of the garden or to clear a particular
area of the garden completely.
Even with the guard fitted,
cutting around pavements, foundations, walls,
etc. can cause above average wear on the line.
•Cut / movement (fig. 11)
Walk at a regular pace, with a side to side move-
ment, similar to traditional scything. Do not tilt
the line head during operation. Try cutting a
small area at the correct height. Keep the line
head at a constant distance from the ground to
obtain an even cutting height
•Precision cut
Position the edge trimmer straight, slightly tilted
until the lower part of the head touches the
ground and the cutting line is in the required
point. Always cut away from the operator. Do not
move the edge trimmer by bringing the line head
towards the operator.
•Cutting beside fences / foundations (fig. 12)
Bring the line head towards fences, posts, rocks,
walls, etc. slowly, without hitting them hard.
If the line comes into contact with rocks, walls,
foundations etc. it may break or wear. If the line
gets caught up in fencing it may become sev-
ered, breaking suddenly.
NOTE
IMPORTANT
CUTTING INSTRUCTIONS 31
EN
CUTTING INSTRUCTIONS

•Cutting around trees (fig. 13)
Cut by gradually approaching tree trunks to pre-
vent the line from knocking against the tree.
Walk around the tree from left to right. Move the
end of the line towards the grass to cut, keeping
the line head tilted slightly forwards.
The nylon line may CUT OR
DAMAGE SMALL BUSHES. The impact of the
nylon line against the trunk of bushes or trees
with soft bark MAY CAUSE SERIOUS DAMAGE
TO THE PLANT.
•Mowing (fig. 14)
In more severe mowing conditions tilt the head
with nylon line about 30 degrees to the left.
Adjust the handgrip if you wish to obtain better
control during this operation. Do not operate in
this way if there is even a slight chance of throw-
ing up foreign bodies that could harm people,
animals or other objects.
DO NOT SWEEP WITH THE
EDGE TRIMMER tilting the line head. Do not
use the edge trimmer to remove dirt from
pavements, etc.. Your tool is powerful and
can hurl small stones etc. for a distance of 15
metres or more, wounding or injuring people
and animals or damaging to nearby objects
such as cars, windows etc. (fig. 15).
!WARNING!
NOTE
32 CUTTING INSTRUCTIONS
EN

REPLACING THE EDGE-TRIMMING HEAD
LINE
To replace the nylon line, follow the instructions
enclosed with the head (supplementary page
separate from the guide).
Never replace the nylon
line with a line made of any other material
(e.g. metal wire).
DISASSEMBLY (fig. 16)
To block the cutting unit and prevent shaft rota-
tion, fit the steel rod (A) (provided) into the hole
(B) on the upper left side of the head unit, slow-
ly turn the tool until the rod penetrates the hole
of the metal ring nut. Turn the head counter-
clockwise to unscrew the cutting head.
ASSEMBLY (fig. 17)
For safe blocking, the spindle must be prevent-
ed from rotating: fit the steel rod (A) (provided)
into the hole (B) on the left side of the head unit,
turn the tool slowly until the steel rod penetrates
the hole on the metal ring nut, to block tool rota-
tion. Tighten and block the tool without over-
clamping (F).
REMEMBER TO REMOVE
THE ROD AFTER THE CUTTING HEAD HAS
BEEN FITTED AND BLOCKED.
AIR FILTER
Never operate the brush
cutter without the air filter. The air filter must be
kept clean. If damaged or worn fit a new filter.
IMPORTANT
IMPORTANT
!WARNING!
To clean the filter (Fig. 18):
1. Unscrew handle (A) (counter-clockwise).
Remove the filter cap, then remove the air fil-
ter from the support base.
2. Wash the filter element with soap and water.
DO NOT USE PETROL!
3. Leave the filter to dry in the air.
4. Refit the filter.
Replace the filter if it is
worn, lacerated, damaged or can no longer be
cleaned.
SPARK PLUG (fig. 19)
1. The gap (distance between electrodes) of the
spark plug is 0.6 mm / .025”. Adjust if
required.
2. Clean away any carbon residues.
3. The tightening torque must be between 12
and 15 Nm. Connect the spark plug cap.
VARIOUS CHECKS
–Throttle and safety levers: check operation.
–STOP button: check operation.
–Fuel tank: check for any leaks. Do not work in
the event of fuel leakage.
–Cooling air slots: clean.
–Cylinder fins: clean.
–Front guard: check condition.
–Cutting unit: clean away grass residues.
–Screws: check they are screwed down tightly.
–Electric cables and connections: check the
condition and replace if necessary. Make sure
all connection function correctly.
SHARPENING THE LINE-CUTTING BLADE
1. Remove the line-cutting blade (E) from the
guard (fig. 20).
2. Clamp the line-cutting blade in a vice.
Sharpen the blade using a flat file making
sure you keep the cutting angle. Sharpen in
one direction only.
NOTE
NORMAL MAINTENANCE 33
EN
NORMAL MAINTENANCE

EXTRAORDINARY MAINTENANCE
Contact your local Authorised Service Centre for
any procedures not considered to be ordinary
maintenance.
Repairs carried out by unauthorised service cen-
tres and unqualified personnel will invalidate the
warranty.
ONLY USE AND REQUEST ORIGINAL SPARE
PARTS.
STORAGE
If you do not follow these
instruction oily deposits may form in the carbu-
rettor, making starting difficult or causing perma-
nent damage due to disuse of the brush cutter.
1. Clean the outer part of the engine, the drive
assembly, the guard and the line head.
2. Empty the fuel tank.
3. After emptying the fuel tank start the engine.
4. Run the motor at minimum speed until it
stops to remove all fuel from the carburettor.
5. Allow the engine to cool (about 5 minutes).
6. Use the specific key to remove the spark
plug.
7. Pour in 1 teaspoonful of 2-stroke engine oil
(new oil). Pull the starter cord a few times to
cover the internal components with a layer of
oil. Refit the spark plug.
8. Store the brush cutter in a cool, dry place, far
from sources of heat (such as radiators, boil-
ers, etc.) or naked flames.
PREPARING THE BRUSH CUTTER AFTER
STORAGE
1. Remove the spark plug.
2. Pull the starter cord vigorously to remove
excess oil from the combustion chamber.
3. Clean and check the gap (distance between
electrodes) of the spark plug or fit a new
spark plug with a suitable gap.
4. Prepare the brush cutter for use
5. Fill the tank with suitable fuel. See paragraph
FUEL AND LUBRICANT.
IMPORTANT
ALL OUR MACHINES ARE TOP QUALITY. THEY
ARE PERFECTLY TUNED AND ARE DESIGNED
SO THAT THE OPERATOR CAN WORK IN MAX-
IMUM SAFETY.
–NEVER TAMPER WITH MACHINES
–NEVER WORK WITH MACHINES WITH MISS-
ING OR DAMAGED PARTS.
34 NORMAL MAINTENANCE
EN
–Do not cause disturbance to the natural
environment and those around you.
–Always work in safety.
–Avoid hazardous situations.
–Never work alone, especially in remote
areas.
–Take care over those around you and
possible dangers.
–Always wear personal protective gar-
ments.
–Only work with appropriate saws to safe-
ty standards and which have been sub-
jected to regular accurate servicing per-
formed by a skilled person!!!
–RESPECT THE ECOSYSTEM!!

EN
TROUBLESHOOTING 35
TROUBLESHOOTING
Incorrect start-up procedure
Incorrect carburation
Spark plug dirty
Fuel filter clogged
Dirty air filter
Incorrect carburetion
Incorrect spark plug gap
Incorrect carburetion
Mixture with incorrect petrol-oil ratio
The machine will not
start up or keeps
stopping
PROBLEM PROBABLE CAUSE CORRECTIVE MEASURE
Follow the instructions in the User
Manual.
Have the carburettor adjusted at an
Authorised Service Centre.
Clean, correct the gap or replace spark
plug.
Replace the fuel filter.
Remove, clean and refit the air filter.
Adjust the carburettor at an authorized
Service Centre.
Adjust the carburettor at an authorized
Service Centre.
Clean, correct the gap or replace spark
plug.
Adjust the carburettor at an authorized
Service Centre.
Use appropriate mixture
The machine starts
up but there is little
power
Motor irregular
Motor has no power
when running
Operation
IRREGULAR
Excessive fumes

EN
36 TECHNICAL DATA
*Earthed in accordance with ISO 11806 (without fuel, cutting and protection equipment)
•1left (or front)
•2right (or rear)
TECHNICAL DATA
2-stroke air-cooled
25.4 cm3
0.8 kW
10300 1/min
2900 1/min
10300 rpm min-1
Ø25,4 mm
Centrifugal
LD L8RTF
Electronic
WYJ 398
Petrol –oil 50:1
600 cm3
112 dB
99.5 dB
10.24 m/s2
7.05 m/s2
6.23 m/s2
3.35 m/s2
4.3 kg
Ok
///
///
///
Motor type
Displacement
Power
Maximum revolution speed
Idle speed
Tool Maximum revolution speed
Drive
Clutch
Spark plug
Ignition
Carburettor
Mixture
Tank capacity
Sound power level measured
(ISO 10884)
Sound pressure (EN 27917)
(m/s2)
ISO7916
Weight (kg)* (ISO 11806)
TR 25J
Model
sx1
dx2
sx1
dx2
Minimum
revolutions
Table of contents
Other GGP ITALY SPA Trimmer manuals

GGP ITALY SPA
GGP ITALY SPA TB 250J-HT-UA User manual

GGP ITALY SPA
GGP ITALY SPA T3048Li User manual

GGP ITALY SPA
GGP ITALY SPA Grass Trimmer User manual

GGP ITALY SPA
GGP ITALY SPA SGT 2220A User manual

GGP ITALY SPA
GGP ITALY SPA Portable Hedge Trimmer User manual

GGP ITALY SPA
GGP ITALY SPA HTJ 10 User manual

GGP ITALY SPA
GGP ITALY SPA HEDGE TRIMMING DEVICE User manual

GGP ITALY SPA
GGP ITALY SPA EHT 606 R User manual

GGP ITALY SPA
GGP ITALY SPA HT60K User manual

GGP ITALY SPA
GGP ITALY SPA T 26 J User manual