manuals.online logo
Brands
  1. Home
  2. •
  3. Brands
  4. •
  5. Giacomini
  6. •
  7. Thermostat
  8. •
  9. Giacomini K470H Series User manual

Giacomini K470H Series User manual

1
0660EN November 2014
Accessories for rAdiAtors
Chronothermostat for radiators, K470h series
Programmer for Chronothermostat, K471 series
ISO
14001
0032A/3
OHSAS
18001
0064L/1
ISO
9001
0006/7
K470H K471
Components
1
3
5
6
2
4
Mo Tu We Th Fr Sa Su
:
AUTO
MANU
0 246 12 18
9
11
1314
10
8
7
15
12
Legend
1Battery compartment 9“Child protection”function
indicator
2Temperature sensor 10 Battery replacement indicator
3Wheel selector 11 Indicator of active “anti-freeze /
window open” function
4Function keys: MENU – OK – JOLLY 12 Indicator of active ECONOMY
5Mini-USB connector for
connecting K471 13 Indicator of active COMFORT
6LCD display 14 Indicator of active “holidays”
7Area with the 4 alphanumerical
gures 15 Indicator of AUTO or MANUAL
mode
8Prole indicators: day and time bands for comfort/economy mode
Operation
Manual mode
In manual mode, the chronothermostat adjust the temperature set via the
wheel selector.
Auto mode (automatic program)
In automatic program mode, the chronothermostat adjusts the temperature
on the basis of the “comfort” or “economy” functions dened in the relative
time bands of the programmed ambient prole. The comfort and economy
times can be dened via programmed timing.
Up to eight daily switchovers can be selected (four “comfort” and four
“economy”).
The chronothermostat has the following factory settings:
• heating at“comfort”temperature, with the rst switchover at 7.00 am
• reduction to“economy”temperature, with the rst switchover at 10.00 pm
In this way, one daily heating time band is set (from 7.00 am to 10.00 pm) for
the whole week.
Setting the comfort/economy times
Up to four daily “comfort” switchovers (heating active) and four “economy”
switchovers (temperature reduction) can be dened for each of the seven
days of the week, or for three groups of several days.
In the menu, the indications“DAY1”-”DAY7”refer to the days of the week (from
DAY1 Monday to DAY7 Sunday). The days are also shown in abbreviated form
(Mo, Tu, We, Th, Fr, Sa, Su) beneath the hourly timings bar.
The indications “D1-5”, “D1-6” and “D1-7” refer to groups of several days,
allowing you to quickly program a number of days at the same time:
D1-5 = group of days from Monday to Friday
D1-6 = group of days from Monday to Saturday
D1-7 = group of days from Monday to Sunday
Description
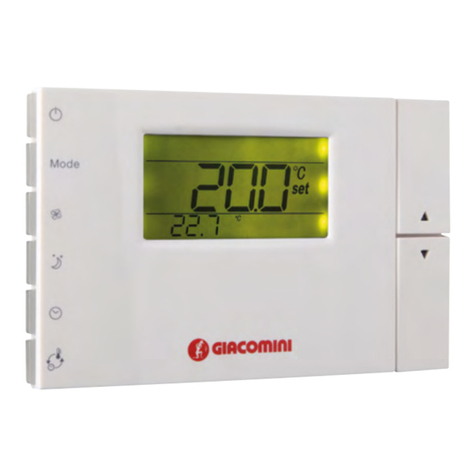
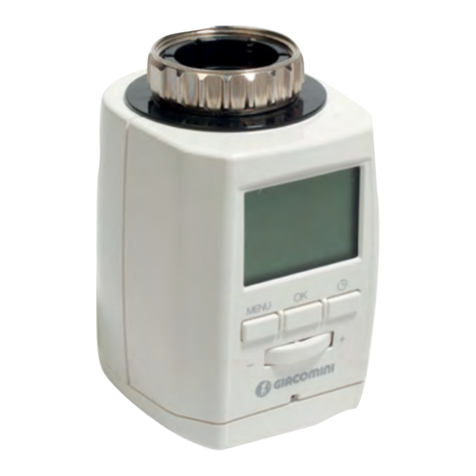
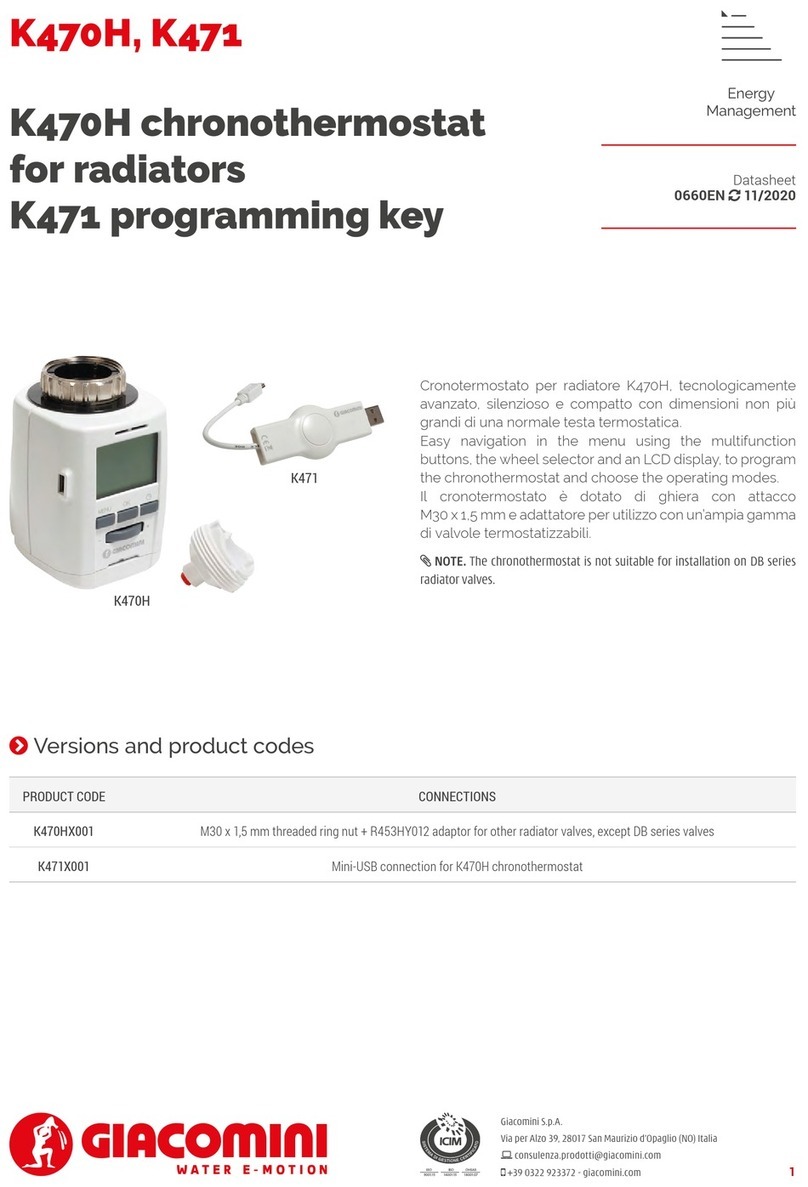
The K470H chronothermostat for radiators is a technologically advanced device
that is quiet and compact - it measures no more than a normal thermostatic
head. The chronothermostat clips onto its ring nut with standard thread M30x1,5
and can therefore be used with a wide range of valves. The function keys, wheel
selector and LCD display enable easy menu navigation for programming the
chronothermostat and selecting the various operating modes.
Versions and product codes
Product code Description
K470HX001 Chronothermostat for radiators
Completion codes
Product code Description
K471X001 Programming key for chronothermostat K470H
Technical data
Chronothermostat K470H
• Power supply: 2 AA batteries 1,5 V
•Serial port to programmer K471: proprietary interface and protocol
•No. of programmable time bands: 4 daily time bands
• Protection degree: IP30
•Working temperature: 0÷50 °C
•Storage temperature: -20÷70 °C
•Type of casing: White ABS
•Casing dimensions (LxHxW): 52x83x65 mm
•Valve connection: M30x1,5
Attention.
Use alkaline batteries only.
Do not use any type of rechargeable battery.
Programming key K471
• Power supply: 5V DC max. 100 mA via USB port
•Serial port to PC: USB 1.1 or 2.0
•Serial port to K470H: proprietary interface and protocol
•System requisites: Windows XP® or higher
•Local signalling: 2 LEDs
• Protection degree: IP30
•Working temperature: 0÷50 °C
•Storage temperature: -20÷70 °C
•Casing: Transparent ABS
Attention.
The device's “Mini-USB” connector is only compatible with the
cable of the programmer K471; do not connect any other devices
tted with a Mini-USB port, as this could irreversibly damage the
chronothermostat.
The key K471 cannot be used as a portable mass memory.
2
0660EN November 2014
Accessories for rAdiAtors
Chronothermostat for radiators, K470h series
Programmer for Chronothermostat, K471 series
ISO
14001
0032A/3
OHSAS
18001
0064L/1
ISO
9001
0006/7
Installation
Installation on Giacomini valves with thermostatic option, with connection
M30x1,5 mm
The chronothermostat isinstalled on allthe Giacominivalves withthermostatic
option of the H series, with connection M30x1,5 as shown below:
• Tighten the ring nut (B) (supplied) on the radiator valve (A);
• Insert the chronothermostat (C) on the ring nut (B); you will hear a “click”
when the two elements are correctly coupled.
BA
C
Installation on other Giacomini valves with thermostatic option
When installing on other Giacomini valves with thermostatic option, use the
contents of the bag R453HY012 (included in the head package).
• Fit the threaded ring nut (D), coupling it with the reference pins on the
radiator valve (E).
D
E
P
• Tighten the ring nut (B) (found in the head package) on the radiator valve
(E+D).
• Insert the chronothermostat (C) on the ring nut (B); you will hear a “click”
when the two elements are correctly coupled.
B
C
Note:
The chronothermostat must be in“INST”or“ON”mode in order to x it
to the ring nut without too much eort.
If the chronothermostat is installed at a later time, select the “INST”
menu before xing it to the ring nut.
To ensure better temperature adjustment, you are advised to install
the chronothermostat with the display facing upwards.
Warning.
If you hold onto the chronothermostat when screwing the ring nut
onto - or unscrewing it from - the valve, this will cause irreversible
damage to the mechanism and the coupling teeth of the ring nut itself.
Note:
Any days that are not programmed remain set
with the factory values.
The“comfort” and “economy” temperatures are factory-set at 21 °C
and 16 °C respectively.
Advanced functions
JOLLY function
With this function, you can dene the required temperature for a set time
period (minimum one hour, maximum 24 hours), regardless of the current
operating mode and set-point. At the end of the JOLLY function timing, the
chronothermostat returns to normal operating mode. The JOLLY function is
handy for forcing the most suitable temperature in the event of a temporary
absence or prolonged presence in the room.
Setting the OFFSET
Elements like shelves and curtains near a radiator can impede good
heat diusion, inevitably aecting the room temperature detected by
the chronothermostat and its subsequent adjustment. In these cases, if
the room temperature is very dierent from the temperature set on the
chronothermostat, you can insert a correction factor (called OFFSET):
Note:
Before implementing an OFFSET value, it is necessary to measure the
room temperature with the aid of a precision thermometer.
Example: if the “comfort” temperature set on the chronothermostat
is 21 °C but the real temperature in the room is only 19 °C, enter a
correction factor of +2 °C.
WINDOW function
The chronothermostat has an “open window” function: when the window is
opened and the temperature therefore drops suddenly, the chronothermostat
temporarily closes the valve (for a set time) to save energy. During this time,
the “anti-freeze” symbol will be shown on the display. At the end of the timed
period, the chronothermostat returns to normal operating mode.
HOLIDAY function
In the event of a prolonged absence, you can set the temperature for that
period (or even the closure of the valve), along with the date and time of
your return.
CHILDREN SAFETY function
This function allows you to deactivate the keys and wheel selector to prevent
unauthorised persons from accessing the menu.
Heating shut-o (valve closure)
If necessary, you can close the valve to deactivate the heating in a room.
The valve closes and thereby deactivates the heating function, but the anti-
calcication function still remains active.
By resetting “AUTO” mode at any time, the chronothermostat will start up
again and implement the programmed prole.
Restoring the factory congurations
With this function, you can delete all the programming operations made
and thereby restore the chronothermostat's initial factory programming
conditions.
Automatic protection functions
Regardless of the programming and operating modes, the chronothermostat
has two automatic protection functions:
Anti-freeze function: if the room temperature falls below 6 °C, the
chronothermostat opens the valve until the temperature rises to 8 °C. This
prevents the water in the pipes from freezing.
Anti-calcication function: once a week (on Friday morning), the
chronothermostat performs a valve opening/closing cycle to prevent the
valve from calcifying.
D+E
3
0660EN November 2014
Accessories for rAdiAtors
Chronothermostat for radiators, K470h series
Programmer for Chronothermostat, K471 series
ISO
14001
0032A/3
OHSAS
18001
0064L/1
ISO
9001
0006/7
Dimensions
Reference Standards
•The “Chronothermostat K470H” meets the requisites laid down by Directive
2004/108/EC.
•The “Programming key K471” meets the requisites laid down by Directive
2004/108/EC.
Product specications
K470H
Chronothermostat for radiators, for valve bodies with ring nut M30x1,5.
Complete with function keys, wheel selector and LCD display for easy menu
navigation.The menu is used to programme the chronothermostat and select
the various operating modes. Power supply - 2 AA batteries 1,5 V. Serial port to
the programmer K471 (proprietary interface and protocol). 4 programmable
daily time bands. Protection degree IP30. Working temperature 0÷50 °C.
Storage temperature -20÷70 °C. Casing in white ABS. Dimensions (LxHxW)
52x65x83 mm. Compliance with Directive 2004/108/EC.
K471
Programming key for chronothermostat for radiators (K470H series). USB
connection to the PC and Mini-USB to the chronothermostat. Using the key
K471 and viewing the graphic interface on the PC, you can easily programme
the daily time bands for the “comfort” (Tmax) and “economy” (Tmin)
temperatures of the chronothermostat.Once the temperature proles of the
various rooms have been stored on the key K471, they can be uploaded onto
the chronothermostat K470H which thus automatically acquires the current
time and date. This means that any pre-setting by the user is superuous.
Removing the chronothermostat
To remove the chronothermostat from the ring nut:
• Set the maximum temperature via the wheel selector (the display will show
“ON”) and wait at least one minute.
• Press in the point indicated by the arrow (A) to release the chronothermostat
from the ring nut.
Programming via key K471
The chronothermostat can be directly programmed via the programmer
K471 (subsequently referred to as “key K471”), ensuring quick and easy
chronothermostat conguration thanks to the exchange of data via the Mini-
USB connector.
Using the key K471 and viewing the graphic interface on the PC, you can easily
programme the daily time bands for the “comfort” (Tmax) and “economy”
(Tmin) temperatures of the chronothermostat.
Once the temperature proles of the various rooms have been stored on the
key K471, they can be uploaded onto the chronothermostat K470H which
thus automatically acquires the current time and date. This means that any
pre-setting by the user is superuous.
Note:
Initial chronothermostat start-up.The transfer of the weekly prole to
a chronothermostat presupposes that the device is already installed
on the valve, as its good functioning depends on the positive
outcome of the initial start-up sequence.
For more details, refer to the installation and user instructions of the
chronothermostat K470H.
Insert the “Mini-USB”
connector of the
programmer in the
relevant connector
on the side of the
chronothermostat.
The standard indications disappear from the display and are replaced with
the code “P01” (“Ambient prole 1”).
Using the chronothermostat knob, select the required ambient prole;
choose the numerical index of the ambient prole from those previously
programmed with the software.
When you press the “PROG” key, the parameters of the selected prole are
transferred from the key to the chronothermostat.
As soon as the chronothermostat has been programmed, the standard
information returns to the display.
Note:
If the list of ambient proles is not viewed via the chronothermostat
wheel within 10 seconds, the display will resume the usual
indications. In this case (and if necessary), take the key out and then
insert it again.
L
P
H
L [mm] H [mm] W [mm]
52 83 65
W
4
0660EN November 2014
Accessories for rAdiAtors
Chronothermostat for radiators, K470h series
Programmer for Chronothermostat, K471 series
ISO
14001
0032A/3
OHSAS
18001
0064L/1
ISO
9001
0006/7
Additional information
For additional information please check the website www.giacomini.com or contact the technical service: '+39 0322 923372 6+39 0322 923255 *[email protected]
This pamphlet is merely for information purposes. Giacomini S.p.A. retains the right to make modications for technical or commercial reasons, without prior notice, to the items described in
this pamphlet. The information described in this technical pamphlet does not exempt the user from following carefully the existing regulations and norms on good workmanship.
Giacomini S.p.A. Via per Alzo, 39 - 28017 San Maurizio d’Opaglio (NO) Italy

This manual suits for next models

1

Other Giacomini Thermostat manuals

Giacomini KPM10 User manual

Giacomini

Giacomini KPM10 User manual

Giacomini KD400 User manual

Giacomini

Giacomini KD400 User manual

Giacomini K470W User manual

Giacomini

Giacomini K470W User manual

Giacomini K470H User manual

Giacomini

Giacomini K470H User manual

Giacomini K470H User manual

Giacomini

Giacomini K470H User manual

Giacomini K495LY002 User manual

Giacomini

Giacomini K495LY002 User manual

Giacomini K470H User manual

Giacomini

Giacomini K470H User manual

Giacomini K492DY012 User manual

Giacomini

Giacomini K492DY012 User manual

Giacomini K495L User manual

Giacomini

Giacomini K495L User manual

Giacomini K492DY012 User manual

Giacomini

Giacomini K492DY012 User manual

Giacomini K470W User manual

Giacomini

Giacomini K470W User manual

Giacomini K494IY001 User manual

Giacomini

Giacomini K494IY001 User manual

Giacomini K492TY002 User manual

Giacomini

Giacomini K492TY002 User manual

Giacomini K495LY002 User manual

Giacomini

Giacomini K495LY002 User manual

Popular Thermostat manuals by other brands

Radio Thermostat CT50 Operation guide

Radio Thermostat

Radio Thermostat CT50 Operation guide

Watts DualTemp P-3285 quick guide

Watts

Watts DualTemp P-3285 quick guide

nest Learning Installation &  configuration guide

nest

nest Learning Installation & configuration guide

Honeywell Home CG511A1000 Quick installation guide

Honeywell Home

Honeywell Home CG511A1000 Quick installation guide

BRAHMA KRONOS GA11 user guide

BRAHMA

BRAHMA KRONOS GA11 user guide

Tech Controllers EU-R-8X user manual

Tech Controllers

Tech Controllers EU-R-8X user manual

Plum eSTER x40 Installation and operating manual

Plum

Plum eSTER x40 Installation and operating manual

Salus FC600 quick guide

Salus

Salus FC600 quick guide

NuTone NTBZ48 quick start guide

NuTone

NuTone NTBZ48 quick start guide

Regulus TZ33 user manual

Regulus

Regulus TZ33 user manual

Honeywell Lyric T5 Wi-Fi Quick install guide

Honeywell

Honeywell Lyric T5 Wi-Fi Quick install guide

Honeywell T8600D Product data

Honeywell

Honeywell T8600D Product data

Home Automation Omnistat RC-80 owner's manual

Home Automation

Home Automation Omnistat RC-80 owner's manual

Elnur Gabarron CTM21 Installation and use manual

Elnur Gabarron

Elnur Gabarron CTM21 Installation and use manual

Perry 1TPTE011B manual

Perry

Perry 1TPTE011B manual

Honeywell T7516A user guide

Honeywell

Honeywell T7516A user guide

Full Gauge Controls Microsol SWP Advanced c-o-n-n-e-c-t manual

Full Gauge Controls

Full Gauge Controls Microsol SWP Advanced c-o-n-n-e-c-t manual

Danfoss REP24CO installation instructions

Danfoss

Danfoss REP24CO installation instructions

manuals.online logo
manuals.online logoBrands
  • About & Mission
  • Contact us
  • Privacy Policy
  • Terms and Conditions

Copyright 2025 Manuals.Online. All Rights Reserved.