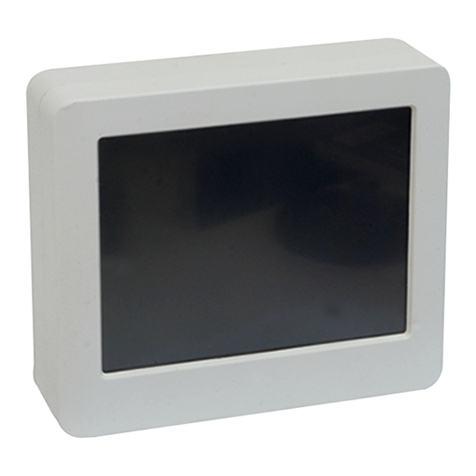
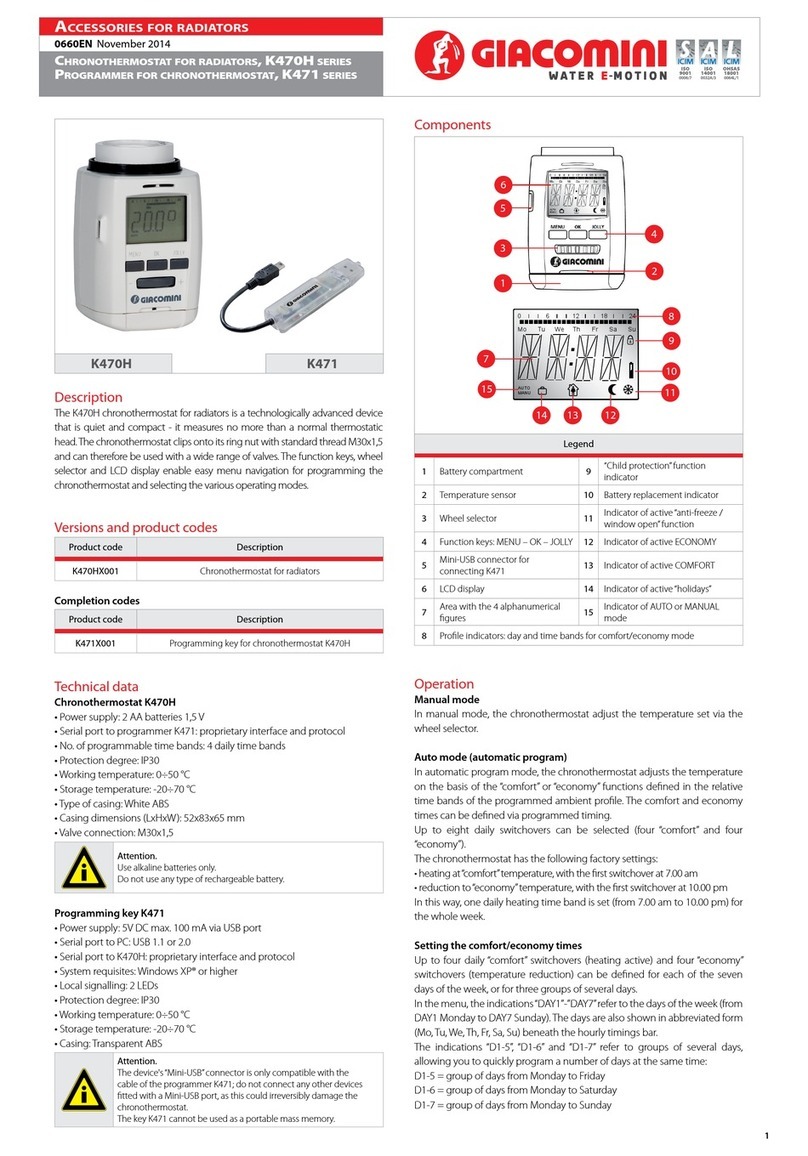
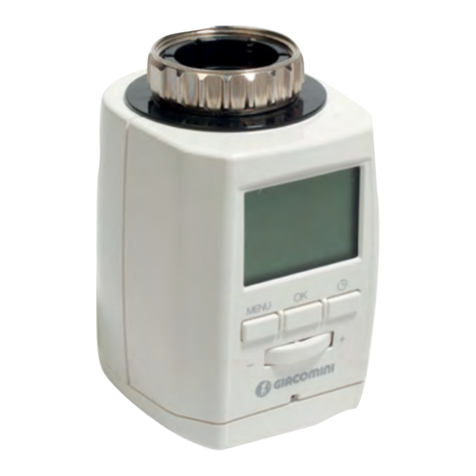
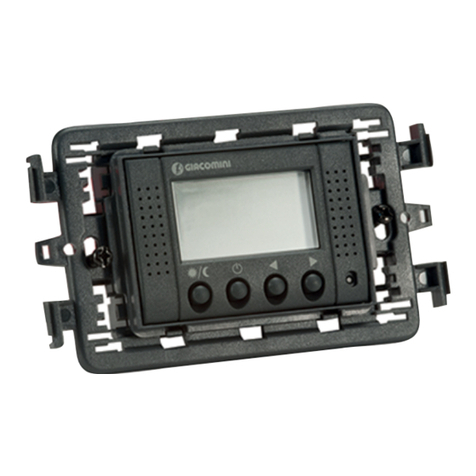
Giacomini K470H User manual

CRONOTERMOSTATO
SETTIMANALE PER
RADIATORE
K470H
Leggere attentamente queste istruzioni prima di installare il dispositivo
e conservarle per successive consultazioni.
La confezione contiene: 1 cronotermostato K470H con ghiera di
ssaggio M30x1,5 mm, un sacchetto R453HY012 contenente adattatore
per ghiera di ssaggio M30x1,5 mm; 1 manuale d’istallazione ed uso.
Per velocizzare le fasi d’installazione è possibile programmare il K470H
tramite la chiave di programmazione K471.
Applicazione secondo direttiva
Acquistando il cronotermostato K470H si ha un termostato programmabile
per radiatori che può quindi essere usato per regolare e temperature in
ambienti chiusi e pertanto contribuire al risparmio energetico.
Si prega di utilizzare il cronotermostato K470H solo per questo scopo.
Utilizzare la porta USB presente sul cronotermostato K470H solo con il
programmatore. Nessun altro dispositivo deve essere utilizzato.
Display ed elementi di controllo
1 Tempi di riscaldamento
2 Sicurezza bambini attiva
3 Batteria scarica
4.a Funzione viaggio attiva
4.b Temperatura comfort attiva
4.c Temperatura economy attiva
4.d Funzione di nestra aperta/
antigelo attiva
5. Modalità automatica o manuale
attiva
6.a Pulsante MENU – visualizza il menu
principale; inoltre si ritorna al livello precedente
6.b Pulsante OK – conferma di impostazione
6.c Pulsante – funzione temporizzazione
7 Rotella di selezione
Impostazione menu
Premendo il tasto MENU si accede al menu di congurazione.
Con la rotella di selezione si va a selezionare la voce desiderata, voce
che viene poi confermata dalla pressione del tasto OK .
Il tasto MENU porta al livello precedente.
Selezionare la modalità
AUTO = modalità automatica / MANU = manuale
Impostazione dell‘orario di lavoro
Impostazione delle temper. comfort ed economy
Impostazione della data e dell’orario
Funzione nestra aperta
Reimpostazione del dispositivo alle impostazioni di fabbrica
Nuovo adattamento dell’otturatore sulla valvola
Funzione viaggio
Funzione installazione (da usare solo con il corretto adattatore)
Adeguamento della temperature alla situazione della stanza
Funzione di standby
Versione
Orario legale/solare
Inserimento / sostituzione batterie
Rimuove il coperchio delle batterie premendolo verso l’alto nel punto
evidenziato (1) e poi tirandolo (2).
(2)
(1)
Inserire quindi le batterie come riportato all’interno dell’apparecchio. Non utilizzare
accumulatori! Assicurarsi che le polarità siano corrette! Attenzione: non ricaricare
le batterie, pericolo di esplosione! Non smontare le batterie! Togliere immediata-
mente le batterie scariche dal dispositivo. Tenere le batterie lontano da fonti calore
– pericolo di perdite! Non applicare insieme batterie usate e nuove. Se necessario,
pulire le batterie ed i contatti prima che vengano utilizzate. Tenere le batterie lon-
tano dalla portata dei bambini. Se si viene a contatto con il liquido della batteria
sciacquare immediatamente la parte interessata e consultare un medico.
Impostazione data ed orario
Dopo aver inserito, per la prima volta, le batterie, la data lampeggerà
sul display. In questo momento, data ed ora possono essere impostate.
Impostare la data con la rotella. Confermare con OK .
Impostare il mese con la rotella. Confermare con OK .
Impostare il giorno con la rotella. Confermare con OK .
Impostare l’ora con la rotella. Confermare con OK .
Impostare i minuti con la rotella. Confermare con OK .
Preparazione all’installazione
Sul display verrà visualizzato PREP.
L’otturatore si sposterà ora nella posizione di installazione per
facilitarne il posizionamento sulla valvola.
Appena il cronotermostato K470H è pronto per l’installazione, sul
display verrà visualizzato INST.
È anche possibile impostare la data e l’ora successivamente attraverso
il menu TIME, ma in questo caso, il cronotermostato non si muoverà
nella posizione dell’installazione.
Nel caso di sostituzione delle batterie, il programma memorizzato
rimane attivo. Bisogna però controllare l’ora per garantire un
funzionamento corretto.
Installazione su valvole termostatizzabili Giacomini con
attacco M30 x 1,5 mm (serie H)
Il cronotermostato si installa sulle valvole termostatizzabili Giacomini
con attacco M30 x 1,5 mm (serie H), come di seguito illustrato:
Avvitare la ghiera (B) del cronotermostato, sulla valvola del radiatore (A).
B
A
Installazione su altre valvole termostatizzabili Giacomini,
eccetto valvole serie DB (non compatibili)
Per l’installazione su corpi valvola termostatizzabili Giacomini utilizzare
il contenuto del sacchetto R453HY012 compreso nella confezione del
cronotermostato.
• Applicare la ghiera letta (C) agganciandola ai pioli di riferimento (P)
presenti sulla valvola (D) del radiatore.
C
D
P
• Avvitare la ghiera (B) del cronotermostato, sulla valvola del radiatore
(C+D).
B
C+D
Il cronotermostato deve essere in modalità INST o ON per applicarlo alla
ghiera con una minima forza.
Se il cronotermostato viene installato successivamente, selezionare il
menù INST prima di applicarlo alla ghiera.
Rimozione del cronotermostato
• Impostare la temperatura max. con il selettore a rotella (sul display
appare ON) ed attendere almeno 1 min.;
• Svitare la ghiera (B) del cronotermostato dalla valvola del radiatore.
B
Adattamento sulla valvola
Prima installazione: premere il pulsante MENU e scorrere con la
rotellina no a quando appare sul display la scritta ADAP.
Premere OK così che il cronotermostato K470H sarà in grado di
iniziare il suo adattamento.
Il K470H si adatterà alla corsa della valvola termostatizzabile.
Questa operazione può richiedere qualche minuto.
Finito con successo l’adattamento il il cronotermostato K470H ritorna
in modalità normale.
Se è richiesto un altro adattamento, per esempio se la valvola non
ha chiuso completamente durante il primo adattamento, selezionare
ADAP dopo aver premuto il pulsante MENU e far ripartire l’operazione.
Se viene visualizzato il messaggio di errore E2 sul display togliere le
batterie per un breve periodo allo scopo di resettare il sistema.
OPERAZIONI DI BASE
Modalità manuale (MANU)
Nella modalità manuale (MANU) la temperatura viene regolata
manualmente con la rotella.
Modalità automatica (AUTO)
Nella modalità automatica il cronotermostato K470H regola la
temperatura ambiente in funzione del programma orario, secondo i
seguenti due livelli:
temperatura di comfort (valore di fabbrica: 21 °C)
temperatura economy (valore di fabbrica: 16 °C)
L’orario di funzionamento in comfort o in economy può essere
modicato attraverso il programma orario.
Èpossibile impostare 8 programmazioni in un giorno (4 per il comfort
e 4 per l‘economy).
Il K470H è impostato secondo i seguenti valori di fabbrica:
- Orario di riscaldamento: riscaldamento alla temperatura di comfort
(valore di fabbrica: 1° orario di riscaldamento dalle 07:00 alle 21:59)
- Orario di economy: abbassamento alla temperatura economy
(valore di fabbrica: 1° orario in economia alle 22:00 alle 06:59)
Impostazione degli orari di riscaldamento e di economy
Èpossibile impostare 4 orari di riscaldamento e 4 orari di economy per
ciascun giorno oppure per un tempo massimo di 7 giorni.
Possibile programmazione degli orari:
D1–5 = stesso programma dal lunedì al venerdì
D1–6 = stesso programma dal lunedì al sabato
D1–7 = stesso programma dal lunedì alla domenica
Per i giorni non programmati rimane attivo il valore di fabbrica.
Impostazioni del singolo programma:
Premere il tasto MENU .
Con la rotella selezionare la voce del menu PROG.
Premere il tasto OK . Il giorno DAY1, che rappresenta il lunedì, è
visualizzato sul display.
Selezionare il giorno/blocco con la rotella. Confermare con OK .
Selezionare il 1° orario di inizio dell’orario di riscaldamento (simbolo )
con la rotella di selezione. Confermare con OK .
Selezionare il primo orario di inizio dell’orario di economy (simbolo )
con la rotella. Confermare con OK .
Ora, volendo, si può impostare anche il 2°, 3° o 4° orario di
riscaldamento/economy.
• Se non si vuole impostare un ulteriore orario di riscaldamento/
economia confermare „ “ con il tasto OK .
Si visualizza quindi il successivo giorno per poter essere programmato.
• Se non si vuole impostare un ulteriore giorno, uscire dal menu
premendo il tasto MENU .
Se si visualizza la temperatura sul display la programmazione è nita.
• All’interno dei blocchi è possibile impostare i singoli giorni con orari
diversi.
Impostazione della temperature di comfort e di economy
Premere il tasto MENU .
Con la rotella selezionare il menu TEMP. Confermare con OK .
Impostare la temperatura di comfort con la rotella. Confermare con OK .
Selezionare la temperature di economy sempre con la rotella.
Confermare con OK .
Temperatura OFF: la funzione antigelo è attiva.
La temperatura di antigelo è di 8 °C.
Temperatura ON: la valvola è completamente aperta.
Nota: il massimo risparmio energetico può essere ottenuto con una
temperatura di economy che è di circa 5 °C al di sotto della temperature
di comfort.
Operazione manuale
Con la rotella di selezione è possibile modicare la temperatura
ambiente in qualsiasi momento.
Nella modalità automatica (AUTO) il valore impostato rimane attivo no
al raggiungimento del successivo cambio di stato (economy/comfort).
Mo Di Mi Do Fr Sa So
:
AUTO
MANU
02
461218
MENU OK
1
4
2
3
5
7
6

FUNZIONI SPECIALI
Funzione Timer
Con questa funzione può essere impostata una determinata temperatura
per un intervallo di tempo prestabilito.
Premere il tasto .
Per prima cosa, viene mostrato il tempo in cui il programma viene attivato.
Confermare con il pulsante OK .
La temperatura desiderata può essere ora impostata.
Premere il pulsante OK per confermare.
Funzione Oset
Nel caso si rilevi una dierenza (in positivo o in negativo) tra il valore im-
postato sul K470H e quello reale nell’ambiente è possibile spostare il valore
di set-point senza modicare la programmazione inserita in precedenza.
Premere il pulsant MENU e, per mezzo della rotella, selezionare il menu
OFFS. Confermare con il pulsante
OK
.
I gradi impostati lampeggeranno sul display 0,0 °C.
Impostare ora il valore di oset desiderato per la temperatura (da -5 °C a
+5 °C) con la rotella di selezione. Confermare con OK .
La temperatura sul display non cambierà!
Funzione Finestra aperta
Se si apre una nestra si ha una notevole dispersione termica con un calo
repentino della temperatura.
In questo caso il cronotermostato K470H chiuderà automaticamente la
valvola radiatore per risparmiare energia.
Sul display si visualizzerà il simbolo .
Successivamente riprenderà il normale funzionamento.
Per impostare questa funzione, selezionare WINW nel menu.
Confermare con OK .
Per prima cosa selezionare la sensibilità con la rotella (HIGH = elevata
sensibilità, MID = media sensibilità (impostazione di fabbrica), LOW =
bassa sensibilità). Confermare con OK .
A questo punto si inserisce il tempo in cui la valvola radiatore rimane
chiusa (range 10-60 min con valore di fabbrica pari a 10 min).
Confermare con OK .
Funzione Viaggio
Se si rimane assenti per un certo tempo è possibile, per quel periodo,
impostare una temperature diversa dal programma standard.
Al termine di questo periodo impostato il programma ritorna attivo.
Premere il pulsante MENU .
Selezionare il menu HOLI.
Confermare con il pulsante OK (il simbolo appare sul display).
Selezionare con la rotella la ne della funzione viaggio (cioè la data in cui
deve riprendere il normale programma di riscaldamento).
Confermare con OK .
Impostare l’orario e confermare con il pulsante OK .
Il segnale OFF apparirà sul display.
Impostare la temperatura e confermare con OK .
Il simbolo apparirà sul display.
Con il pulsante MENU la funzione può essere disattivata.
Sicurezza Bambini
Il cronotermostato può essere bloccato per proteggerla da attivazioni
non autorizzate.
Premere il pulsante OK + nello stesso momento per circa
2 secondi no a quando sul display non appare il simbolo al ne di
bloccare il dispositivo.
Usando di nuovo questa combinazione il simbolo non viene più
visualizzato e lo strumento risulta sbloccato.
Riscaldamento in Pausa (chiusura della valvola)
Premere il pulsante MENU .
Selezionare il menu MODE con la rotella di selezione.
Confermare con il tasto OK .
Selezionare MANU e premere OK .
Impostare la temperature sul display su OFF.
La valvola è ora chiusa ed il programma è disattivato.
La funzione di protezione antigrippaggio rimane attiva una volta a
settimana.
Per riaprire la valvola nel menu selezionare la modalità automatica AUTO
ed il programma impostato riprenderà di nuovo.
Display LCD in stand-by
Premere il pulsante MENU .
Selezionare STBY con la rotella di selezione.
Confermare con il pulsante OK e selezionare ON/OFF con la rotella.
Dopo circa 30 secondi, il display LCD passerà nella modalità stand-by.
Premendo un qualsiasi pulsante, il display si attiverà di nuovo (se si
rimuovono le batterie, la modalità stand-by si disattiverà).
Questa funzione aumenta la durata delle batterie.
Orario legale/solare
Premere il pulsante MENU .
Selezionare DST con la rotella di selezione.
Confermare con il pulsante OK e selezionare ON/OFF con la rotella.
Il cronotermostato commuta automaticamente tra orario legale/solare.
Ritorno al setting di fabbrica/Reset
Premere MENU .
Selezionare la voce RES con la rotella di selezione.
Confermare con OK .
Il display mostra la scritta OK lampeggiante, confermare con OK .
Il cronotermostato è stato resettato.
Le protezioni antigelo e antigrippaggio sono attive automa-
ticamente.
- Funzione protezione antigelo
Se la temperatura scende sotto 6 °C, il cronotermostato K470H apre la
valvola no a che la temperatura risale a 8 °C.
Questo per prevenire la formazione di ghiaccio nei radiatori.
- Funzione antigrippaggio
Per prevenire la formazione di depositi solidi nella valvola radiatore
il cronotermostato K470H attiva il programma antigrippaggio con
frequenza settimanale il Venerdì mattina.
PROGRAMMAZIONE TRAMITE CHIAVE K471
Il cronotermostato K470H può
essere programmato diretta-
mente tramite la chiave di pro-
grammazione K471 che per-
mette la rapida ed agevole
congurazione del cronoter-
mostato tramite lo scambio
dati reso possibile grazie al
connettore mini-USB.
La chiave di programmazione K471 permette di programmare
agevolmente tramite l’interfaccia graca sul PC le fasce orarie
giornaliere delle temperature di comfort (Tmax) ed economy (Tmin) del
cronotermostato.
I proli di temperatura dei diversi ambienti, una volta salvati sulla chiave
K471, possono essere scaricati sul cronotermostato K470H che, in tale
occasione, acquisisce automaticamente ora e data correnti, rendendone
quindi superua la pre-impostazione da parte dell’utente.
Per la programmazione vedere le istruzioni allegate alla chiave K471.
Il connettore Mini-USB presente sul prodotto è compatibile solo ed
esclusivamente con il cavetto del programmatore K471; non collegare
altri dispositivi dotati di connessione Mini-USB per evitare il danneggia-
mento irreversibile del cronotermostato.
PULIZIA E SMALTIMENTO
Pulizia
Pulire il cronotermostato K470H utilizzando unicamente un panno
asciutto leggermente inumidito. Non utilizzare solventi chimici poiché
potrebbero danneggiare il dispositivo.
Smaltimento
Non gettare i dispositivi o gli imballaggi nella spazzatura ordinaria. Essi
possono essere riciclati. Per maggiori informazioni si prega di rivolgersi
all’ucio competente del comune di residenza.
DATI TECNICI
• N° di fasce orarie programmabili: 4 fasce orarie giornaliere
• Tipo di regolazione: PID con tempo di risposta inferiore ai 3 minuti
• Alimentazione: 2 batterie 1,5 V formato AA (stilo)
• Grado di protezione: IP30
• Temperatura di esercizio: 0÷50 °C
• Temperatura di stoccaggio: -20÷70 °C
• Tipologia d’involucro: ABS bianco
• Attacco ghiera: M30 x 1,5 mm (con adattatore R453HY012 per altri corpi
valvola Giacomini - eccetto valvole serie DB)
• Porta seriale verso chiave di programmazione K471: interfaccia e pro-
tocollo proprietari
• Dimensioni: 52 x 86 x 65 mm
• Conforme alla Direttiva 2004/108/CE.
ASSISTENZA
Problema Causa Soluzione
Batterie non hanno
abbastanza potenza.
Sostituire le batterie.
I radiatori
non si scal-
dano
La temperatura del-
la caldaia è corretta?
La valvola non si
apre, è bloccata
dopo la pausa es-
tiva/ invernale?
Regolare la temperature
dell’acqua della caldaia.
Rimuovere la testina crono-
termostatica, muovere avanti
ed indietro lo stelo della val-
vola con l’ausilio di un utensile.
I radiatori
non si raf-
freddano.
La valvola non
chiude completa-
mente. Può darsi
che il punto di chi-
usura della valvola si
è spostato.
Riprovare a settare nuova-
mente la valvola (vedi“adatta-
mento attuatore”) dopo aver
mosso lo stelo manualmente.
Potrebbe darsi che il settaggio
risulta non corretto a causa
della calcicazione della sede.
Il pistoncino
esce dalla
sede (Questo
può causare
anche un
errore E1)
Il pistoncino lavora
su una vite senza
ne e l’eventuale
utilizzo a vuoto
(senza valvola) può
portare alla sua fuo-
riuscita.
Inserire il pistoncino.
Attivare la funzione“ADAP”dal
MENU oppure togliere e rimet-
tere le batterie. La vite senza
ne si attiverà riportando il
pistoncino in posizione. Ora
basta installarlo sul radiatore
e attivare nuovamente la fun-
zione “adattamento attuatore”
- Premendo qualsiasi tasto il messaggio di
errore sarà cancellato e il cronotermostato K470H
ripartirà.
Nessun adattamen-
to possibile.
Cronotermostato
K470H non instal-
lato sulla valvola.
L’installazione è corretta?
Installare il cronotermostato
sulla valvola.
La corsa valvola
è troppo breve.
Aprire e chiudere la valvola
più volte manualmente o so-
stituire le batterie.
Ridotta moviment-
azione del motore.
Lo stelo della valvola si muove
liberamente?
047U58088
11-2020
Giacomini S.p.A.
Via per alzo, 39
28017 San Maurizio d’Opaglio, Novara
+39 0322 923372
www.giacomini.com
Prodotto progettato per Giacomini S.p.A. da Et.
AVVERTENZE PER IL CORRETTO SMALTIMENTO DEL PRODOTTO
Questo prodotto rientra nel campo di applicazione della Direttiva 2012/19/UE riguardante la
gestione dei riuti di apparecchiature elettriche ed elettroniche (RAEE).
L’apparecchio non deve essere eliminato con gli scarti domestici in quanto composto da diversi
materiali che possono essere riciclati presso le strutture adeguate.
Informarsi attraverso l’autorità comunale per quanto riguarda l’ubicazione delle piattaforme
ecologiche atte a ricevere il prodotto per lo smaltimento ed il suo successivo corretto riciclaggio.
Si ricorda, inoltre, che a fronte di acquisto di apparecchio equivalente, il distributore è tenuto al
ritiro gratuito del prodotto da smaltire.
Ilprodottononèpotenzialmentepericolosoperlasaluteumanael’ambiente,maseabbandonato
nell’ambiente impatta negativamente sull’ecosistema.
Leggere attentamente le istruzioni prima di utilizzare l’apparecchio per la prima volta.
Si raccomanda di non usare assolutamente il prodotto per un uso diverso da quello a cui è stato
destinato, essendoci pericolo di shock elettrico se usato impropriamente.
Il simbolo del bidone barrato, presente sull’etichetta posta sull’apparecchio, indica la
rispondenzaditaleprodottoallanormativarelativaai riuti diapparecchiatureelettriche
ed elettroniche.
L’abbandono nell’ambiente dell’apparecchiatura o lo smaltimento abusivo della stessa sono
puniti dalla legge.
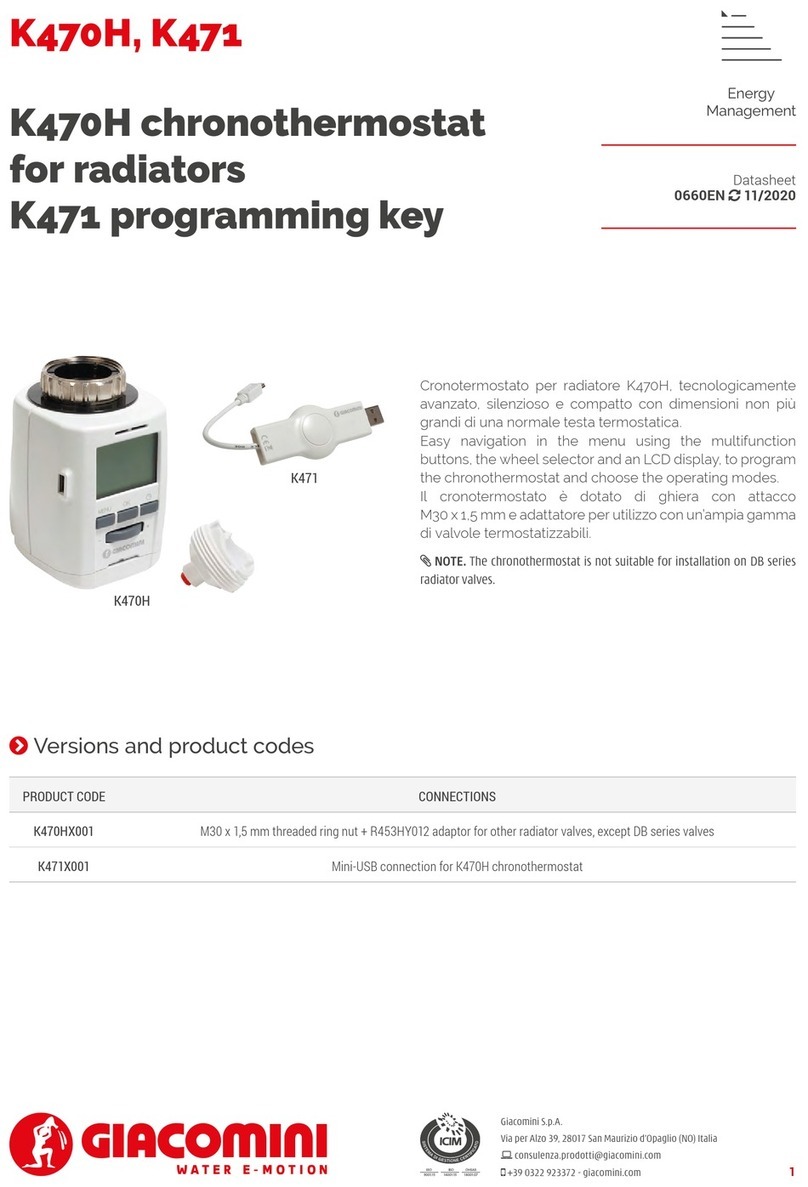
WEEKLY
CHRONOTHERMOSTAT
FOR RADIATORS
K470H
Read carefully these instruction before installing the device, and keep
them for future consultation.
The pack contains: n.1 K470H chronothermostat with M30 x 1,5 mm ring
nut, n.1 sachet R453HY012 containing an adaptor for the ring nut; n.1
installation and user manual.
Remember that, to speed up the installation phase, you can programm
the K470H chronothermostat via the K471 programming key.
Application as directed
By purchasing the K470H chronothermostat for radiators you own a
programmable radiator thermostat which can be used for temperature
regulations in enclosed rooms and therefore, it can contribute to the
reduction of heating energy. Please use the thermostat only for this
purpose. The programming port is intended ONLY for K471 programming
key. Never connect other devices with the programming port!
Display and control elements
1Heating times
2 Children lock active
3Battery low
4.a Travel function active
4.b Comfort temperature active
4.c Economy temperature active
4.d Window/anti-freeze protection
function active
5 AUTO or MANU mode active
6.a Button MENU – leads to the main
menu (starting from regular display);
within the menu one keypress leads
to the previous level
6.b Button OK – conrmation of setting
6.c Button – timer function
7 Selector wheel
Set up menu
By pressing MENU you will arrive at the set up menu.
Please choose one of the items with the selector wheel.
With OK you can select one menu item and with the selection
wheel they can be adjusted. The button OK conrms the setting.
The button MENU leads to the previous level.
to select the mode
AUTO = automatic mode / MANU = manual mode
setting of time programme
setting of comfort and economy temperature
setting of date and time
window function
reset of the device to factory preset
starting of a new adaptation to adjust the valve
travel function
installation function (Please only attach the controller to
the coupling ring in this position)
adaptation of temperature to the room situation
standby function
version
daylight saving time
Inserting / replacing batteries
Remove the battery lid by pressing the battery lid upwards (1) at the
highlighted point and then taking it out (2).
(2)
(1)
Then insert the batteries as represented in the appliance. Do not use
accumulators! Ensure that the polarity is correct! Attention: Never
recharge batteries, danger of explosion! Do not short circuit batteries!
Do not disassemble batteries! Take low batteries out of the device
immediately. Keep batteries away from extreme warming – danger
of leakage! Do not apply used and new batteries together. If needed,
clean the battery and the contacts before using them. Keep the
batteries away from children. When getting in touch with battery acid
instantly irrigate the aected parts with clear water and call a doctor.
Setting date and time
After inserting the batteries for the rst time the date will ash on the
display. Now, date and time can be set.
Set date with the selector wheel. Conrm with OK .
Set month with the selector wheel. Conrm with OK .
Set day with the selector wheel. Conrm with OK .
Set hour with the selector wheel. Conrm with OK .
Set minute with the selector wheel. Conrm with OK .
Installation preparation
On the display PREP will be shown.
Now, the motor will completely move to the installation position in order
to make the installation easier.
As soon as K470H is ready for installation INST will be shown on the
display. (INST - any time selected in the menu).
Now please do not press any other buttons! Plug device for coupling ring.
You can also set date and time via the menu item TIME.
But in case of that, the K470H does not move to the installation position.
In case of replacing batteries, the stored time programme will remain
active. You should check the specied time to ensure that.
Installation on Giacomini valves with thermostatic option, with
M30 x 1,5 mm connection (H series)
Tighten the ring nut (B) of the chronothermostat on the radiator valve (A).
B
A
Installation on other Giacomini valves with thermostatic opti-
on, except DB series valves (not suitable)
When installing on Giacomini valves with thermostatic option, use
the contents of the sachet R453HY012 (included in the chronother-
mostat package).
• Fit the threaded ring nut (C), coupling it with the reference pins (P) on
the radiator valve (D).
C
D
P
• Tighten the ring nut (B) of the chronothermostat on the radiator valve
(C+D).
B
C+D
The chronothermostat must be in INST or ON mode in order to x it to
the ring nut without too much eort.
If the chronothermostat is installed at a later time, select the INST
menu before xing it to the ring nut.
Removing the chronotermostat
• Set the maximum temperature via the wheel selector (the display will
show “ON”) and wait at least one minute.
• Unscrew the ring nut (B) of the chronothermostat from the radiator
valve.
B
Adaptation
Initial installation: press the button OK until ADAP appears on the
display so that the chronothermostat will be able to start its adaptation.
The device will adapt itself to the stroke of your valve body.
To do this the valve will now be opened and closed several times to store
the end points.
In some cases this process can take a few minutes.
After successful adaptation it returns to normal mode.
Should adaptation become necessary again, e.g. if your radiator does
not cool down in the position, please press in the menu the button
ADAP until adaptation starts again.
If the mistake E2 is shown on the display place K470H onto the radiator
valve and then take the batteries out for a short time in order to execute
a reset.
BASIC OPERATING MODES
MANU-mode
In the MANU-mode the K470H chronothermostat adjusts to the
manually specied temperature.
AUTO-mode
In the AUTO-mode the K470H chronothermostat changes between to
temperatures according to the time programme that has been set:
comfort temperature (factory preset 21°C)
economy temperature (factory preset 16°C)
The heating and economy times can be speci ed via the adjustable
time programme.
It is possible to set 8 switch points (4 heating and 4 economy times) per
day at the most.
The K470H has the following factory preset:
- Heating time: heating with comfort temperature
(factory preset: 1st heating time at 07:00)
- Economy time: lowering to economy temperature
(factory preset: 1st economy time at 22:00)
Setting heating and economy times
With the K470H it is possible to set 4 heating and 4 economy times per
day – one for each day or one for a block of several days.
DAY1 to DAY7 represent the weekdays from Monday to Sunday.
Additionally, the corresponding days are shown as abbreviation below
the menu bar on the display.
Block construction:
D1–5 = same programme from Monday to Friday
D1–6 = same programme from Monday to Saturday
D1–7 = same programme from Monday to Sunday
For non-programmed days the factory preset remains active.
Setting of an individual programme:
Press MENU .
Select the menu item PROG with the selector wheel. Press OK .
DAY1 for Monday is shown on the display.
Select day/block with the selector wheel. Conrm with OK .
Set the beginning of the 1st heating time (symbol )with the selector
wheel. Conrm with OK .
Set the beginning of the 1st economy time (symbol ) with the selector
wheel. Conrm with OK .
Now, if desired, a 2nd, 3rd or 4th heating/economy time can be entered.
If you do not want to set a further heating/economy time conrm
„“ with OK .
The next day for programming is shown on the display.
If you do not want to enter a further day, leave the menu with MENU .
If the temperature is shown on the display the programming is nished.
Within the blocks you can also overwrite single days with diering times.
Setting comfort and economy temperature
Press MENU .
Select the menu item TEMP with the selector wheel. Conrm with OK .
Set comfort temperature with the selector wheel. Conrm with OK .
Set the economy temper. with the selector wheel. Conrm with OK .
- Temperature OFF: 8 °C, freeze protection function is active.
- Temperature ON: valve is completely open.
By the way: maximum energy saving can be obtained with an economy
temperature which is about 5 °C below the comfort temperature.
Manual operation
With the selector wheel an adaptation of the room temperature is
possible at any time.
In the AUTO-mode it remains active until the next switch point (change
economy/comfort) is reached.
Now, the usual programme becomes active again.
Mo Di Mi Do Fr Sa So
:
AUTO
MANU
02
461218
MENU OK
1
4
2
3
5
7
6

FURTHER FUNCTIONS
Timer function
The timer function is selected with the timer-button .
With this function a user-dened temperature for a programmable
period can be entered.
This can be very useful in case of a party, for example. Press .
First, the time for which the time programme has been deactivated is
shown. Conrm with OK .
Now, the desired temperature can be set. Conrm with OK .
In the selected period it is not possible to change the temperature
manual, the wheel is locked.
Press MENU and unlock it.
Oset function
If the perceived temperature signicantly diers from the set thermostat
temperature a temperature set up can be executed.
Press MENU .
Select the menu item OFFS with the selector wheel. Conrm with OK .
The degree setting 0,0 °C will ash on the display.
Now, set up the desired adaptation for the temperature (from -5 up to
+5°C) with the selector wheel. Conrm with OK .
The temperature display does not change!
Open Window function
If a window is open and consequently the temperature drops
signicantly, the K470H will automatically close the heating valve in
order to save energy.
The display will show .
Afterwards, the chronothermostat will resume normal operation.
For the set up select WINW in the menu. Conrm with OK .
First, the sensibility is selected with the selector wheel (HIGH = high
sensibility, MID = medium sensibility (factory preset), LOW = low
sensibility). Conrm with OK .
Now, you enter the time (10 min (factory preset) - 60 min) for which the
valve should remain closed.
Conrm with OK .
Travel function
For the time you are absent you can select an individual temperature.
After this period the originally dened programme becomes active
again. Press MENU . Select the menu item HOLY.
Conrm with OK , (suitcase appears on the display).
Select with the selector wheel the end of the travel function
(= date of the recommencement of the regular heating times).
Conrm with OK . Set the time and con rm with the button OK .
The signal OFF appears on the display.
Now set the temperature and conrm with OK .
The appears on the display.
With MENU the function can be deactivated.
Children Lock function
You can lock the chonothermostat to protect the device from
unauthorized activation.
Press the buttons OK + at the same time for about 2 seconds
until the signal appears on the display in order to lock the device.
By using this button combination again the symbol disappears and you
release the lock.
Heating Pause – Closing the valve
Press MENU .
Select the menu item MODE with the selector wheel.
Conrm with OK .
Select MANU and conrm with OK .
Set the temperature on the display to OFF.
The valve is now closed and will work without a time programme.
The calcication protection function remains active once a week.
After the heating pause you switch in the menu to the AUTO-mode and
the personally set programme will be executed again.
Daylight saving time
Press MENU .
Select DST with the selector wheel.
Conrm with OK and select ON/OFF with the selector wheel.
The chonothermostat switches automaticly from summer to winter time.
LCD stand-by indicator
Press MENU .
the menu item STBY with the selector wheel.
Conrm with the OK button and select ON/OFF with the selector wheel.
After about 30 seconds, the LCD indicator switches into standby mode.
By pressing any button, the display will be activated again (by removing
the battery, stand-by mode will be reseted).
Standby function Increases the battery life time.
Going back to factory preset/All reset
Press MENU .
Select the menu item RES with the selector wheel.
Conrm with OK .
OK ashes, conrm with OK .
The K470H is reset again.
Now, proceed as described for the initial operation.
Freeze protection and calcication protection function are
active automatically:
- Anti-Freeze protection function
If the temperature drops below 6 °C, the K470H opens the valve until the
temperature again rises above 8 °C.
This prevents the radiators from freezing.
- Calcication protection function
To prevent radiator valves from calcifying the K470H is submitted to a
calcication protection programme once a week on Friday mornings.
CLEANING AND USED DEVICES
Cleaning
To clean the K470H use only a dry or lightly wet cloth.
Avoid chemical solvent – it can probably damage the device.
Used devices
Do not throw old devices and packaging into the household waste.
They can be recycled. You receive further information at your local
government.
PROGRAMMING VIA K471 KEY
The K470H chronothermostat
can be directly programmed
via the K471 programming key,
ensuring quick and easy chron-
othermostat conguration
thanks to the exchange of data
via the Mini-USB connector.
Using the key K471 and viewing the graphic interface on the PC, you
can easily programme the daily time bands for the comfort (Tmax) and
economy (Tmin) temperatures of the chronothermostat.
Once the temperature proles of the various rooms have been stored
on the K471 programming key, they can be uploaded onto the K470H
chronothermostat which thus automatically acquires the current time
and date.
This means that any pre-setting by the user is superuous.
For the programming, refer to the instructions enclosed with the K471
programming key.
The device’s Mini-USB connector is only compatible with the cable
of the programmer K471; do not connect any other devices tted
with a Mini-USB connection, as this could irreversibly damage the
chronothermostat.
TECHNICAL DATA
•No. of programmable time bands: 4 daily time bands
•Regulation type: PID with answer time lower than 3 minutes
•Power supply: 2 batteries 1,5 V, AA type
•Protection degree: IP30
•Working temperature: 0÷50 °C
•Storage temperature: -20÷70 °C
•Type of casing: white ABS
•Valve connection: M30x1,5 mm (with R453HY012 adaptor for other
Giacomini valve bodies, except DB series valves)
•Serial port to K471 programming key: proprietary interface and protocol
• Dimensions: 52 x 86 x 65 mm
• Compliance with Directive 2004/108/EC.
HELP
Problem Cause Solution
Batteries do not have
enough power.
Replace batteries.
Heating
element
does not
warm up.
Is the boiler water
temperature O.K.?
Valve does not open,
is it calci ed after
the summer pause /
heating pause?
Adjust the temperature
of the boiler water.
Remove the K470H,
move the valve
stem back and forth per
hand or with a tool.
Heating ele-
ment
does
not cool
down.
Valve does not close
completely. It may be
that the closing point
of your valve seat has
shifted.
Adapt again (see
“Adapting”) Move the
valve stem several times
by hand, it may be that
adaptation is impossible
because your valve is
calci ed or the seat
no longer performs its
function.
Pressure
piece falls
out (This can
also cause
an E1-error)
Due to an endlessthread
the pressure piece,
which is situated at the
bottom, can fall out if
the device has not been
axed on the valve.
Put in the pressure
piece. The device can
beadapted by pressing
the MEN - point or by
removing and inserting
the batteries. The end-
lessthread is rotating
now and xes the pres-
sure piece again. Just
install it to the radiator
and adapt
it once again.
- By pressing any key the error message will be
deleted in the display and the K470H is re-started.
No adaptation possible.
K470H is not installed to
the heater.
Is the installation OK?
Install the K470H to the
heater.
Valve stroke is too
short.
Open and close the
valve several times
manually or replace the
batteries.
Motor movement is
not possible.
Does the valve stem
move freely?
047U58088
11-2020
Giacomini S.p.A.
Via per alzo, 39
28017 San Maurizio d’Opaglio, Novara
+39 0322 923372
www.giacomini.com
Prodotto progettato per Giacomini S.p.A. da Et.
IMPORTANT INFORMATION FOR CORRECT DISPOSAL OF THE PRODUCT
This product falls into the scope of the Directive 2012/19/EU concerning the management of
Waste Electrical and Electronic Equipment (WEEE).
This product shall not be dispose in to the domestic waste as it is made of dierent materials
that have to be recycled at the appropriate facilities.
Inquire through the municipal authority regarding the location of the ecological platforms to
receive the product for disposal and its subsequent correct recycling.
Furthermore, upon purchase of an equivalent appliance, the distributor is obliged to collect the
product for disposal free of charge.
Theproductisnotpotentiallydangerousforhumanhealthandtheenvironment,butifabandoned
in the environment can have negative impact on the environment.
Read carefully the instructions before using the product for the rst time.
It is recommended that you do not use the product for any purpose rather than those for which
it was intended, there being a danger of electric shock if used improperly.
The crossed-out wheeled dustbin symbol, on the label on the product, indicates the
complianceofthisproductwiththeregulationsregardingWasteElectricalandElectronic
Equipment.
Abandonmentintheenvironmentorillegaldisposalof the product ispunishablebylaw.
Table of contents
Languages:
Other Giacomini Thermostat manuals

Giacomini
Giacomini K492DY012 User manual

Giacomini
Giacomini K494IY001 User manual

Giacomini
Giacomini K470H User manual

Giacomini
Giacomini K495L User manual

Giacomini
Giacomini K470H Series User manual

Giacomini
Giacomini K495LY002 User manual

Giacomini
Giacomini K470H User manual

Giacomini
Giacomini K492TY002 User manual

Giacomini
Giacomini K470W User manual

Giacomini
Giacomini K492DY012 User manual