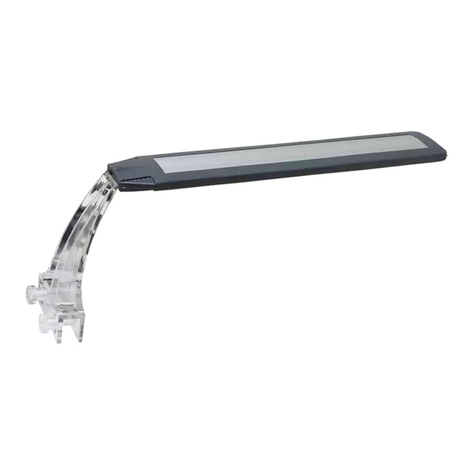
Giesemann VIVA User manual

CEDeclarationofConformity
The company
Giesemann Lichttechnik&Aquaristik GmbH
Buerdestraße14 –41334 Nettetal –Germany
declareunderoursoleresponsibilitythat theproducts:
VIVA
towhichthisdeclaration relatesarein conformitywith the technicalrequirementsof
the followingEuropean Community directives&standards or othernormativedocuments
- 98/37/EC/ -EEC89/336-EEC73/23AND RELATED AMENDMENTSAND ADDITIONS (B.T.)
The followingtechnicalstandards andspecificationshavebeen observed:
Safety: EN60335-1/EN60335-2- 55ANDRELATEDAMENDMENTS/EN292-1-2/CEI61-50
EMCdirective: EN50081-1/EN50081-2and thefollowing amendments /EN5008
FCC
01.12.2015,Nettetal -Germany

3
Deliveryand safetyinstructions
Honouredcustomer, thankyouverymuch for yourconfidence inGiesemann qualityproducts.
Ourexperiencesinthe areaofthe Aquaticsas well asmodernilluminationtechnologyguarantees
the qualitystandardofourproducts.Pleasereadthis manualinitsentiretyinordertoguarantee
optimalfunctionandoperationalreliabilityofyourproductovermany years.Failuretoobservethe
following pointsmayprovedangerousor canviolateexisting guidelines.
All Giesemann fixturesareequippedwiththe CEsign.Youfindthis signonthe typesigninthe fix-
tureor onany externalpowersupply box.
Afterunpacking,pleasechecktoensuretheconditionofyourlampandthatallcomponentsare
present.Damagemustbereportedimmediately toyourspecialistsupplierinordertomakeavalid
claim.The lampsmaybeinstalledonly byauthorizedspecialiststaff.Theselampsmaynotbeoper-
atedifany damageis visible,If falsefunctionappears,aftersubmersionintowater,or any other
deficiency that mayeffectsafeoperation.
The lampsnevermaybeoperatedwithoutthe correspondingprotectionglasses broken splash-
shieldsaretobereplacedimmediately inordertoguarantee sufficient waterprotection.
The describedfixtureis designedexclusively for the illuminationandadditionofilluminationof
indoor aquariums only. The illuminationis tobeinstalledsecurely withaminimumdistance of25 cm
(10”)tothe watersurface abovethe aquariumandshouldneverbeoperatedunderwater.They
shouldneverbeplacedunsecuredonthe aquariumedgeor haveventilationinhibitedbywayof
surroundingequipment,panel workor covers.The fixturesandthe electricalcomponentsshouldbe
protectedunconditionally against direct wateringression.
Usethe fixturewithextremecautionifchildren or otherpeople arepresentwhodonotunderstand
the dangersofcloseproximity.Packagingmaterialsmaynotbeusedfor playingandshouldbedis-
posedofsecurely: DANGER: riskofasphyxiation.
Neverlookdirectly intothelight source. Bright lightcanleadtoeye injuries!
Maintenance workonthe lightunitshouldonly becarriedoutafterremovingapplicablecoversand
ensuringthe lightis disconnectedfrom the powersupplyatthewall.Forsafetyreasonsitis recom-
mendedthatany workcarriedoutinthe aquarium,shouldonly takeplace when the illuminationis
removedfrom the aquarium.
Donotattempt toopenany LEDlightmodule,orpowersupply,as this will causedamagetothe
innersealandwill voidthe warranty.
The housingandprotectiveglassesmaybecomeveryhotduringuse:Avoidtouchingthem!! When
cleaning, itis particularly importanttoensurethatnomoisturegetsintothe airventsinsideor on
topofthelights. Nevercoverthe ventilationgrilleswithany item,andmakesurethattherecanbe
sufficient heat exchange.DO NOT lookdirectly at LEDsregardless ofintensity!!
Improperusewill invalidateany warrantyclaim.The transportandstorageofthe productmustonly
bedone using theoriginalpackaging.
The fixtureis madeofaluminiumwhich isprotectedfrom seawatercorrosionbyahighqualitypow-
dercoating.Tokeepthebodycleanandthelightareas clear,cleanregularly withaslightly damp
cloth.Pleasenotethatsaltdepositsalwaysshouldberemovedimmediately,otherwiseeven quality
surfacesmaybecomedamagedovertime.Failuretomaintaineffectively mayleadtothe loss of
warranty.
Disposal:Oncethis appliance has expired,maketheretiredlightsunusable byremovingtheplug
from the socketandcutthe cable.Disposeofthe lampinaccordance withapplicable environmental
regulationsinyourcountry.Electricalwastemaynotbedisposedofwithhouseholdwaste.Contact
usfor advice onrecycling withyourlocalauthoritiesor dealer.
WARNING:Beforeusingyourfixtureoveranaquariumthatmayalreadycontainsensitive
fish/plants/coralsor otheranimalsthathavebecomeaccustomedtoanalternatelightsource.
PleaserememberthatyourLEDlightis capable ofdeliveringveryhighlevelsoflightintensitywithin
the frequency rangesthatareofgreatestimportance tothe animals.Itis often impossible tojudge
spectralintensitybyvisualreference alone whencomparingdifferentlightingmethods, so itis ad-
visedthatasettingofnomorethan50%intensitybeusedonany channel for the firstfewweeks,or
untilyouhavehadtimetoseehowtheanimalsareadaptingtothechosenspectrumandintensities
thatyouhaveset.Additionallylightingdurationsmaybereducedtemporarily toreduce the chances
ofstress or shock.

4
1Installation
ToassembleyourVIVAtherearedifferentmountingoptions(notincluded)whichareavailablefrom
your Giesemanndealer.
InstallationoftheVIVAbywiresuspensionkit: Attachthetwowiresonthe topof yourfixtureby
screwingthescrews intothe nutsonthetoprail.Checkthe tightness of thecableholder.Install the
ceilingmountingwithsuitablescrews and wall plugs,makingsure thatthe brickwork/ceilingonsite
canoffersufficientsupport.Ifnecessary,specialfasteningsystems,suchas Hollowwallanchors,
screws,etcmaybenecessary.Ifuncertain,pleaseconsultwithaspecialistcompany.Nowrunthe
steelcordthroughtheboreof screw.ScrewintotheceilingmountInsertthelooseend of the steel
cableintothetopopeningof thecableholderholeand pushthroughuntiltheendexitsthroughthe
side hole.Sinceyourlightis equippedwithcontinuouslyvariableheightadjustment,itcanberaised
orloweredeasilybyapplyingpressure tothenozzleof the springlockmechanism.Forsafety reasons,
alwayssupportthelampwhenitis beingadjusted.Whenthelightunitis gentlylowered againwith
the nozzlereleased the cablewill automaticallylockinplace.Alwaysaimtosetyour lightunitlevel
withtheaquarium.
InstallationoftheVIVA withaquariummounting: Install the mountingonthe VIVA,theninstallthe
lightwithit’smountings onthe glass of your aquarium.Tightentheretainingscrews tosecure the
mount tothe aquarium.
2PSU (powersupplyunit)
EachVIVAis equippedwithone powersupply(PSU)withelectroniccontrolsthatdeliveraconstant
output.Theinputvoltageis either 95-130 Voltor220-245 Volt50/60Hz.Useonlytheoriginalpower
adaptor.Theuseof alternatetypesmayresultinirreparabledamagetothelightunitandwill invali-
datethewarranty.
Followthe specificinstructionsof the PSU–printed onthesedevices.DonotusethePSUinhumid
areas and inlocationwithout properventilation. Maximum ambient temperateis 30°C /85°F
First,connect thepower supplytothe socketof thefixturescord.Betweenthefixture and thepower
adapterensurethere is adriploopformedso thatdrippingwatercannotgetintothepower adapter
ortheelectrical outlet.Plugthepowercordinafterpluggingintheexternal powersupplyintothe
wall outlet.The DCconnectionbetween thepowersupplyandthelampshouldnotbemodified inany
way.Attemptstomodifythis connectionwithcontrollersorsimilarinterventionwillleadtoimmedi-
ateloss of warranty.
The power supplyunit(PSU)canbemounted toyourtankbaseortoawall usingthe mountingholes.
MountyourPSUwhereitwon´tgetwet.Donotinstallitinanyareawithhighhumidity,lowaircircu-
lationornext toyour aquarium orsump.
Closesupervisionis necessarywhen anapplianceis used byornearchildren. Keep outof reachof
youngchildren
·Alwaysunplugfixture and PSUfromoutletwhennotinuse,before puttingonortakingoff
partsand beforecleaning.
·Never yankcordtopullplugfrom outlet.Graspthe plugand pulltodisconnect.
·Donotuseapplianceforother thanintended use.The useof attachmentsnotrecommended
orsoldby themanufacturermay causeanunsafecondition.
·Donotinstall orstore theappliancewhereitwill beexposed toweatherortotemperatures
belowfreezingorabove85°F.
·Makesureapplianceis securelyinstalledbeforeoperatingit.Readandobservealltheim-
portantnoticesonthe appliance.
·Ifanextensioncordisnecessary,acordwithaproper ratingshouldbeused.Acordratedfor
less amperesorwattsthanthe applianceratingmayoverheat.Care shouldbetaken toar-
rangethe cord so that it will not be tripped overorpulled.
·Donotoperatethe fixture and the PSUinanenclosure thatdoesnotallowforproperaircir-
culation.
·Donotattempt todismantleormodify fixtureorPSU,as this mayresultininjuryandwillvoid
the warranty.
·The VIVAandthePSUare NOTWATERPROOF;water canpermanentlydamageit.This damage
IS NOTcoveredunderwarranty.Protectthesecomponentsfromsplashes,dripsorothercon-
tact withwater.

5
·DO NOTimmerseinwater.Iftheappliancefallsintothe water,DON’Treachforit!Firstun-
plugitand then retrieveit.Ifelectricalcomponentsof the appliancegetwet,unplugthe ap-
plianceimmediately (non-immersibleequipment only).
·Carefully examinetheapplianceafterinstallation.Itshouldnotbepluggedinifthereis water
onpartsnot intendedtobewet.
·This product carriesaningress protectionratingof IPX0and must notbe immersed inwater.
·Danger:Toavoidpossibleelectrical shock,specialcare shouldbetakensincewateris em-
ployedinthe useof aquarium equipment.
·DO NOTattemptrepairsyourself;return the appliancetothemanufacturer forserviceordis-
card.
·Donotoperateanyapplianceif ithas adamaged cord orplug,if itis malfunctioningorif itis
dropped ordamagedinanymanner.The power cord of this appliancecannotbe replaced:If
the cordis damaged,the applianceshouldbediscarded.Nevercutthecord.Damagefrom
droppingyourfixture orPSUIS NOTcoveredunder warranty.
3Temperature management
The VIVAfixturesare equippedwithalargeheatsinksurface.Dependentuponthe internallymeas-
uredtemperature oneachLEDboard andinthefixture itself,intheeventof overheating,inbuiltpro-
tectionwill automaticallydimdowntheunitandswitchoff theLEDclusteruntilthecorrect tempera-
turehas beenattained atwhichpoint,thefixturewill automaticallyre-engage.Repeatedoverheating
may damagetheelectronicsand shouldbe notified toyour specialist dealerimmediately.
4Turning On
After supplyingpower,theVIVAwill startautomatically.AstatusLEDinsidethe powersupplywill
lightupwhichdisplaystheoperationstatus.Thedisplayshows the“GIESEMANN”logo forafewsec-
ondsand proceedsaninternalhardwareandsoftwarecheck.Thefixtureis ready nowforuse.
5Programmingthe VIVA
The “jogdial”nexttothe displayhas the followingfunctions:left/righttogo backand forththruthe
menu. Push–toconfirmaselection. By keep pushingthe jogdialforafewseconds,youstartentering
the programmingmode.
6Status display
Thestatusdisplayappearsautomaticallyafterthe systemstartof thelight.Pushthe jogdialforafew
secondstoentertheprogrammingmode.
6.1.Demo
This mode canbeselectedfordemonstrationpurposes.Withinapproximately60 seconds,allof the
functionsoftheluminairearesimulated(this is afactorydeterminedmodewhichcannotbeadjust-
ed).

6
The Demostartswiththe sunrise,then ashortlightningis activated,followed bythe cloud simulation
whichis dimmingtheLEDchannelsforawhile.Finallythemoonsimulationdimsallchannelsto0%,
only the LED of themoon-channelare workingwiththeiradjustedintensity.
Duringthedemo„Demo“ appearsinthedisplay;thedemomode willbe finished bypushingonthe
jogdialand youwillcomebacktothe „Individual“(chapter Fehler! Verweisquellekonntenichtge-
funden werden.).
6.2.daycycles (setpoints)
Here,lightcolors, durations,and intensitiesare set foreachday.
Thethreedifferentcolour channelscanbeprogrammed individually.Eachcolour channelcanbepro-
grammed withmax 8switchpoints.
6.2.1.Preset
Tomaketheprogrammingmore comfortable,yourVIVAhas already2differentpredefinedlight
curves.Afterchoosingadefaultyoucanadjustthe curvesof eachchanneltosuiteyour individual
requirementsby moving,adding,orsubtractingset pointsas yougo.
Choosethe default curvethat youprefer:
·Preset 1 (daylight cycle,acclimatizationmode)
·Preset 2 (daylight cycle,standard mode)
With„OK“youconfirm thedesireddefault scenario.
6.2.2.Editing thepresettings
Fromhereyoucanadjustthe curvesof eachchanneltosuiteyour individualrequirementsbymoving,
adding,orsubtractingset pointsas yougo.

7
Eachdaylightcycleofferssix differentlightcurvesforeachLEDchannel.
Choosethe lightchannelthatyouwouldliketoeditbypushingand scrollingand confirmbypushing
the jogdialagain. Thesix LED channelscolors) are:
·A
·B
·C
EachLEDchannelrequiresmin. 2switch-pointsand canhavemax. 8switch-points.
Thenumber of switchpointscanbechosen byturningthe jogdialleftorright.By pushingthe jogdial
your leavingthis point.A simpledaylight cyclecanberealizedalready withafewswitchpointsonly.
Thedisplayindicatesthechosen LED(colour)channelandnexttoitswitchpoint001.Underneaththe
timeforthis switchpoint (10:00)and the intensity 000%.
A simplecurvecouldbelikethis:
10:00 o´clock–0%sunrise
11:00 o´clock–88 %reachingmaximum of 88%
17:30 o´clock–88 %startingtodimm down(sunset)
19:45 o´clock-0%switchingoff
6.2.3.Exit
By choosing„Exit“youwill be forwardedtothemenu„individual“(chapter8.1).
6.3.Controls
Here,theintensity of eachcolour channelcanbetested by movingitsrespectiveslider from 0-100%
The differentintensitiesand colourchannelmixescanbe testedinrealtimeover your aquariumto
achieveaninfinitenumberof lightingconditions.Preferred mixesorratios canthen be recordedfor
referencelaterwhen programmingthedaytimeprofiles.
The display indicatesthe chosen colour channel,andastatusbarwiththe light intensity.

8
Select thedesiredcolourchannelbypushingthejogdial. Confirmagainyour choiceandchangetothe
statusbarbelow,whichis setto0%.Activatethis statusbarbypushingthe jogdial, nowyoumayset
the intensity bymovingthejogdialhorizontally,savingthesettings bypushingagainthe jogdial. Fol-
lowthesamestepsforsettingthe otherscolors.
Choosing„Exit“thetestmode willbefinishedwithoutstoringyoursettings,andthelightwillgo back
tothe automaticdaycyclestate.
6.4.Simulation (theweathermenu)
Inthis section, weather scenarios canbe initiated.
6.4.1.Clouds
Hereyoumay choosewhether youusethecloudsmode ornot by selectingclouds„ON“or„OFF“
Select inthemenu„Settings“ the detailsregardingthe „cloudsimulation“as number of clouds(max.
255 per day)ortheintensity of the clouds(remainingbrightness in%).Select as well the durationin
secondsof eachcloud.
6.4.2.Moon
This sectionallows settingof the moonlight simulation. Ifdesired,choosethat functionbyYESorNO.
The followingoptionsforthe moonsettings are available:

9
Moonday: Thelunarcyclehas 28 daysstartingatnewmoonuntilfullmoonatday14 and withde-
creasingmoonintensity onday 28.
ON/OFF: Here youmay select thetimesformoonriseand moonset.
Intensity: Assignthe"MoonIntensity",toadjustthemaximumbrightness of the moon. This value de-
terminesthe maximumintensity of the full moonatday14.All other valuesof the ascendingand de-
scendinglunarphaseintensity will becalculatedautomatically across the 28 daycycle.
Selectingthe “Exit”itemyouare confirmingthesettings,andhavethechoicetoselectoneof thesix
LED channelssimulatingthemoon–inother words,whichcolourthemoonover your tankshouldbe.
6.4.3.Preview
Clickingthis buttonwillsendtheadjusted profiletemporarilytothelightunitwhere itwillrun
throughthefull24hour cycleincondensed time.This allows youtosee theresultsof anychanges
before usingthenewsettings.(NOTE: whilstinPreviewmode,anyactiveweather ormoonsimula-
tionswill runas well,possiblyshowingas rapidflashingof the lightsimulation. It shouldalso be noted
thatinsituationswhere alatedaycycleis chosen, after 9.00amforexample,itmaytakeseveral
minutesbefore anyactivityinshowninpreviewmode whilstthesoftware runsthroughthenon-light
period00.00-09.00.Thepreviewmodewillcontinuetorun untilthe endof the simulation.
Youcaninterrupt the previewbypushingthejogdial.
6.4.4.Exit
By selecting„Exit“youwillget backtothe menu„Simulation“(chapter8.5).
6.5.custom settings(pincode)
Usingthis functionwillallowtoprogramthe generalparameterof your VIVA.This functionis protect-
ed via pincode – This pincodeis „1234“.
6.5.1.Date
Adjust thedate–DD/MM /YY.
6.5.2.Time
Adjust your localtime(24h)

10
6.5.3.Information
Indicationof the currenthardware version(„HW-Version“), thesoftware version(„SW-Version“) and
dateof thelast software upload(dateof last software version).
By pushingthejogdialthesystemis indicatingfurthertechnicaldetailsof your VIVA,serialnumberof
your fixtureandenergyconsumption(KW/h)
By pushingthejogdialagain, you´llbebackinthesettings menu(chapter 8.6).
6.5.4.Display
Inthis area,thedisplaysettings of thefixturecanbeadjusted,ieif theilluminationof theLCdisplay
shouldbeonoroff.
This sectionallows as welltoprogramthe„delay“of the displayilluminationi.e.after howmanysec-
ondstheilluminationswitchesoff (30-120 secondsafter last keypress)
Oncetheilluminationis switchedoff,asimplekeypress willswitchtheilluminationof the displayon
again.
6.5.5.language
Inthis sectionyoucanchoosethe language.
YoucanchooseEnglish, GermanorItalian(other languagesbeingprepared). Choosing„Exit“will save
thesesettings and brings youbacktothemenu„settings“(chapter8.6).
6.5.6.factorysettings
Inthis sectionyoucandeleteallyourpersonalsettings(nonrecommended).
The system is askingtoconfirm this step.

11
6.5.7.Service (onlyfor GIESEMANN service)
This menucanonlybeusedbytheGIESEMANNtechnicalserviceandis protected byaPINcode.Our
technicianscanreadallthe operatingparametersof your device.Thus,the exact lifeof your lamp,
the maximumtemperature reached,humidity conditionsand anyerrormessagesencountered.Inaddi-
tionit canbedetected whetheranytechnicalchangeshavebeenmade tothe device.
6.5.8.Exit
By choosing„Exit“youwill forwardedbacktothe “settings”menu(chapter 8.6).
6.5.9.Troubleshooting
Wehaveextensivelydevelopedandtestedthelight,the softwareandthe associated descriptions.
Despitetheutmostcareandtechnicalassistanceprovided ourproductshavebeenmadebypeople.
Therefore,errorscanoccur.Constructivecriticism andsuggestionsarealwayswelcome.Forassistance
withquestionsortechnical problems,pleaseseethe support areaat http://giesemann.de/support.

12
PRODUCTREGISTRATION
The Registrationof theGIESEMANN product must becompleted withinthirty (30) daysfrom thedate
of purchasefortheone(1)yearwarranty periodtobecomeeffective.Otherwise,the warranty period
forthis GIESEMANN product is thirty (30)days.
REGISTRATION:
Your product canberegisteredinany of thefollowingways:
Website:Toregister online,visit http://www.giesemann.de toregister yourproduct.
Mail: Toregister by mail,completethe enclosed warranty registrationcard andsend it tothe address
shownbelow(mustbe received withinthirty (30) daysfrom purchase).
GiesemannGmbH
Buerdestr.14
41334 Nettetal–Germany
Phone:+49 2157 812990
E-Mail: service@giesemann.de
WarrantyTerms
Giesemann warrants totheoriginal purchaser onlythat the
GIESEMANN products will befree fromdefectsinmaterial and work-
manshipundernormalusefor aperiod of thirty(30) daysfromthedate
of purchaseof eitherone(1)yearfromthe dateof purchase–if the
product is properlyregisteredthroughthe registrationprocess below
providedthattheproductis installed andused properlyandconsistent
withthe product manual. Norepresentation or warrantybyany
Giesemannsalesperson,dealer,agentrepresentative,employee,or
anyother individual orentityacting orpurporting toact on behalfof
Giesemann, shall bebinding upon Giesemannotherthanasexpressly
set forthherein.This limitedwarrantyappliesonlytotheoriginalpur-
chaser andis nottransferablefromtheoriginal consumerpurchaser.In
the eventofalimited warrantyclaim, proofofpurchasewillberequired.
The Giesemann warrantyshallnot apply:(i)toanydamaged
Giesemannproduct that hasbeensubjectedtoaccident, misuse,
neglect,alteration, acts of God,improper handling, improper transport,
improper storage, improperuseor application, improper installation,
improper testing orunauthorizedrepair,operationoutsiderecommend-
ed parameters(asdescribedintheapplicableproduct manual, for
example, damagefromsaltwater sprayor heat),powerfluctuationor
failure, subjection toabnormalphysicalor electricalstress, useof
incompatibleproducts, non-approvedpowersupplies/connections,or
similar circumstances (ii)toanyGiesemann product whereproduct
beenexposedto water or(iii)tocosmetic problems ordefects that
result fromnormalwearand tear underordinaryuse,and do notaffect
the performanceoruseof theproduct. Giesemann’s warrantyapplies
onlytoaproductthat is manufactured byorfor Giesemannand identi-
fied bythe Giesemanntradenameor product identificationlogo affixed
tothe product. If younoticeaproblemwithyourGiesemann Product,do
notattempt torepairit yourself. Anyattempts at self repairshall void
this limitedwarranty.Giesemann shallnotbe heldliablefordamageto
anyaquarium, aquariumlifeforms, or otherpersonal objects due to
improper useofthedevice.Iftheproduct developsacovereddefect
withintheone-yearperiod,Giesemann will, at its option,either repairor
replacetheGiesemann product withoutcharge, providedthatthe
Giesemannproduct isreturned duringthe warrantyperiod.
NOTE:FOR THEONE(1)YEAR WARRANTYTO BECOMEEFFEC-
TIVE,THEPRODUCTTO WHICHTHISLIMITEDWARRANTYRE-
LATES MUSTBEREGISTEREDWITHIN THIRTY(30) DAYSOF
PURCHASE. INSTRUCTIONSFOR REGISTRATION AREINCLUDED
BELOW.
OBTAINING WARRANTYSERVICE: Ifthis product provesdefective
during theWarrantyPeriod,contact Giesemann (attheaddresslisted
below)for instructionsonhowtoobtainwarrantyservice.
GiesemannGmbH
Buerdestr.14
41334 Nettetal –Germany
Phone: +49 2157 812990
E-Mail: service@giesemann.de
Pleasebeprepared withyourproductmodelandserialnumber,aswell
aproof ofpurchase. DATED PROOFOFORIGINALPURCHASE IS
REQUIRED TO PROCESS WARRANTYCLAIMS. REGISTRATIONOF
YOUR PRODUCTSATISFIES THEPROOFOFPURCHASE RE-
QUIREMENT.
If youare requestedtoreturn your product toGiesemann, youwill be
givenaReturn Materials Authorization (RMA)number.Youare responsi-
blefor properlypackaging andshipping yourproducttoGiesemann,this
includes thecost ofshippingandanyapplicableinsurance(bothtoand
fromGiesemann’sfactory).Giesemann is not responsiblefor, and this
limited warrantydoesnotcover, damagetoproducts incurred inshipping.
Pleasetakeefforts topackageyourproduct properly. Youmust include
the RMAnumber and, if theproduct isnotregisteredacopyofyourdated
proofof originalpurchase when returning yourproduct. Products received
without anRMAnumberand, if applicable,dated proofoforiginal pur-
chasewill be rejected. Donot include anyotheritemswiththeproductthat
youarereturning toGiesemann.
Repairsor replacements not coveredunderthis limitedwarrantywill be
subject tocharge atGiesemann’s then-current rates.
GIESEMANN DISCLAIMSALLOTHERWARRANTIES WHETHER ORAL
OR WRITTEN, EXPRESS OR IMPLIED, TO THEFULLESTEXTENT
ALLOWED BYAPPLICABLELAW. NO IMPLIEDWARRANTYOFFIT-
NESS FOR APARTICULAR PURPOSEOR MERCHANTABILITYSHALL
APPLYEXCEPTAS REQUIRED BYAPPLICABLELAW. GIESEMANN
DOES NOTAUTHORIZEANYPERSON OR BUSINESS ENTITY,IN-
CLUDINGITSAUTHORIZED DEALERS, TO CREATEFORITANY
OBLIGATIONS, LIABILITIES,OR OTHERWARRANTIES IN CONNEC-
TIONWITH THISPRODUCT.
ALL WARRANTIES AREVOIDIFTHEREISDAMAGETO THE
GIESEMANN PRODUCTTHATISNOTARESULTOFADEFECTIN
THEMATERIALSOR WORKMANSHIP. THESOLEAND EXCLUSIVE
REMEDYFOR ALL CLAIMSTHATYOUMAYHAVE ARISING OUTOF
OR IN CONNECTIONWITH YOURUSEOFTHISPRODUCT,WHETH-
ERMADEOR SUFFERED BYYOU OR ANOTHER PERSON AND
WHETHER BASED IN CONTRACTOR TORT, SHALLBE REPAIR OR
REPLACEMENTOFTHEPRODUCT.IN NO EVENTWILL GIESEMANN
BE LIABLETOYOU ORANYOTHERPARTYFOR ANYDIRECT,
INDIRECT, GENERAL, SPECIAL,INCIDENTAL, CONSEQUENTIAL,
EXEMPLARYOROTHER DAMAGES ARISING OUTOFTHEUSE OR
INABILITYOFTO USE THEPRODUCT(INCLUDING,WITHOUTLIMI-
TATION, DAMAGES FORLOSS OFBUSINESS PROFITS,BUSINESS
INTERRUPTION, LOSS OFINFORMATIONOR ANYOTHER PECUNI-
ARYLOSS, DAMAGETOYOUR AQUARIUMOR ANYAQUARIUM
INHABITANTS),OR FROMANYBREACH OFWARRANTY, EVEN IF
GIESEMANN HAS BEENADVISED OFTHEPOSSIBILITYOFSUCH
DAMAGES.IN NO CASE SHALLGIESEMANN’SLIABILITYEXCEED
THEAMOUNTYOU PAID FOR THEPRODUCT.IFYOUDISAGREE
WITH THESE TERMSAND CONDITIONSDO NOTUSE THE
GIESEMANN PRODUCT.
Somestatesdonot allowthe exclusion or limitationofincidentalor con-
sequentialdamages,sotheaboveexclusions maynotapplytoyou.
Giesemann’s warrantyis governed bythe laws of the European Commu-
nity(EC),excludingitsconflict of lawsprinciplesand excludingthe provi-
sionsof theUnited NationsConvention on Contracts for theInternational
Saleof Goods. This warrantygivesyou specific legalrights, andyoumay
alsohaveotherrights, whichvaryfromstatetostate.
TECHNICALSUPPORT:
This limited warrantyis neitheraservicenor asupportcontract.
Table of contents
Other Giesemann Aquarium manuals
Popular Aquarium manuals by other brands

EHEIM
EHEIM thermocontrol e 25 operating manual

CAD Lights Aquariums
CAD Lights Aquariums Versa Series instructions

D-D The Aquarium Solution
D-D The Aquarium Solution Aqua-Pro Reef Series installation instructions

Cobalt Aquatics
Cobalt Aquatics C-VUE 18 Use and care instructions

Red Sea
Red Sea REEFER P 500 Assembly and installation instructions

Reef Factory
Reef Factory Smart roller user manual