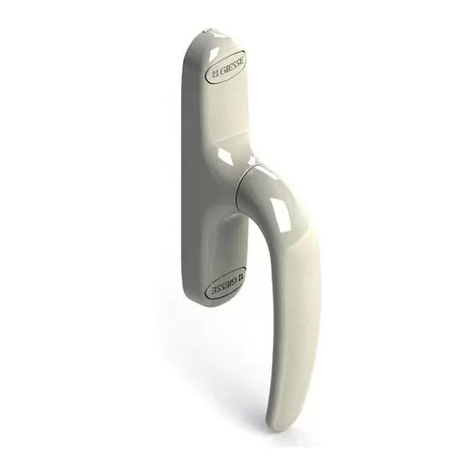
ISTRUZIONI - INSTRUCTIONS - INSTRUCTIONS - INSTRUCCIONES - ANLEITUNG
I0127000/05-2010
- 1/2 -
www.giesse.it
SISTEMA COMPLETO DI CHIUSURA UNICA
Le cremonesi UNICA e UNICA KEY devono essere completate dal relativo Kit specifi-
co per Apertura Interna, Esterna, ad Anta Ribalta o Scorrevole.
Ogni Kit è composto sia da particolari interni alla cremonese sia da tutti gli elementi
necessari a realizzare la chiusura dell’anta.
Ad esclusione del corpo cremonese (fig.1 e 2) tutti i particolari raffigurati sono inclusi
nel Kit specifico. UNICA COMPLETE CLOSING SYSTEM
The UNICA and UNICA KEY cremone bolts must be used with the relative Kit.There
are separate Kits for Internal opening, External opening,Tilt–and–Turn opening and
Sliding opening.
Every Kit consists of both internal cremone bolt parts and all the elements required
for closing the wing.
With the exception of the cremone bolt body (figs. 1 and 2), all the parts illustrated
are included in the specific Kit.
SYSTEME DE FERMETURE UNICA
Les crémones UNICA et UNICA KEY doivent avoir en supplément le Kit spécifique
pour Ouverture Interne, Externe, Oscillo–Battant ou Coulissant.
Chaque kit contient les pièces internes de la crémone et tous les éléments nécessai-
res à garantir la fermeture de la menuiserie.
A l’exclusion du corps de la crémone (fig.1 et 2), le Kit contient toutes les pièces qui
figurent dans le dessin.
SISTEMA COMPLETO DE CIERRE UNICA
Los cierres cremona UNICA y UNICA KEY deben equiparse con el juego dedicado
para Apertura Interna, Externa, Hoja Oscilo – Batiente o Corredera.
Todo juego incluye las piezas internas de la cremona y todos los elementos necesa-
rios para realizar el cierre de la hoja.
Excluyendo el cuerpo de la cremona (fig.1 y 2) todas las piezas ilustradas estàn in-
cluidas en el juego dedicado.
KOMPLETTES FENSTERSCHLIESSYSTEM UNICA
Die Fenstergriffe UNICA und UNICA KEY sind mit dem entsprechenden Bausatz für
nach innen oder nach außen öffnende Fenster, Drehkipp– oder Schiebefenster zu
vervollständigen.
Jeder Bausatz besteht aus den Innenteilen des Griffssowie aus den Elementen zum
Schließen des Fensters bzw. der Fenstertür.
Mit Ausnahme des Griffs (Abb.1 e 2) sind alle dargestellten Bestandteile im jeweili-
gen Bausatz enthalten.
Fig. 5.a
Fig. 4Fig. 3
SX DX
Fig. 5.b
Fig. 6.a Fig. 6.b
Fig. 1 Fig. 2
– Mano DESTRA:inserire gli scorre-
voli nella posizione A delle crema-
gliere, mantenendo le pinne in posi-
zione opposta al manico.
– RIGHT hand: insert the sliding el-
ements in position A on the racks,
keeping the fins in the position oppo-
site the handle.
– Main DROITE : introduisez les
coulissants dans la position A des
crémaillères, enmaintenant les ailet-
tes dans la position opposée à celle
de la poignée.
– Mano DERECHA: introducir los
elementos correderos en la posiciòn
A de las cremalleras, manteniendo
las aletas en la posiciòn opuesta res-
pecto al mango.
– RECHTS:Die Gleitteile in Position
A der Zahnstangen einsetzen, wobei
die Ansätze entgegengesetzt zum
Griff angeordnet sein müssen.
– Mano SINISTRA: inserire gli scor-
revoli nella posizione B delle crema-
gliere, mantenendo le pinne in posi-
zione opposta al manico.
– LEFT hand: insert the sliding el-
ements in position B on the racks,
keeping the fins in the position oppo-
site the handle.
– Main GAUCHE : introduisez les
coulissants dans la position B des
crémaillères, enmaintenant les ailet-
tes dans la position opposée à celle
de la poignée.
– Mano IZQUIERDA: introducir los
elementos correderos en la posición
B de las cremalleras, manteniendo
las aletas en la posición opuesta res-
pecto al mango.
– LINKS: Die Gleitteile in Position B
der Zahnstangen einsetzen, wobei
die Ansätze entgegengesetzt zum
Griff angeordnet sein müssen.
– Estrarre la cremonese dalla con-
fezione ed inserire le cremagliere.
– Take the cremone bolt out of the
pack and insert the racks.
– Déballez la crémone et montez
les crémaillères.
– Sacar la cremona de su embala-
je e introducir las cremalleras.
– Den Fenstergriff aus der Pak-
kung nehmen und die Zahnstan-
gen einsetzen.
– Ruotare il manico di 90°portando così
le cremagliere in posizione centrale.
– Turn the handle 90° to move the racks
to the central position.
–Tournez la poignée de 90° pour que les
crémaillères soient au centre.
– Girar el asa 90° para situar las crema-
lleras en la posición central.
– Den Griff um 90°drehen, wodurch die
Zahnstangen in die mittlere Stellung ge-
fahren werden.
PREDISPOSIZIONE PER APERTURA INTERNA, ESTERNA O SCORREVOLE –
PREPARATION FOR INTERNAL, EXTERNAL AND SLIDING OPENING
PREDISPOSITION POUR OUVERTURE INTERNE, EXTERNE OU COULISSANTE –
PREPARACIN PARA APERTURA INTERNA, EXTERNA O CORREDERA
VORBEREITUNG FR NACH INNEN ODER NACH AUSSEN FFNENDE FENSTER ODER SCHIEBEFENSTER
– Inserire la basetta in nylon e procedere al montaggio sul profilo sfruttando la lavorazione indicata nelle istruzioni dei Kit specifici.
– Insert the nylon strip and fit the bolt to the profile, using the locations illustrated in the instructions for the specific Kit.
– Introduisez la plaquette en plastique et procédez au montage sur le profil en suivant les instructions spécifiques jointes dans chaque Kit.
– Introducir la patilla de nylon y realizar el montaje en el perfil utilizando el asiento indicado en las instrucciones de los juegos específicos.
– Die Nylonplatte einsetzen und am Profil montieren; dabei sind die Bohrungen zu nutzen, die in der Anleitung des jeweiligen Bausatzes angegeben sind.
GRASSO
GREASE
GRAISSE
GRASA
FETT


