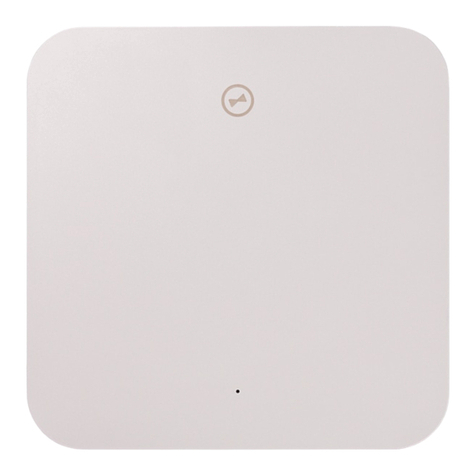
Gira 0529 00 User manual

Gira HomeServer
0529 00
Gira FacilityServer
2075 00
Gira HomeServer/FacilityServer
RemoteVisu


3
05.2012/V 1.2
Contents
1 Introduction ........................................................................................... 5
1.1 General Information........................................................................................ 6
1.2 Operating devices........................................................................................... 7
1.3 System requirements ..................................................................................... 7
1.4 Area of application ......................................................................................... 7
1.5 Specifics ......................................................................................................... 8
1.6 Installation ...................................................................................................... 8
2 RemoteVisu............................................................................................ 9
2.1 Sample project ............................................................................................... 9
2.1.1 Scope of sample project................................................................................. 9
2.2 Start-up........................................................................................................... 10
2.2.1 Setup .............................................................................................................. 10
2.2.2 Page size ........................................................................................................ 11
2.2.3 Popup page .................................................................................................... 12
2.2.4 Transferring a project ..................................................................................... 12
2.3 Starting visualisation ...................................................................................... 13
2.3.1 Start files......................................................................................................... 13
2.3.2 Variants B1, B2 parameters............................................................................ 15
2.3.3 Cookies........................................................................................................... 15
2.4 Media Center.................................................................................................. 16
2.4.1 RemoteVisu.mcl ............................................................................................. 16
2.4.2 Install_RemoteVisu......................................................................................... 17
2.4.3 Uninstall_RemoteVisu .................................................................................... 17
2.4.4 Button assignment ......................................................................................... 17
2.5 Safety ............................................................................................................. 20
2.6 Reconnect and Refresh .................................................................................. 20
2.7 Login variants ................................................................................................. 21
2.7.1 Login type 1.................................................................................................... 21
2.7.2 Login type 2.................................................................................................... 21
2.7.3 Login type 3.................................................................................................... 21
2.7.4 Login behaviour.............................................................................................. 22
2.8 Login mask, fields .......................................................................................... 22
2.8.1 User name ...................................................................................................... 22
2.8.2 Password........................................................................................................ 22
2.8.3 Design ............................................................................................................ 22
2.8.4 Refresh time ................................................................................................... 23
2.8.5 Save information ............................................................................................ 23
2.8.6 Log in.............................................................................................................. 23
2.8.7 5th parameter................................................................................................. 23
2.9 Installed files................................................................................................... 24

405.2012/V 1.2
2.10 Graphics files.................................................................................................. 24
2.10.1 ax0.gif ............................................................................................................ 24
2.10.2 num_bg.png................................................................................................... 24
2.10.3 mark1.png...................................................................................................... 25
2.10.4 mark2.png...................................................................................................... 25
2.10.5 hide3.png ....................................................................................................... 25
2.10.6 hide4.png ....................................................................................................... 25
2.10.7 Selection of marking ...................................................................................... 25
2.11 Javascript files................................................................................................ 26
2.12 HTML files...................................................................................................... 26
2.13 Login masks................................................................................................... 26

Introduction
5
05.2012/V 1.2
1. Introduction
The RemoteVisu provides you with an operating interface for the HomeServer and
FacilityServer that is optimally matched to the use of the visualisation on the Windows Media
Center and Internet Explorer.
Operation is carried out with the Media Center remote control. As an option, the Windows
Media Center can be operated with an XBox 360 and the wireless XBox 360 wireless
controller (see below).
Figure 1.1: Windows Media Center for Windows XP or Windows Vista
Figure 1.2: Media Center - Section with four integrated HS links

Introduction
605.2012/V 1.2
Figure 1.3: Resolution 1680x1050: Internet Explorer (without upstream MCE). The browser should
be operated in the full-screen mode.
1.1 General Information
The information, data, values, etc. contained in these documents may be changed without
prior notification. The illustrations are also non-binding.
Subject to technical modifications!
i
Note: Up-to-date information is available on the Gira website.
As the software for the device purchased by you is being continuously further developed
and updated, information in this manual may no longer be up-to-date.
Current product information is always available on the Gira website:
www.gira.com
Current software updates and documentation for your product are also available.

Introduction
7
05.2012/V 1.2
1.2 Operating devices
RemoteVisu can be operated using the following operating devices:
– MS Media Center IR Remote Control for the Windows Media Center or only for the
Internet Explorer
– XBox 360 wireless controller As an option, the Windows Media Center of a PC can
be operated with an XBox 360.
1.3 System requirements
The following is required for using the RemoteVisu:
– HomeServer or FacilityServer.
– Expert software from Version 2.2.071114 (from 14/11/2007 or newer)
– HomeServer or FacilityServer firmware from Version 2.2.071114 (from 14/11/2007
or newer)
– Windows Media Center (on Windows XP or Windows Vista) or Internet-Explorer on
the operating device
1.4 Area of application
The RemoteVisu expands the existing HomeServer/FacilityServer visualisation functions.
Any other use of the device and software is not permitted. Gira shall assume neither legal
responsibility nor a warranty of any kind for errors and damage resulting from the improper
use of the device and/or the related software.
The areas Menu, Query and Seven-day time clock mask are not included in the scope of
the application.

Introduction
805.2012/V 1.2
1.5 Specifics
The RemoteVisu comprises the option of defining different sized visualisation pages.
A visualisation page can be opened as a popup mask.
No additional design is required for the RemoteVisu in a project. The layout is determined by
the visualisation program.
1.6 Installation
The RemoteVisu is a component of the HomeServer/FacilityServer Expert software and is
automatically installed with it.

RemoteVisu
9
05.2012/V 1.2
2. RemoteVisu
2.1 Sample project
A sample project is included with the HomeServer/FacilityServer Expert software. The name
of the sample project is:
sample-yyyymmdd-rv.de
Here "yyyymmdd" stands for the date of the respective file.
2.1.1 Scope of sample project
Two resolutions can be selected in the sample project:
1680 x 1050 and 1024 x 768.
The following visualisation masks are available:
– Graph overview
– Camera image overview
– Ground plan of grounds with light, blind and courtyard gate
– Ground floor, switchable elements: light, blind, temperature, universal time clock
(UTC)
– Upper floor, switchable elements: light, blind, temperature, temperature, universal
time clock
The following popups are available:
– Blind control
– Value entry
–Graphs
– Camera images
–UTC
– Camera archive
– Buddy list
– Message archive
– Holiday calendar
– Public holiday calendar
– Date and time entry
i
Note: Design MCE1680.
The design MCE1680 used in the sample project is only suitable for working with the
RemoteVisu.
The elements used in other designs (e.g. gira1024v) are not present here.

RemoteVisu
10 05.2012/V 1.2
2.2 Start-up
2.2.1 Setup
Existing projects can be expanded with the HomeServer AjaxVisu without an additional
design. Open the menu item Setup in the Expert. Create the following two symbols in the
Project settings mask (see Image 2.1). The image ID is decisive for the definition.
– Image ID: XXPAGE
– Image ID: XXPOPUP
The symbols can be assigned any name. However, using expressive names is advisable.
Figure 2.1 Creating two symbols under "Project settings"
i
Note: Do not create by copying or duplicating.
Please note that the two symbols cannot be created by copying or duplicating another
symbol!

RemoteVisu
11
05.2012/V 1.2
2.2.2 Page size
If the area of a standard visualisation page is to be limited, this is possible with the XXPAGE
symbol. If this symbol is set on a visualisation page, it defines the lower right-hand corner.
All information which lies outside the limited area is not shown.
Figure 2.2 Example of setting page size
Create the symbol as described above:
Image ID: XXPAGE
Designation (name): "RemoteVisu_page_size".
The symbol can be used as an option. If this symbol is not used, the browser shows the
entire area of the visualisation page.
Using a small, square symbol is advisable. The upper left-hand corner of the symbol defines
the page size.
The green frame on the left of the screen (see Image 2.2) shows the area defined by the
upper left-hand point of the small grey XXPAGE symbol. The right of the screen shows the
result visible in the RemoteVisu.
The size and colour of the XXPAGE symbol are not significant, as it of course lies outside the
defined display area.
Only onesymbol (either exactly one XXPOPUP or exactly one XXPAGE) may be created per
page!

RemoteVisu
12 05.2012/V 1.2
2.2.3 Popup page
The RemoteVisu offers popup visualisation pages.
If a visualisation page is to be laid over the visualisation page to be called (popup), it is
possible with the XXPOPUP symbol. If this symbol is set on a visualisation page, it defines
the lower right-hand corner and at the same time it defines this page as a popup. All
information which lies outside the limited area is not shown. The page is laid centred over
the existing page when it is called.
Figure 2.3 Creating a symbol for a popup Left: Draft of popup page. Right: Called popup in
the visualisation
Create the symbol as described above:
Image ID: XXPOPUP
Designation (name): "RemoteVisu_PopUp".
Using a small, square symbol is advisable. The upper left-hand corner of the symbol defines
the page size.
A mask (e.g. message archive) can be called from a popup page. However, it is not possible
to call another visualisation or popup page within a popup page.
The previous page can be accessed with the "Return button" (see below).
With a popup page it is possible, for example, to realise device-specific popups, e.g. a popup
for blind control.
The later popup can be seen together with the small red XXPOPUP symbol, which limits the
area to be shown, on the left of the screen (see Image 2.3). The result which can then be
seen as a popup in the RemoteVisu is shown on the right.
The size and colour of the XXPOPUP symbol are not significant, as it of course lies outside
the defined display area.
Only ONE symbol (either exactly one XXPOPUP or exactly one XXPAGE) may be created per
page!
2.2.4 Transferring a project
The project must always be completely (images+data+voice messages) transferred to the
HomeServer or FacilityServer.

RemoteVisu
13
05.2012/V 1.2
2.3 Starting visualisation
The RemoteVisu is started by calling one of the following pages in the Internet Explorer:
– http://IP_DES_HS-FS/opt/hsrv-gira_en/startgast.htm
– http://IP_DES_HS-FS/opt/hsrv-gira_en/start2.htm
The two variants differ from each other in the user and the resolution used.
2.3.1 Start files
startguest.htm starts the project with the user 'u1024' and the resolution 1024x768.
start2.htm starts the project with the user 'u1680' and the resolution 1680x1050.
The file startguest.htm is entered as standard In the RemoteVisu.mcl file included in the
sample project.
The explanations on the start files are provided using the example of the file startguest.htm.
The startguest.htm file only differs in the line of start2.htm marked with a blue font.
Code listing using the file startguest.htm as an example :
Line Code
1<html>
2 <head>
3 <title>HomeServer AjaxVisu</title>
4 <script type="text/javascript" src="js/keys.js"></script>
5 <script type="text/javascript" src="js/ajax.js"></script>
6 <style class="text/css">
7 body { background-color:#000000; }
8div{}
9img{}
10 input {padding:0px; margin:0px; font-size:24pt; }
11 </style>
12 </head>
13 <body scroll="no"onkeydown="onRemoteEvent(window.event. keyCode)">
14 <!-- Visu -->
15 <div id="xbase" style="position:absolute; top:0px; left:0px;
width:1024px; height:768px; overflow:hidden;
border:0px; border-color:red; border-style:solid;">
16 </div>
17
18 <!-- Marking -->

RemoteVisu
14 05.2012/V 1.2
19 <div id="xmark" style="position:absolute; top:0px;
left:0px; visibility:hidden;">
20 <img id="xmarkimg" src="img/hide.png"
style="position:absolute; top:0px; left:0px;" />
21 <img id="xmarkimg2" src="img/mark2.png"
style="visibility:hidden;
position:absolute;top:0px;left:0px;" />
22 </div>
23
24 <!-- Reconnect -->
25 <div id="xreconnect" style="position:absolute; top:0px;
left:0px; width:1024px; height:768px; overflow:hidden;
text-align:center; visibility:hidden;
background-color:red;">
26 Restore connection....<br/>
27 <span id="tryCnt">*</span><br/>
28 <span id="tryState"> </span>
29 </div>
30
31 <!-- Start -->
32 <script language="JavaScript">
33 startClientEx('u1024', 'u1024', 'MCE1680', 'R1', 0);
34 </script>
35 </body>
36 </html>

RemoteVisu
15
05.2012/V 1.2
Explanations
The explanations refer to the setting options in this file. It is assumed that the standard HTML
commands are known.
The specification of the design "MCE1680" in the startguest.htm file is not a typing error, as
no separate design is used for the resolution 1024x768!
The sizes of the masks are limited by the XXPAGE symbol instead.
2.3.2 Variants B1, B2 parameters
The parameters can be adjusted.
1. User
2. Password
3. Design abbreviation
4. Refresh time
5. Login behaviour
A detailed description of the fields is provided in Chapter "Login mask, fields" on page 22.
Example of line 33:
startClientEx('u1024', 'u1024', 'mce1680', 'R1', 0);
2.3.3 Cookies
If you log in with one of the B variants, all cookies are deleted, i.e. during next login with
Variant A, all data must be re-entered.
Line Explanation
3 Page heading or tab heading in the browser.
6 to 11 CSS settings for Login and Reconnect masks.
7 Background settings. Current: colour.
15 <div> "xbase". This container contains the entire visualisation.
19 to 22 <div> "xmark" with img "xmarkimg1" and "xmarkimg2". Of the images
entered here ("img/mark1.png" and "img/mark2.png"), exactly one must
always have the option "visibility:hidden". The respective other image is
then used for the click display.
25 <div> "xreconnect". Container for the Reconnect-Display mask.
32 to 34 The <span>'s with the IDs "tryCnt" and "tryState" must be present, as
otherwise it is possible to design freely with HTML here.
33 Client is started with JavaScript. Some things can be set:
Running the client. In this line the start files differ from each other.

RemoteVisu
16 05.2012/V 1.2
2.4 Media Center
The files for integrating the RemoteVisu in the Windows Media Center are contained in the
delivery scope of the sample project:
– RemoteVisu.mcl
– Install_RemoteVisu.cmd
– Uninstall_RemoteVisu.cmd
2.4.1 RemoteVisu.mcl
The RemoteVisu.mcl file contains the necessary data for the installation. In the line which
begins with "<entrypoint" (coloured red), you must make the specific adjustments for your
HomeServer.
url: Here you enter an address as described in the point Internet Explorer. You can also
choose between the following variants:
• http://IP_DES_HS-FS/opt/hsrv-gira_en/startgast.htm
• http://IP_DES_HS-FS/opt/hsrv-gira_en/start2.htm
title: Assign a title to the call symbol, e.g. "HS/FS RemoteVisu".
description: Enter a brief description on what is concerned, e.g. "HS/FS Client for
RemoteVisu".
After you have made all changes to the RemoteVisu.mcl file and have saved these, call the
Install_RemoteVisu.cmd file and register the RemoteVisu in your Media Center with it.
Then the HS/FS appears in the menu item Programs.
<application title="My HS"
id="{8F32B3C9-645B-45f6-BA93-9D20ACB476BA}"
CompanyName="Gira, Giersiepen GmbH + Co KG" sharedviewport="true">
<entrypoint id="{E186AD7C-F9B8-45a3-9CA9-BE4C9C50AA08}"
url="http://192.168.0.11/opt/hsrv-gira_en/startguest.htm"
title="HS/FS RemoteVisu"
description="HS/FS Client for RemoteVisu"
ImageUrl=".\RemoteVisu.png">
<category category="More Programs"/>"
</entrypoint>
</application>

RemoteVisu
17
05.2012/V 1.2
If several HomeServer are to be integrated, the two IDs (coloured blue) must be changed
with any desired unique code. With one device, the IDs can remain unchanged.
2.4.2 Install_RemoteVisu
The file Install_RemoteVisu.cmd:
%windir%\ehome\RegisterMCEApp.exe /allusers RemoteVisu.mcl
pause
This installs a menu item in the Media Center.
2.4.3 Uninstall_RemoteVisu
The file Uninstall_RemoteVisu.cmd:
%windir%\ehome\RegisterMCEApp.exe /u /allusers RemoteVisu.mcl
pause
This removes the Media Center menu item again.
2.4.4 Button assignment
When using the RemoteVisu the buttons of the operating devices are assigned as follows:
Mask Function Button Joystick
Value entry 0...9 0...9 Up/Down
C Left Left
New number Right
Save Back/OK Back/OK
Plus/Minus Replay Replay
Comma Skip Up/Down
Cancel C C/Cancel
Mask Function Button Joystick
Message archive Page + Down Down
Page - Up Down
Latest entry Left Left
Oldest entry Right Right
Close Back Back

RemoteVisu
18 05.2012/V 1.2
Mask Function Button Joystick
Date + Time 0...9 0...9 Up/Down
Navigation Left/Right Left/Right
Save Back/OK Back/OK
Cancel C C/Cancel
Mask Function Button Joystick
Buddy Page + Down Down
Page - Up Up
Latest entry Left Left
Oldest entry Right Right
Close Back/C Back/C
Mask Function Button Joystick
Camera archive Image forward Down Down
Image back Up Up
Latest image Left Left
Oldest image Right Right
Close Back/C Back/C
Mask Function Button Joystick
Public holiday
calendar
Navigation Lt/Rt/Up/Dn Lt/Rt/Up/Dn
Select OK OK
Save Back Back
Cancel C/Cancel C/Cancel
Mask Function Button Joystick
Holiday calendar 0...9 0...9 Up/Down
Navigation Left/Right Left/Right
Deactivate/Activate Skip Skip
Save Back Back
Cancel C C/Cancel

RemoteVisu
19
05.2012/V 1.2
Mask Function Button Joystick
Universal time
clock (UTC)
Event + Up Down
Start page Event - Down Down
Edit event OK OK
TCL On/Off Skip Skip
New event Right Right
Close Back/C Back/C
Mask Function Button Joystick
Universal time
clock (UTC)
Edit
Change date OK OK
Change date type <> <>
Change time OK OK
Change time type <> <>
Filter <> <>
Action <> <>
Remove Replay Replay
Save Back Back
Cancel C C/Cancel
Mask Function Button Joystick
Universal time
clock (UTC)
Days of week
Mark OK OK
Navigation Lt/Rt/Up/Dn Lt/Rt/Up/Dn
Back Back Back
Mask Function Button Joystick
Universal time
clock (UTC)
Single day
0...9 0...9 Up/Down
Navigation Left/Right Left/Right
Save Back Back
*Up/DownUp/Down

RemoteVisu
20 05.2012/V 1.2
2.5 Safety
As with the B variants the login data are saved unencrypted, we only recommend using this
variant for users, who only have an internal access authorisation. Otherwise it is possible for
someone to obtain access to this file and misuse the data.
On the other hand, Variant A can be used without limitations, as in this case no data are
saved in unprotected areas and at least the password is requested during each login and
during each reconnect.
2.6 Reconnect and Refresh
If the connection to the HS/FS is disconnected, e.g. due to restarting the HS/FS, a reddish
information window with the heading "RemoteVisu" and a note that an attempt is being
made to re-establish the disconnected connection are displayed. This attempt at
reconnection is repeated at intervals that are determined by the refresh time.
A number of asterisks are shown in the information window, each of which stands for a
reconnection attempt already carried out.
As soon as the connection has been restored, the information window disappears.
If 'Variant A' described in the chapter "Starting visualisation" is used to log in, then the Login
mask is shown again after a connection has been established.
When using one of the 'B variants', the user is then on the page again that was active before
the connection failed.
Exception: Popup pages. The user is on the page again from which the popup page was
called.
Mask Function Button Joystick
Universal time
clock (UTC)
Period
0...9 0...9 Up/Down
Navigation Left/Right Left/Right
Save Back Back
Mask Function Button Joystick
Universal time
clock (UTC)
Time***
0...9 0...9 Up/Down
Navigation Left/Right Left/Right
Save Back Back
Other manuals for 0529 00
1
This manual suits for next models
1
Table of contents
Other Gira Gateway manuals
Popular Gateway manuals by other brands
ZyXEL Communications
ZyXEL Communications P-660HN-Fx series quick start guide
EtherWAN
EtherWAN EW50 user manual
Banner
Banner SureCross DX80 manual
Cisco
Cisco RF Gateway 10 Release notes
HMS Networks
HMS Networks Intesis IN776MHI00 O000 Series Installation sheet
Smartenit
Smartenit Harmony P3 6007A quick start guide
