Global Sat GB-580B User manual


GPS BIKE COMPUTER GB-580
Power / Light / Esc
Page / Enter
Up/ Start/ Stop
Down / Lap / Save
1
GPS
BIKE COMPUTER

2 3
GPS BIKE COMPUTER GB-580 GPS BIKE COMPUTER GB-580
CAUTION !
- Before first time using device, please fully charge the device.
- Please dry the USB cavity before connection of charging or data transfer.
- Before start training, please let antenna face to sky to get 3D fix
Symbol Explanations
GPS status indicator
- None: No signal
- Solid: 3D fix
- Solid with 1 bar: 3D fix with poor signal
- Solid with 2 bar: 3D fix with good signal
- Solid with 3 bar: 3D fix with strong signal
Timer icon
Cadence sensor
Clock alert
Heart rate monitor indication
Battery capacity indication
What is GPS?
GPS stands for Global Positioning System. For 3D fix, we need at least four satellites.
Normally the accuracy of GPS under open sky which means no tall building and clear sky
is within 10 meters per second. Therefore, if the device shift 10 meter at that second, the
device may shows 36 kilometer per hour instant speed. Nowadays, the GPS consumer
product has built in adjust algorithm and assisted method to extend capability of GPS.
What is Water Resistant IPX7?
Protected against the effects of temporary immersion in water. Under specific conditions
of pressure and duration, water must not enter a temporarily submerged headlamp in
quantities that would cause adverse operational effects.
The IPX7 waterproof standard is for device one meter under water within 30 minutes
protection. Waterproof standards usually measure by the pressure of water. IPX7 standard
provides device protection to be exposed the rain and sprayed over water. However, the
pressure of swimming or diving should exceed IPX7 standard.
SUITABLE UNSUITABLE
WATER RESISTANCE
Note for Upgrading Firmware
- Do not interrupt during upgrading the firmware
- Choose the right firmware file carefully
- Press UP+PG+PW to enter Boot Loader mode if device dead from fail of firmware update and then
process updating process again to recover device.

4 5
GPS BIKE COMPUTER GB-580 GPS BIKE COMPUTER GB-580
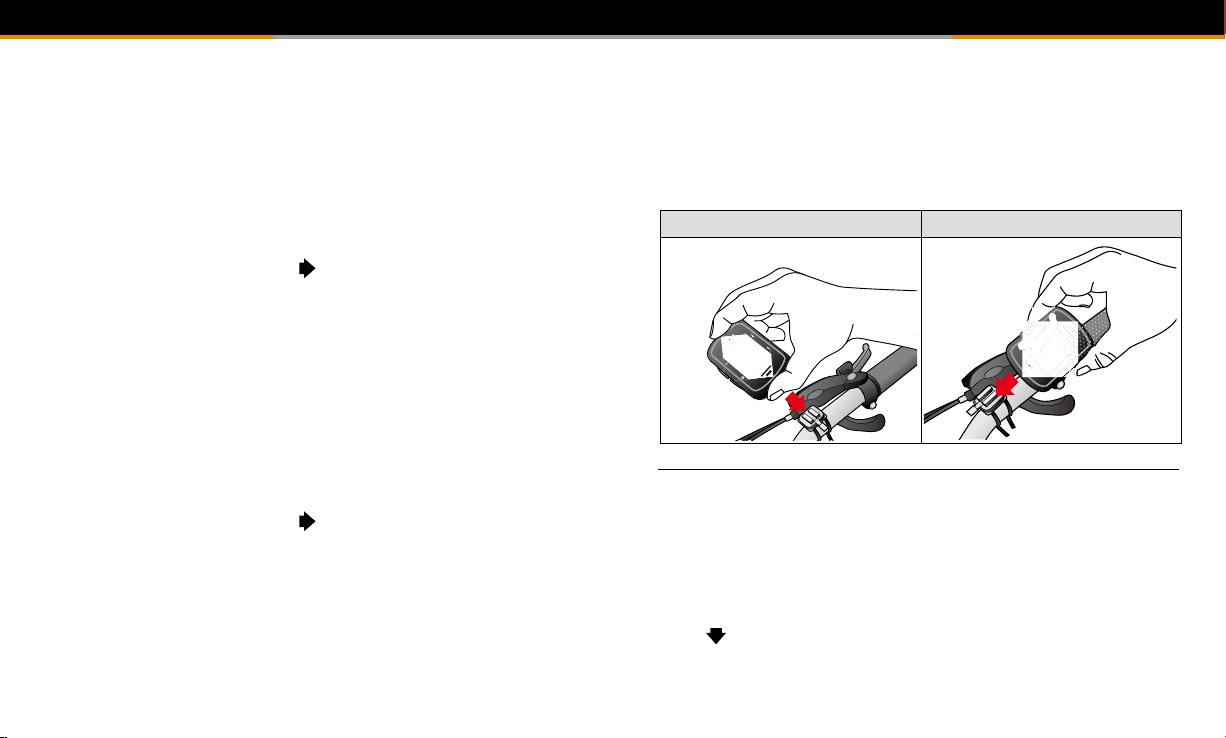
How to Set Up Custom Page
Set up the custom page and function list before your training.
[MAIN MENU] > [CONFIGURATION] > [SET CUSTOM PAGE ]
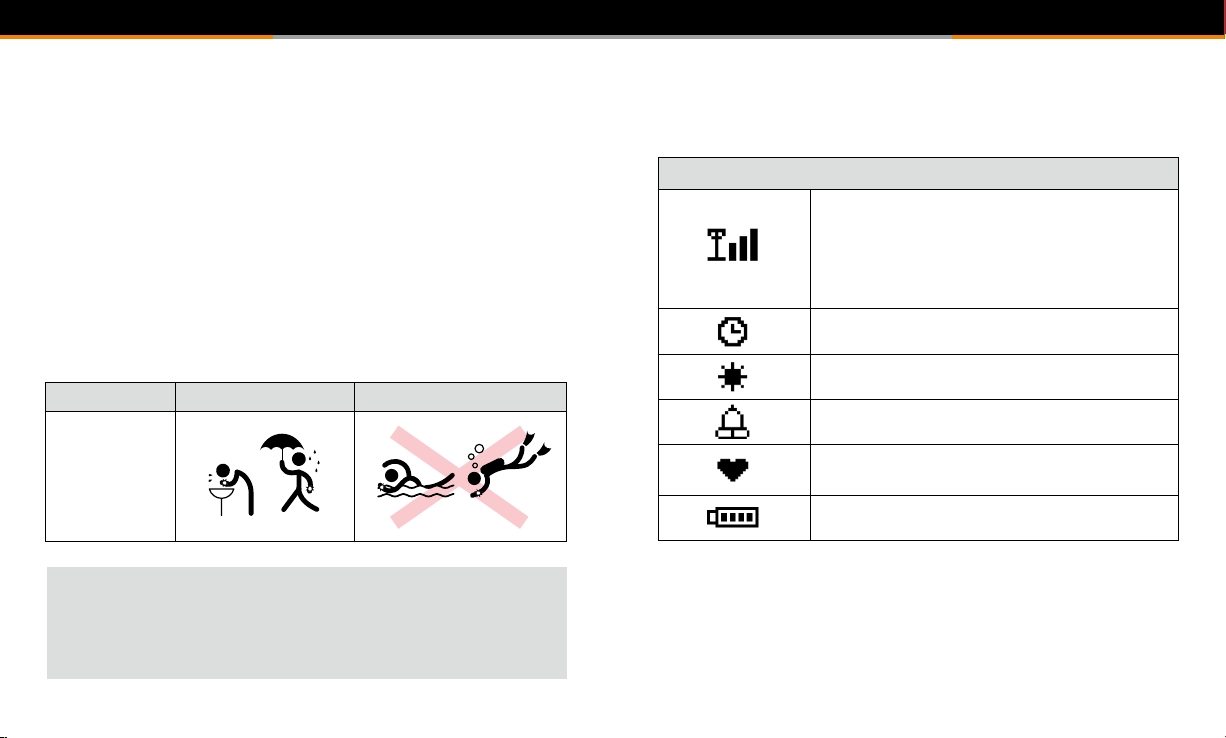
The GPS antenna is located in the lower part of the
device. Let it face to the sky for a better reception.
1. Press‘’Page button’’ 2s to enter MAIN MENU
2. Choose ‘’ CONFIGURATION’’ then press ‘’Enter button’’.
3. Chose ‘’ PAGE SETTINGE’’ then press ‘’Enter button’’
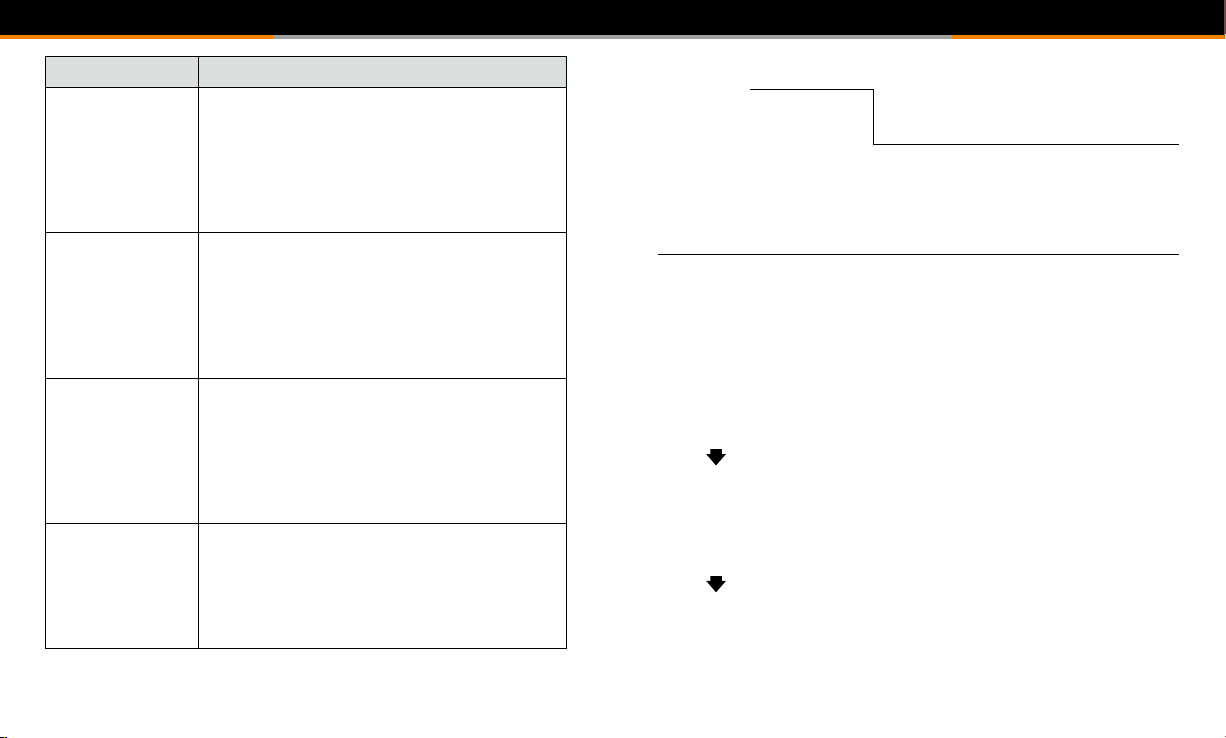
Button Description
Power/ESC Press 2 seconds to turn on/off GB-580.
When GB-580 is on, quickly press this button will turn on/off
the backlight.
Press and hold this button for 14 seconds to do hardware
reset if the system is halted.
In Menu mode, press ESC button shortly to escape from the
current page and go back to the previous page.
PG /ENTER
Switch between the screens of Speedometer mode.
Press 2 seconds to enter between Main Menu page
Speedometer Page alternatively.
In Main Menu page, press this button shortly as ENTER
function.
Switch between the screens of“Menu mode”,“Location mode”,
“Speedometer mode”and “Map mode”.
Up /Start/Stop
To press UP to up scrolling as highlighting an item in Main
Menu page.
In Speedometer mode, press START button to start timer to
get training.
In Speedometer mode, press STOP button to stop timer in
training.
In Map mode, press for zoom in.
Down/Lap/Save
To press Down to down scrolling as highlighting an item in
Main Menu page.
In Speedometer mode, when timer is counting for training,
press Lap button to create a lap.
If timer is stop while in training, press SAVE button to save
training.

6 7
GPS BIKE COMPUTER GB-580 GPS BIKE COMPUTER GB-580
B. Bike setting (GB-580P only)
1. Please press Page
button 2s to enter Main
MENU and then chose
USER PROFILE.
2. To press UP and Down
button to select BIKE
SETTING.
3. There are five bicycles
for configuration.
Press ESC button to exit if
finished.
C. Heart Rate Zone setting (GB-580P only)
1. Please press Page
button 2s to enter Main
MENU and then chose
ACCESSORIES.
2. To press UP and Down
button to select BIKE
SETTING.
3. You may configure
Heart Rate Zone
parameters and press
ESC button if finished.
4. Modify the screen field number.
5.There have four types of screen field could
be choose for every page.
6. Select the function coefficient you want then press ’Enter
button’’ to save setting.
Press‘’ESC button’’ to exit
How to configure your device
Before getting training, you may configure your device in the best condition to get more
accurate performance.
A. User Profile Setting
1. Please press Page button 2s to
enter Main MENU and then chose
USER PROFILE.
2.To press UP and Down button to
select each item for definition.
3. Press ESC button to exit if finished.

8 9
GPS BIKE COMPUTER GB-580 GPS BIKE COMPUTER GB-580
F. Power setting (GB-580P only)
1. Please press Page button 2s to enter Main MENU and then chose ACCESSORIES
2. And then press ENTER button.
3. Chose POWER SETTING and press ENTER button to configure.
4. To describe the power scale as W or % by setting VIEW.
5. To set POWER ZONE by MAX or custom.
E. Barometer Setting (GB-580P only)
1. Please press Page button 2s to enter
Main MENU and then chose ACTIVITY.
2. Chose SETTING and then press ENTER
button.
3. Chose BARO SETTING and press
ENTER button to configure.
4. To define the appropriated parameters
and then press ESC button if finished.
5. There are some ways to get well
calibration:
A. Go to website to find the local SEA LEVEL
PRESSURE and then put in;
B.Try to put in the OFFSET base on current altitude
from information or GPS.
NOTE: The default data recording setting is upon BAROMETER, it is important to get
calibration to come out accuracy performance.
D. Calories Setting
1. Please press Page button 2s to enter
Main MENU and then chose ACTIVITY.
2. Chose SETTING and then press ENTER
button.
3. Chose CALORIES and press ENTER
button to configure.
4. To define the appropriated
parameters and then press ESC button
if finished.

10 11
GPS BIKE COMPUTER GB-580 GPS BIKE COMPUTER GB-580
How to make device reading easily
GB-580 provides vertical and horizontal setting at display for easier reading while in
activity.There are two ways to set that:
1. Press OK +DOWN key to rotate
2. Go to MENU mode and go for [MAIN MENU] > [CONFIGURATION] > [SET SYSTEM] >
[DISPLAY]> [ORIENTATION]
Vertical Horizontal
BIKE SYSTEM
HQT
BIKE SYSTEM
HQT
How to Start Your Training and Save Data
1. Please assure you are at training screen and get 3D fix.
G. E-compass Setting (GB-580P only)
Electronics compass can assist GPS and improve the unreliable problem from stationary.
You have to calibrate before use that.You may follow instruction to calibrate.
1. Please press Page button 2s to enter
Main MENU and then chose ACTIVITY.
2. Chose SETTING and then press ENTER
button.
3. Chose CALORIES and press ENTER
button to configure.
4. And then press CALIBRATION button.
5. Follow instruction to calibrate
E-compass.
6. The direction will be getting more
reliable
After well calibrated.

12 13
GPS BIKE COMPUTER GB-580 GPS BIKE COMPUTER GB-580
There are five types to set your training partner.There are:
DIST/TIME:To define distance to be finished in the specified time.
DIST/SPEED: To define virtual trainer SPEED to race with you in
defined distance.
SPEED/TIME: To define SPEED for virtual trainer to compete with
you in the duration.
PACE/DIST: To define PACE for virtual trainer to compete with you
on the road.
YOURSELF:To race with your through the previous record.
[DISTANCE /TIME]
Set distance for 10 km and time for 5 minutes which means the
virtual trainer will finish 10km within 5 minutes to compete with
you.
1.You could change DIST / TIME to set up your goal.
2. Finished setting, press ‘’Up or Down button’’ to select ‘’Start’’ and
then press ‘’Enter button’’to start.
3. ENABLE ALERT ? you can select YES or NO to give you a alert.
2. When chronometer is running, press ‘’Enter button’’ quickly to
pause.
3. To press ‘’Stop button’’ and then the screen
show “RESET TRAINING DATA and SAVE?”.
Select YES and press “ENTER button” to save
training data. Screen shows ‘’SAVE AND
FINSIH’’ means the file be saved successfully.
4.Then chronometer will be reset to zero.
How to Use Virtual Trainer
In order to improve your training performance; GB-580 provides virtual trainer to pretend
your coach to improve your performance through mutual training and reaction.
[MAIN MENU] > [NAVIGATION] > [TRAINER]
Press“Page button”2s to enter MAIN MENU.

14 15
GPS BIKE COMPUTER GB-580 GPS BIKE COMPUTER GB-580
4. DO YOU RECORD RUNNING DATE ? If select YES the chronograph
will start to record your training.
5. When you reach your goal or have superior or poor performance
to trainer, it will show ahead or behind distance to you.
[SPEED /TIME]
Set speed 10km/hr and time 00:05:00 means trainer will keep
10km/hr running for 5mins to race with you.
1.You could change SPEED / TIME to set up your goal.
2. Finished setting, press ‘’Up or Down button’’ to select ‘’Start’’ and
then press ‘’Enter button’’to start.
3. ENABLE ALERT ? you can select YES or NO to give you a alert.
4. DO YOU RECORD RUNNING DATE ? If select YES the chronograph
will start to record your training.
5. When you reach your goal or have superior or poor performance
to trainer, it will show ahead or behind distance to you.
4. DO YOU RECORD RUNNING DATE ? If select YES the chronograph
will start to record your training.
5. When you reach your goal or have superior or poor performance
to trainer, it will show good job / do harder next time
6. If you have superior or poor performance to trainer, it will show
ahead or behind distance to you.
[DISTANCE /SPEED]
Set distance for 10 km and speed for 10 km/hr which means trainer
will keep 10km/hr running for 10km to race with you.
1.You could change DIST / SPEED to set up your goal.
2. Finished setting, press ‘’Up or Down button’’ to select ‘’Start’’ and
then press ‘’Enter button’’to start.
3. ENABLE ALERT ? you can select YES or NO to give you a alert.

16 17
GPS BIKE COMPUTER GB-580 GPS BIKE COMPUTER GB-580
How to Create Waypoint
- Create Waypoint
[MAIN MENU] > [NAVIGATION] >[SAVE WAYPOINT]
1. You can save the current position. If the GPS position is fixed, it
shows the longitude,latitude and elevation on the screen.
2. Use Up and Down button to scroll to the item you wish to modify
and then use the ‘’Enter button’’ to select and confirm.
3.When you finish the modification, input a “enter sign”character or
press the ‘’Esc /Lap button’’ to exit.
4. Move highlight to "CONFIRM?" and press ‘’Enter button’’ . The
location data will be stored in the memory
[PACE /DISTANCE]
Set dist 10m/hr and pace 00:01:00/km means trainer will keep the
specific pace to run 10km to race with you.
1.Yu could change PACE/ DIST to set up your goal.
2. Finished setting, press ‘’Up or Down button’’ to select ‘’Start’’ and
then press ‘’Enter button’’to start.
3. ENABLE ALERT ? you can select YES or NO to give you a alert.
4. DO YOU RECORD RUNNING DATE ? If select YES the chronograph
will start to record your training.
5. When you reach your goal or have superior or poor performance
to trainer, it will show ahead or behind distance to you.

18 19
GPS BIKE COMPUTER GB-580 GPS BIKE COMPUTER GB-580
Heart Rate Sensor Installation Procedure (Only for GB-580P)
Wear the Heart Rate Monitor
Outer side
Inner side
Moisten this side to your skin.You can wet the sensor to obtain a better reception of your pulse.
Sensor Sensor
Transmitter
1. Wrap the heart rate monitor and strap around
your chest. Adjust the heart rate monitor to be at the
center of your chest.
2. Adjust the strap to fit your chest and make it tight
enough to prevent dropping while you are jogging.
3. Remember to select “scan” to paring heart rate
monitor with your GB-580.
[MAIN MENU] > [CONFIGURATION] > [ACCESSORIES]
> [SENSORS] > [HEART RATE ] > SCAN.
It will show HR instead of SCAN once paring was
finished.
How to Use Find Waypoints
If you want to find the place which you have saved the waypoint,you can use this function
to find your waypoint and track it.
[MAIN MENU] > [NAVIGATION] >[FINW WAYPOINT] >[LIST ALL]
1. Use Up and Down button to scroll to the Waypoint you wish to go
to and press‘’Enter button’’.
2. Highlight "GOTO?" item and press ‘’Enter button’’.
3. You will see your current position and destination point on the
screen, and those nearby waypoints are also displayed.
4. Press ‘’Page button’’ display the distance and time for you to reach
destination on the right part of screen. The direction of destination
waypoint is shown by the arrow sign of the compass.
How to Upgrade Firmware
[MAIN MENU] > [CONFIGURATION] >[SYSTEM UPGRADE]
1. Allow you to upgrade the firmware of GB-580.
2. If you want to cancel the upgrade process, press Power + ESC
button at the same time.

20 21
GPS BIKE COMPUTER GB-580 GPS BIKE COMPUTER GB-580
Max. 30
Max.
150cm
The image of sensor mount on the wheel
Remember to select “scan” to paring speed sensor with your GB-580. It will show SP instead of SCAN once paring was finished.
[MAIN MENU] > [CONFIGURATION] > [ACCESSORIES] > [SENSORS] > [SPEED ] > SCAN.
6. 7.
8.
9.
Press button Green LED turn on 2 sec and also the LED will blinking for
the first 10 times after sensor detect magnetic
Silicon Rubber
Speed Sensor Installation Procedure (Only for GB-580P)
Max. 12
mm
Parts content list
1. 2.
3. 4.
5.
The edge of magnet should be on the arrow In order to achieve the necessary 12mm or less install the
transmitter and the magnet closer to the wheel hub

22 23
GPS BIKE COMPUTER GB-580 GPS BIKE COMPUTER GB-580
Max. 12mm
Cadence Sensor Installation Procedure (Only for GB-580P)
Max. 30
Max. 150cm
Parts content list
1. 2.
3. 4.
5.
The edge of magnet should be on the arrow
6.
Replace and change battery
Battery

24 25
GPS BIKE COMPUTER GB-580 GPS BIKE COMPUTER GB-580
GB-580 UI Flow Chart
ACTIVITY
ACTIVITY INFO
TRAINING INFO
DELETE ALL
SETTING
AUTO HOLD
ALERTS TIME/DIST ALERT
SPEED/PACE ALERT
HEART RATE ALERT
CADENCE
SETTING
CALORIES SPORT TYPE
TRANING LEVEL
EXTRA WEIGHT
LAP SETTING
DATA RECORDING
TRAINER DIST / TIME
DIST / SPEED
SPEED / TIME
RACE/ DIST
YOURSELF
MEMORY STATUS
Press button
7. 8.
9.
Remember to select “scan”to paring speed sensor with your GB-580. It will show CA instead of SCAN once paring was finished.
[MAIN MENU] > [CONFIGURATION] > [ACCESSORIES] > [SENSORS] > [CADENCE ] > SCAN.
Green LED turn on 2 sec and also the LED will blinking for
the first 10times after sensor detect magnetic
Replace and change battery
Battery

26 27
GPS BIKE COMPUTER GB-580 GPS BIKE COMPUTER GB-580
CONFIGURATION
SET SYSTEM
TIME SETTINGS
TIME FORMAT
TIME ZONE
DAYLIGHT SAVING
ALARM
FREQUENCY
TIME
TIME SETTINGS
TIME FORMAT
TIME ZONE
DAYLIGHT SAVING
ALARM
FREQUENCY
TIME
ACCESSORIES
SENSORS*
HEART RATE*
SPEED*
CADENCE*
SPEED/CADENCE*
POWER METER*
CARDIO SETTING*
BIKE SETTING*
BIKE*
WEIGHT*
WHEEL SIZE*
BARO SETTING*
CALBRATION*
SEA LEVEL PRESSURE*
CURRENT ALTITUDE*
ACTIVITY
ADD MAP MODE / REMOVE MAP MODE
REMOVE COMPAS / ADD E-COMPASS
ROUTES
CREATE NEW
LIST ALL
DELETE ALL
SAVE WAYPOINT
FIND WAYPOINT
LIST ALL
DELETE ALL
BACK TO START / STOP GOTO
CONNECT TO PC
CONFIGURATION
USER PROFILE
PAGE SETTING
SET PAGE 1
SET PAGE 2
SET PAGE 3
SET PAGE 4
SET LAP PAGE
SET SYSTEM
BEEPER
TOD MODE
DISPLAY
BACKLIGHT
LANGUAGE
ORIENTATION
UNITS

28
GPS BIKE COMPUTER GB-580
CONFIGURATION
SET SYSTEM SET COMPASS*
CALIBRATION*
DECLINATION*
FOLLOW BEARING*
GPS SETTINGS
WAAS / EGNOS
GPS
GPS INFO
MAP MODE SET
BIRD EYE VIEW/ DIRECT TO NORTH
ZOOM IN / OUT
FACTORY RESET
SYSTEM UPGRADE
ABOUT PRODUCT
Note: "*" is only available for P model.

This manual suits for next models
1
Table of contents
Other Global Sat Bicycle Accessories manuals