Go-Rock GR-60 User manual

MANUAL DE INSTRUCCIONES
ALTAVOZ INALÁMBRICO PORTÁTIL
GR-60
ATENCIÓN
- Leer atentamente este manual antes de usar el aparato por primera vez.
- Guardar este manual para futuras consultas.
- Si presta o vende este aparato debe ir acompañado de este manual.

Estimado Cliente:
Agradecemos la confianza depositada en nosotros al adquirir este producto GOROCK® .
Nuestro principal empeño es ofrecer artículos excelentes, manteniendo los más estrictos
controles de calidad y cumpliendo todas las normativas vigentes de seguridad, con el
objetivo de presentar un producto perfecto y seguro para el uso doméstico.
ESPECIFICACIONES
2
3
6W
60Hz-10KHz
admitida: USB / TF: Hasta 32 GB.
500 mAh
Puerto de carga: MicroUsb.
Tiempo cargando: Dependerá del amperaje del cargador utilizado.
Autonomía: Dependerá del volumen y modo utilizado.
Accesorios:
(Usb a MicroUsb).
PANEL DE MANDOS
1. Interruptor On/Off.
2. Puerto de carga MicroUsb.
4. Puerto Usb.
5. Modos de luz.
6. Pista + / Volumen +.
7. Pista - / Volumen -.
8. Play / Pause / Scan.
9. Modo Altavoz.

CARGA DE LA BATERÍA
- La batería se debe cargar al 100% antes del primer uso.
- El cargador utilizado debe ser de 5V y tener un amperaje de hasta 2A máximo.
- Cuando se enchufa a cargar se enciende un piloto rojo
El piloto se apaga cuando la carga está completa.
- Nunca se debe interrumpir la carga una vez enchufado a cargar.
- El tiempo de carga dependerá del amperaje del cargador utilizado.
- No encender el altavoz mientras está cargando.
- Si no va a utilizar el altavoz durante un tiempo, debe mantener a la batería con carga.
Cargar la batería al menos una vez al mes.
Si la batería se queda sin carga puede averiarse.
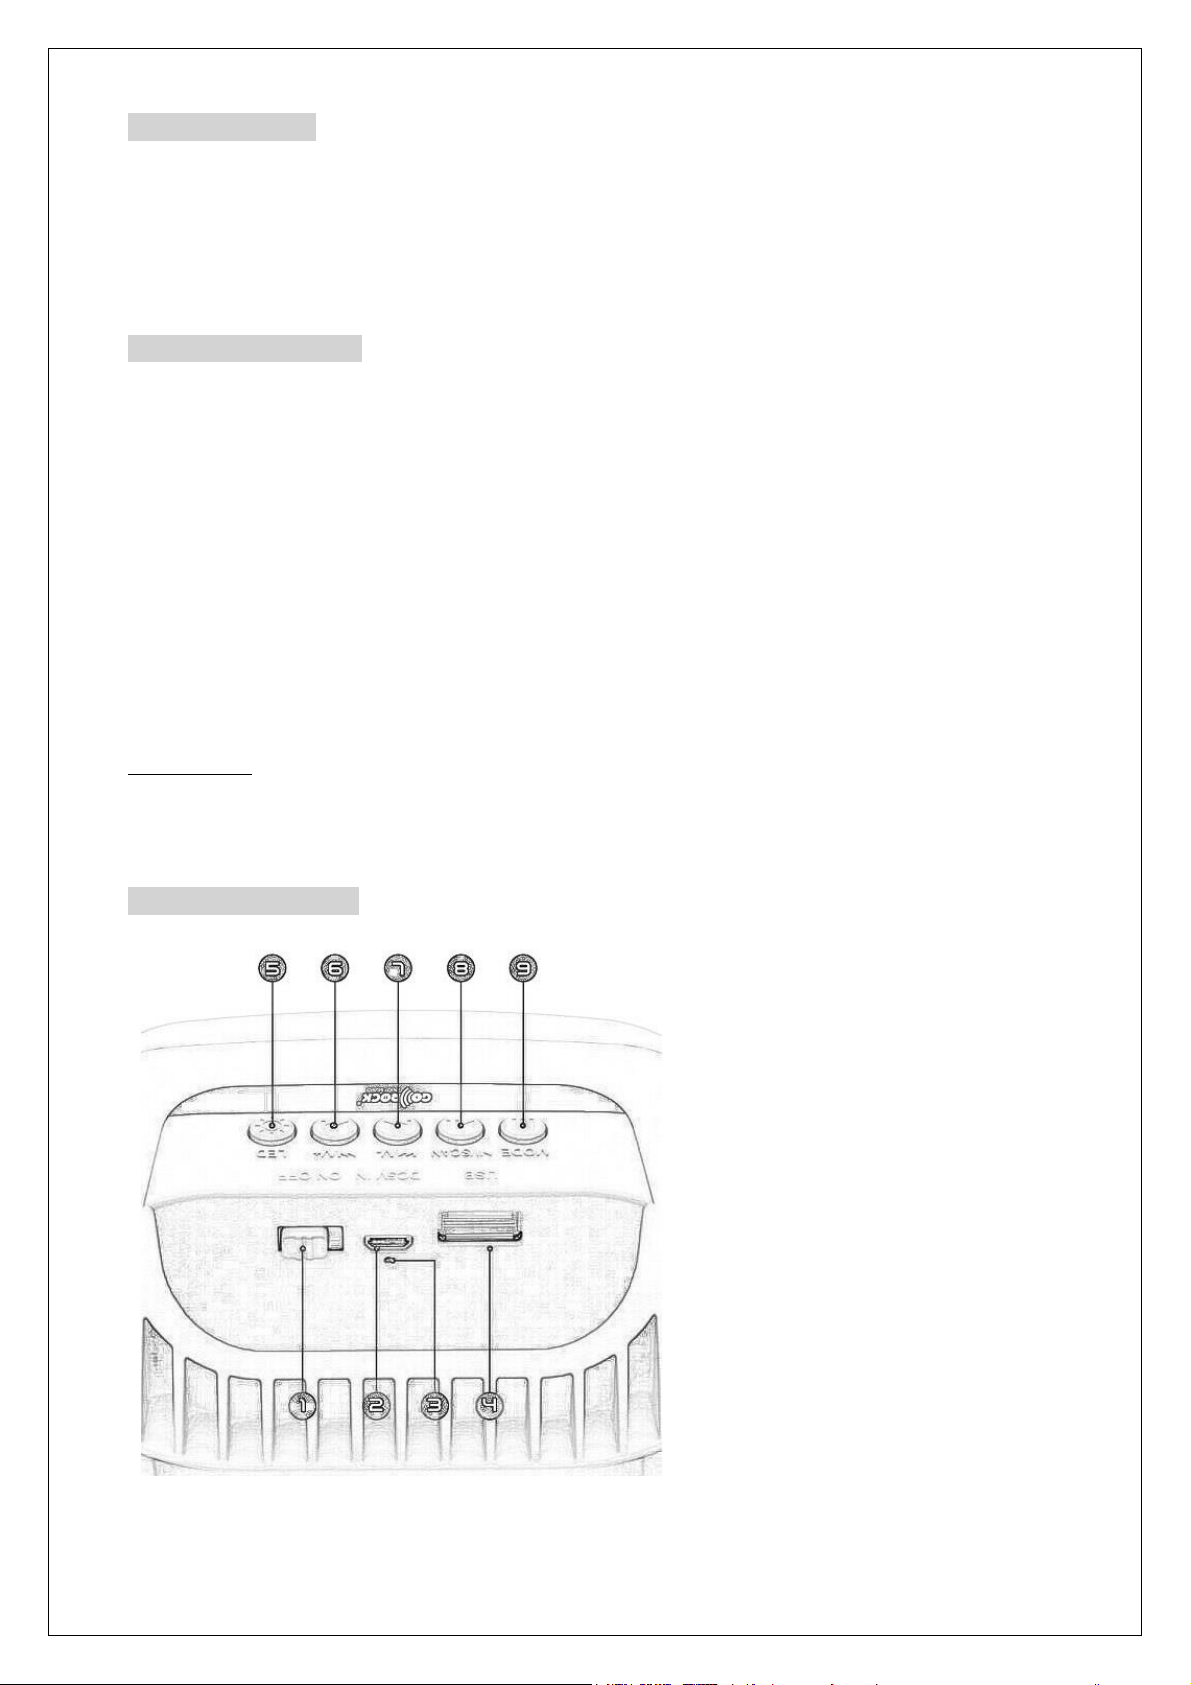
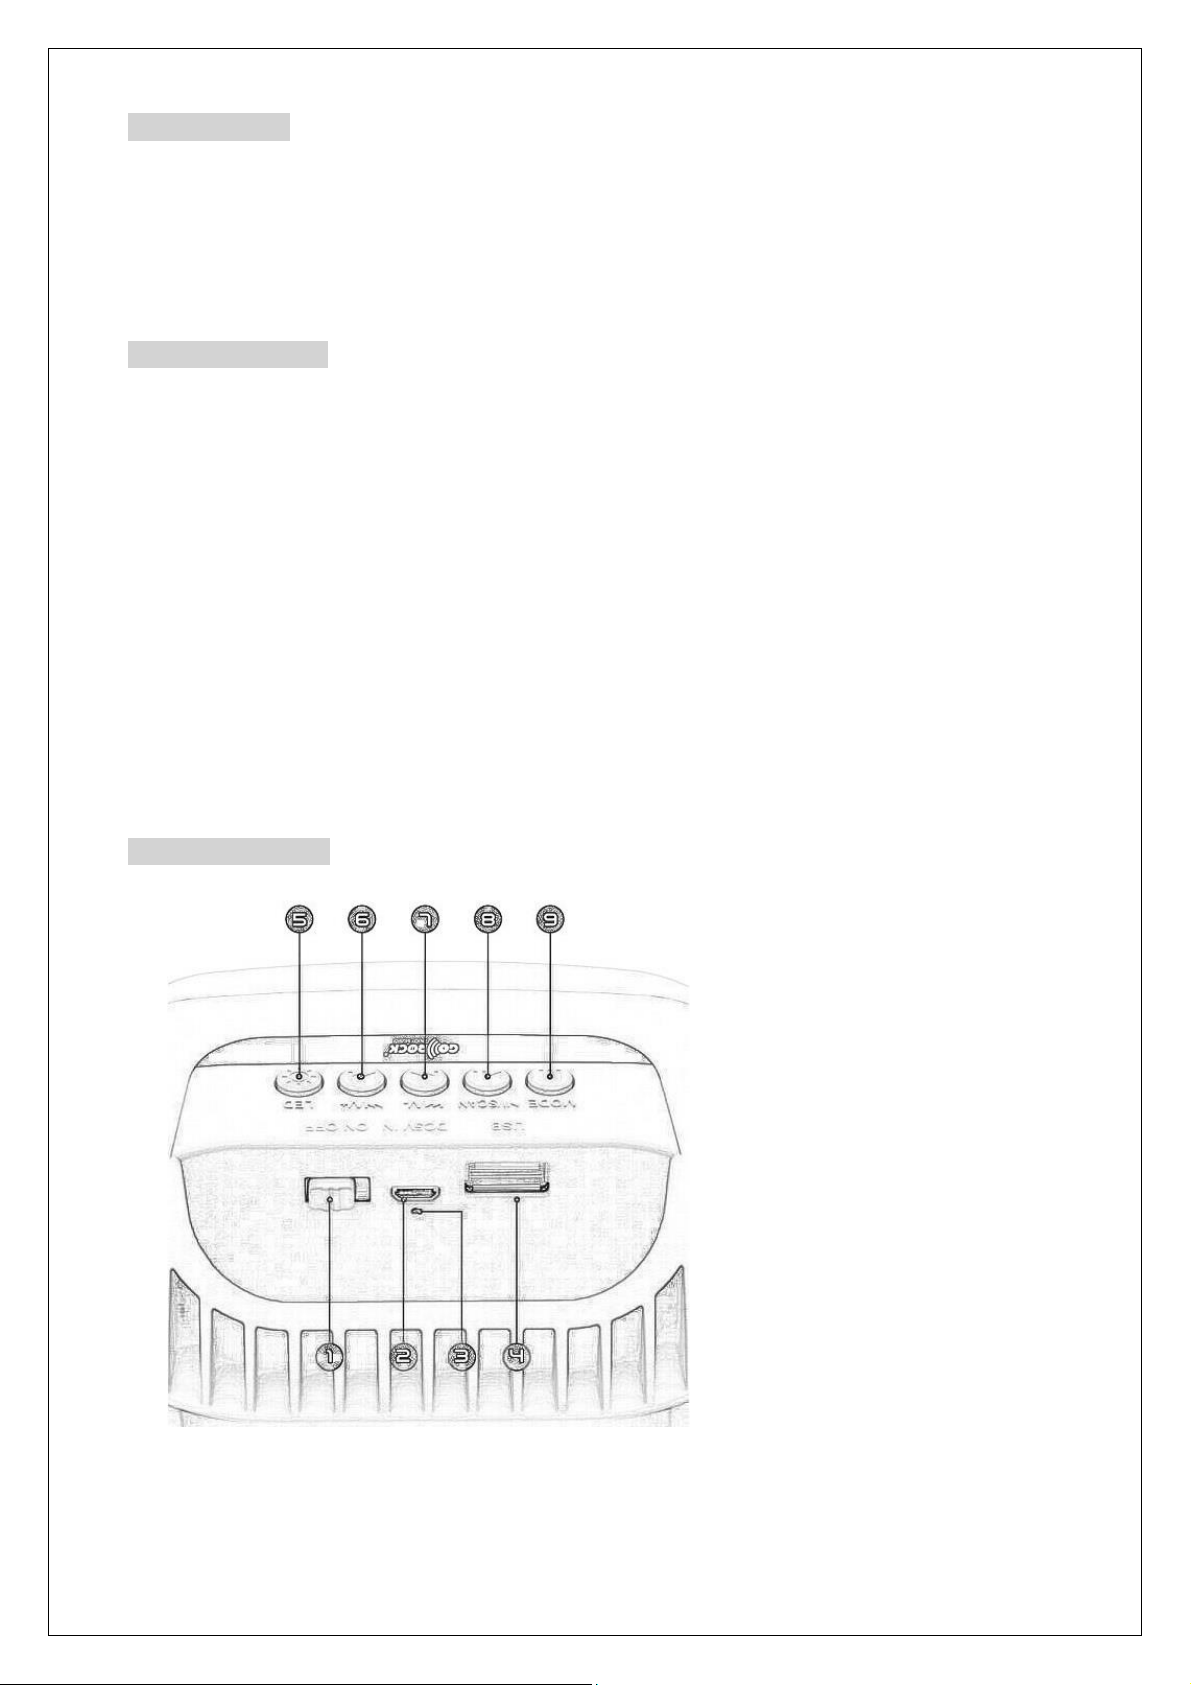
CONECTAR A DISPOSITIVO BLUETOOTH
Encienda el altavoz y encienda su dispositivo móvil Bluetooth, luego busque el nombre
del modelo de altavoz "GR-60" y selecciónelo para emparejarlo.
Una vez emparejado el Bluetooth, el altavoz se conectar
automáticamente las próximas
veces que se encienda.
MODO BLUETOOTH
El altavoz entra directamente en modo Bluetooth al encenderlo. Después de emparejar el
dispositivo, puedereproducirla música,presione brevemente ll parareproducir / pausar,
presione y para anterior / siguiente canción.
Mantener pulsado - / + para bajar o subir el volumen.
MODO USB
Inserte un pendrive en el puerto Usb,
el altavoz leer la música en formato MP3 automáticamente. Presione ll para
Reproducir / Pausa, presione brevemente y para anterior o siguiente canción.
Mantener pulsado - / + para bajar ó subir volumen.
MODO RADIO FM
- la búsqueda y el memorizado de emisoras.
- Una vez memorizadas las emisoras, pulsar y para anterior y siguiente.
- Mantener pulsado - / + para bajar o subir el volumen.
NOTA:
Si la recepción de la emisora no es buena, conectar simplemente un cable MicroUsb
suelto sin cargador y hará de antena mejorando la recepción de la señal FM.

CONDICIONES DE GARANTÍA
- Este aparato está cubierto contra cualquier avería eléctrica por fallo del fabricante.
- La garantía cubre averías causadas por el propio sistema eléctrico del fabricante.
- En el ticket o factura deben aparecer los datos del aparato para ser documento válido.
- La garantía no cubre:
- Averías causadas por golpes o mal uso por negligencias del usuario.
- Daños estéticos.
- Cuando no se dispone de ticket o factura de compra.
- Cuando no se dispone de ticket, factura o tarjeta de garantía cumplimentada.
Nota.
Durante el período de garantía, la tienda donde compra el aparato es la responsable
y encargada de gestionar y tramitar la garantía en caso de avería.
Debe ir a la tienda donde compró el aparato con su ticket o factura de compra.
NORMAS DE PROTECCIÓN DEL MEDIO AMBIENTE
Este aparato no se debe desechar con los residuos domsticos cuando finalice
su durabilidad, sino que se debe ofrecer a un centro de reciclaje de aparatos
elctricos y electrnicos domsticos. Este smbolo en el aparato, manual de
instrucciones y embalaje le avisa de este aspecto importante.
El/los materiales utilizados en este aparato se pueden reciclar. Mediante el reciclaje de
electrodomsticos, usted contribuye a fomentar la proteccin del medioambiente.
Consulte a sus autoridades locales informacin acerca del punto de recogida.

USER´S GUIDE
WIRELESS SPEAKER PORTABLE
GR-60
ATTENTION
- Read this manual carefully before using the appliance for the first time.
- Save this manual for future reference.
- If you lend or sell this device, it must be accompanied by this manual.

Dear Customer
We thank you very much for having purchased this GOROCK® product.
Our main commitment is to provide excellent articles, maintaining the strictest quality
controls and compliance with all applicable safety regulations, with the aim of presenting
a perfect and safe product for home use.
SPECIFICATIONS
version: 5.2
-10KHz
It will depend on the amperage of the charger used.
Accessories:
CONTROL PANEL
1. On/Off switch.
2. MicroUsb charging port.
3. "Charging" indicator light.
4. Usb port.
5. Light modes.
6. Track + / Volume +.
7. Track - / Volume -.
8.Play/Pause/Scan.
9. Speaker mode.

BATTERY CHARGE
- The battery must be charged to 100% before first use.
- The charger used must be 5V and have an amperage of up to 2A maximum.
-
The pilot light goes out when charging is complete.
- Charging should never be interrupted once plugged in to charge.
- The charging time will depend on the amperage of the charger used.
- Do not turn on the speaker while it is charging.
- If you are not going to use the speaker for a while, you should keep the battery charged.
Charge the battery at least once a month.
If the battery runs out of charge it can be damaged.
CONNECT TO BLUETOOTH DEVICE
Turn on the speaker and turn on your Bluetooth mobile device, then search for the
speaker model name -60" and select it to pair.
Once the Bluetooth is paired, the speaker will automatically connect the next times it is
turned on.
BLUETOOTH MODE
The speaker directly enters Bluetooth mode when you turn it on. After pairing the device,
previous/next song.
Long press - / + to decrease or increase the volume.
USB MODE
Insert a pen drive into the USB port,
Long press - / + to decrease or increase volume.
FM RADIO MODE
-
-
- Long press - / + to decrease or increase the volume.
NOTE:
If the reception of the station is not good, simply connect a MicroUsb cable loose
without a charger and it will act as an antenna, improving the reception of the FM signal.

WARRANTY CONDITIONS
- This appliance is covered against any electrical breakdown due to manufacturer's fault.
- The warranty covers breakdowns caused by the manufacturer's own electrical system.
- The device data must appear on the ticket or invoice to be a valid document.
- The guarantee does not cover:
- Faults caused by blows or misuse due to user negligence.
- Physical damages.
- When there is no ticket or purchase invoice.
- When there is no completed ticket, invoice or warranty card.
Note.
During the warranty period, the store where you buy the appliance is responsible
and in charge of managing and processing the guarantee in the event of a breakdown.
You must go to the store where you bought the device with your ticket or purchase
invoice.
GUIDELINES FOR PROTECTION OF THE ENVIRONMENT
This appliance should not be put in to the domestic garbage at the end of its
durability, but must be offered at a central point for their cycling of electric and
electronic domestic appliances. This symbol on the appliance, instruction
manual and pack again put your attention to this import an tissue.
The materials used in this appliance can be recycled. By recycling of used domestic
appliances, you contribute important push to the protection of our environment. Ask your
local authorities for information regarding the point of recollection.
Table of contents
Languages:
Other Go-Rock Portable Speakers manuals
Popular Portable Speakers manuals by other brands

Gigabyte
Gigabyte USB-Powered Two-Piece Audio System GP-S5500 owner's manual

Crystal Acoustics
Crystal Acoustics TUB instruction manual

Philips
Philips BT100 user manual

LENCO
LENCO Boost-4 user manual

Definitive Technology
Definitive Technology Home Theater Speakers Specification sheet

Sony
Sony RDP-CA2 operating instructions