54
1. Choose a flat level surface to set up the Skylight.
Unscrew the lid on your carrying case and remove
the light.
WARNING - Tip Hazard. Ensure the Skylight is
properly secured. Avoid using in windy conditions.
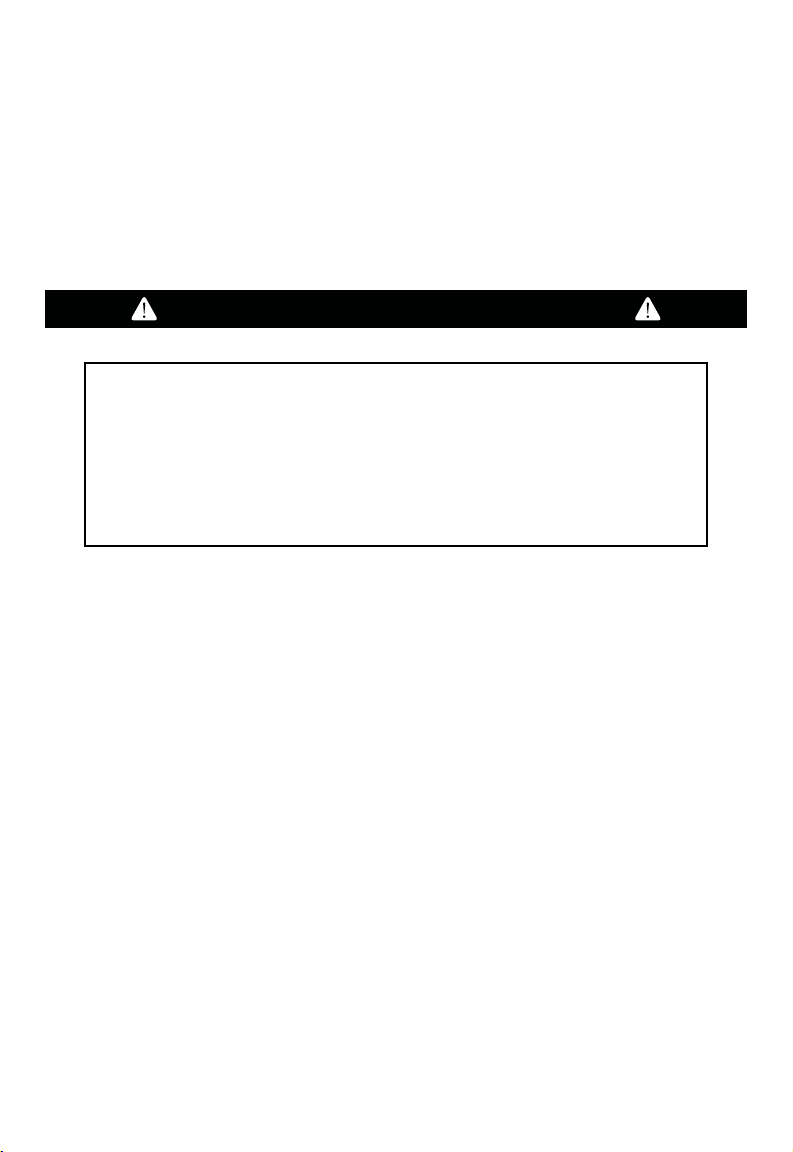
2. Lift the LED light petals. Detach the cable clip
from the cable and rotate the hook to release it.
(Note: As the light is extended, the cord will be
pulled through the pole). See illustration.
3. Grip the light with one hand directly above the
handle and press the button on the handle with
your other hand and pull down until it locks into
place. See illustration.
4. Adjust each individual tripod leg
a. Open the lever, extend the leg to desired height
b. Close the lever
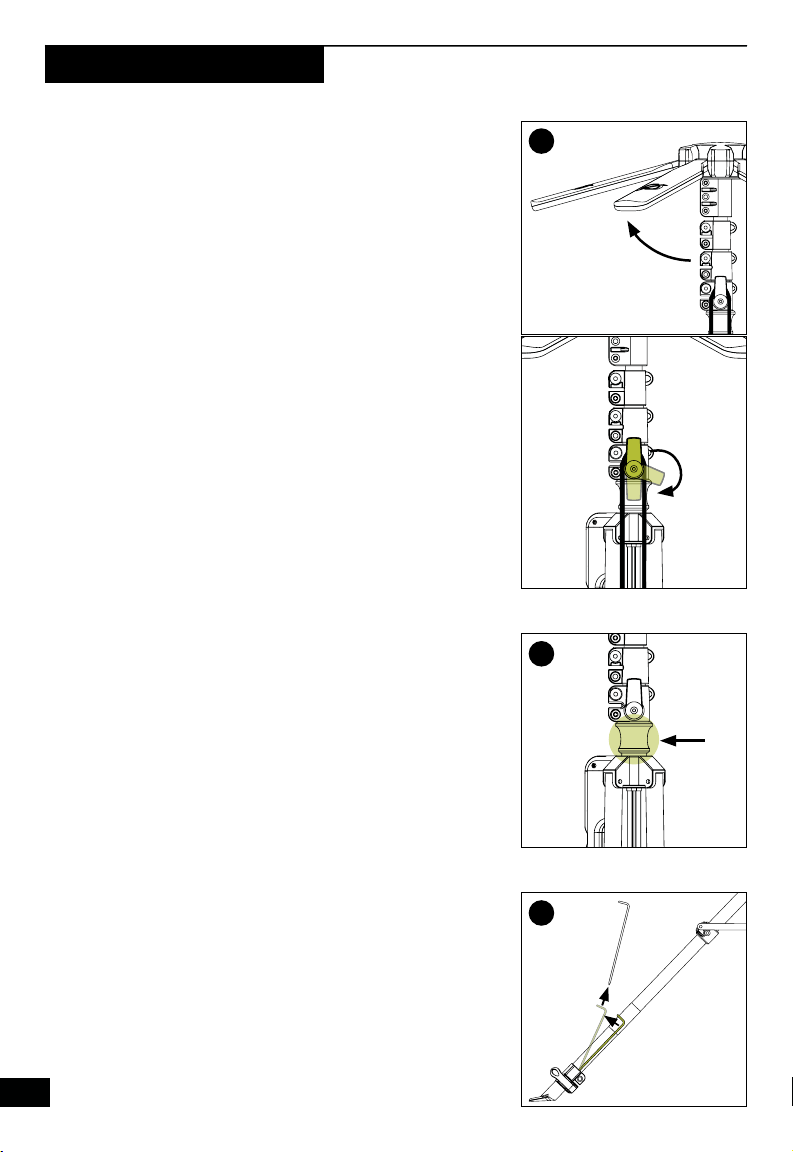
5. Secure the light with the U shaped stakes
attached to the bottom of the tripod legs.
a. Remove the stakes from the legs by pulling away
and then up. See illustration.
Setting Up Your Skylight
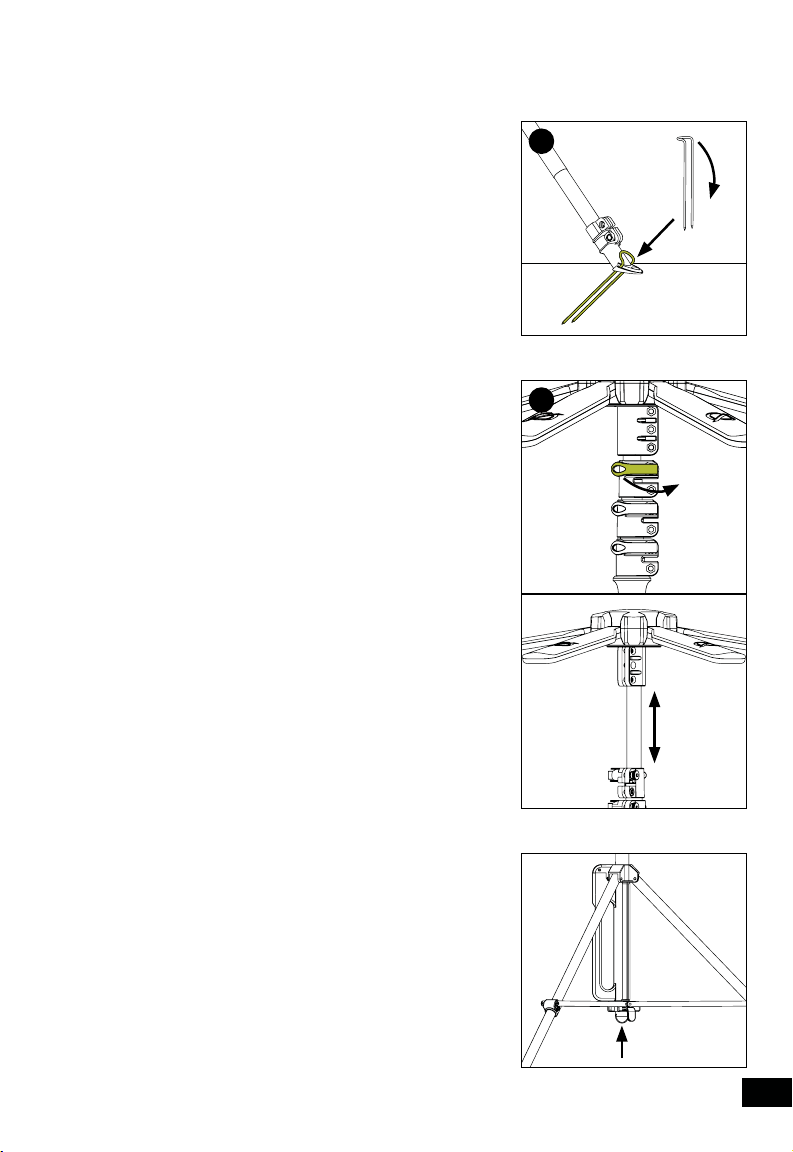
b. Insert the stakes into holes in the foot of the
tripod legs at an angle. See illustration.
6. Adjust the light panels to your preferred angle.
7. Adjust the height of the light
a. Open the top lever on the pole and extend to
desired height, then close the lever to secure at
that height. See illustration.
b. Continue to the next lever and extend the height
as needed. As you extend the light, the cord will
pull through.
Use caution when adjusting the height. The
Skylight may collapse quickly if not secured when
the levers are released.
8. Plug the Skylight into the 6mm port on your Goal
Zero Yeti power station (or a 12V aux port in your
car using the adapter included with your light).
WARNING - Ensure that all cords are properly
secured to avoid becoming a trip hazard.
9. Use the wired remote to turn the light on. Press
and hold the button to power it on. Then press the
button to cycle through brightness settings.
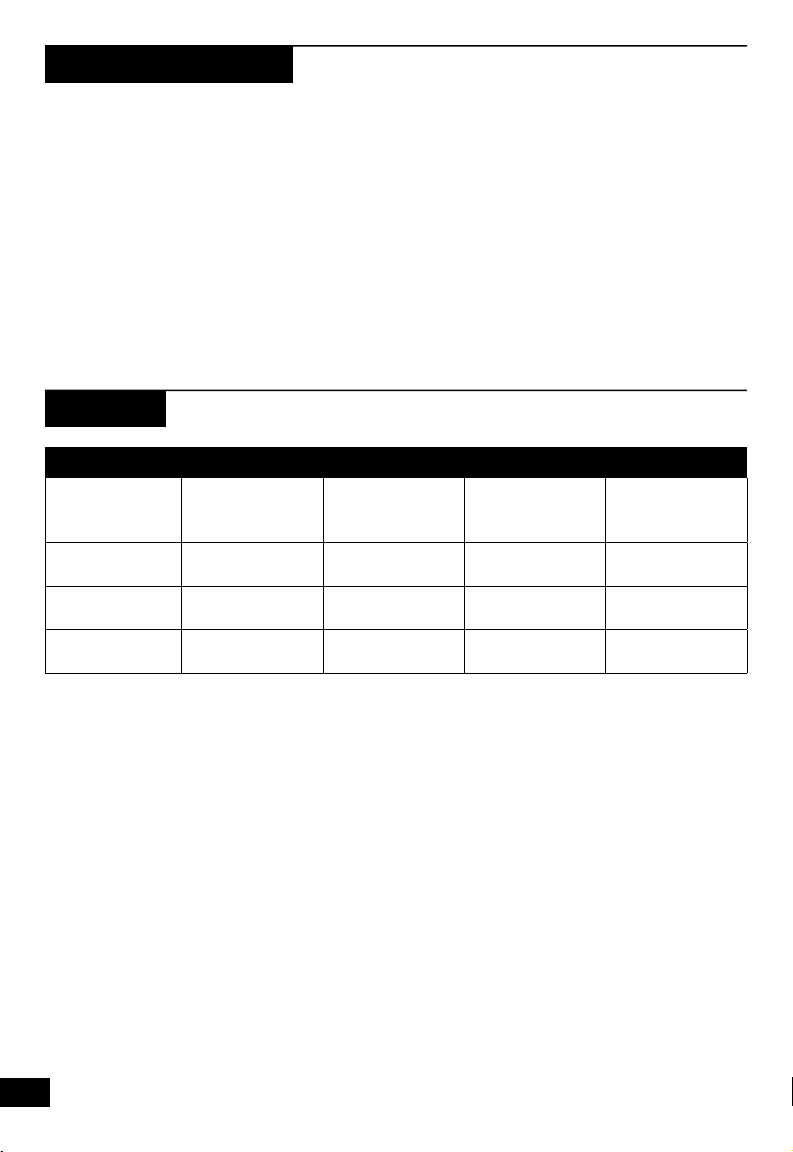
NOTE: For additional stability, you can attach a heavy
stable object or your Yeti power station to the hook at
the center of the tripod. See illustration.
WARNING - Keep away from children. Do not allow
children to interact with moving parts, especially any
levers or hinges.
2
3
90˚
5b
7
5a