Thank you for purchasing UHF Wireless Microphone system-WMicS1. These products
are suitable for video recording, journalistic shooting, audio recording, etc. Please read this
manual carefully before using to make sure the correct operation and exert the optimum
function.
(Note: as the max. support frequency is 514MHz-596MHz which includes the 96 wireless
channel's frequency, there are parts of frequency may not be ultilized.)
UHF Frequency Range: 514MHz-596MHz
There are 96 wireless channels which can be freely switched without interference
High and stable sound quality like broadcast
The maximum wireless distance up to 100m
With OLED display to show the parameters setting
Achieve real-time monitoring with 3.5mm earphone
With output volume control and silence function
The power of transmitter is adjustable
Support two transmitters and one receiver to work simultaneously
Two power supply mode
Features:
•
•
•
•
•
•
•
•
•
•
Forward
Do not disassemble. Should repairs become necessary, this product must be sent to an
authorized maintenance center.
Always keep this product dry. Do not use in rain or in damp conditions.
Keep out of reach of children.
Do not use the flash unit in the presence of flammable gas. In certain circumstance,
please pay attention to the relevant warnings.
Do not leave or store the product if the ambient temperature reads over 40℃.
Turn off the flash trigger immediately in the event of malfunction.
Observe precautions when handling batteries.
Warning
Use only batteries listed in this manual. Do not use old and new batteries or batteries of different types
at the same time.
Read and follow all warnings and instructions provided by the manufacturer.
Batteries cannot be short-circuited or disassembled.
Do not put batteries into a fire or apply direct heat to them.
Do not attempt to insert batteries upside down or backwards.
Batteries are prone to leakage when fully discharged. To avoid damage to the product, be sure to remove
batteries when the product is not used for a long time or when batteries run out of charge.
Should liquid from the batteries come into contact with skin or clothing, rinse immediately with fresh
water.
-
-
-
-
-
-
-
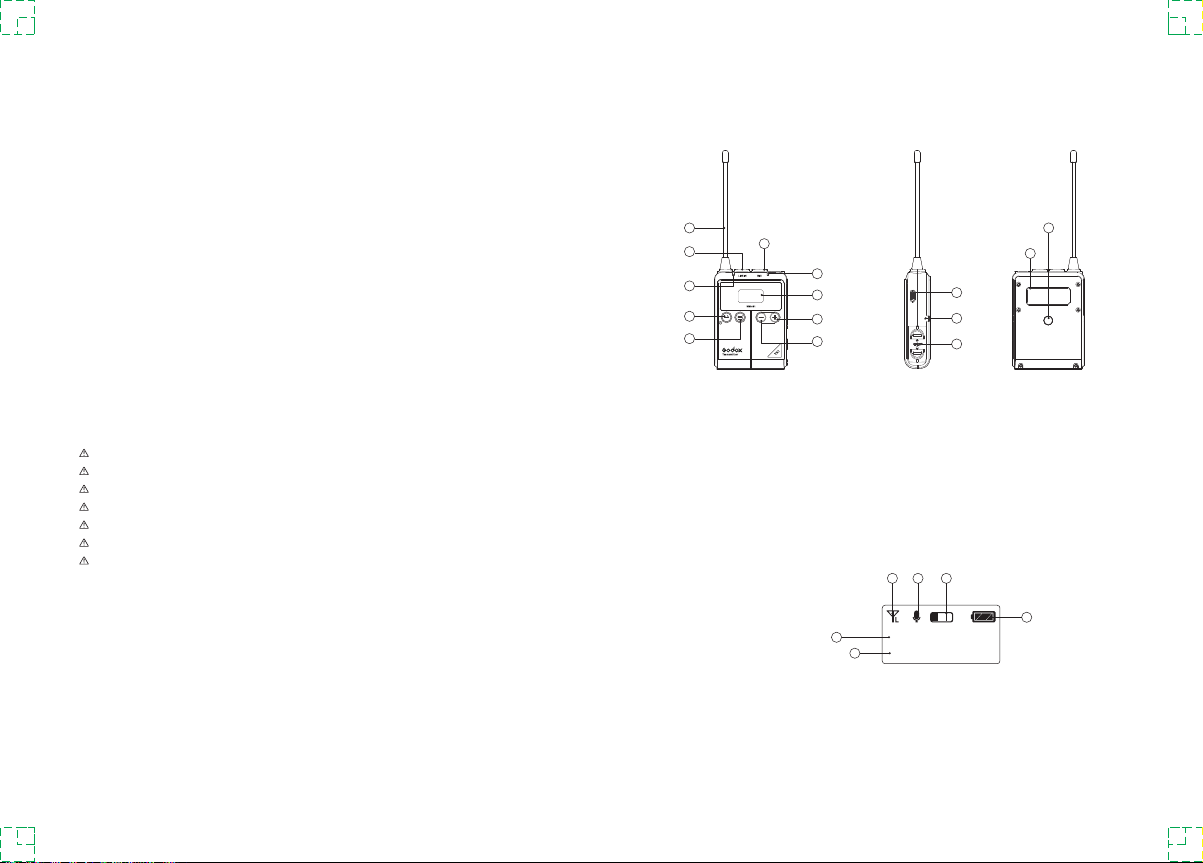
Names of Parts
Body-pack Transmitter(TX1)
1. Communication Frequency
2. Wireless Group and Channel
3. Transmitting Power Icon
4. Pick-up Sound/Silent Icon
5. Input Volume Indicator
6. Battery Level Indicator
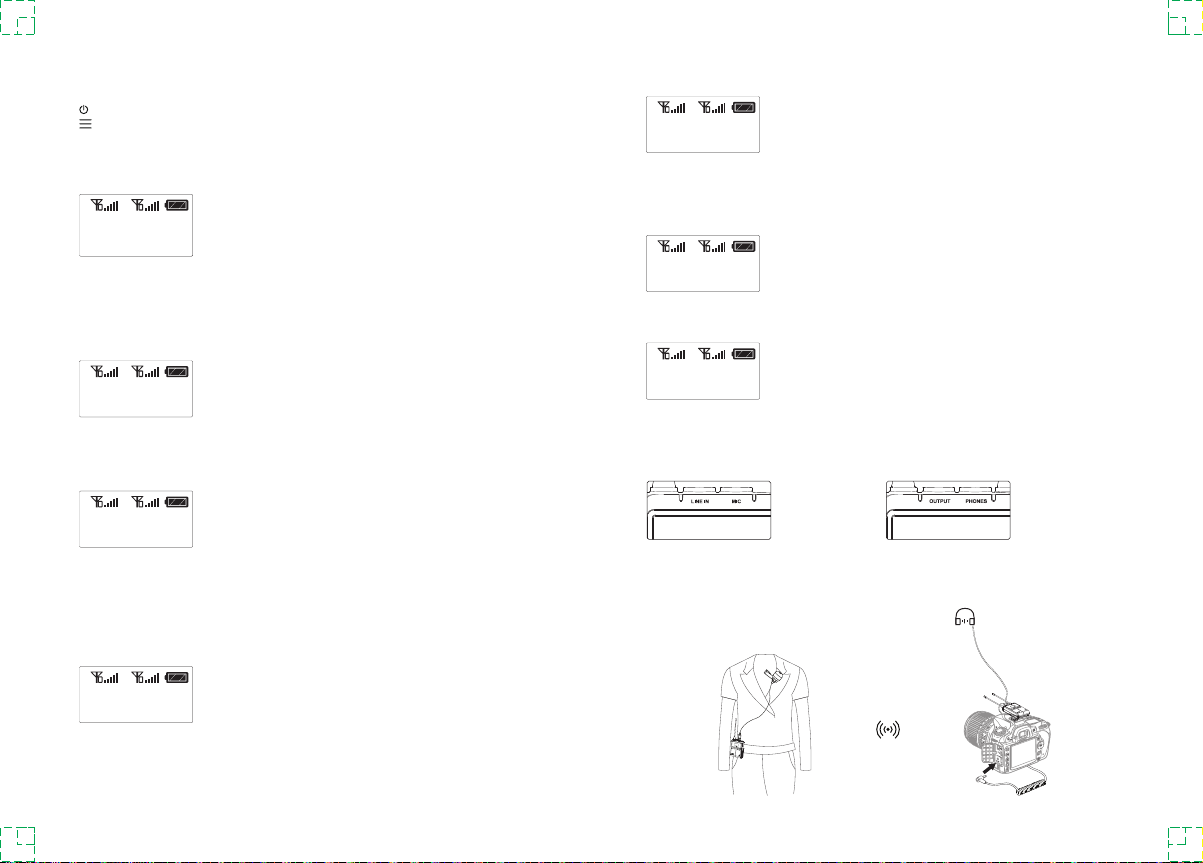
1. Antenna
2. 3.5mm Audio
Line In Port
3. Power Indicator
-Green light: full battery level
-Red light: Low battery level,
replace the batteries
4. Power Source/Mute
Button
5. Menu Button
6. MicrophoneInput Port
7. Audio Indicator
-Green light: Sound
directivity mode
-Red light: Silent mode
8. OLED Display
9. Menu +
10. Menu -
11. USB Type-C Port
12. Metal Clip Port
13. Battery Holder
-2×AA Battery
14. Product Label
15. 1/4"Shoe Mount Port
OLED Display:
1
6
7
8
9
10
11
12
13
14
15
2
3
4
5
CH-B-05
578.030MHZ
1
2
3 4 5
6