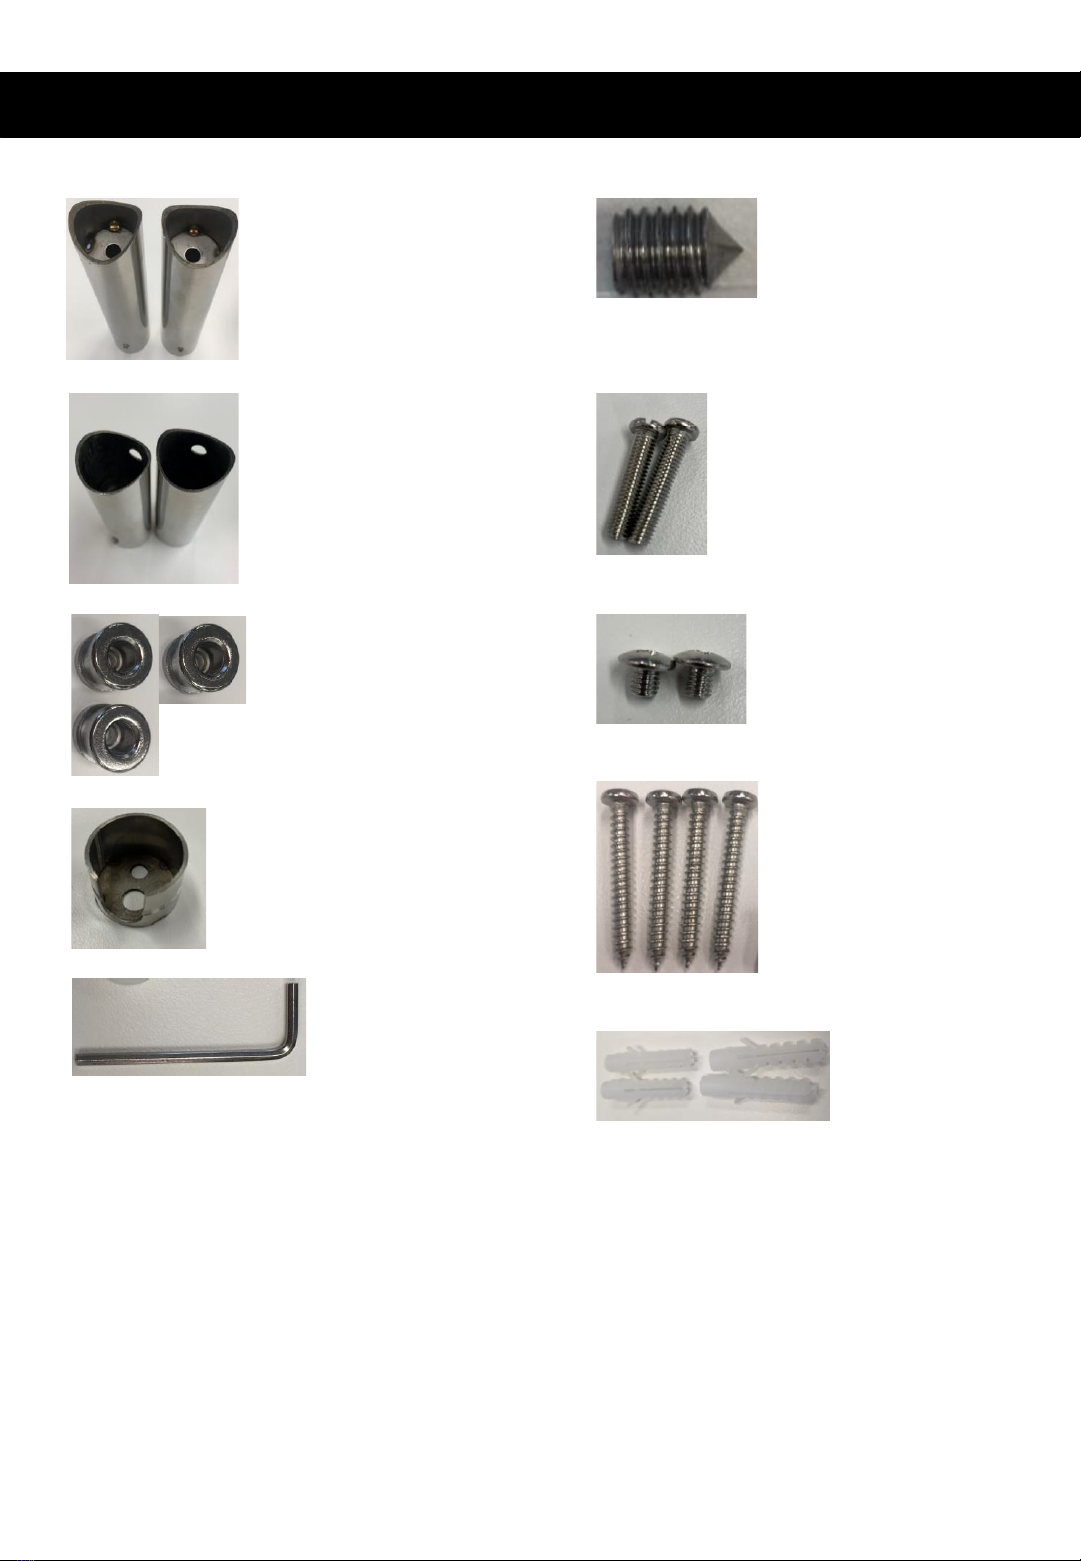
General Care and Safety Guide
Thank you for choosing a Goldair Towel Rail. This Goldair Towel Rail has been
designed and manufactured to high standards of engineering and with proper use and
care, as described in this leaflet, will give you years of useful service. Please read
these instructions carefully.
1. This Towel Rail is not intended for use by persons (including children) with reduced
physical, sensory or mental capabilities, or lack of experience and knowledge,
unless they have been given supervision or instruction concerning use of the Towel
Rail by a person responsible for their safety.
2. Children should be supervised to ensure that they do not play with the Towel Rail.
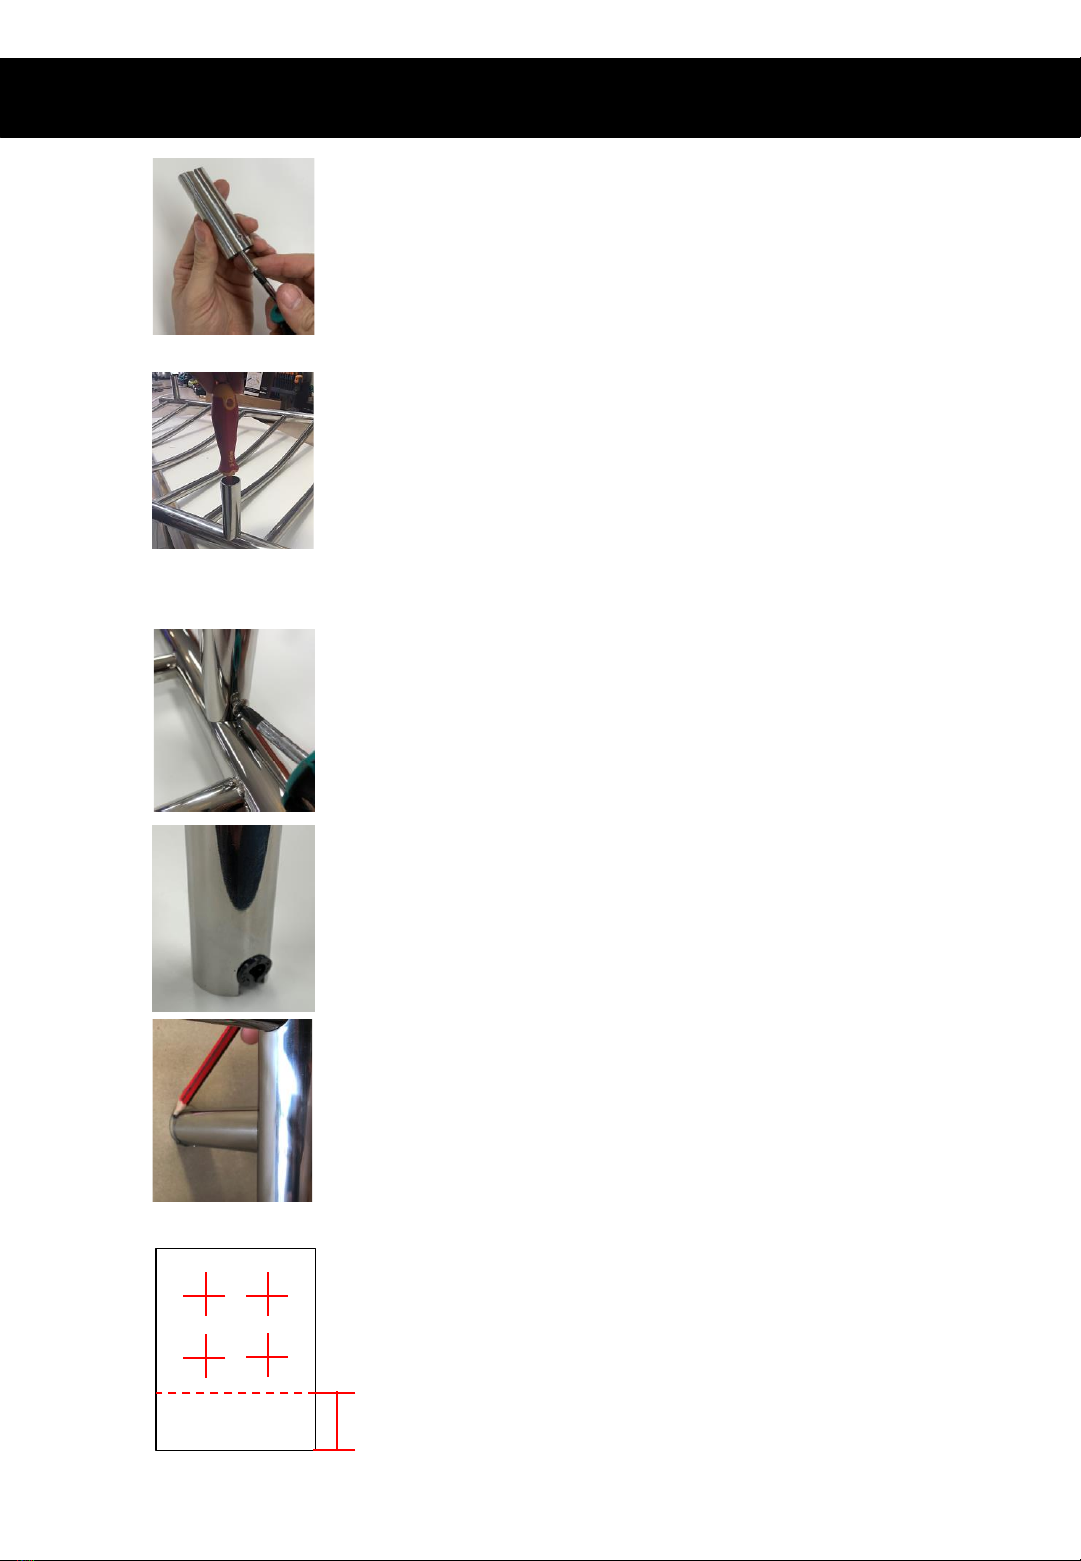
3. In order to avoid a hazard, this Towel Rail must be installed so that the bottom rail
is at least 600mm above the floor.
4. These towel rails must be located and installed in accordance with the AS/NZS
3000:2007 and any local regulation information for mounting in damp areas.
5. This Towel Rail is intended to warm and dry towels and therefore is hot to the
touch.
6. Any rise in ambient temperature is directly reflected in the Towel Rail, and as a
result of this, the Towel Rail will feel hotter to the touch during warmer periods.
Also the insulation effect of towels will cause the operating temperature to
increase slightly.
7. Means of disconnection must be incorporated in the fixed wiring in accordance
with wiring guidelines AS/NZS 3000:2007.
8. The towel rail is to be installed so that switches and other controls cannot be
touched by a person in the bath or shower.
9. Do not use this towel rail for any purpose other than its intended use.
10. To avoid a hazard this towel rail must not be used to hold towels or any other
articles that have been in contact with oil, petroleum based products or dry
cleaning fluids.
11. Use this Towel Rail only with the voltage specified on the rating label.
12. Do not immerse in liquid or allow liquid to run into the interior of the Towel Rail.
13. Indoor use only.
14. Do not operate this towel rail if damaged or after the Towel Rail malfunctions or
has been dropped or damaged in any manner. Return to a qualified electrical
person for examination, electrical service or repair.
15. This Towel Rail is intended for household use only and not for commercial or
industrial use.
16. Use this Towel Rail only as described in this manual. Any other use is not
recommended by the manufacturer and may cause fire, electrical shock or injury