Goldair GCW300 User manual

Operating Instructions
Model: GCW300
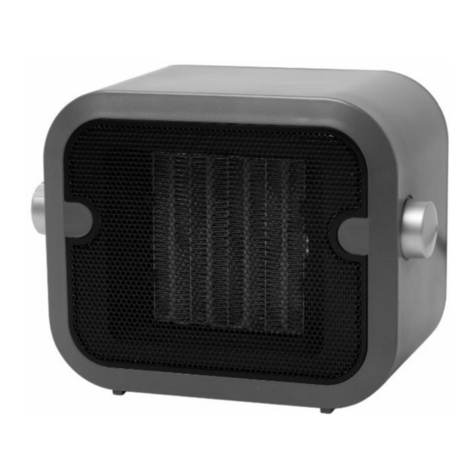
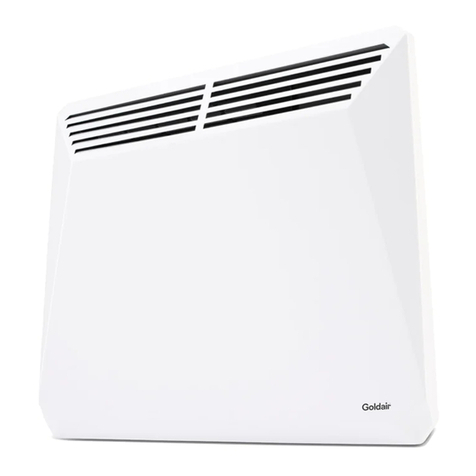
2000W CERAMIC WALL HEATER

CAUTION: In order to avoid a hazard due to inadvertent resetting of the
thermal cut-out, this appliance must not be supplied through an external
switching device, such as a timer, or connected to a circuit that is regularly
switched on and off by the utility.
•This appliance is not intended for use by persons (including children) with
reduced physical, sensory or mental capabilities or lack of experience and
knowledge, unless they are supervised or have been given instruction
concerning the use of the appliance by a person responsible for their safety.
•Children should be supervised to ensure that they do not play with the
appliance.
•If the supply cord is damaged, it must be replaced by the manufacturer, its
service agent or similarly qualified persons in order to avoid a hazard.
WARNING: You must not cover this appliance. Covering this appliance
presents fire risk and will activate the safety fuse; permanently disabling the
unit.
WARNING: Do not use this appliance in small rooms when they are
occupied by persons not capable of leaving the room on their own, unless
constant supervision is provided.
WARNING: To reduce the risk of fire, keep textiles, curtains, or any
flammable material a minimum distance of 1 metre from the air outlet.
General Care and Safety Guide
•Use only the voltage specified on the rating label of the appliance.
•Keep all objects at least 1 metre from the front and sides of the appliance.
•This appliance is intended for household use only and not for commercial or
industrial use.
•Indoor use only.
•Use this appliance only as described in this manual. Any other use is not
recommended by the manufacturer and may cause fire, electric shock or
injury.
•Do not use the appliance if it has been dropped or damaged.
•The common cause of overheating is deposits of dust or fluff in the appliance.
Ensure these deposits are removed regularly by unplugging the appliance and
vacuum cleaning the air vents and grills.
YOUR SAFETY IS IMPORTANT TO US. PLEASE ENSURE YOU TAKE NOTE OF THE
INSTRUCTIONS AND WARNINGS OUTLINED IN THIS MANUAL.

•Never use the appliance to dry clothes.
•Always unplug appliance when not in use.
•When the appliance has been unpacked, check it for transport damage and
ensure all parts have been delivered. If parts are missing or the appliance has
been damaged, contact the Customer Services Team.
•Do not use if there are visible signs of damage to the appliance.
•Do not connect the appliance to mains supply until completely assembled and
adjusted.
•Ensure hands are dry before handling the plug or main unit.
•Ensure appliance is on a flat, stable, heat-resistant surface.
•Do not operate with cord set coiled up as a heat build up is likely, which could
be sufficient to become a hazard.
•Carry out regular checks of the supply cord to ensure no damage is evident
•Do not operate this appliance with a damaged cord, plug or after the appliance
malfunctions or has been dropped or damaged in any manner. Take to a
qualified electrical person for examination, electrical service or repair.
•Do not twist, kink or wrap the cord around the appliance, as this may cause the
insulation to weaken and split. Always ensure that all cord has been removed
from any cord storage area and is unrolled before use.
•It is recommended that this appliance is plugged directly into the wall socket.
Power boards are not rated to supply power to high wattage appliances.
•A correctly specified, undamaged extension cord may be used with this
appliance provided it is used in a safe manner.
•Do not remove plug from power socket until the appliance has been switched
off.
•Do not remove plug from power socket by pulling cord; always grip plug.
•Don’t place appliance on bedding or on thick & long carpet where the openings
may get blocked.
•Switch off and use handle provided when moving
•Do not place appliance close to radiant heat source.
•Do not insert or allow foreign objects to enter any ventilation or exhaust
opening, as this may cause an electric shock, fire or damage to the appliance.
•Do not sit on the appliance.
•Do not use abrasive cleaning products on this appliance. Clean with a damp
cloth (not wet) rinsed in hot soapy water only. Always remove plug from the
mains supply before cleaning.
•Do not operate in areas where petrol, paint or other flammable liquids are used
or stored.
•Do not use this appliance in the immediate surrounds of a bath, a shower, or a
swimming pool or other liquids.
General Care and Safety Guide

WARNING!
DANGER IF SWALLOWED
Keep batteries out of reach of
children. Swallowing may lead to
serious injury or death in as little
as 2 hours due to internal burns.
If swallowed, go straight to a
hospital emergency room.
Dispose of used batteries
immediately.
The remote control supplied with this appliance uses a CR2025 coin type battery.
DANGER IF SWALLOWED
•Keep batteries out of reach of children. Swallowing may lead to serious injury
or death in as little as 2 hours due to internal burns.
•If swallowed, go straight to a hospital emergency room.
•Dispose of used batteries immediately.
•The appliance must not be immersed in any liquids.
•There are no user serviceable parts installed in the unit.
•Do not place the unit in wardrobes or other enclosed spaces as this may cause
fire hazards.
•This unit is not supposed to be used in or around locations where foodstuffs,
works of art or delicate articles of science, etc. are stored.
•If your appliance does not work, or is not working properly, contact the place of
purchase or the Customer Services Team.
General Care and Safety Guide

Components
Main Unit x 1
Remote x 1
Screw Pack:
Screws x 2
Wall plugs x 2
Installing your Appliance
NOTE: Your Goldair Ceramic Wall Heater should be installed with at least
1.8m clearance from the floor at least 300mm clearance from the ceiling and
200mm clearance from any other surrounding parts including other
appliances, side walls, shelves and soft furnishings.
The heater must not be mounted in front of a socket outlet.
NOTE: Do not run the power cord behind the heater.
WALL MOUNTED HEATERS ARE ONLY TO BE MOUNTED ON HEAT RESISTANT
WALLS THAT COMPLY WITH CURRENT AS/NZS SPECIFICATIONS & BUILDING
REGULATIONS
Before using this appliance, it must be wall mounted.

CAUTION: Do not mount directly under or over an electrical power socket.
It is recommended to install the heater to the side of the power socket.
The cord length is 1.5m, an electrician may be required to install a power socket
nearer to the appliance.
LOCATION
The heater should be placed with a minimum distance of 1 metre between the unit and
flammable objects such as curtains, paintings or other materials that may pose fire risk.
Installation of the heater on the wall MUST BE 1.8m above the floor to the bottom of the
heater, 300mm from the ceiling to the top of the heater and 200mm away from closest
side walls.
INSTALLATION
1. Measure the distance between the mounting holes on the back of the appliance and
then mark the wall at the measured distance. Ensure that the marks you make are
level.
2. Drill holes to the same diameter as the wall plugs.
3. Place the wall plugs into the hole in the wall and then fix two screws into the wall
plugs.
4. Keep the heads of the screws out approximately 10mm.
5. Now hang the heater on screws and slide the heater across to the right and then
down, locking the heater to the screws in the wall.
Installing your Appliance
Always choose a safe location for the heater, keeping in mind the safety
precautions outlined. Ensure all packaging has been removed from the unit before
use.

Operating Your Heater
WARNING: In order to avoid overheating or fire, do not cover the heater.
WARNING: Keep all objects at least 1 metre from the front and sides of the
appliance.
WARNING: Do not use this heater with a programmer, separate timer,
remote-control system or any other device that switches the heater on
automatically, since a fire risk exists if the heater is covered or positioned
incorrectly.
WARNING:Never leave this heater unattended when in use.
Ensure heater is on a flat, stable, heat-resistant surface.
Once the heater is in a safe operating position and all switches are in the off
position, insert the power plug into the mains outlet and switch on.
CAUTION: Ensure the power cord is not tight because if pulled it may partially
pull the plug from the socket. A partially inserted plug will overheat the plug and
socket and could result in fire.
Note: When the appliance is turned on for the first time, it may release a slight
odour or smoke. This odour or smoke is a normal occurrence caused by the initial
heating of the internal heating elements and should not occur again.

HEATER CONTROLS
Switch on the Power Button at the rear of the heater to
turn the unit on.
All functions are controlled from the remote control.
For best results, aim the remote directly at the remote
sensor on the front panel of the heater.
The remote has a 3 metre range of operation.
The remote control requires 1 x CR2025 battery
SETTING THE TIME
WEEK –press the SET button and MON will show on the
display. Use the ‘-’or ‘+’ buttons to select the day of the
week.
HOUR –press the SET button again the unit will switch to
setting the hour. Use the ‘-’or ‘+’ buttons to select the
current hour. (Note it is a24 hour clock so 2pm is 14:00).
MINUTE –press the SET button again the unit will switch to
setting the minutes. Use the ‘-’or ‘+’ buttons to select the
current minutes.
Press the ON/OFF button, the unit will start to blow out air
at room temperature.
Press the MODE button, the heater will operate in Low
Heat Mode.
Press the MODE button again, the heater will operate in
High Heat Mode.
Press the MODE button again, the heater will go back to no
heat and blow room temperature air.
Operating Your Heater
For the Low and High Heat settings the fan remains at the same speed; only the element
changes temperature to create the greater/lesser heat output.
NOTE: To assist in maintaining the internal components, when the unit is turned OFF the
fan will continue to blow room temperature air for a period of 30-60 seconds before
shutting down to standby.
SWING
Press the swing button to allow the outlet louvre to oscillate backwards and forwards to
assist in moving the heated air.
There is a button on the back of the heater below the main power switch. Press this
button to activate ‘Smart Start’, the heater will turn on in high heat and swing setting.

THERMOSTAT
To adjust temperature, press the ‘-’or ‘+’ buttons to set the desired temperature from
10℃to 49℃
When the temperature is 4 degrees or more below the set temperature, the heater will
operate in the HIGH heat setting. When the temperature is within 2 degrees of the set
temperature, the heater will reduce to the low heat setting.
When the temperature is 1 degree or more above the set temperature, the heater
elements will turn off and the heater will continue to blow room temperature air.
24 HOUR DELAY TIMER
The Timer function allows the heater to operate continuously from 1 - 24 hours before
automatically turning Off.
When the heater is ON, press the ’24H’ button and the heater will display 1.0 hours and
the icon will be displayed.
By pressing the ’24H’ button again you can adjust the desired length of time in 1 hour
increments.
The Timer indicator will illuminate on the control panel.
To stop the Timer function, press ’24H’ button until 0.0 is displayed.
The OFF Timer can be operated in any mode.
When the heater is in STANDBY, press the ’24H’ button and the heater will display 1.0
hours and the icon will be displayed.
By pressing the ’24H’ button again you can adjust the desired length of time in 1 hour
increments.
The Timer indicator will illuminate on the control panel.
To stop the Timer function, press ’24H’ button until 0.0 is displayed.
AUTO
In this function the open window icon will be displayed. The heater will sense the
temperature in the room and if it drops more than 3 degrees in a minute it will turn the
heater off.If this happens, you will need to restart with the ON/OFF button.
CHILD LOCK
Press the LOCK button, the heater display lights will turn off (except the power light).
The child lock is active.
Press LOCK button again, the heater display lights will come on again.
The child lock is cancelled.
Operating Your Heater

WiFi –Downloading and Setting up APP
For WiFi, the APP is supported only on 2.4GHz WiFi channels. Please ensure your
phone is 2.4GHz capable.
WARNING: You should never leave your heater unattended when in use.
Tap REGISTER in the centre of the screen.
If you already have an existing account, then you
can Log In.
Download Goldair mobile APP
•Open the APP Store or Google Play on your
mobile phone.
•Open “Search” and enter “Goldair"
•Click “GET” and begin to download and install.
Once downloaded to your phone open the APP

WiFi –Downloading and Setting up APP
You can either register an email address or a phone number. The APP defaults to email but you just need
to tap the “Register by Phone” at top right of the screen to change.
XXXXXXXXXXXXXX XXXXXXXX
Enter you email address or a phone number then press “Get authentication code”.

Pairing APP to Heater
Enter the verification code that you will receive by email or text message
Next you will be prompted to Set a Password. The password must contain 6 - 20 characters and must be a
mix of letters and numbers.
We recommend allowing the APP to access your location.

Pairing APP to Heater
Turn the heater on using power switch on the back and
setting the heater to ON with the remote control.
On your phone tap the ‘+’ to connect to the heater.
If the ‘WiFi’ symbol is not already flashing on the
heater, press the small black button on the back of
the heater for 5 seconds until the WiFi indicator
light starts flashing.
Tap ‘Confirm indicator rapidly blink’ on the phone.

Pairing APP to Heater
When the phone interface shows the addition is
successful, the WIFI indicator on the heater
will stop flashing.
The heater pairing is complete and the main
control screen on your phone will appear showing
the heater as ON.
If the phone and heater fail to connect, then you will need to try to connect again as per the above
process.
Choose/confirm which WiFi to connect to.
Note: your phone may pick up other WiFi signals
(e.g. neighbours) so you will need to choose.
Enter your WiFi password and press ‘Confirm’
The phone will then connect to the heater.
Ensure you have a good strong signal from your
WiFi router.
Note: The WiFi indicator on the heater may go off
during this pairing process.
Once complete the screen showing the device has
been successfully added will appear.
Rename the heater if desired.
Tap ‘Completed’ to continue.

Operating your Heater from the APP
Mobile phone remote operation (connect heater
power and turn on the side switch, so that the
heater is in standby mode).
Open the “GOLDAIR" APP to select the heater
(when using one mobile phone to control multiple
heaters, you need to select the heater to be
operated).
•Select the heater to be operated and enter the
operation interface.
If the phone interface color is dark, this indicates
that the heater is in the OFF standby setting.
•Tap the ‘Switch’ icon and the heater will turn
on.
The display will change to show the set
temperature and ambient temperature.
•You can now control the heater.
•To turn the heater off again tap the ‘Switch’
icon and the heater will revert to the dark
screen.
TEMPERATURE SETTING:
•Tap the ‘+’ or ‘-’ button to set the temperature.
•When the set temperature is higher than the
ambient temperature, the heater begins to
heat.
•If the heater temperature setting is below
ambient temperature the heater will be in
standby mode and will not operate until the
ambient temperature drops below the set
temperature.
You can set the temperature from 10-49 degrees.
Dark –Heater Off Bright –Heater On

LEVEL
Mode can be set to Cool Wind, Level 1 (low) Heat,
Level 2 (high) Heat or Automatic heating.
Set your desired ‘Level’ then ‘Done’ to return to
the main screen
The screen will display which mode has been
selected and the current set temperature and
ambient temperature.
In ‘AUTOMATIC’ the heater will adjust the heat
settings automatically to suit the amount of power
required to reach and then maintain the set
temperature.
Operating your Heater from the APP
You can adjust the heating levels, add a countdown
timer and control some other settings from the
APP
DELAY TIMER
The ‘DELAY TIMER’ can be set to automatically turn
the heater off after a period of time has elapsed.
(1 - 24 hours).
When the heater is turned on, press the ‘DELAY
TIMER’ icon then select the number of hours before
the heater will turn OFF (1 - 24 hours ).
The main screen will show the set time.
To cancel the timer set to ‘Cancel’
The ‘DELAY TIMER’ can also be set to turn ON when
the heater is in Standby/Off.
When the heater is turned OFF, press the ‘DELAY
TIMER’ icon then select the number of hours before
the heater will turn ON (1 - 24 hours ).
The main screen will show the set time.
To cancel the timer set to ‘Cancel’

SETTINGS
From ‘Settings’ you can
•turn off the heater display ‘Light’
•set the ‘Open Window’ function
•set the louvre oscillation ‘Swing’
Operating your Heater from the APP
Tap the “Pen’ symbol on the top right of the
control screen of the APP to take you to the next
page.
From here you can
•Change the heater name
•Add a location
•Set up sharing

SUPPORT AND TECHNICAL ADVICE
Goldair –New Zealand
Monday –Friday 8am-5pm
Phone +64 (0)9 917 4000
Phone 0800 232 633
Goldair –Australia
Monday –Friday 8am-5pm
Phone +61 (0)3 9365 5100
Phone 1300 465 324
TECHNICAL SPECIFICATION
Model No: GCW300
Supply: 220-240VAC 50/60Hz
Wattage: 2000W
PROOF OF PURCHASE
To receive warranty retain receipt as proof of purchase.
Operating Your Heater
SAFETY DEVICES
This appliance has two protection devices:
•Resettable Thermal Link - this will automatically disconnect the power to the
appliance at a pre-set overheat temperature. After cooling down it will reset and
power on again. If this occurs, investigate what is causing the appliance to
overheat.
•Thermal Fuse - this disconnects the appliance permanently in case of overheating.
(It is non resettable).
CAUTION: The appliance generates heat during use. Precautions must be
taken to prevent the risk of burns, scalds, fires or other damage to persons.
CARE AND CLEANING
The heater requires regular cleaning to ensure trouble free operation:
•Unplug the heater from the mains supply before cleaning.
•Ensure that the heater has been allowed to cool down completely before cleaning.
•The common cause of overheating is deposits of dust or fluff in the appliance.
Ensure these deposits are removed regularly by unplugging the appliance and
vacuum cleaning the air vents and grills.
•Use a damp cloth (not wet) to wipe the exterior of the heater to remove dust and
dirt.
•Never use solutions such as petrol, thinners or polishing agents.
•Ensure the heater is dry before plugging back into the mains supply.
•Do not attempt to dismantle the heater.
•There are no user serviceable parts. For service or repair, contact an authorised
electrical service technician.

Thank you for purchasing this Goldair product. Your product is warranted against faults and manufacture when used in normal
domestic use for a period of two years. In non-domestic use Goldair limits the voluntary warranty to three months.
Goldair undertake to repair or replace this product at no charge if found to be defective due to a manufacturing fault during the
warranty period.
This warranty excludes damage caused by misuse, neglect, shipping accident, incorrect installation, or work carried out by anyone
other than a qualified electrical service technician.
PLEASE KEEP YOUR RECEIPT AS THIS WILL HELP VERIFY YOUR WARRANTY.
The benefits given to you by this warranty are in addition to other rights and remedies available to you under law in relation to the
goods or services to which this warranty relates.
In Australia, our goods come with guarantees that cannot be excluded under the Australian Consumer Law. You are entitled to a
replacement or refund for a major failure and compensation for any other reasonably foreseeable loss or damage. You are also
entitled to have the goods repaired or replaced if the goods fail to be of acceptable quality and the failure does not amount to a
major failure.
In New Zealand this warranty is additional to the conditions and guarantees of the Consumers Guarantee Act (1993).
Two Year Warranty
Goldair Two Year Warranty (IMPORTANT: Please complete and retain this warranty card)
Name
Address
Place Of Purchase Date Of Purchase
Name Of Product Model Number
Attach a copy of the purchase receipt to this warranty card
Due to continual design improvements, the product illustrated in this User Manual may differ slightly from the actual product.
Goldair –New Zealand
CDB Goldair
PO Box 100-707
N.S.M.C
Auckland
Phone +64 (0)9 917 4000
Phone 0800 232 633
www.goldair.co.nz
Goldair –Australia
CDB Goldair Australia Pty
PO Box 574
South Morang
Victoria, 3752
Phone +61 (0)3 9365 5100
Phone 1300 GOLDAIR (1300 465 324)
www.goldair.com.au

New Zealand
PO Box 100707,
North Shore Mail Centre,
Auckland, 0745
www.goldair.co.nz
Australia
PO Box 574,
South Morang,
Victoria, 3752
www.goldair.com.au
Table of contents
Other Goldair Heater manuals

Goldair
Goldair GMH225 User manual

Goldair
Goldair FFH222 User manual

Goldair
Goldair GGPH205 User manual

Goldair
Goldair GCV330 User manual

Goldair
Goldair GOC177C Installation instructions

Goldair
Goldair GCT250 User manual

Goldair
Goldair GCH320 User manual

Goldair
Goldair GECO200 User manual

Goldair
Goldair GPRH300 User manual

Goldair
Goldair GMH220 User manual

Goldair
Goldair GCV125 User manual

Goldair
Goldair GFH150 User manual

Goldair
Goldair GSCH230 User manual

Goldair
Goldair GCT270 User manual

Goldair
Goldair GPH110 User manual

Goldair
Goldair GCV290B User manual

Goldair
Goldair GCW220 User manual

Goldair
Goldair GCT325 User manual

Goldair
Goldair GOC137T User manual

Goldair
Goldair GCT340 User manual