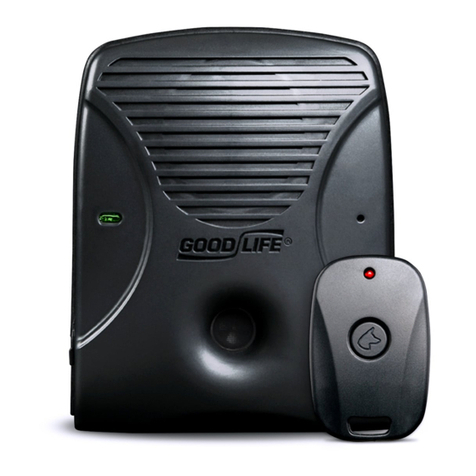
Goodlife Bark Control Pro User manual

Bark Control Pro™ Instruction Manual
Included In Your Package
Sold Separately
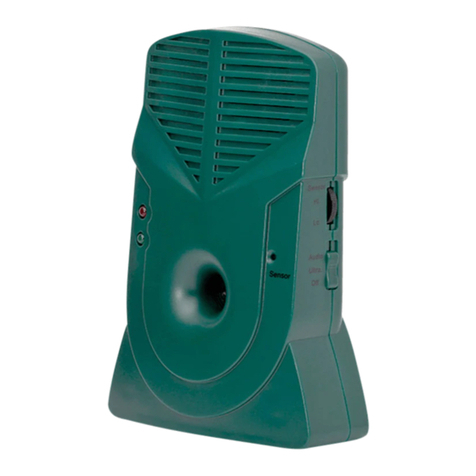
Bark Control Pro
Remote
Control
Rain Jacket
AC Adapter
(sold separately)
60ft. Extension
(sold separately)
Getting Started
1. Choose Power Source
Option 1: Insert Battery
Insert a 9v battery (not included)
into the battery compartment.
Note: The battery may last 1
week or less during the initial
training period. Battery life should
improve as the dog is trained.
OR
Option 2: Plug It In
Insert the AC Adapter (sold
separately) into the DC Jack and
plug into a wall outlet.
Note: To prevent damage or
voiding your warranty, please only
use the official AC Adapter.
OR
Option 3: Use the Extension & Plug It In
Insert one end of the 60ft Extension (sold
separately) into the AC Adapter and the other
end into the DC Jack and plug into an outlet.
Note: To prevent damage to the Bark Control
Pro or voiding your warranty, please only use
the official AC Adapter.
2. Turn It On
Turn the Bark Control
Pro on by pushing the
Power Switch upwards.
Stop when you get to
the Audio setting.
To confirm the unit is
working, press the Remote
Control.
The unit will then emit
sound for 3-5 seconds and
the front LED Indicator
Lights will blink.

3. Adjust the Bark Sensitivity Dial
Note: Try to find a relatively quiet environment to perform this step so that sounds other than barking won’t activate the unit.
The sounds emitted by the Bark Control Pro will not penetrate solid barriers such as walls, ceilings, windows or solid fences. Make sure
to place the unit so that it isn’t obstructed by any solid barriers.
This is not a volume dial.
Instead it adjusts the unit’s
sensitivity to dog barking.
Do not turn it “Hi” unless the
dog is very far away or if you
want the unit to activate to
almost any sound!
Turn the dial until it is a quarter turn above “Lo”. Please do not
turn the dial the way to “Lo” – at that setting, it will not detect
barking at all.
Wait for the dog to bark naturally (do not force it to bark) and
observe whether the unit has activated.
If the unit didn’t activate, turn the dial upwards by a quarter
turn and try again.
Repeat this process until the Bark Control Pro produces
sound every time the dog barks.
Optimal Bark Sensitivity: The optimal sensitivity setting depends on many factors, including how close the Bark Control Pro is to the
dog. The farther away the device is from the barking, the higher the sensitivity will likely need to be and vice versa.
Large Dogs: Some larger dogs may respond better to the Audio frequency while smaller dogs may respond better to the Ultra setting.
Responses vary greatly between dogs. We recommend always starting with the Ultra mode and adjusting from there.
Dogs with Hearing Loss: Dogs that are deaf will not be able to hear the Bark Control Pro. Dogs with high frequency hearing loss may
be able to hear the “Audio” setting.
4. Choose the Sound Setting
If you want to hear the unit activate,
leave the switch set to Audio.
When a dog barks, the unit will emit
sound in both audible and ultrasonic.
OR
Move the switch to Ultra if you only
want the dog to hear the sound.
When a dog barks, the unit will emit
ultrasonic sound.
This setting is recommended for
neighbor’s dogs or indoor
installations.
When the unit has been activated by
barking, the LED Lights will blink to
indicate the type of sound emitted.
Both lights (red and green) will turn on
when the unit is set to Audio, while only
the green LED Light will blink when set
to Ultra.

5. Installation
Extend the Fold-Out Feet and place
the Bark Control Pro on any flat
surface indoors or outdoors.
If installing indoors, place the unit in an
open space in the room where your
dog most commonly barks.
OR
To hang the unit instead, use the
Mounting Bracket on the back.
Hang on a fence, wall, tree or other
solid surface by fastening with a
nail or screw.
Cover the Bark Control Pro with the
water-resistant Rain Jacket when
installing outdoors or in any situation
where it may be exposed to moisture.
Bring the unit inside during a downpour.
Water damage will void your warranty.
6. Remote Control
The included keychain remote control gives you the option to manually activate the Bark Control Pro. This is perfect for situations where
the dog is outside the 75ft automatic detection range.
When activated by the remote control, the Bark Control Pro will emit an audible sound if
the Power Switch is set to “Audio” and ultrasonic sound when the Power Switch is set to
“Ultra”.
The remote control does not turn the unit on or off.
The remote will work up to 75ft away from the Bark Control Pro.
7. That’s it! Here’s Some Important Notes to Keep in Mind During the Training Process:
Allow Plenty of Time: The Bark Control Pro is a training device. Please allow 2-3 weeks for optimal results.
“Invisible Fence” Systems: We do not recommend using invisible fence systems with the Bark Control Pro.
Protective Barking: If the dog’s barking does not cease within a month, it may be because the dog is barking due to instinct,
is being harassed, is in a high stress area or is being protective. These types of barking are not nuisance barking.
Low Power Indicator: If your Bark Control Pro is running on batteries and it has stopped functioning or is emitting sound
constantly, this is a sign that the battery has died or is low on power. Replace the battery or use the AC Adapter.
Moisture: If moisture gets inside the unit, try laying it face-down until all water drains out and it has completely dried.
Features & Specifications
Sound Distance: Up to 150 feet
Bark Detection Range: Up to 50 feet
Remote Control Range: 75 feet
Dimensions: 6.5”H x 5”W x 1.5”D
Ultrasonic Output: 111db
Weight: 1 lb (2 lbs with AC Adapter)
Power Options: 9v Battery (not included) or AC
Adapter (sold separately)

Troubleshooting
“The dog has no immediate reaction to the Bark Control Pro.”
Please keep in mind that the Bark Control Pro is a training device. Some dogs may take longer to learn to associate the Bark Control
Pro’s sounds with their barking. While some dogs can be trained in a matter of hours or days, other dogs may take up to 2-3 weeks.
“This isn’t reducing the dog’s barking” or “The dog reacted to the Bark Control Pro at first, but now seems to ignore it.”
This usually means that the Bark Sensitivity Dial has not been setup correctly, causing the unit to activate too frequently or not
often enough. This will confuse the dog and have a negative impact on his training. Readjust the bark sensitivity as detailed in
Step 3 of the “Getting Started” section.
Did you start using the Bark Control Pro less than a week ago? If so, give it more time to train the dog.
The battery may be low. If you are running the unit on battery, try replacing it.
Make sure the unit is activating properly. Press the button on the Remote Control or otherwise trigger the unit. You should see
the green light blink if using the “Ultra” setting. In the “Audio” setting you will see both the red and green lights turn on.
Verify that the Power Switch is either set to “Ultra” or “Audio” and not in the “Off” position.
If possible, try moving the unit closer to the dog.
To further troubleshoot, contact our Customer Care Department at 800-657-8214.
“The dog is barking MORE than before I started using the Bark Control Pro.”
This is actually a good sign and is a common stage in the training process. This means that the dog is hearing the sound and certainly
does not like it! This should last for a few days to a week or so. After this step, the dog learns to associate the sound with his barking.
“Is the Bark Control Pro legal to use on my neighbor’s dog?”
The Bark Control Pro falls within the accepted limits for residential ultrasonic sound levels in most cities/counties. There may be
additional restrictions within certain commercial zones. Please check with your local business authority for more information.
“Can I use the Bark Control Pro with a puppy?”
We do not recommend using the Bark Control Pro with puppies under 1 year old. Please consult your veterinarian before using.
“My remote doesn’t work anymore”
Your remote probably needs a new battery. The remote uses a 23A, 12V battery (L1028). Call us or visit the Bark Control Pro page at
www.ultimatebarkcontrol.com to order a replacement. To install the battery, unscrew the two small screws on the back of the remote to
remove the cover. Replace when done.
“The Bark Control Pro is emitting sound randomly or continuously.”
The Bark Sensitivity Dial may be set too high, causing the unit to be triggered by sounds other than barking. Try turning it
down by following Step 3 in the “Getting Started” section.
The battery may be low. A low battery may cause the unit to act erratically. Try replacing the battery.
If the unit is connected to the AC Adapter, unplug it and try using a battery instead. If the problem disappears, the AC Adapter
may not be working correctly. Please contact us to arrange for an AC Adapter replacement.
To further troubleshoot, contact our Customer Care Department at 800-657-8214.
This device complies with part 15 of the FCC Rules. Operation is subject to the following two conditions:
1. This device may not cause harmful interference, and
2. This device must accept any interference received, including interference that may cause undesired operation.
FCC ID: ZJ8UP1730
Other Goodlife Pet Care Product manuals