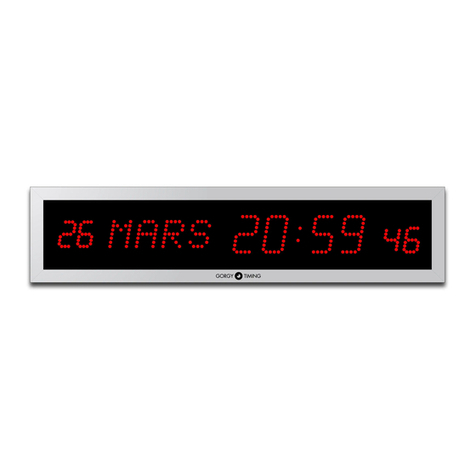
Gorgy Timing HANDI 300 User manual

MDE-HANDI-2078V4.0
1
ENGLISH
HANDI®CLOCKS
USER GUIDE
HANDI®300
HANDI®450
HANDI®620
HANDI®800

2
MDE-HANDI-2078V4.0
WARNING! The following section provides the safety instructions for installation.
Please read it carefully before installing your device.
To protect your device, plug it into a grounded outlet.
The device must be connected to an electrical installation which is in accordance with
the NF C15-100 standard.
The wiring installation must include an easily accessible breaking device (circuit
breaker or disconnecting switch). This device must withstand the nominal voltage and
current values indicated on the device.
In Europe: in accordance with European regulations on the protection of individuals
and the environment, it is your responsibility to dispose of this equipment at a collection
site designed for this purpose (separately from household waste). For further
information, contact your reseller, your collection site or the relevant local authorities.
Any modification or opening of the product without the consent from the Customer
service department will void the warranty.
The HANDI® must only be installed, maintained and handled by competent and
knowledgeable persons.
All maintenance operations must be carried out with the power off, including for
systems connected to any relay outputs.
As a general rule, to avoid any interferences, the power (230V supply) and signal (time
information) cables must not be too close to each other. (keep a few centimetresapart)
CAUTION! After unpluggingthe HANDI®, there is arisk of electric shock fromthe power
connector/plug socket for up to 2 seconds.
To avoid the risk of electrical interference, position the HANDI® as far as possible from
sources of radiation (Loudspeakers, antennas, high-frequency equipment,
electromagnetic alarms…).
This product can be used with TT or IT grounding.
If a fuse is defective, it must be replaced with an identical one.
Gorgy Timing disclaims all liability in the event of accident or damage caused by
improper use of LEDI®.
All GORGY TIMING products comply with the following standards: CE, EN62368,
EN55032, EN50035.
IMPORTANT SAFETY INSTRUCTIONS
CONSIGNES DE SÉCURITÉ IMPORTANTES

MDE-HANDI-2078V4.0
3
ENGLISH
General hazard –there is a risk of damage to the product if instructions are not followed
Electrical hazard –there is a risk of electrocution or personal injury if instructions are not
followed.
Functional ground
Warnings
Please follow the precautions and instructions indicated below in order to ensure the safety of you and
your environment, and to prevent any potential damage to your device.
WARNING: An isolating switch in compliance with EN60947 standards is used as a
disconnecting device. It must be easily accessible and installed close to the power supply. It
must disconnect all active poles.
The HANDI® is intended for indoor use only, at an altitude of less than 2000 metres.
Waste disposal by users in private households within the European Union
This symbol on the product or its packaging indicates the product must not be disposed of with
your general household waste. Instead, it is your responsibility to dispose of your waste by
taking it to a designated collection point for the recycling ofelectrical and electronic appliances.
The separate collection and recycling of your waste contributes to the conservation of natural
resources and helps to ensure that recycling is environmentally and health friendly. For more
information about your nearest recycling centre, please contact the shop where you purchased
your device, the household waste disposal services or your local authorities.
Technical specifications
Power supply
Voltage (following item)
230VAC 50/60Hz
110-240VAC 50/60Hz
Low voltage 12-24 or 24 VDC
NTP Version: PoE (Power over Ethernet)
Dimensions
Length
XXX mm
Width
XXX mm
Height
XXX mm
Condition de
fonctionnement
Operating Temperature
-20°C to +50°C
Hygrometry (non condensed)
90 %
The product contains a non-replaceable lithium battery.
EXPLANATION OF SAFETY SIGNS ON THE PRODUCT
INTRODUCTIONSOMMAIREDUINTRODUCTIONIOINSTALLATION RAPIDEENPRINCIPES
GENERAUX

4
MDE-HANDI-2078V4.0
CONTENTS
CONTENTS..........................................................................................................................4
1. HANDI®300 & HANDI® 450.......................................................................................7
1.1. DESCRIPTION..................................................................................................................7
1.2. CONNECTIONS................................................................................................................7
1.2.1. PULSE RECEIVER VERSION ...............................................................................7
1.2.3. DCF24v RECEIVER VERSION..............................................................................7
1.2.4. NTP RECEIVER VERSION....................................................................................7
A. 230VAC Version ................................................................................................7
B. PoE Version.......................................................................................................8
C. Wi-Fi Version.....................................................................................................8
1.2.5. ASCII RS485 RECEIVER VERSION......................................................................8
A. Gorgy Timing Protocol .......................................................................................8
B. Polaris Protocol..................................................................................................9
1.4. FIXING & DIMENSIONS (IN MM)....................................................................................10
1.4.1. HANDI®300.........................................................................................................10
1.4.2. HANDI®450.........................................................................................................11
2. HANDI®620.............................................................................................................12
2.1. DESCRIPTION................................................................................................................12
2.2. CONNECTIONS..............................................................................................................12
2.2.1. PULSE RECEIVER VERSION.............................................................................12
2.2.2. AFNOR NFS 87500 / IRIG-B 122 RECEIVER VERSION.....................................12
2.2.3. DCF24v RECEIVER VERSION............................................................................12
2.2.4. NTP RECEIVER VERSION..................................................................................13
A. 230VAC Version ..............................................................................................13
B. PoE Version.....................................................................................................13
C. Wi-Fi Version...................................................................................................13
2.2.5. LIGHTING OPTION .............................................................................................13
2.3. FIXING & DIMENSIONS (IN MM)....................................................................................14
2.3.1. SINGLE FACE –MOUNTING WITH BRACKET...................................................14
2.3.2. DOUBLE FACE –MOUNTING WITH BRACKET.................................................15

MDE-HANDI-2078V4.0
5
ENGLISH
3. HANDI®800.............................................................................................................16
3.1. DESCRIPTION................................................................................................................16
3.2.CONNECTIONS.................................................................................................................16
3.2.1. AFNOR NFS 87500 / IRIG-B 122 RECEIVER VERSION.....................................16
3.2.2. NTP RECEIVER VERSION..................................................................................16
A. 230VAC Version ..............................................................................................16
B. PoE Version.....................................................................................................16
C. Wi-Fi Version...................................................................................................16
3.2.3. LIGHTING OPTION .............................................................................................16
3.3. FIXING & DIMENSIONS (IN MM)....................................................................................17
4. CONFIGURATION BY WEB INTERFACE..............................................................18
4.1. FIRMWARE VERSIONS 1.X.X.X.....................................................................................18
4.1.1. Main web page.....................................................................................................18
4.1.2. Ethernet web page...............................................................................................20
4.1.3. Security web page................................................................................................21
A. Secure Shell (for expert users only) .................................................................21
4.1.4. Time input web page............................................................................................22
A. NTP Synchronization options...........................................................................23
B. NTP Synchronization Information.....................................................................24
4.1.5. SNMP settings web page.....................................................................................25
4.1.6. Firmware update web Page..................................................................................27
4.1.7. FTP Firmware update...........................................................................................27
4.1.8. With Windows Command prompt.........................................................................27
A. With FTP client Filezilla....................................................................................28
4.1.9. Factory Default web page ....................................................................................29
4.1.10. Reboot web page...............................................................................................29
4.1.11. HANDI settings web page..................................................................................29

6
MDE-HANDI-2078V4.0
4.2. FIRMWARE 120.X.X.X VERSION...................................................................................33
4.2.1. Main web page « HOME »...................................................................................33
4.2.2. Web page « NETWORK CONFIGURATION ».....................................................34
4.2.3. WEB page « NTP Configuration »........................................................................36
4.2.4. Web page « Autonomous Mode »........................................................................37
4.2.5. Web page « HANDI Configuration ».....................................................................38
A. Section Time settings.......................................................................................38
B. Reset to zero of the hands...............................................................................39
4.2.6. Web page « Security Account » ...........................................................................39
A. Section Password Settings...............................................................................39
A. Section Protocol Settings.................................................................................39
4.2.7. Web page « SNMP Configuration »......................................................................40
A. SNMP configuration through web page.................................................................40
B. SNMP configuration through software...................................................................41
4.2.8. Web page « Firmware Update »...........................................................................45
4.2.9. Firmware update via FTP.....................................................................................46
4.1.10. Web page « Restart / Restore ».........................................................................47
A. Section periodically restart...............................................................................47
B. Section Factory Default and Restart.................................................................47
5. WI-FI SETTINGS .....................................................................................................48
5.1. GENERAL.......................................................................................................................48
5.2. WI-FI SETTINGS BY WEB PAGE ...................................................................................50
5.2.1. Firmware 1.X.X.X versions...................................................................................50
A. Connection to the Wi-Fi "Access Point".................................................................50
B. Access to web interface of the clock.....................................................................50
C. Web page Configuration Wi-Fi..............................................................................50
5.2.2. Firmware 120.X.X.X Versions ..............................................................................51
A. Connection to « Wi-Fi access Point » ...................................................................51
B. Access to web interface of the clock.....................................................................52
C. Wi-Fi Configuration Web Page « Wi-Fi Configuration ».........................................53
6. TROUBLESHOOTING.............................................................................................55
6.1. PRODUCT TROUBLESHOOTING..................................................................................55
6.1.1. Generic issues.....................................................................................................55
8.1.2. Ethernet Network issues ......................................................................................56

MDE-HANDI-2078V4.0
7
ENGLISH
1. HANDI®300&HANDI®450
1.1. DESCRIPTION
Analogue clocks in receiving pulses version, AFNOR NFS 87500 / IRIG-B 122,
DCF24v, RS485 ASCII or NTP.
1.2. CONNECTIONS
To reset the clock switch it off
and on
:
- by the "ON" / "OFF" located on the rear face of the clock (for
versions where button is available)
- Or unplug and replug the clock (for pulse versions)
- Or open the clock and press the reset button on the card
- In the waterproof version, open the clock to perform this
operation.
1.2.1. PULSE RECEIVER VERSION
►Connect the clock to the impulse line as shown below in the
opposite figure.
►To set the time on the clock manually, use the knob on the back
of the movement.
1.2.2. AFNOR NFS 87500 / IRIG-B 122 RECEIVER VERSION
►Connect the AFNOR NFS 87500 / IRIG-B 122 code (No polarity).
►Depending on the power supply option, connect the clock to the mains.
►Change the switch position on the back onto the “ON” position.
Wait a few minutes until the clock hands reach 12h position. After receipt of time code, the
hands will reach the right position according to time information.
1.2.3. DCF24v RECEIVER VERSION
►Connect the DCF24v code (No polarity).
Wait a few minutes until the clock hands reach 12h position. After receipt of time code, the
hands will reach the right position according to time information.
1.2.4. NTP RECEIVER VERSION
A. 230VAC Version
►Connect the clock to the computer network.

8
MDE-HANDI-2078V4.0
►Connect the clock to the mains.
B. PoE Version
►Connect the clock to the POE injector.
C. Wi-Fi Version
►Connect the clock to the mains.
►Consult chapter 5. « Pre-configuration Wi-Fi products » to connect clock to Wi-Fi network.
The hands are positioned at 12 o'clock and then, 3 to 4 minutes after receiving the
code, are positioned according to the received time information. For the advanced
configuration, see chapter 4. WEB INTERFACE.
1.2.5. ASCII RS485 RECEIVER VERSION
►Connect the ASCII code by following the following table:
Green wire
GND
Brown wire
RX-
White wire
RX+
►Connect the clock to the mains.
►Change the switch position on the back onto the “ON” position
The hands are positioned at 12 o'clock and then,
3 to 4 minutes after receiving the code, are positioned according to the received time
information.
A. Gorgy Timing Protocol
►Reception Mode
►In this mode the clock is running in standalone mode but sets the time earlier compared with
the ASCII code received (confguration: 2400 bits, format 8 bits, parity pair, 1 stop bit).
►The time information is in the form below:
S
T
X
D
A
Y
10
D
D
/
10
M
M
/
10
Y
Y
10
H
H
:
10
m
m
:
10
S
S
C
R

MDE-HANDI-2078V4.0
9
ENGLISH
Byte Nr
Field
Size
Value/Meaning
1
STX
1
Start of Text ($02) –mark the beginning of the frame.
2,3,4
D,A,Y
3
The day in the week in a human-readable way (MON, TUE, WED, THU, FRI, SAT,
SUN for Monday to Sunday)
5
1
Space character ($20)
6,7
10D,D
2
Day in the month on two ASCII characters ($30,$31 to $33,$31)
8
/
1
Forward slash character ($2F)
9,10
10M,M
2
Year on two ASCII characters ($30,$30 for 2000 –$39,$39 for 2099)
11
1
Forward slash character ($2F)
12,13
10Y,Y
2
Year on two ASCII characters ($30,$30 for 2000 –$39,$39 for 2099)
14,15
2
Two Space characters ($20)
16,17
10H,H
2
Hours on two ASCII characters ($30,$30 to $32,$33)
18
1
Colon character ($3A)
19,20
10m,m
2
Minutes on two ASCII characters ($30,$30 to $35,$39)
21
1
Colon character ($3A)
22,23
10S,S
2
Seconds on two ASCII characters ($30,$30 to $35,$39)
24
CR
1
Carriage Return ($0D) –mark the end of the frame
►This ASCII code could be:
1 - The time information using the protocol described in the above table generated by an RT4000
or any other ASCII code generator.
2 - Or the information from another clock of the same type functioning in transmitter mode, in which
case the clock is completely enslaved to the latter.
3 - In HORO QUARTZ specific version the time information from a HORO QUARTZ pointing
system.
B. Polaris Protocol
►The time information received must be in the following form:
\
H
M
S
C
Y
M
D
W
0
0
C
H
K
Here is the detailed description of the frame:
Byte Nr
Field
Size
Value/Meaning
1
\
1
Back slash character ($5C)
2
H
1
Hours on one binary character ($00 to $17)
3
m
1
Minutes on one binary character ($00 to $3B)
4
S
1
Seconds on one binary character ($00 to $3B)
5
C
1
Century on one binary character ($00 to $63)
6
Y
1
Year in the century on one binary character ($00 to $63)
7
M
1
Month in the year on one binary character ($01to $0C)
8
D
1
Day in the month on one binary character ($01-$1F)
9
W
1
Weekday on one binary character ($01 to $07 for Monday to Sunday)
10, 11
0, 0
2
Null character ($00)
12
CHK
1
Checksum = Sum in hexadecimal of all Field excluding the first

10
MDE-HANDI-2078V4.0
1.4. FIXING & DIMENSIONS (IN MM)
1.4.1. HANDI®300

MDE-HANDI-2078V4.0
11
ENGLISH
1.4.2. HANDI®450

12
MDE-HANDI-2078V4.0
2. HANDI®620
2.1. DESCRIPTION
Analogue clocks in receiving pulses version, AFNOR NFS 87500 / IRIG-B 122,
DCF24v, RS485 ASCII or NTP.
2.2. CONNECTIONS
To reset the clock switch it off
and on
:
- by the "ON" / "OFF" located on the rear face of the clock (for
versions where button is available)
- Or unplug and replug the clock (for pulse versions)
- Or open the clock and press the reset button on the card
- In the waterproof version, open the clock to perform this
operation.
2.2.1. PULSE RECEIVER VERSION
►Connect the clock to the impulse line as shown below in the
opposite figure.
►To set the time on the clock manually, use the knob on the back
of the movement.
2.2.2. AFNOR NFS 87500 / IRIG-B 122 RECEIVER VERSION
►Connect the AFNOR NFS 87500 / IRIG-B 122 code (No polarity).
►Depending on the power supply option, connect the clock to the mains.
►Change the switch position on the back onto the “ON” position.
Wait a few minutes until the clock hands reach 12h position. After receipt of time code, the
hands will reach the right position according to time information.
2.2.3. DCF24v RECEIVER VERSION
►Connect the DCF 24v code (No polarity).
Wait a few minutes until the clock hands reach 12h position. After receipt of time code, the
hands will reach the right position according to time information.

MDE-HANDI-2078V4.0
13
ENGLISH
2.2.4. NTP RECEIVER VERSION
A. 230VAC Version
►Connect the clock to the computer network.
►Connect the clock to the mains.
B. PoE Version
►Connect the clock to the POE injector.
C. Wi-Fi Version
►Connect the clock to the mains.
►Consult chapter 5. « Pre-configuration Wi-Fi products » to connect clock to Wi-Fi network.
The hands are positioned at 12 o'clock and then, 3 to 4 minutes after receiving the
code, are positioned according to the received time information. For the advanced
configuration, see chapter 4. WEB INTERFACE.
2.2.5. LIGHTING OPTION
►Connect the LED lighting supply cable to the mains.
In NTP Version, the LED lighting is power by the power cable.
In POE version, the LED lighting is powered directly by the network cable

14
MDE-HANDI-2078V4.0
2.3. FIXING & DIMENSIONS (IN MM)
2.3.1. SINGLE FACE –MOUNTING WITH
BRACKET
►The bracket can be fitted in the position of
wall mount or side mount.
►Fixation of the rod (2 screws of 6 x 16)
Remark: Mount at 6h on request.

MDE-HANDI-2078V4.0
15
ENGLISH
2.3.2. DOUBLE FACE –MOUNTING WITH BRACKET
The bracket can be fitted in the position of wall
mount or side mount.
►Fix one rod on each clock face.
►(4 screws of 6 x 16)
►Fix the 3 corner brackets on the back panel
of each face (6 self-tapping screws of 4.8 x
19)
►Pass the cables through the rods
►Put the two clock sides back-to-back, then
assemble them by mounting the
connecting plates on each corner bracket
(self-tapping screws of 4.8 x 19)
►Fix the metal plate to the end of rod (6
screws of 5 x 20)
►Fix the circle strap onto the bracket (4
screws of 2.9 x 9)
Screws supplied with the clock
Side mount: special attention shall be given to the fixation of rods (mount at 3h or 9h).
Bottom Mount at 6h: on request. This option shall be mentioned on Purchase order.

16
MDE-HANDI-2078V4.0
3. HANDI®800
3.1. DESCRIPTION
Analogue clock in AFNOR NFS 87500 / IRIG-B 122, DCF24V, NTP version.
3.2. CONNECTIONS
To reset the clock switch it off
and on
:
- by the "ON" / "OFF" located on the rear face of the clock (for
versions where button is available)
- Or unplug and replug the clock (for pulse versions)
- Or open the clock and press the reset button on the card
- In the waterproof version, open the clock to perform this
operation.
3.2.1. AFNOR NFS 87500 / IRIG-B 122 RECEIVER VERSION
►Connect the AFNOR NFS 87500 / IRIG-B 122 code (No polarity).
►Depending on the power supply option, connect the clock to the mains.
►Change the switch position on the back onto the “ON” position.
Wait a few minutes until the clock hands reach 12h position. After receipt of time code, the
hands will reach the right position according to time information.
3.2.2. NTP RECEIVER VERSION
A. 230VAC Version
►Connect the clock to the computer network.
►Connect the clock to the mains.
B. PoE Version
►Connect the clock to the POE injector.
C. Wi-Fi Version
►Connect the clock to the mains.
►Consult chapter 5. « Pre-configuration Wi-Fi products » to connect clock to Wi-Fi network.
The hands are positioned at 12 o'clock and then, 3 to 4 minutes after receiving the
code, are positioned according to the received time information. For the advanced
configuration, see chapter 4. WEB INTERFACE.
3.2.3. LIGHTING OPTION
►Connect the LED lighting supply cable to the mains.
In NTP Version, the LED lighting is power by the power cable.
In POE version, the LED lighting is powered directly by the network cable

MDE-HANDI-2078V4.0
17
ENGLISH
3.3. FIXING & DIMENSIONS (IN MM)

18
MDE-HANDI-2078V4.0
4. CONFIGURATIONBYWEB
INTERFACE
4.1. FIRMWARE VERSIONS 1.X.X.X
Many product parameters can be configured through the product's built-in web interface. Forclock group
configurations, you can also use the dedicated program GTNetConfig (see the User Manual on
https://www.gorgy-timing.fr/188-modes-d-emploi.htm for more information)
To access the embedded web page, open your web browser (Firefox, Chrome, Internet Explorer...), and
enter the product IP address.
NB: By default, the product asks an IP address from DHCP server. It always keeps an auto-IP
(169.254.x.y/16) and Link-Local IPv6 address (fe80::/64).
To easily detect GORGY-TIMING products in your network, you can use the GTNetworkManager2
program (or the old GT Network Manager version).
4.1.1. Main web page
►When you enter the product IP address in Web browser, it will ask you to enter product’s login and
password. Upper and lower case letters are taken into account.
By default, Ids are :
User login: root
Password: gtmt

MDE-HANDI-2078V4.0
19
ENGLISH
The index web page displays general information about your product You will find among others the
following information:
►Product Name and Serial Number: to identifythe product and knowwhat kind ofGORGY-TIMING
product it is.
►Uptime and Internal Time: how much time the product is on and current internal time (UTC).
►IP Adresses : it could have up to 4 IP addresses: 1 Auto-IP address, 1 IPv4 (DHCP/Static), 1 IPv6
Link Local and 1 Global IPv6 (DHCP/Static) which are dis-played here with netmask in CIDR
notation.
►MAC Adress: the product interface MAC address
►Network and Synchronization status: to know if the product is connected to network and/or
synchronized (or not) and since when.
►Firmware Version and Change Log: the firmware version of the product and a history of the
evolutions and improvements of the software directly consultable from the product.
You can use the menu on the left side to browse along embedded webpagesor change language
if the browser wrongly set it.

20
MDE-HANDI-2078V4.0
4.1.2. Ethernet web page
On this page, you can set the network configuration of your product. You can use auto settings (DHCP)
or set a static IP address (Manual IP Settings option) with network mask and gateway.
Network settings support IPv4 addresses, IPv6 addresses or both.
ENDMI protocol allows the Gorgy-Timing clocks and Time servers network discovery. You can disable
the ENDMI protocol on this web page. In this case, the product will not be visible by GTNetworkManager
Software.
Other manuals for HANDI 300
1
This manual suits for next models
3
Table of contents
Other Gorgy Timing Clock manuals

Gorgy Timing
Gorgy Timing LEDI 1.60 User manual

Gorgy Timing
Gorgy Timing HANDI 300 User manual

Gorgy Timing
Gorgy Timing LEDI User manual

Gorgy Timing
Gorgy Timing HANDI User manual

Gorgy Timing
Gorgy Timing RADIO TIMING GTC User manual

Gorgy Timing
Gorgy Timing LEDI Series User manual

Gorgy Timing
Gorgy Timing 93000011 User manual

Gorgy Timing
Gorgy Timing LEDI 1S User manual

Gorgy Timing
Gorgy Timing LEDI 6 User manual