2
Failure to follow these warnings and the
assembly instructions could result in serious injury or death.
• PLEASE SAVE OWNER’S
MANUAL FOR FUTURE USE.
• FOR YOUR CHILD’S SAFETY,
read the labels and the owner’s
manual before using product.
• BEFORE EACH USE. Inspect the
highchair for damaged hardware,
loose joints, missing parts, or
sharp edges.
• DO NOT USE highchair if any
parts are missing or broken.
• DO NOT substitute parts.
• FALL HAZARD Never move or
lift high chair or booster seat with
child in it.
• ADULT ASSEMBLY REQUIRED.
• NEVER LEAVE CHILD
UNATTENDED. Always keep your
child in view in product.
• PREVENT SERIOUS INJURY
OR DEATH FROM FALLS OR
SLIDING OUT. Always use seat
belt. Secure your child at all times
with the restraint system
provided, either in the reclining
or upright position.
The tray is not designed to hold
your child in the product. It is
recommended that the product
be used in the upright position
only by children capable of
sitting upright unassisted.
• NEVER allow a child to push
away from table.
• DO NOT FORCE TRAY
against child. Use only the three
adjustment positions. Be sure
both tray arms are engaged in
armrest holes.
• STRANGULATION HAZARD:
Do not place product in any
location where there are cords,
such as window blind cords,
drapes, phone cords, etc.
• THIS HIGHCHAIR IS
DESIGNED TO BE USED BY A
CHILD UP TO 3 YEARS OF
AGE. Maximum weight 40
pounds (18 kg).
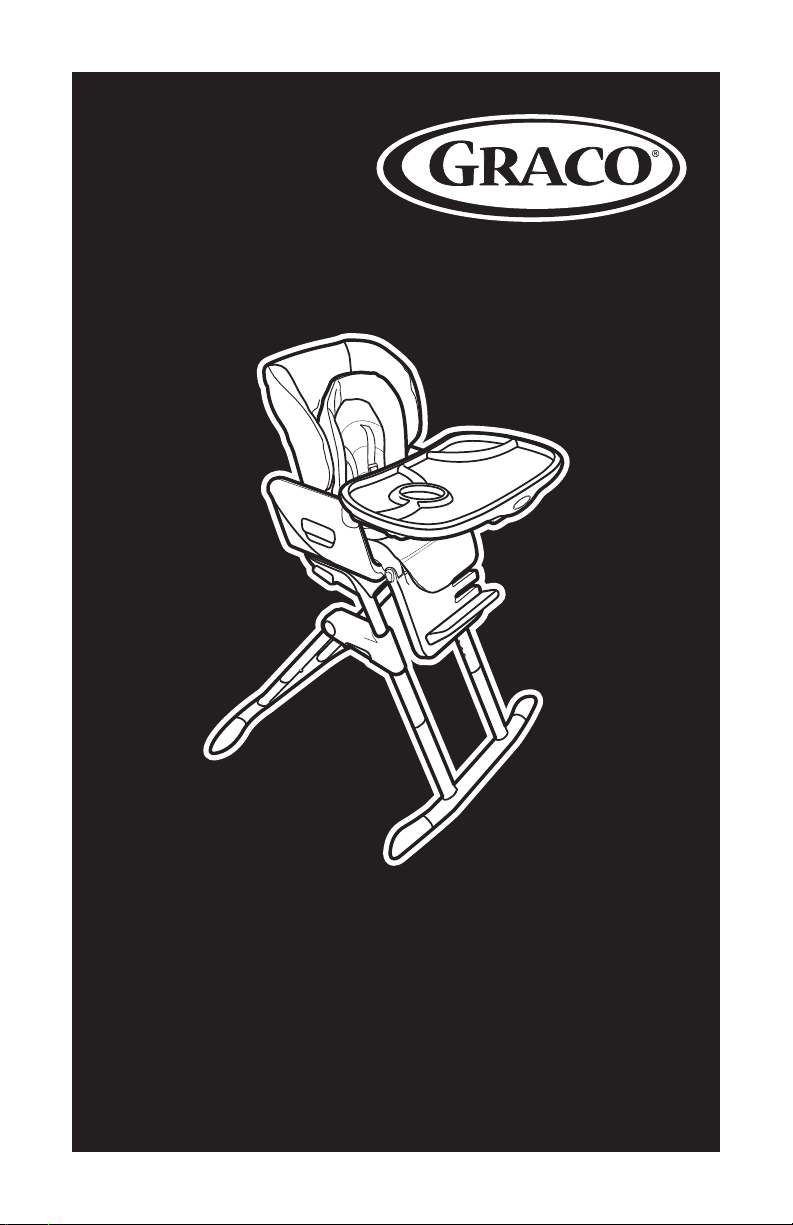
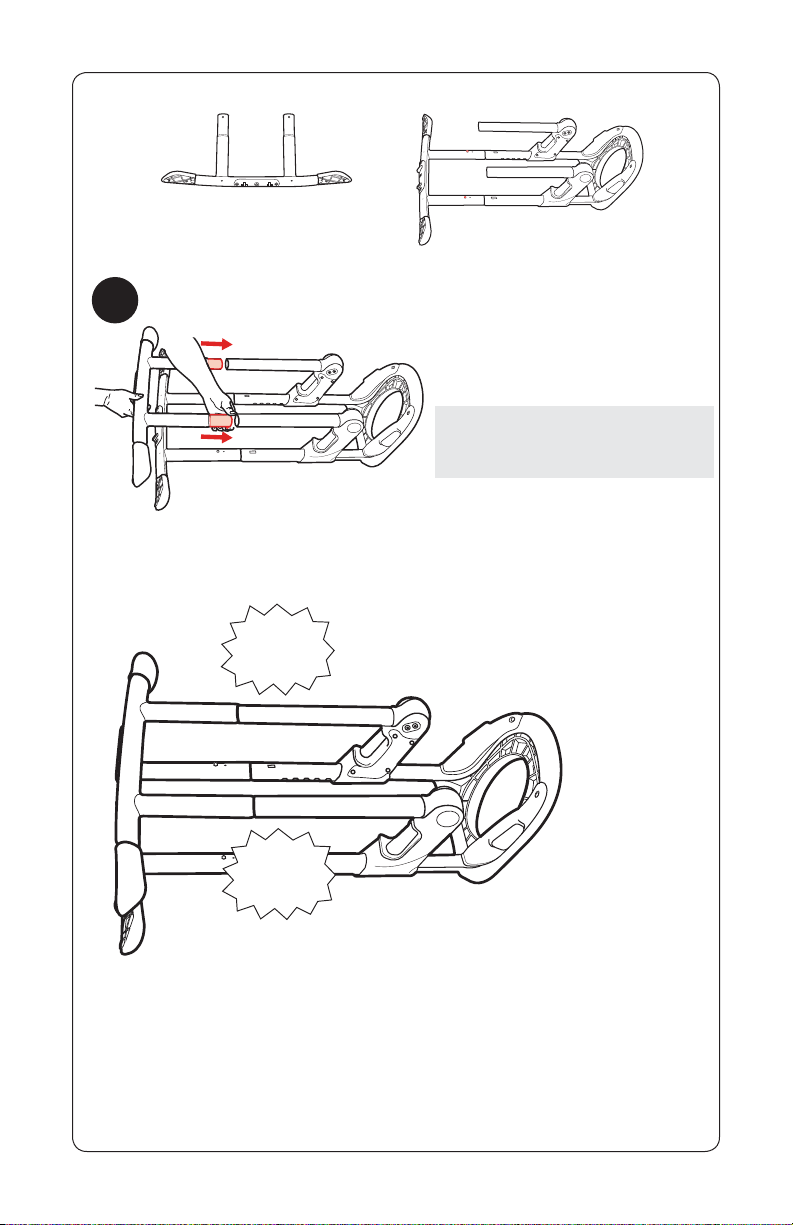
• FOLLOW ASSEMBLY
INSTRUCTIONS CAREFULLY.
If you experience any difficulties,
please contact the Customer
Service Department.
• DISCONTINUE USING YOUR
HIGHCHAIR should it become
damaged or broken.
• PREVENT SERIOUS INJURY OR
DEATH. Do not use in motor
vehicles.
• DO NOT ADJUST the recline of
product with your child in it.
• USE ONLY Swivi Seat™
highchair accessories with this
product.