manuals.online logo
Brands
  1. Home
  2. •
  3. Brands
  4. •
  5. Graf
  6. •
  7. Water Heater
  8. •
  9. Graf 330L User manual

Graf 330L User manual

Otto GRAF GMBH, Carl-Zeiss-Straße 2-6, 79331 Teningen – Tel.: 0049/(0)7641/589-0, Fax: 0049/(0)7641/589-50 – www.graf-online.de, www.graf.fr, info@graf-online.de, inf[email protected] - Stand: 02/05
Windsicherung
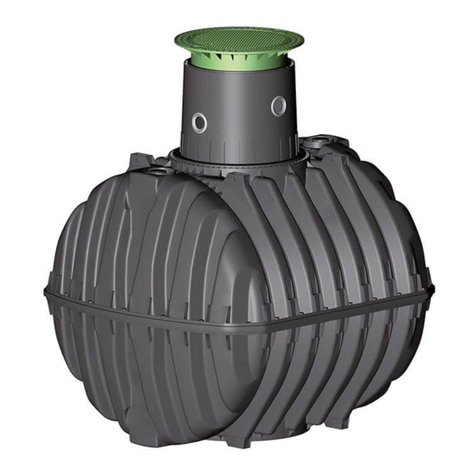
Säulentank
Windsicherung
Säulen-Wandtank
Montagefläche oben
mit Dichtung DN 50
Montierte Dichtung DN
50 im Schnitt
Innenseite
A
ußenseite
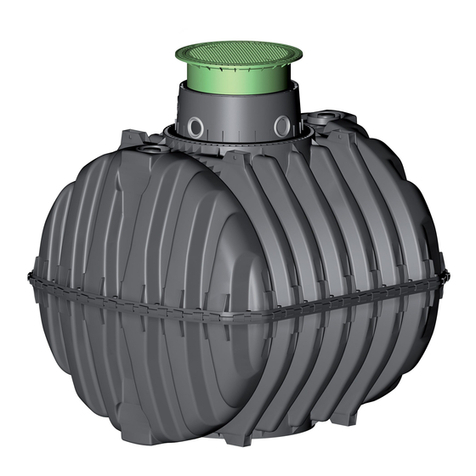
Säulentank und Säulen-Wandtank
oberirdisch – die elegante Alternative
Säulentank 330 L
Farbe Best.-Nr.
sandbeige 326532
steingrau 326533
Säulentank 500 L
Farbe Best.-Nr.
sandbeige 326511
steingrau 326513
Säulentank 1000 L
Farbe Best.-Nr.
sandbeige 326504
steingrau 326508
dunkelgrün 326507
Säulen-Wandtank 550 L
Farbe Best.-Nr.
sandbeige 326523
steingrau 326522
dunkelgrün 326524
Aufstellanleitung für Säulentank und
Säulen-Wandtank
Allgemeines:
- Die Säulentanks dürfen nur oberirdisch aufgestellt
werden.
- Bei Frostgefahr müssen die Tanks vollständig entleert
werden.
- Bei der Aufstellung muss das Gesamtgewicht der gefüllten
Tanks berücksichtigt werden (Gesamtgewicht =
Eigengewicht + Tankvolumen).
- Den Tank in schattiger Umgebung aufstellen, dass erhöht
die Lebensdauer des Materials und das gespeicherte
Wasser bleibt länger frisch.
- Die Behälter dürfen auf keinen Fall unter Druck gesetzt
werden, d. h. es muss ein Überlauf im gleichen
Durchmesser wie der Zulauf oder ein Filter mit
Überlaufstopp installiert werden.
Montage Zulauf:
- Die Bohrung für die Zulaufdichtung wird in einem
Durchmesser von 58 mm mit einer handelsüblichen
Lochkreissäge in eine der oberen Montageflächen
gebohrt. Anschließend wird die mitgelieferte
Spezialdichtung DN 50 in die Öffnung eingesetzt und das
Zulaufrohr DN 50 waagerecht eingeschoben.
Montage Windsicherung:
- Die beiliegenden Ösen für die Windsicherung werden
oben am Tank montiert und mittels einer Kette (bauseits)
mit der Hauswand verbunden. Dabei ist zu gewährleisten,
dass die Wand und das Wandmaterial ausreichend stabil
sind.
- Für den Säulen-Wandtank wird eine spezielle
Windsicherung mitgeliefert. Zur Montage wird die Position
der beiden Schlitze in der Behälterrückwand an der
Hauswand gekennzeichnet. Anschließend die Löcher für
die Dübel bohren, die Dübel einsetzen und den Wandtank
mit den beiliegenden Schrauben an der Wand befestigen.
Es ist unbedingt darauf zu achten, dass die Wand und das
Wandmaterial eine ausreichende Stabilität aufweisen.
Sollten die Dübel nicht für das vorhandene Wandmaterial
geeignet sein sind diese bauseits gegen geeignete Dübel
auszutauschen.
- Die Windsicherung ist nur eine Kippsicherung, der Tank
darf auf keinen Fall daran angehängt werden.
Durch die Befüllung der Tanks kann es zu Setzungen um
bis zu 10 mm kommen.
Otto GRAF GMBH, Carl-Zeiss-Straße 2-6, 79331 Teningen – Tel.: 0049/(0)7641/589-0, Fax: 0049/(0)7641/589-50 – www.graf-online.de, www.graf.fr, info@graf-online.de, inf[email protected] - Stand: 02/05
Space where seal can
be installed
Wind safety device for
column tank
Wind safety device for
column wall tank
Installed seal DN 50
outside inside
Notice de montage des colonnes et
colonnes murales
- Les colonnes ne doivent pas être enterrées
- Lors de l´installation, prendre ne compte le poids de
l´ensemble colonne + volume d´eau
- Le perçage pour le tuyau de remplissage doit être
fait au haut de la colonne à l´endroit prévu à cet
effet avec une scie cloche de Ø58mm. Placer
ensuite le joint dans ce perçage et introduire
horizontalement le tuyau
Montage du dispositif de sécurité vent
- 2 anneaux (fournis avec la colonne) sont à fixer au
haut de la colonne et servent d´encrage de sécurité,
afin de permettre, par l´intermédiaire d´une chaîne
(non fournie), de fixer la colonne à un mur.
- Les colonnes murales sont livrées avec un système
d´encrage spécifique. Celui-ci consiste à visser la
colonne directement à un mur en faisant passer les
vis (fournies) dans les ouvertures se trouvant au
haut et à l´arrière de celle-ci. Commencer par
marquer le mur au niveau ou se trouve les
ouvertures de la colonne. Percer le mur et y glisser
les chevilles (fournies). Fixer la colonne au mur
avec les vis. Attention, la colonne peut, après
remplissage, se tasser de 10mm, prévoir la marge
suffisante par rapport aux ouvertures de la colonne.
Le mur doit être sain et solide pour supporter le
poids de la colonne en pleine charge. Vérifier que
les chevilles soient adaptées au mur de fixation,
sinon , utiliser un type de cheville adapté. Le
dispositif de sécurité vent est uniquement là pour
éviter un renversement de la colonne, en aucun cas
il ne doit servir à suspendre la colonne au mur.
Assurez vous que la colonne repose toujours sur un
sol plat et stable.
Installation manual for the column tank and
the column wall tank
General information:
- The column tanks are only for installation above ground
- The tank must be emptied at temperatures below 0°C.
- The total weight of the full tanks must be considered when
installed (total weight = tank weight + tank volume).
- If the place for the tank is shady, the life span of the tank
material is longer and the stored water remains fresher.
- In no case the tanks are allowed to be set under pressure.
An overflow in the same diameter as the inlet or a filter
with overflow stop must be installed.
Installation inlet:
- The drilling for the inlet seal can be installed when using a
standart 58 mm diameter saw into one of the upper
mounting surfaces. After installation of the seal DN 50 a
standart inlet pipe DN 50 can be pushed in.
Installation Wind safety device:
- The enclosed parts for the wind safety device are installed
on the upper section of the tank and connected by a chain
(not contain) with the wall. You must ensure that the wall
and the wall material are sufficiently stable.
- There is a special wind safety device for the column wall
tank. For the installation the position of the two slots in the
tank rear is marked in the wall. Now drill the holes for the
pegs and fix the tank with the enclosed screws. Make sure
that the wall and the wall material are sufficiently stable. If
the pegs should not be suitable for the existing wall
material they must be changed against suitable pegs.
- The wind safety device is only to prevent the tank from
falling to the front, in no case to hang the tank to the wall.
- Please note that the tank hight when filled with water is 10
mm lower.

This manual suits for next models

3

Other Graf Water Heater manuals

Graf PLATIN User manual

Graf

Graf PLATIN User manual

Graf one2clean User manual

Graf

Graf one2clean User manual

Graf PLATIN User manual

Graf

Graf PLATIN User manual

Graf HERKULES Operating and maintenance manual

Graf

Graf HERKULES Operating and maintenance manual

Graf Diamant User manual

Graf

Graf Diamant User manual

Graf CARAT XL User manual

Graf

Graf CARAT XL User manual

Graf Garantia Top-Tank Instructions for use

Graf

Graf Garantia Top-Tank Instructions for use

Graf Carat RS Series User manual

Graf

Graf Carat RS Series User manual

Graf Diamant User manual

Graf

Graf Diamant User manual

Graf PLATIN XL User manual

Graf

Graf PLATIN XL User manual

Graf Carat XXL Manual

Graf

Graf Carat XXL Manual

Graf CARAT-S- Series Manual

Graf

Graf CARAT-S- Series Manual

Graf 300 Instructions for use

Graf

Graf 300 Instructions for use

Graf Carat series User manual

Graf

Graf Carat series User manual

Graf 320001 Operating and maintenance manual

Graf

Graf 320001 Operating and maintenance manual

Graf RainHarvest Systems Top-Tank 323002 Instructions for use

Graf

Graf RainHarvest Systems Top-Tank 323002 Instructions for use

Graf CARAT XL User manual

Graf

Graf CARAT XL User manual

Graf CARAT XXL Series Manual

Graf

Graf CARAT XXL Series Manual

Graf PLATIN User manual

Graf

Graf PLATIN User manual

Popular Water Heater manuals by other brands

Noritz ecoTOUGH NRC98-DV-NG installation manual

Noritz

Noritz ecoTOUGH NRC98-DV-NG installation manual

Groen DH-40 Operator's manual

Groen

Groen DH-40 Operator's manual

Nibe UKV 100 installation instructions

Nibe

Nibe UKV 100 installation instructions

A.O. Smith AOSRE50400 instruction manual

A.O. Smith

A.O. Smith AOSRE50400 instruction manual

MicroHeat 1-10 CFEWH SERIES Installation & operation manual

MicroHeat

MicroHeat 1-10 CFEWH SERIES Installation & operation manual

Elkay EWHA8 installation instructions

Elkay

Elkay EWHA8 installation instructions

State Water Heaters GS6-40-UBPDS Installation and operating manual

State Water Heaters

State Water Heaters GS6-40-UBPDS Installation and operating manual

FloodMaster RS-094-MK4 installation manual

FloodMaster

FloodMaster RS-094-MK4 installation manual

State Water Heaters STC-080 Service handbook

State Water Heaters

State Water Heaters STC-080 Service handbook

Bradford White EverHot TGHE-160I-NX Installation and operation instruction manual

Bradford White

Bradford White EverHot TGHE-160I-NX Installation and operation instruction manual

Kenmore 153.316040 owner's manual

Kenmore

Kenmore 153.316040 owner's manual

GE GG40T06TVT Energy guide

GE

GE GG40T06TVT Energy guide

Nibe BA-ST 9022 - 2FE Installation and operating manual

Nibe

Nibe BA-ST 9022 - 2FE Installation and operating manual

THERMEx Eterna Series user manual

THERMEx

THERMEx Eterna Series user manual

Viessmann VITOWELL EASY C1 Operation manual

Viessmann

Viessmann VITOWELL EASY C1 Operation manual

STIEBEL ELTRON Tempra 12 B installation instructions

STIEBEL ELTRON

STIEBEL ELTRON Tempra 12 B installation instructions

Quick BX 16 user manual

Quick

Quick BX 16 user manual

Rheem Stellar 850330 Owner's guide and installation instructions

Rheem

Rheem Stellar 850330 Owner's guide and installation instructions

manuals.online logo
manuals.online logoBrands
  • About & Mission
  • Contact us
  • Privacy Policy
  • Terms and Conditions

Copyright 2025 Manuals.Online. All Rights Reserved.