Grant OQ610-S User manual
ES
IT
DE
FR
EN

Version 12 28123
Page 1
www.grantinstruments.com
Contents
1. Hardware Checklist............................................................................2
2. General Information...........................................................................3
3. Connecting the Probes………………................................................4
4. Logger Menu and Navigation...........................................................5
5. Getting Started with the Software....................................................9
6. TB610/TB612 Thermal Barriers.....................................................13
8. Specifications..................................................................................16
After reading this guide please
refer to the Help contents within
SquirrelView or PaintView (press F1)
for further details on your logger and
how to use it with the software.
28123 Version 12
Page 2
www.grantinstruments.com
EN
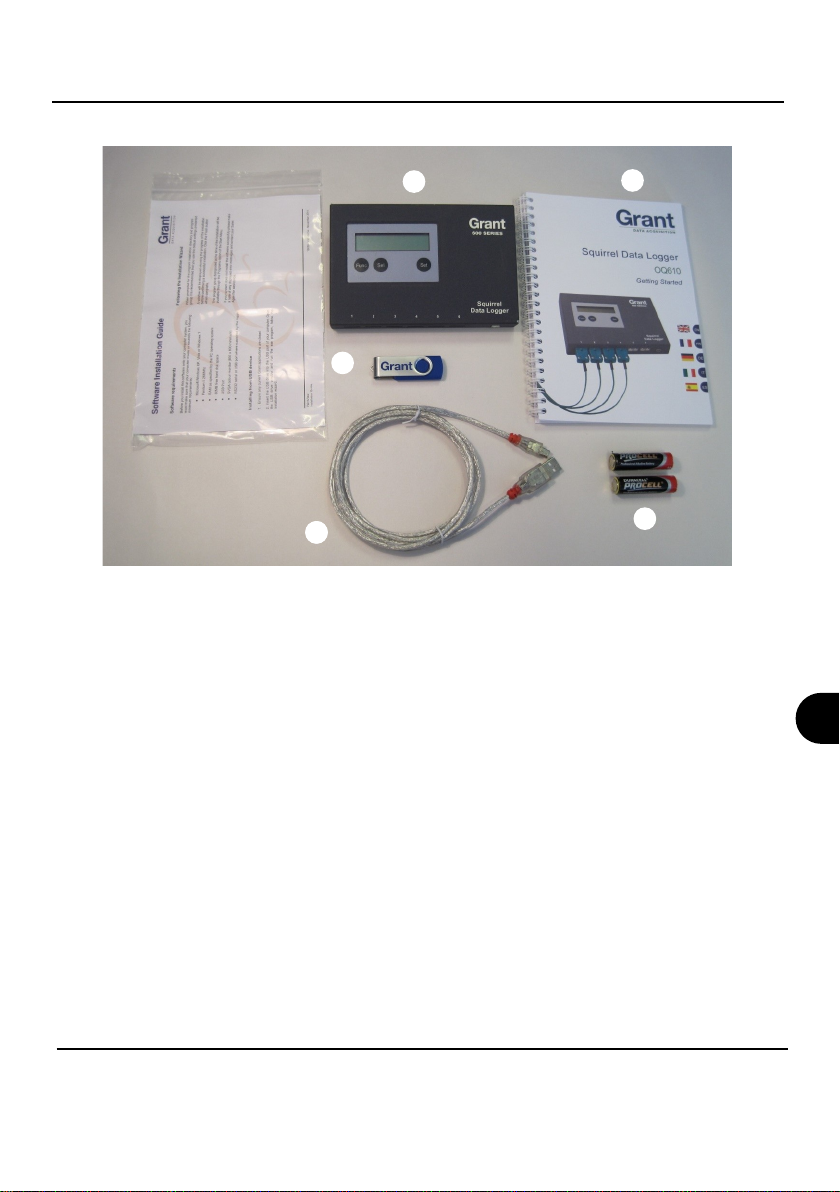
A) OQ610 Logger
B) USB drive containing software (SquirrelView/PaintView)
C) Getting Started manual (this booklet)
D) USB Cable (LC80)
E) Batteries, 2 x AA
Options available
USB - Printer cable (LC81)
Probes - K/T type thermocouples
TB610 Thermal barrier
TB612 Long duration thermal barrier
1. Hardware Checklist
A
B
C
D E
Version 12 28123
Page 3
www.grantinstruments.com
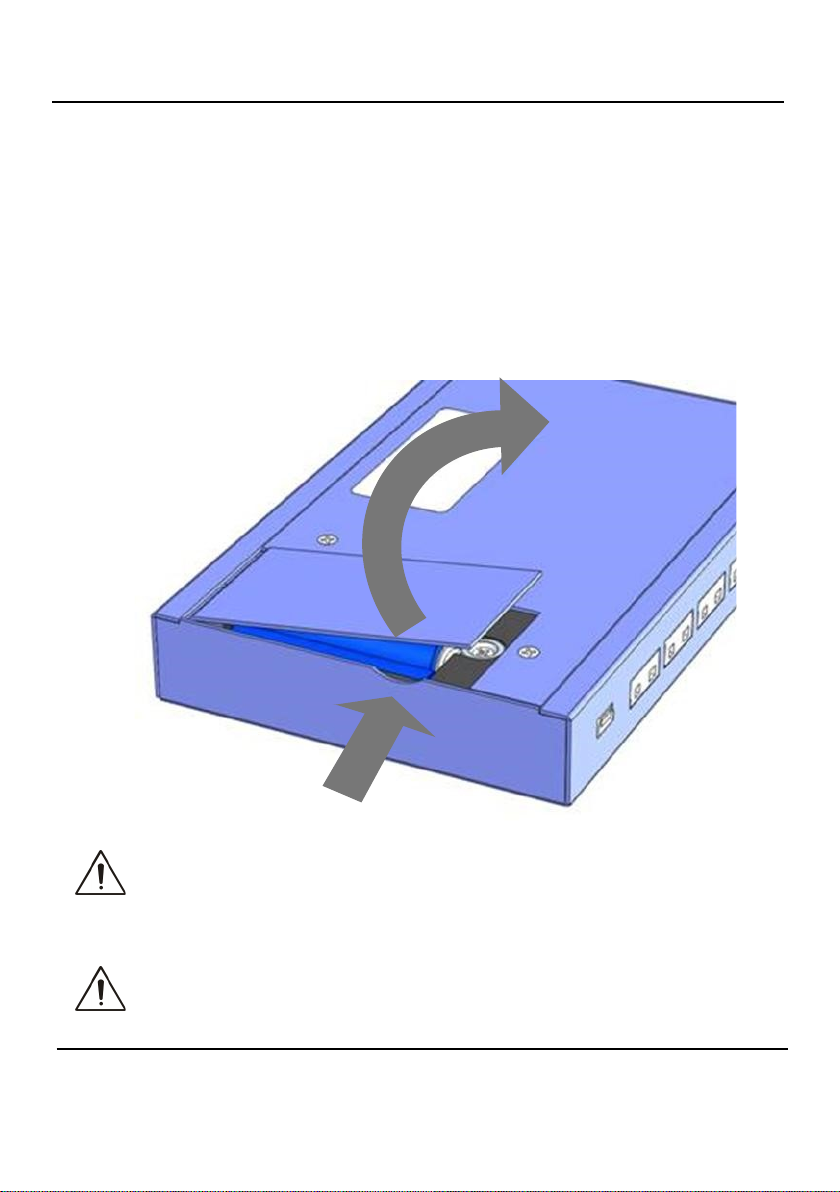
2. General Information
The Squirrel uses 2 x AA* size batteries located under a removable battery door held in place by a
magnetic catch To change the batteries:
1. Lift the battery door and pull forward.
2. Fit new batteries noting correct orientation
3. Refit the battery cover
*Maximum operating temperature for AA alkaline batteries supplied is 50°C
Important: Remove the batteries when the logger is not used for long periods
of time or is being transported.

28123 Version 12
Page 4
www.grantinstruments.com
EN
3. Connecting the Probes
The OQ610 is fitted with six thermocouple connector sockets which support K and T type thermocou-
ples. Connect each probe to an input socket, as shown below. The logger will recognise which chan-
nels are being used. If no probes are connected, the Squirrel will not start logging.
Note: T type thermocouples are software controlled and only available when used with SquirrelView
or PaintView software.
Note: Each plug has a wide terminal and a narrow terminal. Ensure that the plug is orientated cor-
rectly before making the connection.
To confirm which probes are connected, press the button on the logger until the METER
function is displayed:-
Func
Repeatedly press the button to view each probe in turn.
Sel

Version 12 28123
Page 5
www.grantinstruments.com
4. Logger Menu and Navigation
Selects the function Chooses the channel
or sub-function
Changes any
of the settings
The OQ610 comes pre-programmed with a default setup providing a basic setup without the
need to use any software. Default settings are as follows:-
4.1 Introduction
K-Type -200 to 1300°C
Logging interval every two seconds
Record up to eight runs before overwriting the oldest.
Logging results may be evaluated immediately by directly connecting to a printer (see
section 7). In addition, the logger can be set up with 'Cure parameters’ for a percentage
cure readout (see software Help content for more details)
The operating buttons allow the set up of all of the major functions of the logger.
4.2 Overview of the operating buttons
Setup changes are not allowed whilst logging
When using the software, the Set button also wakes the Logger for
communication when instructed/required
The logger memory is divided up into a number of runs. When all the runs are
completed, start logging will automatically overwrite the oldest. It is not
necessary to clear any runs in the memory unless specifically required
Only use the reset function on recommendation from technical support
Important Notes:
Func Sel Set
28123 Version 12
Page 6
www.grantinstruments.com
EN
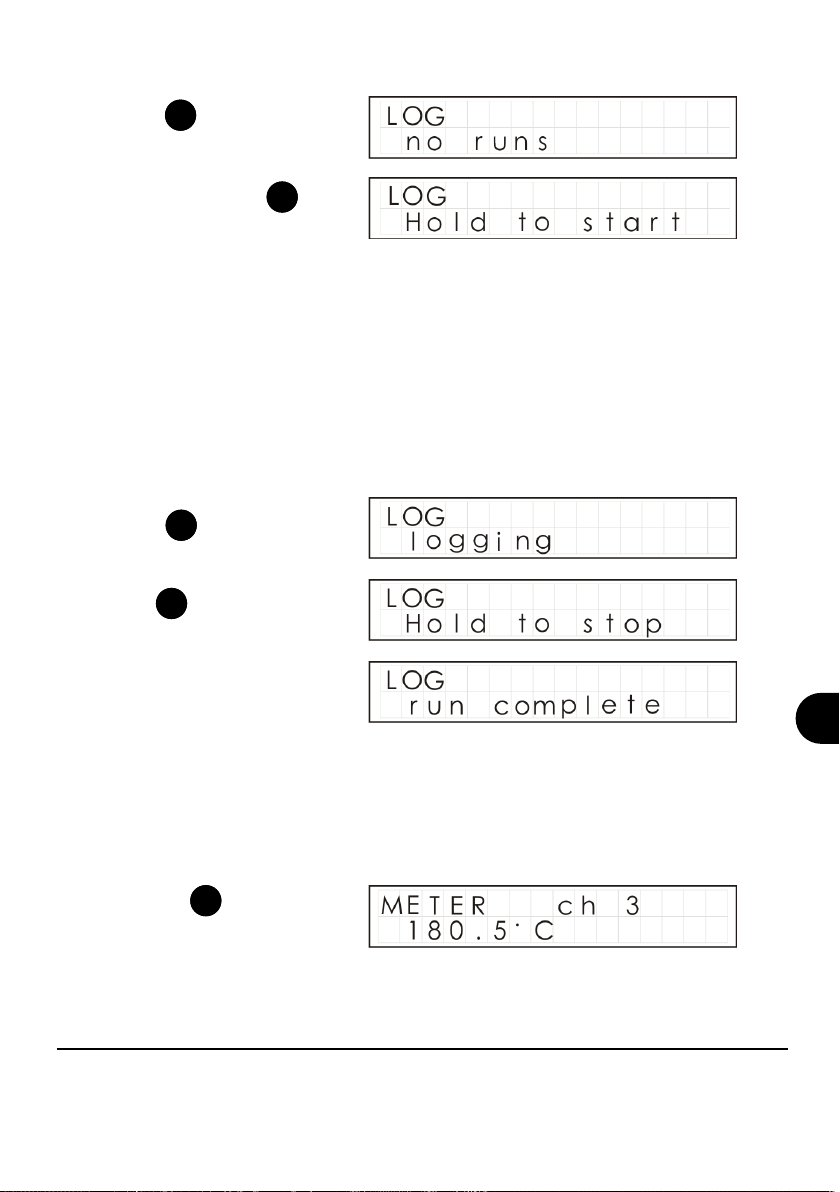
4.3 Start logging
Note: The logger will display “Logging” if no Triggers have been set up from the software
(see software Help Content for more details on Triggers.
Press until the
following is displayed.
Func
4.4 Stop logging
When the logger has stopped
“run complete” will be displayed
on the logger.
Manually stopping the logger will override any pre-programmed automatic ‘stop trigger’.
When logging has completed, the screen will indicate whether the latest run has met its
Cure Specifications (if programmed). For more graphical analysis, either print the
results to a portable printer or download the run into software for detailed analysis.
Press to wake the logger.
Func
Hold to stop the logger.
Set
Now press and hold
to start logging.
Set
Note: a reading of “open” indicates that the probe is not connected.
4.5 METER
Press the button to view
each probe in turn.
Sel

Version 12 28123
Page 7
www.grantinstruments.com
This displays the approximate percentage of remaining capacity.
Two AA cells should give 200 hours operation using the logger default settings. However,
excessive use of communications via the software will dramatically reduce battery life, e.g.
online metering. At -20°C (-22ºF), the battery life can be decreased to 10% of normal.
This allows you to set the Logger up by changing the configuration of the thermocouple
temperature range, the date format, the display language and mains rejection frequency.
4.7 SET range/date format/language/mains rejection
4.6 BATTERY
Press the button to move
to the desired menu option
then press to change it.
Sel
Set
28123 Version 12
Page 8
www.grantinstruments.com
EN
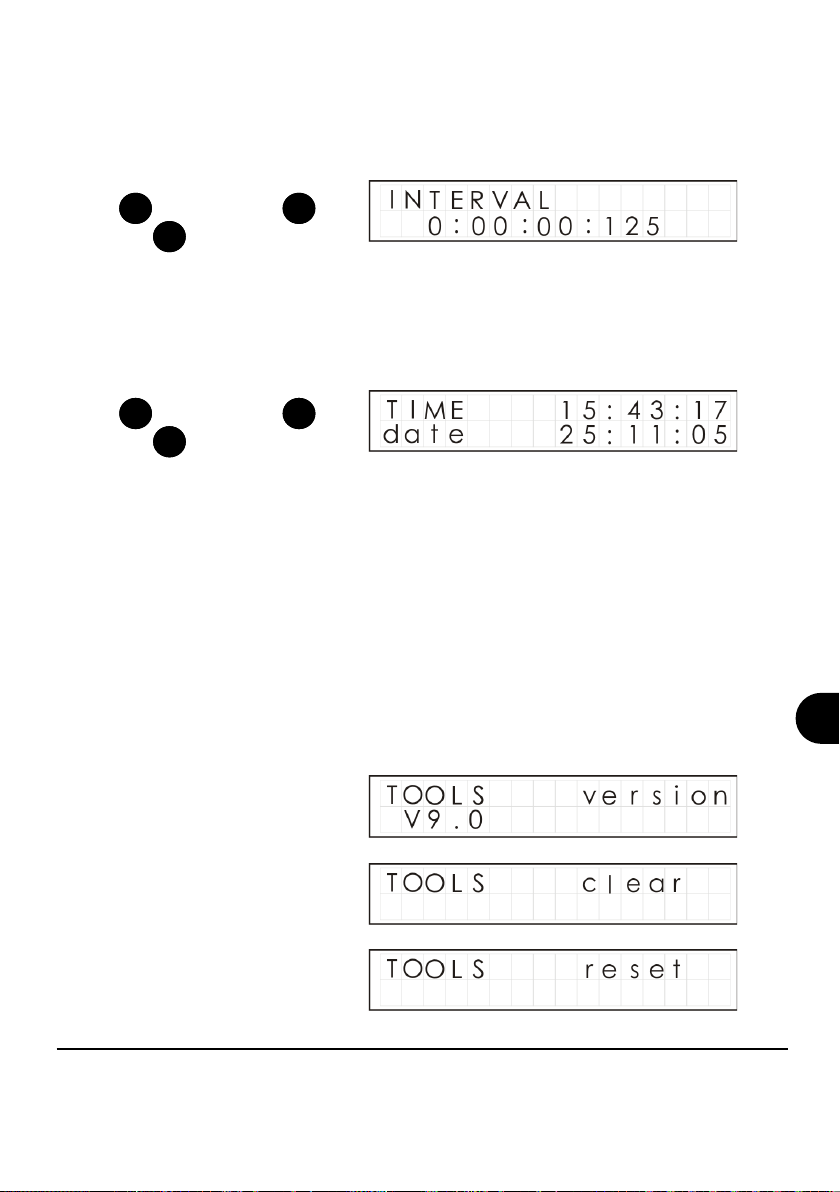
How often the logger will log is displayed here. This can be from 0.125s (8 readings per
second) to 2Hrs.
4.8 INTERVAL
This displays the real time and date on two lines. The time is in 24 hour format (HH:MM:SS)
4.9 TIME and date
If using the software to set the
logger up, it will automatically
inform you if the logger time is
different from the PC time.
The tools menu contains maintenance functions such as displaying the firmware version of
the logger, clearing all runs from the memory or resetting the logger to factory defaults.
Note that as the logger will record up to 8 runs then overwrite the oldest, it is not necessary
to clear the memory unless specifically required.
4.10 TOOLS
Note: It is recommended that
you only use the reset function
if instructed to do so by a
member of technical support.
To change, press and hold the
key then use the and
keys as required.
Set Sel
Set
To change, press and hold the
key then use the and
keys as required.
Set Sel
Set

Version 12 28123
Page 9
www.grantinstruments.com
5. Getting Started with the Software
5.1 Installing the software
Install the software from the USB drive by following the on-screen instructions.
Synchronise clocks:
From
SquirrelView\PaintView
Assistant click on Logger
Setup.
From the Logger
Setup screen select
the Logger Control
tab.
Click on Set Logger
Time to PC Time, click
OK on the confirma-
tion screen.
5.3 Startup SquirrelView\PaintView and Select Logger Type
Click on the shortcut icon on your desktop to launch SquirrelView\PaintView or select it
from your start menu. When the SquirrelView\PaintView Assistant is loaded, ensure
the correct logger type and communication method is selected. This can be viewed in
the top right corner of the screen. If you need to make any changes select Logger Se-
lection from the
Assistant toolbar or run the Communication Wizard.
5.4 Synchronise Logger & PC
It is advisable to start by synchronising the Logger clock with the PC clock. See step 1
and 2 below:
Important: Please ensure the software is installed before connecting the Squirrel
data logger.
5.2 Connecting the Squirrel data logger
Connect one end of the supplied USB lead to the logger and the other end to the PC.
On detection of the logger the PC will install the Grant Instruments OQ610 USB device
Win 7,8,10 - USB Device Drivers are automatically installed and no further action is
required
Important information
Only use a USB cable up to 3m in length to maintain CE compliance
This manual suits for next models
1
Table of contents
Languages:
Other Grant Data Logger manuals

Grant
Grant sq16 User manual

Grant
Grant 20 Series User manual

Grant
Grant Squirrel OQ606 User manual

Grant
Grant Squirrel OQ610 User manual

Grant
Grant 2020 Series User manual

Grant
Grant SQ1600 Use and maintenance manual

Grant
Grant sq16 User manual

Grant
Grant Squirrel SQ2010 SERIES User manual

Grant
Grant Yoyolog User manual

Grant
Grant Squirrel SQ2010 SERIES User manual


