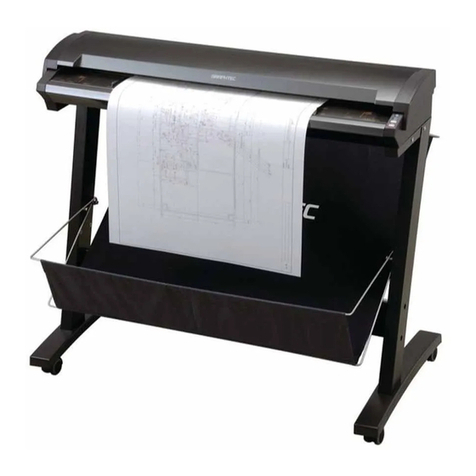
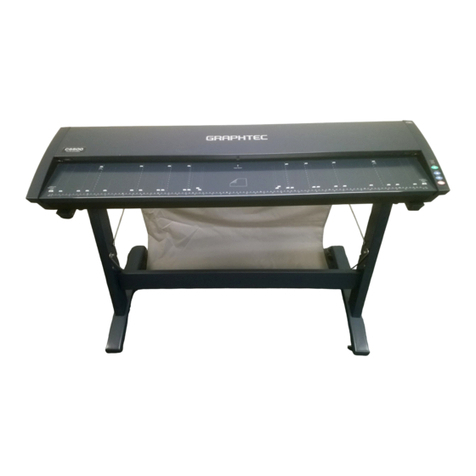
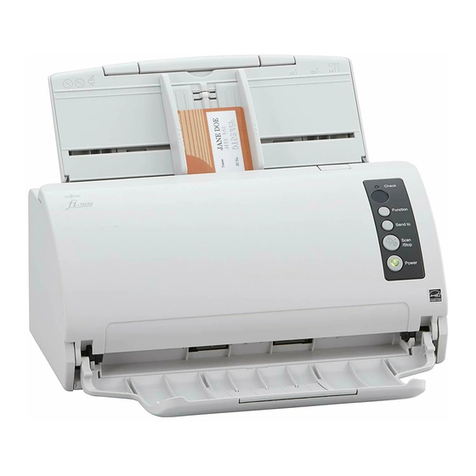
GRAPHTEC CS2000 User manual

COLOR IMAGE SCANNER
SERVICE MANUAL
CS2000-UM-251-04-9370

CS2000-UM-251-9370 i
HISTORY OF REVISIONS
No. Date issued Description of revision Page Edition
1 03.03.16 First Printing All 01
2 04.02.16 Contents of the 2nd cautions corrected. 8-3, 8-4 02
3 05.03.09 Part number for main board corrected. 14-14 03
4 05.06.23 Part number for CS Retaining Plate-JED corrected. 6-1,14-7 04

CS2000-UM-251-9370 ii
CONTENTS
1. OVERVIEW
1.1 Features .......................................................................................................................................1-1
1.2 Standard Specications ...............................................................................................................1-2
1.3 External View ...............................................................................................................................1-3
1.4 System Requirements..................................................................................................................1-4
2. PART NAMES AND FUNCTIONS
2.1 Part Names and Functions...........................................................................................................2-1
3. PREPARING TO OPERATE THE SCANNER
3.1 Assembling the Scanner ..............................................................................................................3-1
3.2 Connecting the Scanner to a Power Supply ................................................................................3-3
3.3 Connecting the SCSI Cable .........................................................................................................3-4
Compatible Cables .....................................................................................................................3-4
Connection Procedure ................................................................................................................3-4
3.4 Setting the ID Number..................................................................................................................3-6
3.5 Turning the Scanner On or Off .....................................................................................................3-7
3.6 Attaching the Document Support Wires .......................................................................................3-7
4. OPERATION AND CONNECTION
4.1 Connecting the Scanner to a Computer.......................................................................................4-1
4.2 Checking the Interface Connection ..............................................................................................4-9
4.3 Installing the Scanning Master 21+ Application .........................................................................4-11
4.4 Document Types Compatible with the CS2000..........................................................................4-12
4.5 Loading a Document ..................................................................................................................4-13
4.6 Making the Document Hold-Down Unit Force Settings..............................................................4-14
4.7 Using the Carrier Sheet..............................................................................................................4-15
4.8 Scanner Driver Software Compatibility with Windows 2000 ......................................................4-16
4.9 How to Obtain (Install) the ASPI Manager .................................................................................4-16
1. What you will need................................................................................................................4-16
2. How to obtain ASPI Manager................................................................................................4-16
3. How to install ASPI Manager ................................................................................................4-16
4.10 Checking the ASPI Layer ..........................................................................................................4-17
4.11 Checking Windows 2000 ASPI32 Status and Starting the Software.........................................4-18
4.12 Changing the Transfer Rate with the AVA-2915LP (Ultra SCSI-compliant) Card......................4-21
4.14 Factory Settings ........................................................................................................................4-23
DIP Switch ................................................................................................................................4-23
ID Number ................................................................................................................................4-23
5. DAILY MAINTENANCE
5.1 Removing and Mounting the Document Hold-Down Unit.............................................................5-1
5.2 Cleaning the Document Hold-Down Unit .....................................................................................5-3
5.3 Cleaning the Image Sensors........................................................................................................5-4
5.4 Cleaning the Paper Sensors ........................................................................................................5-6
5.5 Removing a Jammed Document..................................................................................................5-7
6. RECOMMENDED PARTS LIST

CS2000-UM-251-9370 iii
7. LIST OF JIGS AND TOOLS
7.1 Jigs...............................................................................................................................................7-1
7.2 Tools.............................................................................................................................................7-1
7.3 Other ............................................................................................................................................7-1
8. DISASSEMBLING AND ADJUSTING MECHANICAL PARTS
8.1 Considerations before starting disassembly ................................................................................8-1
8.2 Document Hold-down Unit ...........................................................................................................8-2
8.3 CS Retaining Plate.......................................................................................................................8-4
8.4 Side Covers..................................................................................................................................8-5
8.5 Top Cover.....................................................................................................................................8-6
8.6 Front Cover ..................................................................................................................................8-7
8.7 Rear Cover...................................................................................................................................8-8
8.8 Large and Small Bottom Plates....................................................................................................8-9
8.9 Main Board.................................................................................................................................8-10
8.10 Power Boards............................................................................................................................8-12
8.11 CIS (Charge Coupled Device Imaging Semsor) Boards A, B, and C........................................8-13
8.12 Cooling Fan...............................................................................................................................8-14
8.13 Separator Plates .......................................................................................................................8-15
8.14 Pinch Roller Units......................................................................................................................8-17
8.15 Front Guide ...............................................................................................................................8-19
8.16 Rear Guide................................................................................................................................8-20
8.17 Control Panel ............................................................................................................................8-21
8.18 Cover Open Sensor ..................................................................................................................8-22
8.19 Front and Rear Paper Detection Sensors .................................................................................8-23
8.20 Motor .........................................................................................................................................8-25
8.21 Pulleys.......................................................................................................................................8-27
8.22 Drive Rollers..............................................................................................................................8-28
8.23 Image Sensor Unit ....................................................................................................................8-29
Replacing the Entire Image Sensor Unit...................................................................................8-29
Replacing the Glass Base Unit Only.........................................................................................8-32
9. BOARDS AND ELECTRICAL COMPONENTS
9.1 Wiring Diagrams...........................................................................................................................9-1
Overall Conguration ..................................................................................................................9-1
Component Layout on the Main Board .......................................................................................9-2
Power Unit Wiring .......................................................................................................................9-3
9.2 Power Supply Unit........................................................................................................................9-4
1. Checking Voltage Levels ........................................................................................................9-4
9.3 Main Control Board ......................................................................................................................9-5
1. Precautions for replacing the main board ...............................................................................9-5
2. Checking voltage levels ..........................................................................................................9-5
3. LED status ..............................................................................................................................9-5
4. Replacing the main board.......................................................................................................9-5
9.4 At-a-glance Guide to Adjustment Functions.................................................................................9-7
Key operations............................................................................................................................9-7
9.5 Downloading Firmware ................................................................................................................9-8
1. Items required to download rmware......................................................................................9-8
2. Procedure ...............................................................................................................................9-8

CS2000-UM-251-9370 iv
9.6 Test Mode.....................................................................................................................................9-9
1. Procedure ...............................................................................................................................9-9
10. ADJUSTMENTS USING THE SOFTWARE
10.1 Starting the Software.................................................................................................................10-1
10.2 Preparations before Making Adjustments .................................................................................10-3
10.3 Preparing a Test Chart ..............................................................................................................10-4
10.4 Making Adjustments ..................................................................................................................10-5
Scanner Calibration ..................................................................................................................10-5
1. Calibration (white correction) ................................................................................................10-5
2. Feed distance adjustment.....................................................................................................10-7
3. Position adjustment ..............................................................................................................10-9
4. Shading (undesired color line removal) ..............................................................................10-14
5. Shading (undesired gray line removal) ...............................................................................10-17
10.5 Resolution adjustment check ..................................................................................................10-20
1. Paper-feed distance accuracy check..................................................................................10-20
2. Image-sensor offset (joint accuracy)...................................................................................10-20
3. Offset check........................................................................................................................10-20
4. Resolution check ................................................................................................................10-20
5. Color correction (using a color correction sheet) ................................................................10-21
11. TROUBLESHOOTING
12. SCHEMATIC DIAGRAMS
12.1 Control Board ............................................................................................................................12-1
13. OPTION
13.1 Basket Assembly Procedure (PG0010).....................................................................................13-1
Parts List...................................................................................................................................13-1
Assembly Procedure.................................................................................................................13-1
14. PARTS LIST
14.1 Parts List ...................................................................................................................................14-1
14.2 External Casing 1......................................................................................................................14-3
14.3 External Casing 2......................................................................................................................14-4
14.4 External Casing 3......................................................................................................................14-6
14.5 Document Hold-down Unit ........................................................................................................14-7
14.6 Pinch Roller Unit .......................................................................................................................14-8
14.8 Drive Roller Unit ......................................................................................................................14-11
14.9 Sensor Unit .............................................................................................................................14-12
14.10 Board Unit ...............................................................................................................................14-13
14.11 Accessories.............................................................................................................................14-15

CS2000-UM-251-9370 1-1
1. OVERVIEW
1. OVERVIEW
1.1 Features
600-dpi optical resolution for high-precision image scanning
Scanning with an optical resolution of 600 dpi allows even complex and difcult-to-scan documents,
such as CAD drawings, electronic les, and mapping data to be scanned rapidly and with high precision.
Scanning Master 21+ (scanner software included as a standard accessory) can be used to adjust the
resolution in ve levels (200 dpi to 800 dpi) to suit the scanned document.
Compatible document widths range from 210 mm to 1000 mm
Compatible with document sizes from ISO A4 up to ANSI E
Capable of color and grayscale scanning
Capable of scanning in color (24-bit color, 8-bit color) or grayscale (256 shades)
Capable of reading long-axis data
Long-axis images are supported with a maximum length of approximately four meters each.
Compact and lightweight design
A compact design was achieved by using a document travel system that employs closely-adhered image
sensors in the sensor unit (ve rows arranged in a zigzag pattern).
Image-processing functions
Use of the scanning software provided lets you set image-processing functions for the scanning of a
document.
Interface
The interface conforms to the SCSI-2 standard.

CS2000-UM-251-9370 1-2
1. OVERVIEW
1.2 Standard Specifications
Item CS2000
Document size ANSI E to ISO A4 (all sizes centered)
Effective scanning
area
Width : 914 mm (max. 1000 mm)
Length : 1189 mm (capable of long-length scanning) *1
Document thickness 1.5 mm or less (including the carrier sheet)
Optical resolution 600 dpi
Interpolated resolution Main scanning direction : 200 dpi, 300 dpi, 400 dpi, 600 dp
Secondary scanning direction : 200 dpi, 300 dpi, 400 dpi, 600 dpi,
800 dpi
Main scanning system Contact image sensor system (Five A4 sensors in a zigzag pattern)
Sub scanning system Document travel (sheet through) system
Scanning speed*2 Monochrome: Approx. 1.3 ms/line
3.8 inch/s at 200 dpi
1.9 inch/s at 400 dpi
1.26 inch/s at 600 dpi
Color: Approx. 3.9 ms/line
1.28 inch/s at 200 dpi
0.64 inch/s at 400 dpi
0.42 inch/s at 600 dpi
Scanning precision *3 ±0.1%, ±5 pixels
Gradation Monochrome: Bilevel, intermediate tones (dithering, error diffusion)
Gray : 256 shades
Color: 8-bit, 24-bit
Light source LED (RGB)
Interface SCSI-2
Output Image data
Rated power supply 100 to 120/200 to 240 VAC ±10%, 50/60 Hz
Operating
environment
Temperature: 10˚C to 35˚C, Humidity: 35% to 80% RH (no condensation)
Power consumption 125 VA or less
External dimensions
(approx.)
1205 X 1020 X 600 mm (WXHXD) (including stand)
Weight Approx. 48 kg (including stand)
Standards UL, FCC Class A (USA); CE Marking (EU)
* 1 Documents up to approximately 16 m in length (driver software limitation) can be scanned. However, the actual
document length that can be scanned is limited by the available memory (hard disk or other data storage device)
of the computer to which the scanner is connected, and also by the grade of the medium being scanned.
* 2 Excluding data-transfer time
* 3 Notes on scanning precision
Scanning precision may vary slightly depending on the grade and thickness of the medium being scanned, and on
the operating conditions. The precision figures above were measured under the operating conditions described
below.
• Test chart used : Mylar sheet #200
• Guaranteed precision conditions : Temperature 20 ±3˚C; humidity: 60% ±10% RH
• Guaranteed scanning precision range : 1189 mm x 841 mm
• Document hold-down unit setting : Standard

CS2000-UM-251-9370 1-3
1. OVERVIEW
1.3 External View
External Dimensions of the CS2000
156
1020
1205 600
Unit : mm
Dimensional precision error : ±5 mm

CS2000-UM-251-9370 1-4
1. OVERVIEW
1.4 System Requirements
The minimum system requirements for running the scanner’s hardware and software are listed below.
Operating system: Windows 95/98/Me, Windows NT 4.0, Windows 2000 or later
CPU: Pentium 133 MHz or higher
Memory: 32 MB or more
Monitor: 1024 × 768 pixels, 256 colors or more
Enough disk space to store data
Mouse
SCSI board by Adaptec
Recommended environment
For binary monochrome data
CPU: Pentium 200 MHz or higher
Memory: 64 MB or more
SCSI board by Adaptec (PCI type)
For grayscale data
CPU: Pentium III 550 MHz or higher
Memory: 256 MB or more
Monitor: 1024 × 768 pixels, High Color or higher resolution
SCSI board by Adaptec (PCI type)
For 8-bit color data
CPU: Pentium III 866 MHz or higher
Memory: 512 MB or more
Monitor: 1024 × 768 pixels, True Color or higher
SCSI board by Adaptec (PCI type)
The system conguration should correspond to the recommended specications listed here, in order to ensure the
optimum capabilities of the scanner.
Use with a system conguration below the recommended specications will affect the scanning speed and prevent
the scanner from operating to its specied capabilities.
To edit an A1-size or larger grayscale document with a resolution of 400 dpi or higher, or an 8-bit color document,
you may need more than the recommended memory sizes above. Depending on the type of document, you may not
be able to scan in the document even if you increase the memory size.

CS2000-UM-251-9370 2-1
2. PART NAMES AND FUNCTIONS
2.1 Part Names and Functions
Front View
Cover sensor
Paper sensor
Top cover
Caster
Control panel
Stand
Top cover
Opening the top cover allows the document hold-down unit to be removed.
Cover sensor
This senses whether the top cover is open or closed, and interrupts scanner operation if the top cover is
opened during operation.
Stand
The stand unit is assembled for mounting of the scanner unit.
Casters
Release the lock on the casters to allow the unit to be moved.
Paper sensor
This senses whether a document is present in the scanner.
Do not touch the cover sensor or paper sensor.

CS2000-UM-251-9370 2-2
2. PART NAMES AND FUNCTIONS
Control panel
POWER LED
Unlit : Is unlit while the scanner is turned off.
Lit : Lights (green) when the scanner is turned and remains lit while it is operating normally.
PAPER LED
Unlit : Normal status (Local status).
Lit : Lights (green) when the scanner enters Scan READY status.
Flashing : Flashes (green) while image data is being scanned.
ERROR LED
Lit : Lights (red) to indicate a hardware error.
Flashing : Flashes (red) when a document is detected during the self-test when the scanner is turned on or
when the scanning is suspended by pressing the STOP key.
Unlit : Normal status
FORWARD key
Advances the document into the scanner. When this key is pressed in Scan READY status, the Scan
READY status is cancelled and the document is ejected toward the rear of the scanner.
REVERSE key
Feeds the document toward you. When this key is pressed in Scan READY status, the Scan READY status
is cancelled and the document is ejected toward the front of the scanner.
STOP key
Compulsorily stops scanning of the document.

CS2000-UM-251-9370 2-3
2. PART NAMES AND FUNCTIONS
Rear View
SCSI-ID switches
DIP switch
Power switch
AC line inlet
SCSI connectors
SCSI-ID switches
Used to specify the ID numbers of the SCSI interfaces.
DIP switch
Used to set the scanner’s functions.
Power switch
Controls the on/off status of the power supply to the scanner.
AC line inlet
Connect the power cord’s female plug here.
SCSI connectors
Used to connect SCSI interface cables. The two connectors are connected in parallel inside the scanner.

CS2000-UM-251-9370 3-1
3. PREPARING TO OPERATE THE SCANNER
3.1 Assembling the Scanner
Assemble the stand before mounting the scanner unit. Eight bolts and an Allen wrench are provided with the
stand.
(1) Using the four bolts, loosely attach the center bar (3) to side stay R (1) and side stay L (2).
(1)
(2)
(3)
Attach the center bar loosely. Tighten the bolts securely after the scanner unit has been mounted on the
stand.

CS2000-UM-251-9370 3-2
3. PREPARING TO OPERATE THE SCANNER
(2) Hold the scanner unit by the side covers on both sides, and mount the scanner so that the positioning
pins on the stand align with the positioning holes on the underside of the scanner. Secure using the four
bolts.
Holding the scanner by the rear part of the top cover may cause damage to the scanner or to the person doing the
installation. Always hold the scanner by the side covers, at the positions indicated by the shaded circles in the fig-
ure below.
Positioning pin
Side cover
Side cover
(3) Fully tighten the four bolts on the center bar to secure the side stays (see the diagram for step (1)).
(4) Before beginning scanner operation, be sure to remove the plastic sheet from the bottom of the document
hold-down unit. Please refer to Section 8.2 “Document Hold-Down Unit” for the removal and mounting
procedures.

CS2000-UM-251-9370 3-3
3. PREPARING TO OPERATE THE SCANNER
3.2 Connecting the Scanner to a Power Supply
Insert the female plug of the power cord provided into the scanner’s AC line inlet and insert its male plug into
an electrical socket supplying AC voltage.
Check that the scanner’s Power switch remains in the Off position until the connection of both the power cord
and SCSI interface cable has been completed.
Ensure that the scanner’s Power switch is in the Off position.

CS2000-UM-251-9370 3-4
3. PREPARING TO OPERATE THE SCANNER
3.3 Connecting the SCSI Cable
Obtain a SCSI interface cable (optional) that is compatible with the computer to be connected.
Compatible Cables
The cable must have half-pitch pin-type 50-pin connectors.
To connect multiple SCSI devices in a daisy-chain* arrangement, the total cable length must be no longer
than three meters.
Among Graphtec cables, the SC0006 or SC0006 2M model can be used (depending on the shape of the
connector on the computer’s SCSI interface board).
* Daisy-chain: A method for connecting peripheral devices in a ring arrangement
The use of an incompatible cable may cause the scanner to malfunction or damage the interface.
If the cable comes into contact with the document, use the cable clamp provided as a standard accessory to fasten
the cable to the underside of the scanner.
Connection Procedure
(1) Insert one end of the SCSI cable’s into one of the two SCSI connectors on the scanner’s rear panel.
* Firmly insert the cable’s connector into the scanner’s SCSI connector until it locks into place.

CS2000-UM-251-9370 3-5
3. PREPARING TO OPERATE THE SCANNER
(2) If the SCSI cable comes into contact with the document, use the cable clamp provided as a standard
accessory to fasten the cable to the underside of the scanner, at either the left or right side.
SCSI cable
Cable clamp
(3) Insert the cable’s other end into the computer’s connector.
(4) If this scanner will be a terminal within the network conguration, set Bit 4 of the DIP switch on the
scanner’s rear panel to enable the internal terminator function.
1 2 3 4
4 3 2 1
ON
DIP switch’s bits
ON
OFF
Usually OFF
Terminator Disable
Enable
Turn off the scanner before changing a DIP switch setting.
The scanner comes with the Terminator setting of “Enable” as its factory-preset default.

CS2000-UM-251-9370 3-6
3. PREPARING TO OPERATE THE SCANNER
3.4 Setting the ID Number
The SCSI bus is designed to allow up to eight devices to be connected at the same time. As a result, a single
computer can be used to exchange data with multiple SCSI devices, including a scanner and disk drives.
Each device must be assigned an ID number (device number) to enable the devices to be distinguished on
the SCSI bus.
Using a mechanical pencil or other pointed object at the SCSI-ID switches on the scanner’s rear panel, set
the scanner’s ID number that corresponds to the host computer’s applications.
2
3
2
1
• The ID can be set from 0 to 7.
• The scanner’s default ID number is 2.
If the host computer cannot communicate with the scanner, rst check that both of the SCSI cable’s
connectors are rmly inserted. Note that the host computer and scanner cannot communicate if the scanner
shares the same ID as another device or its ID does not correspond to the host computer’s applications.
The ID number for the host computer is normally 7.
Turn off the scanner before setting the SCSI-ID number.
The scanner comes with the default SCSI-ID number of 2.

CS2000-UM-251-9370 3-7
3. PREPARING TO OPERATE THE SCANNER
3.5 Turning the Scanner On or Off
Whenever the scanner’s Power switch is turned on, the POWER, PAPER, and ERROR lamps on the control
panel light up. When the scanner has been initialized, the POWER lamp lights up.
When resetting the scanner by turning it off then back on again, wait at least three seconds before turning it back
on.
3.6 Attaching the Document Support Wires
The document support wires should be attached when carrier sheets or heavy documents are scanned.
Document support wires

CS2000-UM-251-9370 3-8
3. PREPARING TO OPERATE THE SCANNER
Attaching the document support wires
(1) Insert one end of the document support wire provided into the slot at the rear of the scanner.
(2) Squeeze the document support wire, and insert the other end.
(3) Press down on both sides of the document support wire.
(4) Attach the other document support wires in the same manner.
Detach the document support wires when moving or packing the scanner. Squeeze softly and lift them to detach.
Other manuals for CS2000
1
Table of contents
Other GRAPHTEC Scanner manuals

GRAPHTEC
GRAPHTEC CS500 User manual

GRAPHTEC
GRAPHTEC CS2000 User manual

GRAPHTEC
GRAPHTEC SK200-09 User manual

GRAPHTEC
GRAPHTEC CSX500 SERIES User manual

GRAPHTEC
GRAPHTEC CS500 User manual

GRAPHTEC
GRAPHTEC CSX300-09 User manual

GRAPHTEC
GRAPHTEC CS400 User manual

GRAPHTEC
GRAPHTEC CSX500 SERIES User manual

GRAPHTEC
GRAPHTEC CS1000EV User manual

GRAPHTEC
GRAPHTEC CS510 User manual