manuals.online logo
Brands
  1. Home
  2. •
  3. Brands
  4. •
  5. Green Brook
  6. •
  7. Switch
  8. •
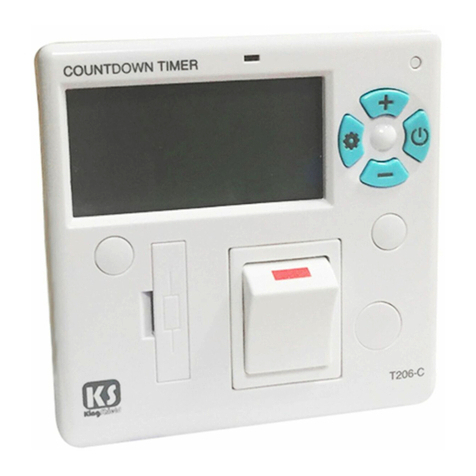
  9. Green Brook t205-c User manual

Green Brook t205-c User manual

Installation / perating Instruction
for 7 day Fused Timer Spur Switch
- Model: T205-C
PERATING INSTRUCTI NS
‘ N’ Indicator Programme
Button
Time
Button
Fuse
Holder
Front Cable
Entry
Double Pole
Isolation Switch
Reset
Button
‘+’ and ‘-’
Button
Dia.1
Dia.2
Dia.3
Dia.4
SETTING THE DAY F WEEK
AND TIME
Note: Time setting is 24 hour mode.
1. Press the ‘TIME’ button for 2 seconds. Day of
week will start flashing (example shows 7 Day
setting Dia.3)
2. Use the ‘+’ or ‘-’ button to change the
display to the correct day of the week.
3. Press the ‘TIME’ button and the hour digits will
flash.(Dia.4)
4. Use the ‘+’ or ‘-’ button to set the hours.
5. Press the ‘TIME’ button and the minute digits will
flash. (Dia.5)
6. Use the ‘+’ or ‘-’ button to set the minutes.
7. Press the ‘TIME’ button to save the setting
and return to operating mode.
RESET THE DEVICE
1. To fully reset this unit press the recessed
‘Reset’ button with a insulated blunt probe.
2. A full display will show when the battery is
charged, then revert to the default screen
( : ). No display indicates that the
battery requires charging for a minimum 3
hour period. (Dia.2 - Full display)
Please read the instructions fully before attempting installation.
IMPORTANT
This unit should be installed by a competent person
in accordance with the current IET Wiring Regulations.
If in doubt consult a qualified electrician.
• Timer Spur must not be mounted on a flammable surface.
• Ensure that the Timer Spur does not come into contact with any
combustible materials such as towels or bedding.
• Ensure at least a 300mm air space is allowed around the Timer Spur
switch.
• A 12mm pattress is provided if extra spacing is required.
• Twin Earth terminal provided.
Note: Where earthing termination is required this must be connected to
a earth terminal as provided in a metal back box.
Dia.22
SUMMER M DE
1. In operating mode, pressing the ‘PR G’
and ‘TIME’ (combination of buttons) to set
the summer mode. The clock will forward
on one hour (showing the icon Dia.22).
Note: Battery is fully charged after 14.5 hours.
The non-replaceable, fully charged battery, will retain any program information
for a period of 700 hours should their be power loss or the unit switched off with
the double pole isolation switch.
Display is not visible during this period unless a button is pressed.
S
Note: Pressing the ‘PROG’ and ‘TIME’ (combinations of buttons) to exit the summer mode.
WIRING DIAGRAM
BATTERY BACK UP/LIFE
Display: LCD
Working Voltage: 230V-50Hz
Rated Impulse Voltage: 2,500V
perating Temp: -5°C to +40°C
peration: Integrated Control
Max Load:
Resistive - 13A
Inductive - 6A
Isolation: Double Pole Isolation
Switch
Conforms to: BS 1363-4:1995+A4:2012,
BS EN 60730-1:2011,
BS EN 60730-2-7:2010.
Working Environment: Indoor use only
Pollution Degree: 2
TECHNICAL INF RMATI N
(Example: the clock will change to ‘11.00’, if the time is ‘10.00’ now
press “PR G’ and ‘TIME’.)
T205
Supply Load
TIMER
13A Fuse
Isolation Switch
L
NN
L
Issue no: 704698
WEST R AD . HARL W
ESSEX . CM20 2BG . UK
info@greenbrook.co.uk
www.greenbrook.co.uk
GUARANTEE
our GreenBrook Fused Timer Spur Switch
is guaranteed for 1 year from
the date of purchase.
This is in addition to your statutory rights.
PLEASE KEEP THESE INSTRUCTI NS
SAFE F R FUTURE REFERENCE
Dia.12
Dia.13
Dia.14
Dia.15 Dia.16
Dia.17 Dia.18
Dia.19
Dia.20 Dia.21
M DIFYING R ADDING
NEW PR GRAMMES
1. Press ‘PR G’ button and hold for approx 2
seconds, the display will show: (Dia.14).
2. Use ‘+’ or ‘-’ button to select the day
grouping which requires modifying or a new
day grouping for a new programme.
3. For modification press ‘PR G’ repeatedly to
arrive at the programme time requiring
modification then use ‘+’ or ‘-’ button to
make the change. Press ‘PR G’ repeatedly
again to arrive at the next time requiring
modification and use ‘+’ or ‘-’ button to
make the change.
NE AND TW H UR B ST
1. Pressing ‘-’ (Boost) once in normal
operating mode turns on for 1 hour period
(Dia.19).
2. Pressing ‘-’ (Boost) twice turns output on a
for 2 hour period (Dia.20).
3. Pressing ‘-’ (Boost) button three times
cancels the (Boost) N period (Dia.21).
3. Press ‘TIME’ button then the icon ‘M N’ will
be flashing (Dia.12).
4. Use ‘+’ or ‘-’ button to select ‘TUE’, then press
‘TIME’ button twice to copy the data. The
display will show: (Dia.13).
(Example shown for copying data TUE to THU)
When the N/ FF times for WED are set, the
display will show ‘THU’:- (Dia.11).
Dia.11
PERATING M DE
Advance to next program
1. Use’+’ button to set the output mode.
N - utput to permanently N and omit the program (Dia.15).
FF - utput to permanently FF and omit the program (Dia.16).
N AUT - utput to N until next program FF period (Dia.17).
FF AUT - utput to FF until next program N period (Dia.18).
Note: If ‘+’ or ‘-’ button is held for more than 2
seconds, the selected time digit will add or
decrease quickly (about 5 steps per second), if
no key is pressed within 60 seconds the display
will return to operating mode.
PR GRAMMING THE
‘ N’/ FF’ TIMES
1. Press the ‘PR G’ button and hold for 2
seconds, after 2 seconds the display will show:
(example shows 7 Day setting Dia.6)
3. nce the desired day grouping is selected,
press ‘PR G’ button to move onto
programming N/ FF times. Display will
show PR G 1 N, and the hour digits flashing
(24 hour clock) (Dia.7).
2. Use the ‘+’ or ‘-’ button to change the day
grouping (PR G) at the top of the display. This
will step through the following programming options:
7 DAY - M N TUES WED THU FRI SAT SUN
All of them have the same programming.
R
5 DAY - M N TUE WED THU FRI
Are grouped as one group, and they will all have the same
programming. SAT and SUN will be programmed individually.
R
INDIVIDUAL DAY -
Each day will have its program set individually. MON followed
automatically in programming by each of the other days. To copy
times set for an individual day to another day (e.g. copy Sat set
times to Sun), please see PROGRAM
DUPLICATION below.
4. Use the ‘+’ or ‘-’ to set the hours and the
‘PR G’ to change between hours and
minutes. Followed by ‘+’ or ‘-’ again to set the
minutes. Press ‘PR G’ to change to program
FF time. (Dia.8)
5. Use the ‘+’ or ‘-’ to set the FF time in the
same way as for PR G 1 N time.
6. Press ‘PR G’ to scroll through program 2 N,
program 2 FF, program 3 N, program 3 FF,
program 4 N, program 4 FF, adding in times
as required. If you wish to omit programmes
just leave dashes in that N/ FF location.
Press ‘PR G’ to move to the next linked day
(SAT follows the 5 day group automatically)
(Dia.9).
7. Set N/ FF times as before. Press ‘PR G’ to
move to the next linked day (SUN follows the
SAT automatically) (Dia.10).
Dia.5
Dia.6
Dia.7
Dia.8
Dia.9
(Example shown is for 5 + 1 + 1 + day program)
Dia.10
8. Set N/ FF times as before.
9. nce program 4 FF has been set, press
‘PR G’ to exit program mode and
return to operating mode.
PR GRAM DUPLICATI N
There are two copy functions: copy one day to another, or copy one day to all
other days. When programming for ‘Individual Day’ or ‘5 Day’ you can copy
the programmed data from one day to another day.
1. When setting N time of ‘PR G’ 1, press ‘TIME’ button and then use ‘+’ or ‘-’
to select the day you want to copy.
2. Press ‘TIME’ button twice to copy the data of the selected day to current
day.
r press ‘TIME’ button for 2 seconds to copy the data of the selected day to
the following days.
Note: Only ONE of the following
options can be used at one time.

Other Green Brook Switch manuals

Green Brook PowerBreaker ProteKt PSW1G2W Manual

Green Brook

Green Brook PowerBreaker ProteKt PSW1G2W Manual

Green Brook T41D-C Manual

Green Brook

Green Brook T41D-C Manual

Green Brook PowerBreaker PROTEKT User manual

Green Brook

Green Brook PowerBreaker PROTEKT User manual

Green Brook TLS Manual

Green Brook

Green Brook TLS Manual

Green Brook KingShield T206-C User guide

Green Brook

Green Brook KingShield T206-C User guide

Green Brook WNBP-C User manual

Green Brook

Green Brook WNBP-C User manual

Green Brook OD100 User manual

Green Brook

Green Brook OD100 User manual

Popular Switch manuals by other brands

Lightware MMX4x2-HT200 user manual

Lightware

Lightware MMX4x2-HT200 user manual

Westermo RedFox Series user guide

Westermo

Westermo RedFox Series user guide

Honeywell CENTRAL HUB Quick reference guide

Honeywell

Honeywell CENTRAL HUB Quick reference guide

NETGEAR DS104 brochure

NETGEAR

NETGEAR DS104 brochure

DeLOCK 64207 user manual

DeLOCK

DeLOCK 64207 user manual

Aruba AT-8400 SERIES user guide

Aruba

Aruba AT-8400 SERIES user guide

F&F AZH-LED manual

F&F

F&F AZH-LED manual

BayTech DS2-RPC owner's manual

BayTech

BayTech DS2-RPC owner's manual

Enabling Devices 2700 user guide

Enabling Devices

Enabling Devices 2700 user guide

Lutron Electronics Caseta Claro Smart Quick install guide

Lutron Electronics

Lutron Electronics Caseta Claro Smart Quick install guide

Panasonic GA-AS48T installation guide

Panasonic

Panasonic GA-AS48T installation guide

Surecom 824DXFS2B user guide

Surecom

Surecom 824DXFS2B user guide

Kramer WP-20CT user manual

Kramer

Kramer WP-20CT user manual

Teleco TV-INTERNET manual

Teleco

Teleco TV-INTERNET manual

BenQ SP0005 user guide

BenQ

BenQ SP0005 user guide

LEGRAND Plexo 0 698 19L manual

LEGRAND

LEGRAND Plexo 0 698 19L manual

SMC Networks SMCGS26C-SMART - FICHE TECHNIQUE Product overview

SMC Networks

SMC Networks SMCGS26C-SMART - FICHE TECHNIQUE Product overview

GST CAN100H quick start guide

GST

GST CAN100H quick start guide

manuals.online logo
manuals.online logoBrands
  • About & Mission
  • Contact us
  • Privacy Policy
  • Terms and Conditions

Copyright 2025 Manuals.Online. All Rights Reserved.