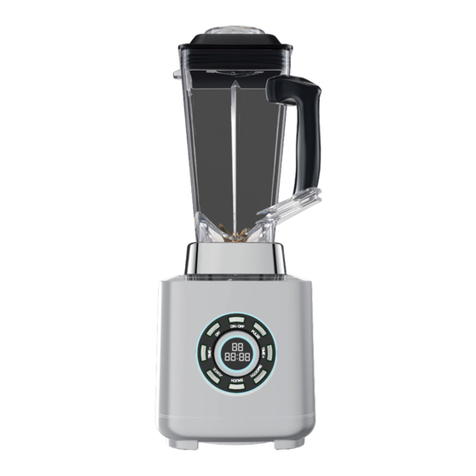
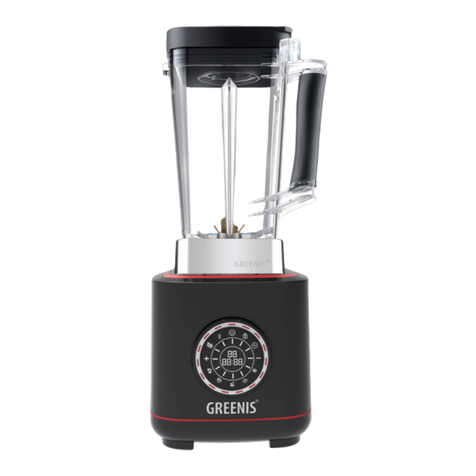
GREENIS FGR-9800 User manual

POWER BLENDER
FGR-9800
Ningbo Greenis Home Appliances Co., Ltd.
www.greenis.com

01 GREENIS POWER BLENDER
WELCOME
GREENIS POWER BLENDER 02
To familiarize yourself with your new Greenis blender, please take the time to read
through this user manual. All content in this manual is for reference purposes only. Its
design, workings and accessories are subject to change without warning due to
continual product development.
We hope you enjoy your experience with Greenis, as you embark on a journey towards
richer nutrition and better health!
TABLE OF CONTENTS
01
02-04
05-06
07-09
10-12
13
14
15
16
Welcome
Important Safeguards
Product Components
Operating Instructions
User Precautions
Cleaning & Maintenance
Product Safety Instructions
Troubleshooting
Product Specifications
IMPORTANT SAFEGUARDS
Read All Instructions.
Please ensure the current, voltage and frequency are in accordance with the standard
in your country.
This appliance is not to be used by persons (including children) with reduced physical,
sensory or mental capabilities, or lack of experience and knowledge, unless they have
been given supervision or instruction.
Close supervision is necessary when any appliance is used by or near children.
To avoid danger of electric shock, please DO NOT immerse the motor base in water (or
any other liquid) or pour water onto the machine.
Please unplug the machine if it is to be in long-time disuse. Unplug from outlet when
not in use, before putting on or taking o parts and before cleaning.
Do not operate any appliance with a damaged cord or plug or after the appliance
malfunctions, or is dropped or damaged in any manner. Contact customer service for
information on examination, repair, or adjustment.
It may cause fire, electric shock or human injury if using unauthorized parts & accesso-
ries or refitting machine without authorization.
DO NOT leave the machine unattended when it is in use.
When using the machine please ensure water or any other liquid in the jar does not
exceed maximum scale marked on the jar surface.
DO NOT operate the machine with no ingredient or water inside the jar.
Please keep the machine away from intense heat. DO NOT place it on a cloth in order
to prevent damage to parts.
To ensure user safety, please read through the manual before use and keep the manual
where it is easily accessible. This product is intended for household use only. Please
follow all operating instructions closely.

03 GREENIS POWER BLENDER GREENIS POWER BLENDER 04
SAVE THESE INSTRUCTIONS
WARNING:
Electric Shock !
DO NOT use plug adapter or extension cord.
CAUTION:
Failure to follow safety and use instructions shall void the product warranty and
may cause severe damages or injuries.
This product is intended for indoor use only. Do not use outdoors.
DO NOT use the appliance for more than 30 minutes continuously as the motor may
overheat; if running a long cycle, please pause for 45 minutes to let the motor cool
down after use.
To reduce the risk of injury, never place cutter-assembly blades on base without jar
properly attached.
Blades must be assembled, disassembled and changed by the manufacturer, its
service agent or similarly qualified persons in order to avoid a hazard.
The use of attachments, including canning jars, not recommended by the manufactur-
er may cause a risk of injury to persons.
Do not let cord hang over edge of table or counter.
Keep hands and utensils out of container while blending to reduce the risk of severe
injury to persons or damage to the blender. A scraper may be used but must be used
only when the blender is not running.
Be careful when handling the sharp cutting blades, emptying the jar and during cleaning.
Be careful if hot liquid is poured into blender as it can be ejected out of the appliance
due to a sudden steaming.
Switch o the appliance and disconnect from supply before changing accessories or
approaching parts that move in use.
Please secure the lid and measuring cup in place before use. Always operate blender
with cover in place. Do secure the lid when making hot drinks (soups) and start with
low speed as otherwise high speed may lead to liquids splashing to cause injuries.
The motor will automatically stop when encountering work overload as the interior
temperature detection system is activated to protect the machine from risk of burning
out. It can only resume work after cooling o for 45 minutes.
Blades are sharp. Handle carefully. Please be careful when cleaning.
Do avoid contact with any moving part.
The product is fitted with a tamper tool and please ensure you use the tamper tool
when the lid is secured on the jar.
DO NOT place any other implement like spoons, forks and knives into the jar as they
may cause damage to blades and other parts.
Flashing light indicates ready to operate. Avoid inadvertent contact with the touch
screen.

05 GREENIS POWER BLENDER GREENIS POWER BLENDER 06
PRODUCT COMPONENTSPRODUCT COMPONENTS
01. Measuring cup
02. Lid
03. Jar set
04. Control panel
01
02
03
04
05
07
08
06
05. Motor base
06. Speed dial
07. Tamper
08. Power cord
5T5LL
:OSK 9VKKJ
9SUUZNOK 0[OIK .UZ*XOTQ 6[RYK)RKGT9G[IK

07 GREENIS POWER BLENDER GREENIS POWER BLENDER 08
OPERATING INSTRUCTIONS
On/Off
“ ”
Tap “On/O” button to start working after selecting pre-programmed cycle, and tap it
to stop during work.
There are 10 speed variables displayed on the panel. When the blender is working at a
specific speed, the light for that speed and for those below will be on, e.g. when the
blender is working at speed 2, light for speed 1 and speed 2 will be on.
Time progress will be displayed in percentage of the total work time that it will take for
a cycle. The minimum display unit is 10%.
When the blender has progressed the 11% - 19% (e.g. 15%) of the cycle, the light for 10%
will be on, and light for 20% will be flickering, and so on.
Continuous work time is no more than 10 minutes.
Rotating the Speed Dial, the blender will start working at selected speed. The longest
continuous working time is 10 minutes.
Rotate the Speed Dial clockwise to increase speed (maximum speed 10) and rotate
anti-clockwise to decrease speed. The blender will stop working when speed is
decreased to 0.
Hold “Pulse/Clean” button to keep working at the highest speed 10. Release the button
to stop.
The blender has Bluetooth function. Check the connection status in the GREENIS APP.
Search “GREENIS” in Apple Store or Google Play. Download and install GREENIS app to
your mobile phone.
Open the app, select “Recipes” at the bottom of the home page. Select the desired
recipe.
Prepare food ingredients as instructed, put ingredients into the blend jar, close jar lid
properly and put the jar on motor base.
Turn on Bluetooth on your phone (go to next step if it’s already on).
Get back to home page of the app. Select “Kitchen” at the bottom of the page.
Click searching button to search blenders available and click “Connect” to connect the
blender to your phone.
Get back to the “Recipes” section, search and go to the recipe that you selected before.
Click download button at the upper right corner of the recipe page to download the
program to your blender.
Tap “On/O” button at the blender to start processing as selected recipe program.
You can see the progress in the app and the blender will stop automatically when the
program is completed.
Time Display
Speed Dial Mode
Pulse/Clean
Bluetooth
GREENIS app Instruction
Speed Display

Icon
Smoothie
Hot drinks
Juice
150g Fresh sliced pineapple
500g Ice grains
300ml Pineapple juice
150 g soaked soybeans (for better flavour
soaked in boiling water for 0.5 h in
advance)
1/4 Cucumber 1 Celery 1 Apple
600 ml water 9 Ice cube
Cycle Recipe
09 GREENIS POWER BLENDER GREENIS POWER BLENDER 10
About measuring cup, lid and seal ring:
Place the measuring cup onto the lid (place measuring cup through the central opening
of lid and twist clockwise to fasten) and place the lid onto the jar securely.
Make sure that the machine is not running before putting the tamper.
The seal ring around the lid is detachable. When cleaning remove seal ring from the lid
to thoroughly clean away residues stuck inside the seal ring and the lid.
CAUTION:Make sure the measuring cup is securely placed through lid when blending
hot liquids.
Make sure the lid is securely placed on the jar if tamper is to be used. Shut down the
blender before placing tamper through the hole of lid, in case of food splashing to cause
injures.
DO NOT use other implements to replace the tamper if it is missing, which may other-
wise cause injuries. Please contact local dealer to purchase replacement part.
Sauce
OPERATING INSTRUCTIONS
Select desired pre-programmed cycle and tap “On/O” button to start working as per
selected cycle. The time display will show the time progress and speed display will show
the real-time speed at which the blender is working. The machine will automatically stop
once the time display shows 100% and the cycle is completed.
Warning!
USER PRECAUTIONS
Rotating Blades Can Cause Severe Injury.
DO NOT put hands, spatulas, utensils, etc. into the jar while the blender is running or
while the jar is on the base.
Dierent tampers and lids match with dierent jar styles, types and sizes. Use the
tamper that is supplied with your jar and blender.

11 GREENIS POWER BLENDER GREENIS POWER BLENDER 12
Other important precautions
USER PRECAUTIONS
Blending dry ingredients for a long time may cause overheating and trigger the
thermal protection mechanism built in the motor. To avoid this, start with low speed
and then adjust to higher speed if the ingredients are very thick or dry. If it’s still a
problem, then reduce the amount of ingredients or add some liquid to decrease
viscosity.
The motor will stop working when overloaded to protect the motor, it will work again
once cooled. Should the motor overheat unplug the blender and cool down the
motor for 45 minutes in a cool place or in front of a fan.
While the blender is running, ensure the lid and measuring cup are fastened tightly
to avoid splashing.
DO NOT put hands, spatulas, utensils, etc. into the jar while the blender is running or
while the jar is on the base to reduce the risk of severe injury to persons or damage
to the blender.
When making hot drinks, ensure the lid and measuring cup are fastened tightly and
start the speed from low and then to higher speed.
When making sauces (like hummus, jam, peanut butter, sesame paste, etc.), nut
butters, or flours, the volume of ingredients should be between 3 and 5 cups; DO
NOT operate continuously for a long period of time, or your ingredients may devel-
op a scorched flavor because of overheating. Too many ingredients may cause over-
load and trigger the motor’s thermal protection.
Place liquid and soft ingredients in the blender before hard ones like ice cubes.
DO NOT remove the jar until the blades come to a complete stop. Removing it
sooner may cause damage to the drive socket.
Stop the machine if there is a scorching smell. It may be caused by overload of ingre-
dients or if the blades and drive socket are not fully engaged
It is recommended to operate the machine no more than 10 minutes at a time.
Always disconnect the appliance from the supply if it is left unattended and before
assembling, disassembling or cleaning.
This appliance shall not be used by children. Keep the appliance and its cord out of
reach of children.
Appliances can be used by persons with reduced physical, sensory or mental capa-
bilities or lack of experience and knowledge if they have been given supervision or
instruction concerning use of the appliance in a safe way and if they understand the
hazards involved.
Children shall not play with the appliance.

13 GREENIS POWER BLENDER GREENIS POWER BLENDER 14
CLEANING & MAINTENANCE
Please ensure the blender is unplugged before cleaning or maintenance.
Attention:
Warm Prompts:
Simple cleaning:
Attention: DO NOT immerse jar into water
1. Add 750 ml clean water and 1-2 lemon slices, tap button “Pulse/Clean” .
2. Pour away dirty water and repeat step no.1.
3. Pour away dirty water and wipe it clean with cloth. Dry the jar in a drafty place.
DO NOT immerse motor base or power cords into water or any other liquid.
Use soft cloth or sponge to wipe clean the surface of jar. Remove the measuring cup and
seal ring before proceeding to cleaning.
Rinse the jar with clean water after each use. Or you can add 2 cups of clean water (1 L)
into the jar, secure the lid and press “Pulse/Clean” button without release to clean.
Lay down the jar horizontally in a drafty place or place it upside down to let it dry natural-
ly. Do not immerse it entirely in water.
DO NOT rinse motor base with clean water. Use soft cloth to clean instead.
When drying the machine by placing it in an upside-down position, please wipe away
leftover water at the bottom of the jar. Keep it away from the sink in case of any water
dripping into the bottom of the jar and potentially rusting interior key components like
metal bearing.
To thoroughly clean the inside of the jar and leftover dirt on the blades and ensure dura-
bility of jar and blades, it is recommended to add some clean water and lemon into jar,
secure the lid and press button “Pulse/Clean” to quick clean for 2-3 times. Pour away
water and repeat the step.
PRODUCT SAFETY INSTRUCTIONS
Correct way of using tamperIncorrect way of using tamper

15 GREENIS POWER BLENDER GREENIS POWER BLENDER 16
TROUBLESHOOTING Above are general problems users may encounter and possible solutions they can adopt.
For any other problems, please contact your local customer service. DO NOT open the
machine and attempt to repair by yourself.
Attention:
PRODUCT SPECIFICATIONS
Model
Voltage/Frequency
Rated power
Product Dimensions
FGR-9800
120V a.c. 60Hz
1400 W
192 (L) *206 (W) *453 (L) mm
The unit does not work after being
connected to power (no display on the
control panel).
The jar is not securely placed on the
motor base or the lid is not in place.
Remove the jar or lid and place them properly.
Abnormal noise during the operation.
1. Either the jar or mat is not
correctly assembled. Or food
residue/foreign objects are stuck on
the drive socket.
2. Tamper tool is not used when
blending large chunks of ingredient or
overly thick ones.
1. Switch o the machine and remove the jar. If there are
any foreign objects stuck on the mat or drive socket,
clean them out and place the jar back in position again.
2. Use the tamper supplied with the machine.
Child lock cannot be unlocked. Or
unresponsive touch buttons.
1. Moisture entered motor base when
motor base was cleaned with a wet
cloth or sponge.
2. Two buttons touched simultaneously.
3. Caused by capacitive interference
from other sources.
1. Wipe dry the touch panel.
Let it fully dry in an airy place.
2. Release one button (only touch one button at a time).
3. Unplug the machine. Plug in again and tap “On/O”
button to restart.
The machine suddenly stops during the
operation.
1. The lid is blown out by the food.
2. The power cord comes loose from socket
located on the back of the motor base.
3. The power plug is not properly
inserted in the power outlet.
1. Place the lid back in position and restart the machine.
2. Firmly press the power cord into the socket located
on the back of the motor base.
3. Firmly press power plug into the power outlet to
secure.
Bluetooth cannot be connected.
1. The smartphone’s Bluetooth is not
activated.
2. It is out of range.
1. Try to activate smartphone’s Bluetooth again.
2. Place the smartphone within 3 meters of the machine.
1. The LCD display indicates E1, E2, E3, E4.
E1: motor overheating.
E2: motor is “locked up” (not turning).
E3: motor overloading (over-current).
E4: motor’s speed signal is interfered.
When the LCD display indicates E1, cool o the machine
for 45 minutes.
When the LCD display indicates E2 or E3, remove big
chunks of ingredients that clog the blades. Then chop
big chunks into smaller pieces instead and put them
back into the jar.
When the LCD display indicates E4, re-connect the
machine to power and restart.
Fault Possible Cause Possible Solution


WEEE Correct Disposal of this product
This marking indicates that this product should not be disposed with other household wastes
throughout the EU. To prevent possible harm to the environment or human health from
uncontrolled waste disposal, recycle it responsibly to promote the sustainable reuse of
material resources. To return your used device, please use the return and collection system or
contact the retailer where the product was purchased, They can take this product for
environment safe recycling.
Warning: Changes or modifications to this unit not expressly approved by the party responsible for compli-
ance could void the user’s authority to operate the equipment.
Note: This equipment has been tested and found to comply with the limits for a Class B digital device,
pursuant to Part 15 of the FCC Rules.
These limits are designed to provide reasonable protection against harmful interference in a residential
installation. This equipment generates, uses and can radiate radio frequency energy and, if not installed and
used in accordance with the instructions, may cause harmful interference to radio communications. Howev-
er, there is no guarantee that interference will not occur in a particular installation. If this equipment does
cause harmful interference to radio or television reception, which can be determined by turning the equip-
ment o and on, the user is encouraged to try to correct the interference by one or more of the following
measures:
●Reorient or relocate the receiving antenna.
●Increase the separation between the equipment and receiver.
●Connect the equipment into an outlet on a circuit dierent from that to which the receiver is connected.
●Consult the dealer or an experienced radio/TV technician for help.
“This equipment complies with FCC RF radiation exposure limits set forth for an uncontrolled environment.
This equipment should be installed and operated with a minimum distance of 20 centimeters between the
radiator and your body.”
17 GREENIS POWER BLENDER GREENIS POWER BLENDER 18
Table of contents
Other GREENIS Blender manuals

GREENIS
GREENIS FGR-8800 User manual

GREENIS
GREENIS F-2010 User manual

GREENIS
GREENIS GR-8880S-1 User manual

GREENIS
GREENIS FGR-8840-4 User manual

GREENIS
GREENIS FGR-8880R-1 User manual

GREENIS
GREENIS FGR-8830 User manual

GREENIS
GREENIS F-2002s User manual

GREENIS
GREENIS FGR-8840 User manual

GREENIS
GREENIS FGR-8880T Series User manual

GREENIS
GREENIS F-9200 User manual