manuals.online logo
Brands
  1. Home
  2. •
  3. Brands
  4. •
  5. Greenway Home Products
  6. •
  7. Water Dispenser
  8. •
  9. Greenway Home Products GACS835 Service manual

Greenway Home Products GACS835 Service manual

Water Technologies
Water Technologies
Water Technolo
g
ies
Installation Instructions & Owner’s Manual
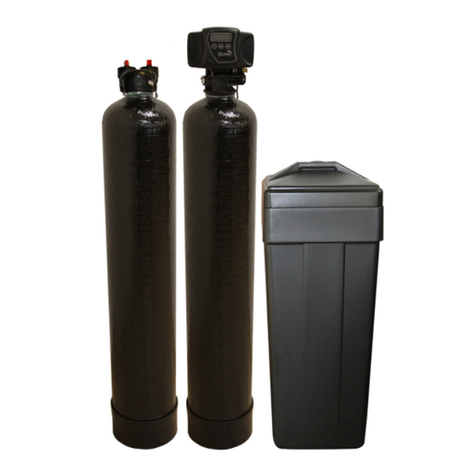
Advance Cabinet Series Softeners
Table of ConTenTs:
Preinstallation Instructions for Dealers Page 1
Bypass Valve Page 1-2
Installation Instructions Page 3-4
Programming Procedures for Water Softeners Page 5-6
Operating Displays for the Softener Page 6-7
Start-up Instructions Page 7-9
Specifications Page 9
Troubleshooting Guide Page 10-11
Replacement Parts Page 12-17
Quick Reference Guide Page Back Cover
Your Water Test
Hardness gpg
Iron ppm
pH number
*Nitrates ppm
Manganese ppm
Sulphur yes/no
Total Dissolved Solids
*Over 10ppm may be harmful for human consumption. Water
conditioners do not remove nitrates or coliform bacteria, this requires
specialized equipment.
Greenway Water Conditioners are precision built, high quality products. These units will deliver
conditioned water for many years to come, when installed and operated properly. Please study this
manual carefully and understand the cautions and notes before installing. This manual should be
kept for future reference. If you have any questions regarding your water conditioner, contact your
local dealer or Greenway Water Technologies at the following:
400 Southgate Dr. Guelph, Ontario, Canada
•Phone:1-888-5-WATER-0 •
Fax:
519-837-8913
1
PreinsTallaTion insTruCTions:
The manufacturer has set the water treatment unit’s sequence of cycles, cycle times, salt dose, exchange
capacity, and gallon capacity. For water softeners the salt dose refill time has been preset.
The dealer
should read this page and guide the installer regarding hardness, day override, and time of
regeneration, before installation:
For the installer
, the following must be used:
 •SetInstallerSettings...Hardness,DayOverride(presetto12days),andTimeofRegeneration
(presetto2:00a.m.)
 •ReadNormal operatiNg Displays
 •Settime of Day
 •Readpower loss & error Display
For the homeowner,
please read operating instructions and displays.
Water Softeners:
Duringoperation,thenormaluserdisplaysaretime of Day or galloNs remaiNiNg before regeneration will
occur.
Days remaiNiNgisanoptionaldisplaybutisnotnormallyused.Eachofthesecanbeviewedbypressing
Next to scroll through them. When stepping through any displays or programming, if no buttons are
pressed within 5-minutes, the display returns to a normal user display. Any changes made prior to the 5
minute time out are incorporated.
ToquicklyexitanyProgramming,InstallerSettings,etc.,pressset clock. Any changes made prior to the
exitareincorporated.Ifdesired,tworegenerationswithin24hoursarepossiblewithareturntothepreset
program. To do a double regeneration:
1.PresstheregeN button once. regeN toDay will flash on the display.
 2.PressandholdtheregeN button for 3 seconds until a regeneration begins.
Oncethevalvehascompletedtheimmediateregeneration,thevalvewillregenerateone more time at the
preset.
byPass ValVe:
Thebypassvalveistypicallyusedtoisolatethecontrolvalvefromtheplumbingsystem’swaterpressure
inordertoperformcontrolvalverepairsormaintenance.The1”fullflowbypassvalveincorporates4
positionsincludingadiagnosticpositionthatallowsaservicetechniciantohavepressuretotestasystem
whileprovidinguntreatedbypasswatertothebuilding.
Besuretoinstallbypassvalveontomaincontrolvalve,beforebeginningplumbing.Or,makeprovisionsin
the plumbing system for a bypass.
The bypass body and rotors are glass filled Noryl®and the nuts and caps are glass filled polypropylene.
Allsealsareself-lubricatingEPDMtohelppreventvalveseizingafterlongperiodsofnon-use.Internal“O”
Ringscaneasilybereplacedifserviceisrequired.
Thebypassconsistsoftwointerchangeableplugvalvesthatareoperatedindependentlybyredarrow
shapedhandles.Thehandlesidentifythedirectionofflow.Theplugvalvesenablethebypassvalveto
operatein4positions.
2
1. Normal Operation Position: The inlet and outlet handles point in the direction of flow indicated
bytheengravedarrowsonthecontrolvalve.Waterflowsthroughthecontrolvalvefornormaloperationof
awatersoftenerorfilter.Duringtheregenerationcyclethispositionprovidesregenerationwatertotheunit,
whilealsoprovidinguntreatedwatertothedistributionsystem(Fig. 1).
2.Bypass Position: The inlet and outlet handles point to the center of the bypass. The system is
isolated from the water pressure in the plumbing system. Untreated water is supplied to the
building (Fig. 2).
3. Diagnostic Position:Theinlethandlepointstowardthecontrolvalveandtheoutlethandlepointsto
thecenterofbypassvalve.Untreatedsupplywaterisallowedtoflowtothesystemandtothebuilding,
while not allowing water to exit from the system to the building (Fig. 3).Thisallowstheservicetechnician
to draw brine and perform other tests without the test water going to the building.
NOTE:Thesystemmustberinsedbeforereturningthebypassvalvetothenormalposition.
4.Shut Off Position:Theinlethandlepointstothecenterofthebypassvalveandtheoutlethandle
pointsawayfromthecontrolvalve.Thewaterisshutofftothebuilding.Thewatertreatment
systemwilldepressurizeuponopeningatapinthebuilding.Anegativepressureinthebuilding
combined with the softener being in regeneration could cause a siphoning of brine into the
building.Ifwaterisavailableontheoutletsideofthesoftenerorfilter,itisanindicationofwater
bypassing the system (Fig. 4)(i.e.aplumbingcross-connectionsomewhereinthebuilding).
NORMAL OPERATION POSITION
Figure 1
DIAGNOSTIC POSITION
Figure 3
BYPASS POSITION
Figure 2
SHUT OFF POSITION
Figure 4
3
GENERAL INSTALLATION & SERVICE WARNINGS
Thecontrolvalve,fittingsand/orbypassaredesignedtoaccommodateminorplumbingmisalignments.
Thereisasmallamountof“give”toproperlyconnectthepipingbutthewatersoftenerisnotdesignedto
support the weight of the plumbing.
DonotuseVaseline,oils,otherhydrocarbonlubricantsorspraysiliconeanywhere.Asiliconelubricant
maybeusedonblack“O”Rings,butisnotnecessary.Avoid any type of lubricants, including silicone, on
red or clear lip seals.
Do not use pipe dope or other sealants on threads. Teflon®tape must be used on the threads of the
1”NPTinletandandoutlet,thebrinelineconnectionatthecontrolvalve,andonthethreadsforthedrain
line connection. Teflon®tapeisnotusedonthenutconnectionsorcapsbecause“O”Ringsealsareused.
ThenutsandcapsaredesignedtobeunscrewedortightenedbyhandorwiththespecialplasticService
Wrench,YY.WS.CV3193(seepage7).Ifnecessaryplierscanbeusedtounscrewthenutorcap.Donot
use a pipe wrench to tighten nuts or caps. Do not place screwdriver in slots on caps and/or tap with a
hammer.
SITE REQUIREMENTS
 •waterpressure–30-100psi    •currentdrawis0.5amperes
 •watertemperature–33-100°F(0.5-37.7˚C)  •theplug-intransformerisfordry
 •electrical–110-50/60Hzuninterruptedoutlet locationsonly
 •thetankshouldbeonafirmlevelsurface
Wasteconnectionsordrainoutletsshallbedesignedandconstructedtoprovideforconnectiontothe
sanitarywastesystemthroughanairgapof2pipediametersor25mm(1in),whicheverislarger.
1.Thedistancebetweenthedrainandthewaterconditionershouldbeasshortaspossible.
2.Sincesaltmustbeperiodicallyaddedtothebrinetank,itshouldbe located where it is easily accessible.
3.Donotinstallanywaterconditionerwithlessthan10feetofpipingbetween its outlet and the inlet of a
water heater.
4.Donotlocateunitwhereitoritsconnections(includingthedrainandoverflowlines)willeverbe
 subjectedtoroomtemperaturesunder33°F.
WELL WATER INSTALLATION MUNICIPAL INSTALLATION
Air Gap
To
Drain
Air Gap
To
Drain
insTallaTion insTruCTions:
4
5. INLET/OUTLET PLUMBING:BesuretoinstallBypassValveontomaincontrolvalvebefore
beginningplumbing.Makeprovisionstobypassoutsidehydrantandcoldhardwaterlinesatthistime.
Installaninletshutoffvalveandplumbtotheunit’sbypassvalveinletlocatedattherightrearasyou
facetheunit.Thereareavarietyofinstallationfittingsavailable.TheyarelistedunderInstallationFitting
Assemblies,page17.Whenassemblingtheinstallationfittingpackage(inletandoutlet),connectthe
fittingtotheplumbingsystemfirstandthenattachthenut,splitringand“O”Ring.Heatfromsoldering
orsolventcementsmaydamagethenut,splitringor“O”Ring.Solderjointsshouldbecoolandsolvent
cementsshouldbesetbeforeinstallingthenut,splitringand“O”Ring.Avoidgettingsolderflux,
primer,andsolventcementonanypartofthe“O”Rings,splitrings,bypassvalveorcontrolvalve.Ifthe
building’s electrical system is grounded to the plumbing, install a copper grounding strap from the inlet
to the outlet pipe. Plumbing must be done in accordance with all applicable local codes.
6. DRAIN LINE:First,besurethatthedraincanhandlethebackwashrateofthesystem.Solderjoints
nearthedrainmustbedonepriortoconnectingthedrainlineflowcontrolfitting.Leaveatleast6”
between the drain line flow control fitting and solder joints. Failure to do this could cause interior
damagetotheflowcontrol.Installa1/2”I.D.flexibleplastictubetotheDrainLineAssemblyordiscard
thetubingnutandusethe3/4”NPTfittingforrigidpipe(recommended).Wherethedrainlineis
elevatedbutemptiesintoadrainbelowthelevelofthecontrolvalve,forma7”loopatthedischarge
endofthelinesothatthebottomoftheloopislevelwiththedrainconnectiononthecontrolvalve.This
willprovideanadequateanti-siphontrap.Wherethedrainemptiesintoanoverheadsewerline,a
sink-typetrapmustbeused.Rundraintubetoitsdischargepointinaccordancewithplumbingcodes.
Payspecialattentiontocodesforairgapsandanti-siphondevices.
7.BRINE TANK CONNECTION:Installthe3/8”O.D.polyethylenetubefromtheRefillElbowto 
 theBrineValveinthebrinetank.
8.OVERFLOW LINE CONNECTION:
An overflow drain line is recommended where a brine overflow could damage furnishings or the
building structure. Your softener is equipped with a brine tank safety float which greatly reduces the
 chanceofanaccidentalbrineoverflow.Intheeventofamalfunction,however,anoverflow line
connectionwilldirectthe“overflow”tothedraininsteadofspillingonthefloorwhereitcouldcause
considerabledamage.Thisfittingisanelbowonthesideofthebrinetank.Attachalengthof1/2”
 I.D.tubingtofittingandruntodrain.Donotelevateoverflowlinehigherthan3”belowbottomof
 overflowfitting.Donot“tie”thistubeintothedrainlineofthecontrolvalve.Overflowlinemustbea
 direct,separatelinefromoverflowfittingtodrain,sewer,ortub.Allowanairgapasperthedrainline
instructions.
CAUTION: Never insert a drain line into a drain,
sewer line, or trap. Always allow an air gap
between the drain line and the wastewater to
prevent the possibility of sewage being back-
siphoned into the conditioner.
Drain Line
Air Gap
2 pipe diameters
or 25 mm (1 in)
To Wastewater
Waste connections or drain outlets shall be designed and
constructedtoprovideforconnectiontothesanitarywaste
systemthroughanairgapof2pipediametersor25mm
(1in),whicheverislarger.
5
Timeofdayshouldonlyneedtobesetafterextendedpoweroutagesorwhendaylightsavingtimebegins
or ends. If an extended power outage occurs, the time of day will flash on and off indicating that the time
should be reset.
STEP 1–PressSETCLOCK.
STEP 2–CurrentTime(hour):Setthehourofthedayusingthes or tbuttons.AM/PMtoggles
  after12:00.Pressnext to go to step 3.
STEP 3–CurrentTime(minutes):Settheminutesofthedayusingthes or tbuttons.
Press nexttoexitSetClock.
1. Set time of
day:
Installer Displays/Settings
STEP 1–Pressnext and ssimultaneously for 3 seconds.
STEP 2–Hardness:Settheamountofhardnessingrainsofhardnessascalciumcarbonateper
gallon using the s or tbuttons.Thedefaultis20withvaluerangesfrom1to150in1
grain increments.
Note: The grains per gallon can be increased if soluble iron needs to be reduced.
Press next to go to step 3.
STEP 3–Day Override: When gallon capacity is set to off, sets the number of days between
regenerations. When gallon capacity is set to AUTO or to a number, sets the maximum
  numberofdaysbetweenregenerations.Ifvalueissettooff regeneration initiation is based
  solelyongallonsused.Ifvalueissetasanumber(allowablerangefrom1to28)a
  regenerationinitiationwillbecalledforonthatdayevenifsufficientnumberofgallons
  werenotusedtocallforregeneration.SetDayOverrideusing s or tbuttons:
Press nexttogotostep4.
2. Programming:
1 2 3
1 2 3
Programming ProCedures for WaTer sofTeners:
6
STEP 4–
Regeneration Time (Hour):
Setthehourofdayforregenerationusingthes or tbuttons.
  AM/PMtogglesafter12:00.Thedefaulttimeis2:00a.m.
Press next to go to step 5.
STEP 5–Next
Regeneration Time (Minutes):
Settheminutesofdayforregenerationusingthes or
t buttons. Press nexttoexitInstallerDisplays/Settings.
1.
General Operation:
When the system is operating one of two displays will be shown. Pressing
Next will alternate between the displays. One of the displays is always the current time of day. The
seconddisplayisoneofthefollowing:daysremainingorgallonsremaining.Daysremainingarethe
numberofdaysleftbeforethesystemgoesthrougharegenerationcycle.Capacityremainingisthe
number of gallons that will be treated before the system goes through a regeneration cycle. The user
can scroll between the displays as desired. If the system has called for a regeneration that will occur
at the preset time of regeneration, the words regeN toDay will appear on the display. When water is
beingtreated(i.e.waterisflowingthroughthesystem)thewordsofteNiNg flashes on the display if a
water meter is installed.
4 5
oPeraTing disPlays for The sofTener:
2. Programming cont’d:
3.
Manual Regeneration:
Sometimesthereisaneedtoregeneratethesystemsoonerthanwhenthe
systemcallsforit,usuallyreferredtoasmanualregeneration.Theremaybeaperiodofheavywater
usagebecauseofguestsoraheavylaundryday.
To initiate a manual regeneration immediately, press and hold the regeN button for three seconds. The
systemwillbegintoregenerateimmediately.Thecontrolvalvemaybesteppedthroughthevarious
regeneration cycles by pressing the regeN button.
2.
Regeneration Mode:
Typically a system is set to regenerate at a time of
no water use. If there is a demand for water when the system is regenerating,
 untreatedwaterwillbedelivered.Whenthesystembeginstoregenerate,
the display will change to include information about the step of the
regeneration process and the time remaining for that step to be completed.
 Thesystemrunsthroughthestepsautomaticallyandwillresetitselftoprovide
treated water when the regeneration has been completed.
To initiate a manual regeneration at the preset delayed regeneration time, when the regeneration time
option is set to Normal or Normal + oN 0, press and release regeN. The words regeN toDay will flash on the
display to indicate that the system will regenerate at the preset delayed regeneration time. If you pressed the
regeN button in error, pressing the button again will cancel the request.
7
•Afterinstallationiscomplete,rotatebypasshandlestobypassmode
(see Fig. 2 on page 2)
.
•Turnonwaterandcheckforleaks.
•Fullyopenacoldwaterfaucet—preferablyalaundrysinkorbathtubwithnoaerator.
•Allowwatertorununtilcleartoridpipesofdebriswhichmayhaveoccurredduringinstallation.
NOTE: Thesystemregenerationsequenceforsoftenersisinoneofthetwofollowingsequences.(Ifitis
desiredtochangethissequence,pleaserefertotheDealerManualorcontactthemanufacturer.)
Brine (Regenerant) Post Fill Brine (Regenerant) Pre Fill
Backwash Fill
 Regenerate(Brine) Softening
 SecondBackwash* Backwash
 Rinse Regenerate(Brine)
 Fill SecondBackwash
 Service Rinse
* Optional Service   
Once a manual regeneration is initiated, the unit will go into the FILL
position. This position allows water to enter the brine tank until it
 reachestheproperlevel.Oncethispositioniscomplete,youwill
 noticea240Minute(4hours)SOFTENINGposition.This4-hour
 windowallowsthesalttodissolveandachieveproperbrinestrength.
 DuringtheseFILLandSOFTENINGpositions,youwillhavesoftened
 wateravailableforuse.OncetheunitadvancestotheBACKWASHpositionandsubsequentpositions
 thereafter(seeStartUpInstructionsforregenerationsequence),thewatersoftenerwilldeliverwater,
but it will be untreated.
IMPORTANT
:WiththeDrySaltStorageFeature,thebrinetankwillrefill4hoursbeforetheactual
regenerationoccurs.Youmayexperienceasmallamountofnoiseforashortperiodoftimeat10:00
p.m.(withtypicalsetting)onthenightthatregenerationistooccur.Thisnoiseisonlythebrinetankfilling
and at no time during this process will you be without treated water.
4.
Power Loss:
If the power goes out for less than two hours, the system will automatically reset itself. If
an extended power outage occurs, the time of day will flash on and off which indicates the time of day
should be reset. The system will remember all other settings.
5.
Error Message:
If the word error and a number are alternately flashing on the
displayrecordthenumberandcontactthedealerforhelp.Thisindicatesthatthevalve
was not able to function properly.
6.
Brine Tank Maintenance and Salt:
Refillthebrinetankasnecessary,
makingsureatleast1/3ofthebrinetankisfullatalltimes.Withoutpropersaltlevels,thewatersoftener
may not operate properly.
 Because“typical”settingsofthiswatersoftenerincludeadrysaltstoragefeature(nowaterinbrinetank
 betweenregeneration),themanufacturerrecommendstheuseofsolarsaltforbestresults.Thebrinetankis
manufactured for the use of solar, pellets or rock salt. If pellet or rock salt is used, a cleaning of the brine tank
 everysixmonthsisrecommended.Ifthedrysaltstoragefeatureisnotbeingutilized,blocksaltmaybeused.
CAUTION: The manufacturer does not recommend the use of any resin cleaners, nor placement of any resin
cleaners into the brine tank. This may be harmful to the water softener and for human consumption. Consult
dealer for proper cleaning instructions.
sTarT-uP insTruCTions for WaTer sofTeners:
Thesystemisnowreadyforfillingwithwater.Forthepurposeoffillingthesoftener,leavetheunitinthe
bypasspositionuntilthe4thstep,thenrepeatsteps1-6withtheunitfull.Do not open the bypass at
this time,itwillbefilledinthebackwashposition.Oncetheunitisfilledwithwater(step2)thenopenthe
bypass.
8
1.Withthesoftenerinthebypassmode
(Fig. 2 on page 2)
andthecontrolvalveinnormaloperation
where the display shows either the time of day or the gallons remaining:
 Manuallyadd3GALLONSofwatertotheregeneranttank.
NOTE: If too much water is put into the brine tank during softener start up it could result in a salty water
complaint after the first regeneration.
Duringthefirstregenerationtheunitwilldrawouttheinitialvolumeofbrine/regenerantandrefillitwith
the correct preset amount.
2.PressandholdtheregeNbuttonuntilthemotorstarts(3seconds).Releasebutton.Thedisplaywilleither
read backwash or fill and the remaining time in this step is counting down. If backwash is shown in
window,proceedtostep2b.
2a. If the unit display is fill,checktoverifythattheregeneranttankisfillingatarateof1/2gallon
perminute.CheckBrinelineconnectionsforleaks.PressregeN button and unit will proceed to the
softeNiNgposition.Duringanormalregenerationthiswillbea4hourperiodforsalttodissolve.
Press regeNagaintoputvalveinBACKWASH.Proceedto2b.
2b.Unplugthetransformersothatthevalvewillnotcycletothenextposition.Opentheinlethandle
ofthebypassvalve very slightly allowing water to fill the tank slowly in order to expel air. Once
air is expelled and water is running at drain, open inlet to control and place into the diagnostic
mode
(Fig. 3 on page 2).
CAUTION: If water flows too rapidly, it could result in loss of media to
the drain. When the water is flowing steadily to the drain without the
presence of air, slowly open the inlet valve. Check drain that it can
receive the flow of water. Restore power.
3. Press regeNbuttonagaintoputthevalveintoBRINEposition.Checkthebrinelineforsuction(afterunitis
full).Verifythatwaterisbeingdrawnfromregeneranttankwithnoairleaksorbubblesinthebrineline.
There should be a slow flow to the drain.
4.PressregeNbuttonagainandplaceunitintoasecondBACKWASHposition.Waterwillflowsteadilyatthe
drain.Checkforthepresenceofair.Again,checkdrainthatitcanreceivetheflowofwater.
5. Press regeNbuttonandplaceunitintorinseposition.Checkdrainlinetobesecureandthatdraincan
receivetheflowofwater.Thereshouldbearapidflowtothedrain.Unplugtransformertokeepthe
valveintheRINSEposition.Allowtorununtilsteady,clearandwithoutair.Whiletheunitisrinsing,
load the brine tank with water softener salt.
6.PresstheregeN button.
6a.Forunitsthat“PreFill”thebrinetank,thevalvewillcyclebacktothenormaloperatingposition.
AdvancetoStep8.  
6b.Forunitsthat“PostFill,”theunitisnowintheFILLposition.Checktoverifythatthe
regeneranttankisfillingatarateof1/2gallonperminute.CheckBrinelineconnectionsforleaks.
ProceedtoStep7.
7.PressregeNbuttonagain.Valvewillcyclebacktothenormaloperatingpositionwiththetimeofdayor
gallons remaining displayed.
sTarT-uP insTruCTions for WaTer sofTeners:
9
8.Repeatsteps1-7andnowcheckthevariouscyclesforproperoperation.
9.Oncethecycleoperationhasbeenverified,Placebypassvalveinthenormaloperatingmode
(Fig. 1 on page 2)
by opening the outlet bypass handle.
10.Gotolaundrytuborbathtubfaucet,preferablyafaucetwithoutanaeratorandturnonthecold
water, let the water run. Note the color of water coming from faucet. If discolored let water run until
clear.
NOTE:Atnotimeshouldtherebe“largeparticles”ofmedianoticedatfaucetorlaundrytub.Ifthisis
seen immediately shut off water and bypass system as this could be an indication of a distributor failure.
Contactmanufacturerordistributorforassistance.
sPeCifiCaTions:
sTarT-uP insTruCTions for WaTer sofTeners:
1All GPWS Series units are factory set for Medium Salt Setting. Note: influent waters must be at least 3 GPG hardness and 80 TDS.A calcite or corsex unit may
be needed for correct operation.
2Iron removal may vary depending on form of iron, pH and other local conditions. On waters that are pre-chlorinated or where other pre-oxidation occurs, an
iron precipitate can form that is too small to be filtered.
3The pH listed is the minimum for the influent water.
4Unit not tested for capacity at these flow rates. Water quality may vary.
Model GACS835 GACS1035
1Capacity:
(Grains/Lbs.
NaCI)
Maximum 21,000 @ 9.0 32,000 @ 15.0
Medium 18,000 @ 6.0 28,400 @ 9.0
Minimum 13,600 @ 3.0 23,600 @ 6.0
Amount of Media (Cu. Ft.) 0.66 1.0
Maximum Water Hardness (GPG) 50 75
2Maximum Iron (PPM) 1 1
3Minimum pH Required 7 7
4Peak Flow Rate (GPM @ PSI) 12.2 @ 15.0 17.1 @ 15.0
Continuous Flow Rate (GPM @ PSI) 5.8 @ 5.0 5.0 @ 2.8
Water Pressure Range (PSI) 30 - 100 30 - 100
Operating Temperature Range (˚F) 33 - 100 33 - 100
Electrical Requirements (volts-hertz) 110 - 50/60 110 - 50/60
Pipe Size 1” 1”
Total Dimensions: Media Tank 13.5”(w) x 42.5”(h) 13.5”(w) x 42.5”(h)
Depth 22.5” 22.5”
Model GACS835 GACS1035
Min. Gal. Min. Gal.
Brine Refill 3:51 2 5:51 3
Backwash 6 10 8 22
Brine & Rinse 40 16 60 24
Rapid Rinse 4 7 4 11
Total 54 35 78 60
10
TroubleshooTing guide
PROBLEM CAUSE CORRECTION
1. Timer does not
display time of
day
A. transformer unplugged A. reconnect transformer
B. no power at outlet B. repair or use working outlet
C.defectivetransformer C.replacetransformer
D.defectivePCboard D.replacePCboard
2. Timer does not
display correct
time of day
A. outlet is on a switch A. use unswitched outlet
B. power outage B. reset time of day
C.defectivePCboard C.replacePCboard
3. No softening/
filtering display
when water is
flowing
A.bypassvalveinbypassposition A.putbypassinserviceposition
B. meter cable disconnected B.reconnectPCboard
C.restricted/stalledmeterturbine C.removemeterandcheckfordebris
D.defectivemeter D.replacemeter
E.defectivePCboard E.replacePCboard
4. Unit regenerates
at wrong time of
day
A. past power outage A. reset time of day
B. incorrect time of day displayed B. reset time of day
C.timeofregenerantsetincorrectly C.resettimeofregeneration
D.controlsetat“on0” D.checkwithregenerationtimeoption
in programming
E.controlsetat“NORMAL+on0” E. check with regeneration time option
in programming
5. “Error” followed
by code #
• “Error” code
1001- unable to
recognize start of
regeneration
• “Error” code
1002-unexpected
stall
• “Error” code
1003-
motor ran too
long
• Timed out trying
to reach next
cycle position
• If other codes
appear contact
factory
A.valvehasjustbeenserviced(#1001)
A. press next and regen for 3 secs. or
momentarily unplug power source
fromPCboard
B.foreignmaterialstuckinvalve(#1002) B. check piston and spacer stack for
obstruction
C.excessivepistonresistance(#1002) C.replacepiston(s)andspacerstack assy
D.pistonnotinhomeposition(#1004) D.pressnext and regen or momentarily
unplugPCboardpower
E. motor gears not fully engaged - motor wires
broken-failedmotor(#1001) E. check motor wiring
F.centerdrivegearreflectordirtyordamaged-
missingorbrokengear(#1004) F.replaceorcleandrivegear(s)
G.drivebracketincorrectlyalignedonbackplate
(#1004) G.resetdrivebracket
H.PCboardisdamagedordefective
(#1009,2001,4002,4003,4004,4010) H.replacePCboard
I.PCboardincorrectlyalignedondrivebracket
(#1009,2001,4002,4003,4004,4010) I.resetPCboardontodrivebracket
11
PROBLEM CAUSE CORRECTION
6. Valve stalled in
regeneration
A. motor not operating A. replace motors
B. no power at outlet B. repair outlet or use working outlet
C.defectivetransformer C.replacetransformer
D.defectivePCboard D.replacePCboard
E.brokendrivegearordrivecapassy. E.replacegearordrivecapassy.
F. broken piston retainer F.replacedrivecapassy.
G.brokenmainorregenerantpiston G.replacemainorregenerantpiston
7. Valve does
not regenerate
automatically
when regen
button is
depressed
A. transformer unplugged A.connecttransformerandPCboard
power
B. no power at outlet B. restore power
C.brokendrivegearordrivecapassy. C.replacegearordrivecapassy.
D.defectivePCboard D.replaceboard
8. Valve does
not regenerate
automatically
but does when
regen button is
depressed
A.bypassvalvenotinnormaloperatingmode A.seebypassdiagramsonpage2
B. meter disconnected B.reconnecttoPCboard
C.obstructedmeterturbine C.clearobstruction
D.defectivemeter D.replacemeter
E. programming error E.reviewprogramming
F.defectivePCboard F. replace board
9. Time of day
flashes on and
off
A. Power has been out more than two hours.
Transformer was unplugged from either
walloutletorformPCboard.next and
regenwerepressedtoresetthevalve.
A. reset time of day
TroubleshooTing guide
12
rePlaCemenT ParTs:
FRONT COVER AND DRIVE ASSEMBLY
Item No. Part No. Description Qty.
1 YY.WS.CV3175CC-01 FrontcoverassemblyCC 1
2 YY.WS.CV3107-1 Motor 1
3YY.WS.CV3106-1 Drivebracket&springclip 1
4 YY.WS.CV3108CC PCboard,CC 1
6 YY.WS.CV3110 Drivegear,12x36 3
6 YY.WS.CV3109 Drivegearcover 1
2-6 YY.WS.CV3002CC Driveassembly,CC -
not shown YY.WS.CV3186 Transformer,110V-12V 1
PISTON ASSEMBLY
Item No. Part No. Description Qty.
1 YY.WS.CV3005 Spacerstackassembly 1
2 YY.WS.CV3004 Drivecapassembly 1
3YY.WS.CV3135 O-ring228 1
4a YY.WS.CV3011 Piston assembly downflow 1
4b YY.WS.CV3011-01 Piston assembly upflow 1
5* YY.WS.CV3174 Regenerantpiston 1
6 YY.WS.CV3180 O-ring337 1
Replacement parts can be purchased by checking our website at www.greenwaywt.com, or
by calling our customer service line at 1-866-253-0447, Monday to Thursday from 8:30 AM
to 5:00 PM (EST), Friday from 8:30 AM to 4:00 PM (EST),
or write: Greenway Water Technologies, Customer Service Center, 400 Southgate Drive,
Guelph, ON, Canada N1G 4P5.
rePlaCemenT ParTs:
INJECTOR ASSEMBLIES
Item No. Part No. Description Qty.
1 YY.WS.CV3176 Injector cap 1
2 YY.WS.CV3152 O-ring135 1
3YY.WS.CV3177 Injector screen 1
4 YY.WS.CV3010-1Z Injector assembly plug 1
5YY.WS.CV3010-1E Einjector assembly, WhiTe
YY.WS.CV3010-1F Finjector assembly, blue
not shown YY.WS.CV3170 O-ring011,lower *
not shown YY.WS.CV3171 O-ring013,lower *
*Theinjectorplugandtheinjectoreachuseonelowerand
one upper o-ring
REFILL PORT ASSEMBLY
Item No. Part No. Description Qty.
1*YY.WS.CV3195-01 Refillportplugassembly 1
2 YY.WS.CH4615 Elbow locking clip 1
3YY.WS.CJCP-P-6 Tubeinsert,3/8 1
4YY.WS.CJCPG-6PBLK Nut,3/8 1
5YY.WS.CH4613 Elbowcap,3/8 1
6 YY.WS.CV3163 O-ring019 1
7 YY.WS.CV3165-01** Refillflowcontrolretainerassy. 1
8 YY.WS.CV3182 Refillflowcontrol(specifysize) 1
not shown YY.WS.CH4650 Elbow,1/2”withnut&insert OP
**Assembly includes refill flow control (specify size)
13
rePlaCemenT ParTs:
DRAIN LINE ASSEMBLY 3/4”
Item No. Part No. Description Qty.
1 YY.WS.CH4615 Locking clip, elbow 1
2 YY.WS.CPKP10TS8-BULK Insert,5/8”tube OP
3YY.WS.CV3192 Nut,3/4”drainelbow OP
4 YY.WS.CV1358-01 Drainelbowassembly,3/4”NPT 1
5YY.WS.CV3163 O-ring019 1
6 YY.WS.CV3159-01 DLFCretainerassembly 1
7
YY.WS.CV3162-007 0.7DLFCfor3/4”elbow
1
YY.WS.CV3162-010 1.0DLFCfor3/4”elbow
YY.WS.CV3162-013 1.3DLFCfor3/4”elbow
YY.WS.CV3162-017 1.7DLFCfor3/4”elbow
YY.WS.CV3162-022 2.2DLFCfor3/4”elbow
YY.WS.CV3162-027 2.7DLFCfor3/4”elbow
YY.WS.CV3162-032 3.2DLFCfor3/4”elbow
YY.WS.CV3162-042 4.2DLFCfor3/4”elbow
YY.WS.CV3162-053 5.3DLFCfor3/4”elbow
Items 2 and 3, nut and insert are only used with 1/2” I.D. by 5/8” O.D.
polytubing. For other piping material the 3/4” NPT is used.
ProperDLFC
orientation directs
water flow towards
the washer face with
rounded edge and
lettering.
Water
Flow
3/4” NPT
14
rePlaCemenT ParTs:
WATER METER & METER PLUG
Item No. Part No. Description Qty.
1 YY.WS.CV3151 Nut,1”QC 1
2 YY.WS.CV3003 Meterassembly,includesitems3&4 1
3YY.WS.CV3118-01 Turbine assembly 1
4 YY.WS.CV3105 O-ring215 1
5YY.WS.CV3003-01 Meter plug assembly 1
SAFETY FLOAT ASSEMBLY
Item No.
Part No.
Description
1
YY.WS.CH4650-01
474safetyelbow3/8”
2
YY.WS.CH4655
474.5gpmflowcontrol
3
YY.WS.CH4615
Elbow locking clip
4
YY.WS.CH4640-32
474floatassm32”w/grommets
5
YY.WS.CH4500-48
474aircheckassm1/2”x48”
6
YY.WS.CH4600
474safetybrnvlvw/3/8”elbow
7
YY.WS.CH4600-50
474safetybrnvlv.5GPM
100
YY.WS.CH4700-27WR-1
.5gpmsafetyfloata/cassmcom
15
rePlaCemenT ParTs:
BYPASS VALVE
Item No. Part No. Description Qty.
1 YY.WS.CV3151 Nut,1”quickconnect 2
2 YY.WS.CV3150 Splitring 2
3YY.WS.CV3105 O-ring215 2
4YY.WS.CV3145 Bypassrotor,1” 2
5YY.WS.CV3146 Bypass cap 2
6 YY.WS.CV3147 Bypass handle 2
7 YY.WS.CV3148 Bypass rotor seal retainer 2
8 YY.WS.CV3152 O-ring135 2
9 YY.WS.CV3155 O-ring112 2
10 YY.WS.CV3156 O-ring214 2
16
insTallaTion fiTTing assemblies:
1” PVC MALE NPT ELBOW
Item No. Part No. Description Qty.
YY.WS.CV3007 1”PVCmaleNPTelbowassy. 2
1 YY.WS.CV3151 Nut,1”quickconnect 2
2 YY.WS.CV3150 SplitRing 2
3YY.WS.CV3105 O-ring215 2
4 YY.WS.CV3149 Fitting 2
3/4” & 1” PVC SOLVENT ELBOW
Item No. Part No. Description Qty.
YY.WS.CV3007-01 3/4”&1”PVCsolventelbowassy.2
1 YY.WS.CV3151 Nut,1”quickconnect 2
2 YY.WS.CV3150 SplitRing 2
3YY.WS.CV3105 O-ring215 2
4 YY.WS.CV3189 Fitting 2
1” BRASS SWEAT
Item No. Part No. Description Qty.
YY.WS.CV3007-02 1”brasssweatassembly 2
1 YY.WS.CV3151 Nut,1”quickconnect 2
2 YY.WS.CV3150 SplitRing 2
3YY.WS.CV3105 O-ring215 2
4 YY.WS.CV3188 Fitting 2
3/4” BRASS SWEAT
Item No. Part No. Description Qty.
YY.WS.CV3007-03 3/4”brasssweatassembly 2
1 YY.WS.CV3151 Nut,1”quickconnect 2
2 YY.WS.CV3150 SplitRing 2
3YY.WS.CV3105 O-ring215 2
4 YY.WS.CV3188-01 Fitting 2
Although no tools are necessary to assemble
ordisassemblethevalve,theService Wrench,
(showninvariouspositionsonthevalve)is
availabletoaidinassemblyordisassembly
SERVICE WRENCH - YY.WS.CV3193
17
QuiCk referenCe guide:
MANUAL REGENERATION
NOTE: For softeners, if brine
tank does not contain salt, fill
withsaltandwaitatleast2
hours before regeneration.
If you need to initiate a
manual regeneration, either
immediately, or the same
night at the preprogrammed
timeforregeneration(typically2:00AM),completethefollowingsteps.
For Immediate Regeneration: Press and hold regenuntilvalvemotor
starts(typically3seconds).
For Regeneration the same night: Press and release regen(notice
thatflashing“REGENTODAY”appears).
ERROR
Ifthedisplaytogglesbetween“Error”
andanerrorcode(i.e.anumber),call
aservicetechnicianandreporttheerror
code.
BYPASS VALVE OPERATION
To shut-off water to the system, please position arrow handles as shown
inthebypassoperationdiagrambelow.Ifyourvalvedoesn’tlooklikethe
diagrambelow,contactyourservicetechnicianforinstructionsonhowto
shut off water.
NORMAL OPERATION BYPASS OPERATION
TO SET TIME OF
DAY
Intheeventofaprolonged
power outage, time of day
flashes, indicating that this
needs to be reset. All other
information will be stored
in memory no matter how
long the power outage.
Please complete the steps
as shown to the right. To
access this mode, press
set clock.
1.Accessedbypressing
set clock
2.Adjusthourswith
andbuttons,AM/PM
togglesat12
3. Press next
4.Adjustminuteswith
and buttons
5. Press next to complete
and return to normal
operation
1.Accessedbypressing
next and s button
simultaneously
2.Adjusthardnessusing
t and s buttons
3. Press next
4.Adjustdaysbetween
regenerations using t
and s buttons
5. Press next
6.Adjusttimeof
regeneration hour with
t and s buttons,AM/
PMtogglesat12.
7.Pressnext
8.Adjusttimeof
regeneration minutes
with t and s buttons
9.Pressnext to complete
and return to normal
operation.
ADJUST HARDNESS, DAYS BETWEEN
REGENERATION, OR TIME OF REGENERATION
For initial set-up or to
make adjustments, please
complete the steps as
shown to the right. Access
this mode by pressing
next and button
simultaneously.
NOTE:Hardnessdisplay
shows“-nA-”ifusedas
a filter. If other displays
do not appear, refer to
manual.
Water Technologies
Water Technologies
Water Technolo
g
ies
USA: 1270 Flagship Dr. Perrysburg, OH, 43551
Phone: 1-419-874-6770 Fax: 419-874-6769
Canada: 400 Southgate Dr Guelph, ON, N1G 4P5
Phone:1-888-5-WATER-0
Fax:
519-837-8913 www.greenwaywt.com REV05-18
GENERAL OPERATION
When the system is operating, one of three displays will be shown: Time of
day,gallonsoftreatedwateravailable,orgallonsperminute.Pressingnext
will toggle between the three choices.

This manual suits for next models

1

Other Greenway Home Products Water Dispenser manuals

Greenway Home Products GWF8L User manual

Greenway Home Products

Greenway Home Products GWF8L User manual

Greenway Home Products GWD6960BLS User manual

Greenway Home Products

Greenway Home Products GWD6960BLS User manual

Greenway Home Products GWD5440W User manual

Greenway Home Products

Greenway Home Products GWD5440W User manual

Greenway Home Products GWD2630W-1 User manual

Greenway Home Products

Greenway Home Products GWD2630W-1 User manual

Greenway Home Products GWD9500W-POU User manual

Greenway Home Products

Greenway Home Products GWD9500W-POU User manual

Greenway Home Products GWD1000BLS User manual

Greenway Home Products

Greenway Home Products GWD1000BLS User manual

Greenway Home Products VWD8956W User manual

Greenway Home Products

Greenway Home Products VWD8956W User manual

Greenway Home Products GWD860W-3 User manual

Greenway Home Products

Greenway Home Products GWD860W-3 User manual

Greenway Home Products vitapur VWD866W-3 User manual

Greenway Home Products

Greenway Home Products vitapur VWD866W-3 User manual

Greenway Home Products GWD5500WBC User manual

Greenway Home Products

Greenway Home Products GWD5500WBC User manual

Greenway Home Products GWD860W-3 User manual

Greenway Home Products

Greenway Home Products GWD860W-3 User manual

Greenway Home Products GWD4650W User manual

Greenway Home Products

Greenway Home Products GWD4650W User manual

Greenway Home Products Polar PWD8975W User manual

Greenway Home Products

Greenway Home Products Polar PWD8975W User manual

Greenway Home Products Polar PWD5975BLS User manual

Greenway Home Products

Greenway Home Products Polar PWD5975BLS User manual

Greenway Home Products GWD5960W User manual

Greenway Home Products

Greenway Home Products GWD5960W User manual

Greenway Home Products GWD5570WBC User manual

Greenway Home Products

Greenway Home Products GWD5570WBC User manual

Greenway Home Products GWD5400W User manual

Greenway Home Products

Greenway Home Products GWD5400W User manual

Greenway Home Products GWD220W-2 User manual

Greenway Home Products

Greenway Home Products GWD220W-2 User manual

Popular Water Dispenser manuals by other brands

A.O. Smith Pro AOW-S400 owner's manual

A.O. Smith

A.O. Smith Pro AOW-S400 owner's manual

LF Matic Instruction and maintenance

LF

LF Matic Instruction and maintenance

Quality Espresso Water/Steam Dispenser user manual

Quality Espresso

Quality Espresso Water/Steam Dispenser user manual

Kinetico 2030s installation instructions

Kinetico

Kinetico 2030s installation instructions

InSinkErator F-HC3300C installation manual

InSinkErator

InSinkErator F-HC3300C installation manual

Puricom Columbia Aqua FC-750-ROP Technical manual

Puricom

Puricom Columbia Aqua FC-750-ROP Technical manual

Pentair FLECK 2910 NXT user guide

Pentair

Pentair FLECK 2910 NXT user guide

Scarlett SC-1222 instruction manual

Scarlett

Scarlett SC-1222 instruction manual

Elba YL712S-B instruction manual

Elba

Elba YL712S-B instruction manual

Clean Water Systems 5900S Installation & start?up guide

Clean Water Systems

Clean Water Systems 5900S Installation & start?up guide

Propur INLINE CONNECT FS10 Installation & use instructions

Propur

Propur INLINE CONNECT FS10 Installation & use instructions

Elkay EFW Series Installation, care & use manual

Elkay

Elkay EFW Series Installation, care & use manual

Elkay EMABF8 1B Series Installation, care & use manual

Elkay

Elkay EMABF8 1B Series Installation, care & use manual

GE GXSS20B Owner's Manual & Installation Instructions

GE

GE GXSS20B Owner's Manual & Installation Instructions

WaterLogic P2 Classe manual

WaterLogic

WaterLogic P2 Classe manual

Fleck 5600 Econominder Service manual

Fleck

Fleck 5600 Econominder Service manual

Elkay VRC8FR 1C Series Installation, care & use manual

Elkay

Elkay VRC8FR 1C Series Installation, care & use manual

Kinetico 2020c installation instructions

Kinetico

Kinetico 2020c installation instructions

manuals.online logo
manuals.online logoBrands
  • About & Mission
  • Contact us
  • Privacy Policy
  • Terms and Conditions

Copyright 2025 Manuals.Online. All Rights Reserved.