Grillo G107D User manual

02161 - 13
GRILLO G85-D
GRILLO G107D
OPERATOR'S MANUAL
MANUALE DELL'OPERATORE
MANUEL D'UTILISATION
BEDIENUNGSANLEITUNG
MANUAL DE INSTRUCCIONES
MANUAL DE INSTRUÇÕES

SUMMARY
Safety rules 1
Instructions : 6
Warnings 6
Identification and servicing 7
Technical specifications 8
Putting the machine into service 9
Instructions for use 1
Maintenance and lubrication 12
Implements 14
Illustrations 79
EC Declaration of conformity - Noise and vibrations levels 9
INDICE
Norme antinfortunistiche 1
Istruzioni : 18
Avvertenze 18
Identificazione e assistenza 19
Caratteristiche tecniche 2
Messa in opera della macchina 21
Istruzioni d’uso 22
Manutenzione e lubrificazione 23
Accessori 25
Figure 79
Certificato di conformità CE - Rumorosità e livelli di vibrazione 9
INDEX
Règles de sécurité 1
Instructions : 3
Mises en garde 3
Identification et assistance 32
Caractéristiques techniques 32
Mise en service de la machine 34
Mode d’emploi 34
Maintenance et lubrification 36
Outils 38
Illustrations 79
Certificat de conformité CE - Niveaux sonores et de vibration 9
INHALTSÜBERSICHT
Sicherheitsvorschriften 1
Anleitung: 42
Sicherheitsrelevante Hinweise 42
Identifikation der Maschine und Kundendienst 44
Technische Daten 45
Inbetriebnahme der Maschine 46
Betriebsanleitung 47
Wartung und Schmierung 48
Zubehöre 5
Abbildungsverzeichnis 79
EG-Konformitätserklärung - Geräuschemission und Vibrationspegel 9
ÍNDICE
Normas de seguridad 1
Instrucciones: 55
Advertencias 55
Identificación y asistencia 56
Características técnicas 57
Puesta en servicio de la máquina 58
Instrucciones de uso 59
Mantenimiento y lubricación 61
Equipos 62
Indice de ilustraciones 79
Certificado de conformidad CE - Niveles de ruido y vibración 9
INDICE
Normas de segurança 1
Instruções: 67
Recomendações de precaução de acidentes 67
Identificação e assistência 68
Características técnicas 69
Activação da máquina 7
Instruções de uso 71
Manutenção e Lubrificação 73
Alfaias 74
Índice de ilustrações 79
Certificado de conformidade CE - Nível de Ruído – Vibração 9
- i -

SAFETY SYMBOLS - SIMBOLOGIA PER LA SICUREZZA - SYMBOLOGIE POUR LA SECURITE – SICHERHEITSSYMBOLE-
SIMBOLOGÍA DE SEGURIDAD
OPEN MANUAL- means that ou must read the operator's manual ver carefull .
MANUALE APERTO - significa che dovete leggere attentamente il manuale di uso e manutenzione.
MANUEL OUVERT – signifie qu'il faut lire avec attention le présent manuel.
OFFENES HANDBUCH – bedeutet, dass Sie die Gebrauchs- und Wartungsanleitung aufmerksam durchlesen müssen.
MANUAL ABIERTO – es decir que ha que leer mu atentamente el manual del operador.
CAUTION! - means that ou have to pa particular attention to the operation ou have to carr out, in particular if there is the
indication “DANGER”.
ATTENZIONE! - significa che dovete porre particolare attenzione all’operazione che dovete effettuare, in particolare se vi è anche
l’indicazione di “Pericolo”.
ATTENTION! - signifie qu'il faut faire particulière attention dans l'opération que vous allez faire, en particulier s'il a aussi
l'indication “DANGER”.
VORSICHT! - bedeutet, dass Sie besondere Aufmerksamkeit beim Durchführen des Vorgangs haben müssen, insbesondere wenn
auch der Hinweis “GEFAHR” aufgeführt ist.
ATENCIÓN! - es decir que ha que poner ma or atención en la operación a ejecutar si, en particular cuando ha también la
indicación “Peligro”.
INTERDICTION, YOU MUST NOT DO THAT! - means that it is absolutel forbidden to carr out the operations reported under this
s mbol because the could lead to mortal danger.
DIVIETO, NON FARE! - significa che non dovete assolutamente fare le operazioni riportate sotto questo simbolo, potrebbe
comportare un pericolo mortale.
INTERDICTION, NE PAS FAIRE! - signifie qu'il est absolument interdit d' effectuer les opérations reportées sous cette indication,
car elles pourraient conduire au danger de mort.
VERBOT, strengstens untersagt! - bedeutet, dass der Vorgang unter diesem S mbol absolut nicht durchgeführt werden darf, da er
zur einer lebensgefährlichen Situation führen könnte.
PROHIBICIÓN, NO LO HAGAN! - es decir que no ha que hacer absolutamente las operaciones bajo este símbolo, podría
comportar un peligro mortal.
NOTE, ou have to pa particular attention to the note put next to this s mbol
NOTA, dovete porre particolare attenzione alla nota posta accanto a questo simbolo.
NOTE, il faut faire attention particulière à la note mise à côté de ce s mbole.
ANMERKUNG, besondere Aufmerksamkeit muss auf die Anmerkungen neben diesem S mbol gelenkt werden.
NOTA, ha que poner atención particular en la nota puesta a lado de este símbolo.
You must not repair nor lubricate the machine with moving parts or with the engine put on.
Non riparare o lubrificare la macchina con organi in movimento o motore acceso
Ne pas réparer ou lubrifier la machine avec des parties en mouvement ou à moteur en marche.
Niemals bei bewegenden Objekten oder bei laufendem Motor Reparationen oder Einschmierungen durchführen.
No reparar ni lubrificar la máquina con órganos en movimiento o motor en marcha.
You must not smoke, light matches or lift flames, trigger frames nor cause sparks.
Vietato fumare, accendere fiammiferi o fiamme, lasciare fiamme libere o creare scintille.
Il est interdit de fumer, allumer des allumettes ou du feu, laisser des flammes libres ou de causer des étincelles.
Es ist untersagt zu Rauchen, Streichhölzer oder Feuer anzuzünden, Flammen auslösen oder Funken verursachen.
Prohibido fumar, encender cerillas o fuego, dejar llamas o crear chispas.
Use personal protective equipment.
Utilizzare mezzi di protezione individuali.
Utilisez l'équipement de protection individuelle.
Individuelle Schutzausrüstung benutzen.
Utilizar dispositivos de protección individual.

GENERAL SECURITY RULES
NORME DI CARATTERE GENERALE SULLA SICUREZZA
SICHERHEITSHINWEISE
RÈGLES GÉNÉRALES DE SÉCURITÉ
NORMAS DE CARÁCTER GENERAL SOBRE LA SEGURIDAD
NORMAS DE CARÁCTER GENERAL ACERCA DA SEGURANÇA
Pay attention to symbol DANGER! It points out all most dangerous operations according to the situation. All safety rules are important and therefore must be strictly
observed. Always keep this handbook within the reach, read it carefully and learn how to use the equipment in a safe way. Let nobody, unprovided with necessary
information, work with the equipment.
Fare attenzione al simbolo PERICOLO! Esso indica la presenza delle principali situazioni di pericolo. Tutte le norme antinfortunistiche contente sono importanti e
vanno rispettate. Tenere sempre questo manuale a portata di mano, leggerlo attentamente ed imparare ad usare l’attrezzatura in modo sicuro. Non permettere che
qualcuno operi con questa attrezzatura senza aver ricevuto istruzioni esaurienti.
Attention au symbole DANGER! Il indique la présence des principales situations de danger. outes les normes contenues pour la prévention des accidents sont
importantes et doivent être respectées scrupuleusement. Garder toujours ce manuel à la portée de la main, le lire attentivement et apprendre à utiliser ce matériel en
toute sécurité. Ne pas permettre que d’autres personnes utilisent ce matériel sans avoir reçus des instructions exhaustives.
Achtung - die mit dem ymbol GEFAHR! gekennzeichneten Hinweise weisen auf potentielle Gefahrensituationen hin. Alle sicherheitsrelevanten Hinweise in diesem
Handbuch sind sehr wichtig und müssen unbedingt befolgt werden. Bewahren ie dieses Handbuch stets griffbereit auf, lesen ie es aufmerksam durch, und lernen
ie, die Maschine und die gesamte Ausrüstung sicher zu benutzen. Die Maschine darf nur von Personen benutzt werden, die vorher entsprechend unterwiesen
wurden.
Preste atención al símbolo ¡PELIGRO! Indica la presencia de situaciones importantes de peligro. odas las normas de prevención de accidentes detalladas son
importantes y deben respetarse estrictamente. Conserve este manual al alcance de la mano, léalo atentamente y aprenda a utilizar el equipamiento de modo seguro.
No permita que otras personas operen con este equipamiento sin haber recibido instrucciones exhaustivas.
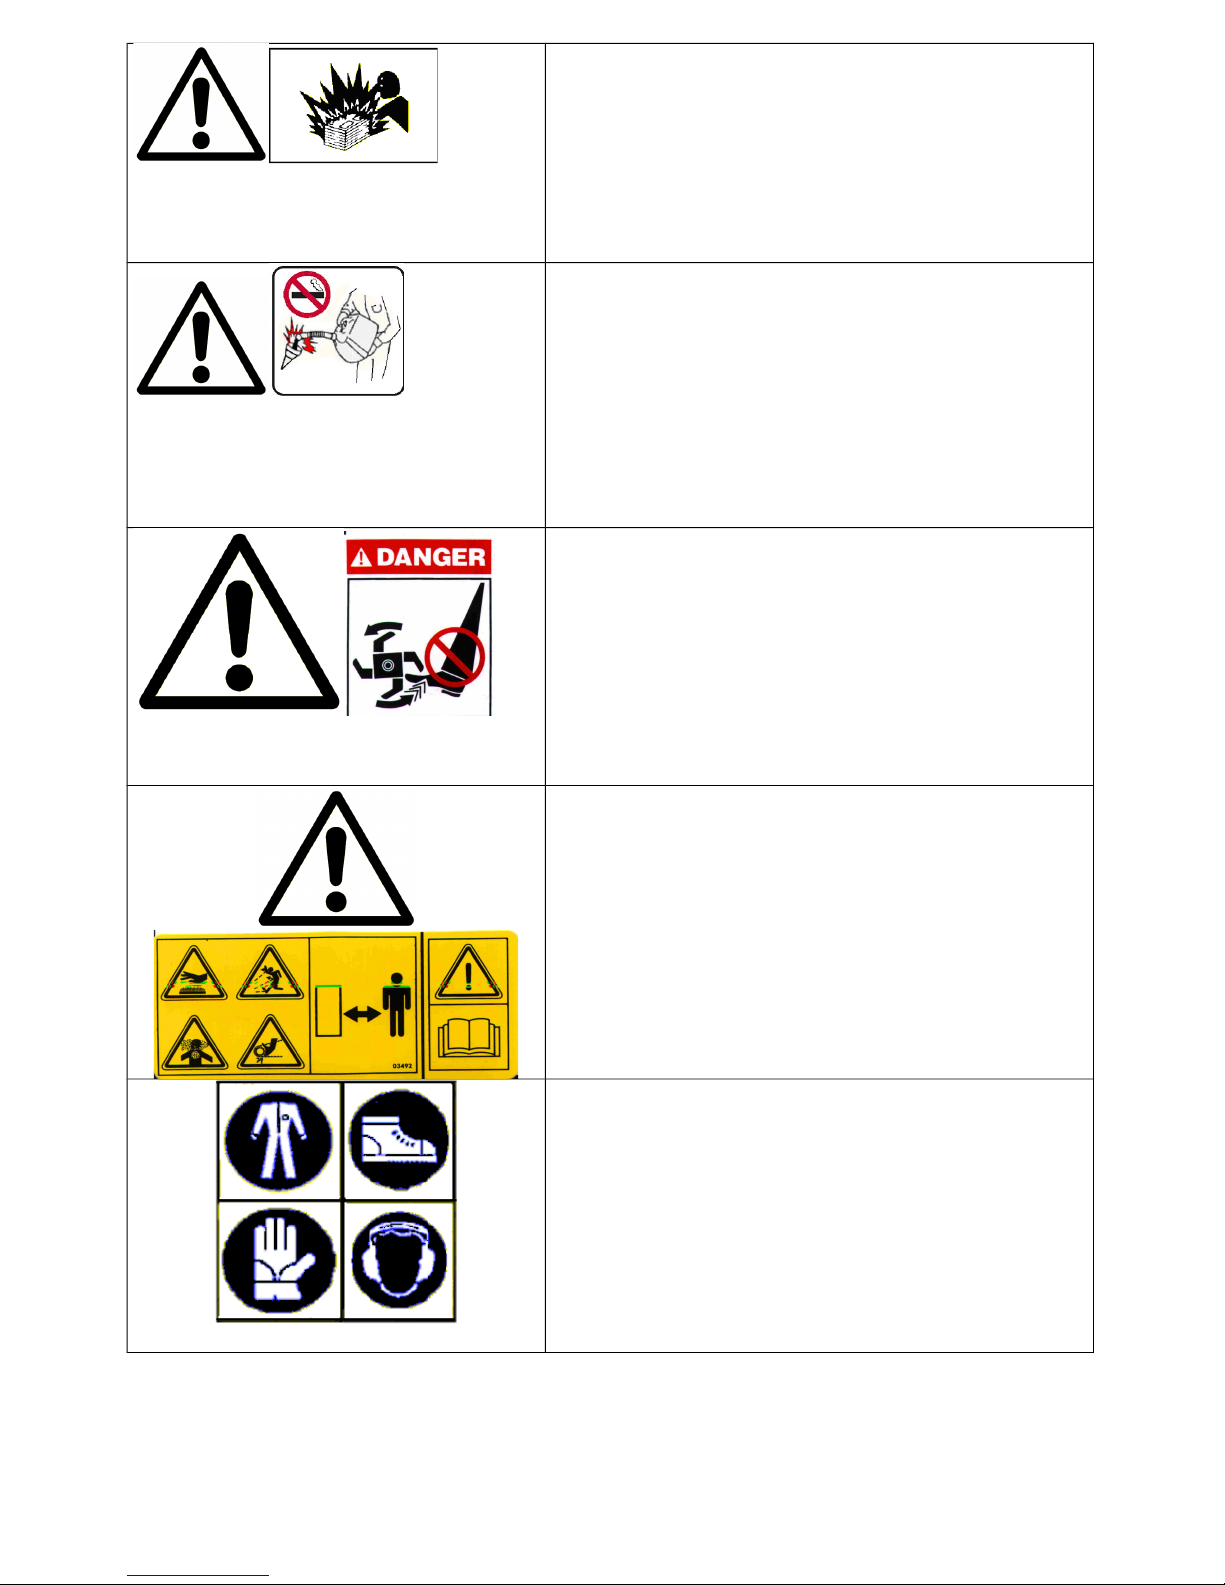
ake special care not to touch hot parts of the engine.
Prestate particolare attenzione a non entrare in contatto con parti surriscaldate del motore.
Veiller tout particulièrement à ne pas toucher des éléments surchauffés du moteur.
Achtung – keine heißen Motorteile berühren!
No tocar partes recalentadas del motor.
Tome muito cuidado para não entrar em contacto com as partes aquecidas do motor.
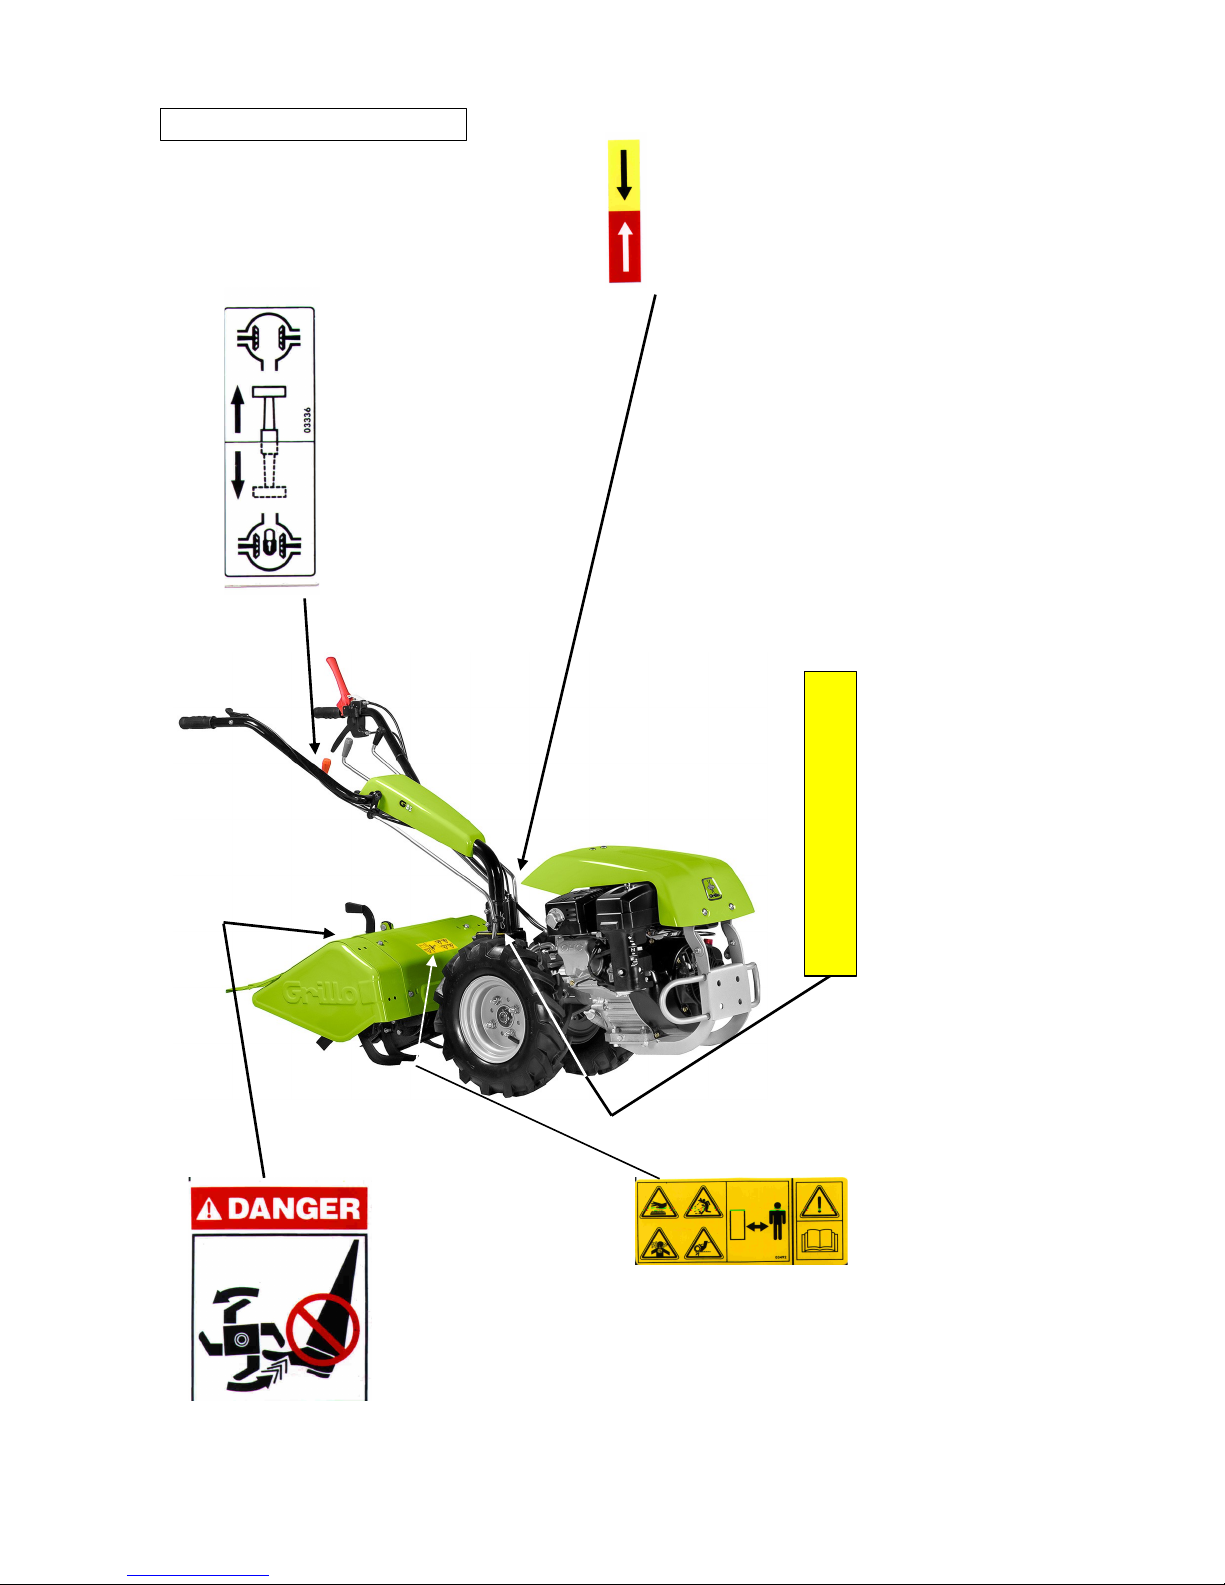
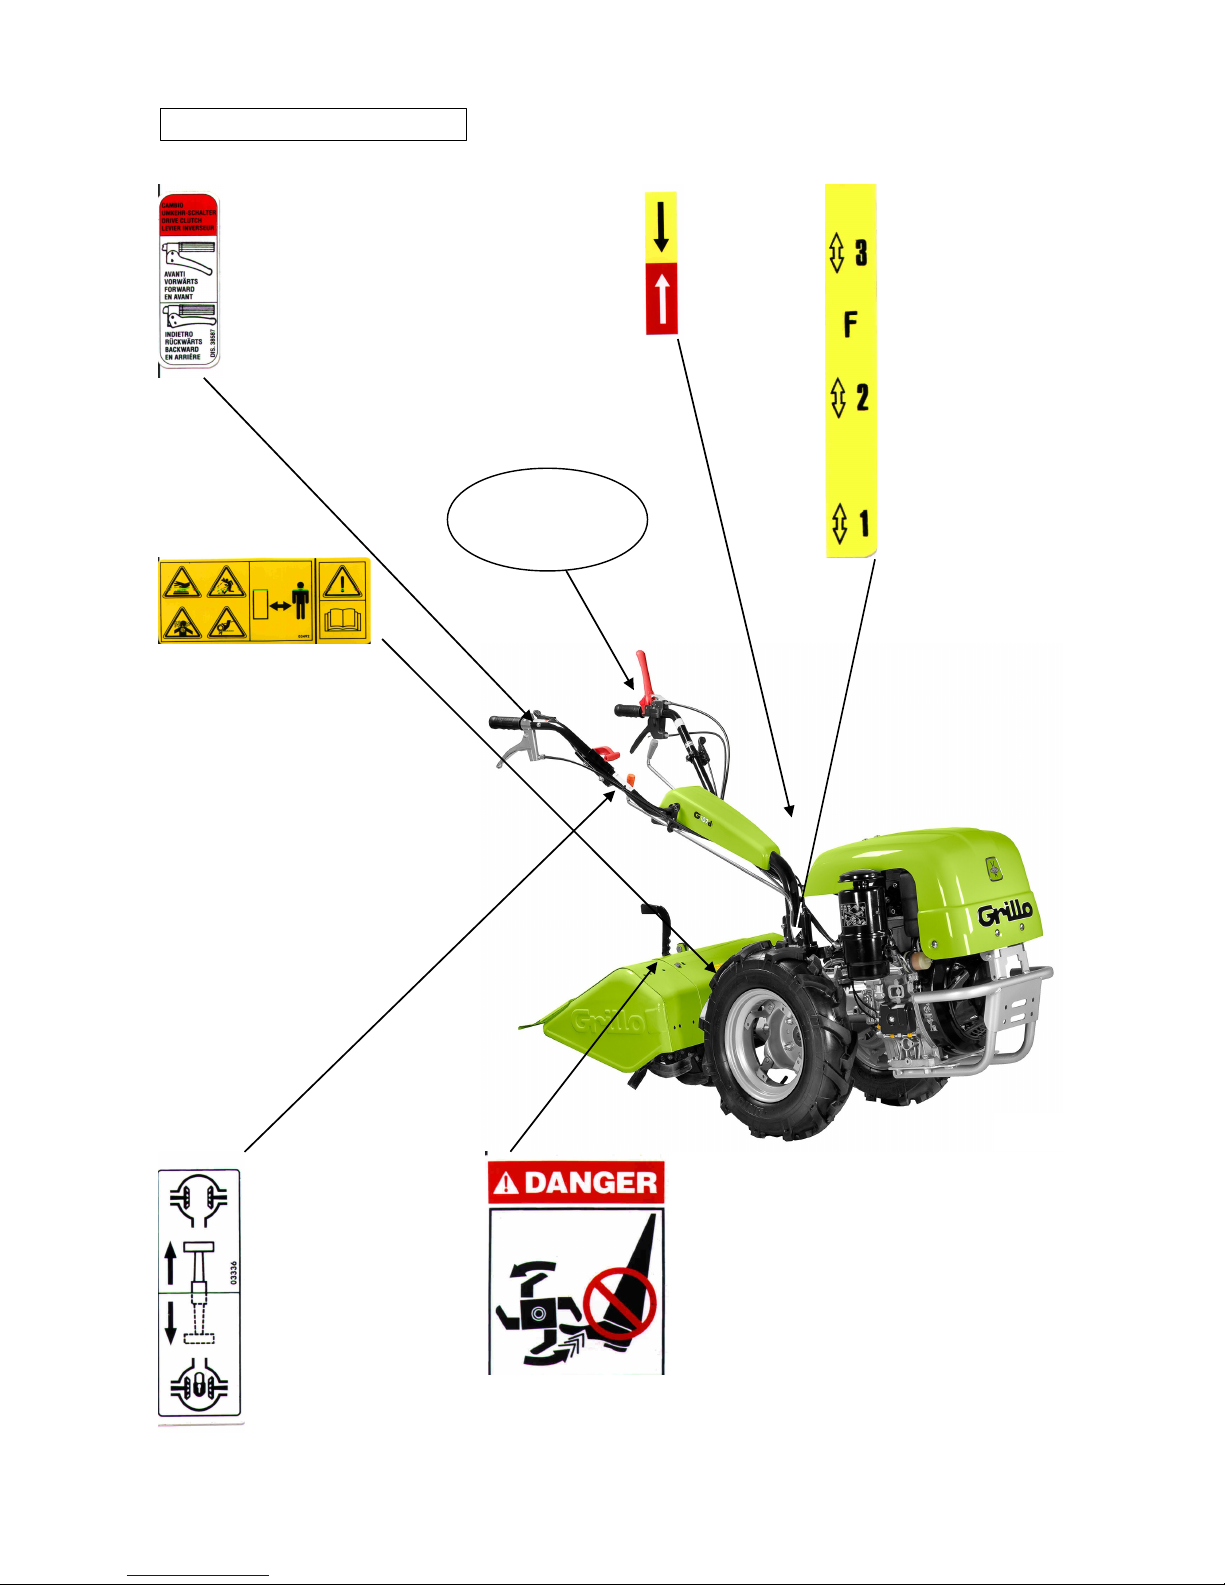
Sharp component. Keep hands and feet away. Do not clean the attachment when the
engine is turning.
Organo tagliente. enere lontano piedi e mani. Non pulire l’attrezzo con il motore in moto.
Organe tranchant. Ne pas approcher mains et pieds. Ne pas nettoyer l’outil quand le
moteur est en marche.
Scharfe Klinge. Hände und Füße fernhalten. Niemals bei laufendem Motor reinigen.
¡Peligro! Órgano cortante. Mantener lejos los pies y las manos. No limpiar la herramienta
con el motor en marcha.
Perigo! Órgão afiado. Mantenha as mãos e os pés afastados. Não limpe o equipamiento
com o motor em movimento.
Engine exhaust fumes can cause sickness or death. If it is necessary to run an engine in an
enclosed area, use an exhaust pipe extension to remove the fumes. Always try to work in a
well ventilated area.
I gas di scarico possono causare malanni o morte. e è necessario mettere in moto un
motore in uno spazio chiuso, usare una prolunga tubo di scarico per far uscire il fumo.
Lavorare in una zona ben ventilata.
L’exhalation des gaz d’échappement peut être cause d’intoxication ou de mort. S’il est
vraiment nécessaire d’allumer le moteur à l’interieur, appliquer au tuyau d’échappement un
autre tuyau extensible pour permettre la sortie des gaz. Il est toujours mieux de travailler en
plein air.
Auspuffgase können Übelkeit oder Tod verursachen. Wenn es notwendig ist, einen Motor
in einem geschlossenen Raum laufen zu lassen, benützen ie eine Verlängerung, um das
Auspuffgas abzuleiten. Versuchen ie immer in einem gut belüfteten Raum zu arbeiten.
Los gases de escape pueden provocar enfermedades o muerte. De tener que poner en
marcha un motor en un espacio cerrado, usar una prolongación del tubo de escape para
que salga el humo. rabajar en una zona bien ventilada.
Os gases de escape podem causar danos ou morte. Caso seja ncessário fazer com que o
motor funcione num espaço fechado, utilize uma extensão para o tubo de escape que os
fumos sejam espulso para o exterior. Trabalhe numa área bem ventilada.
Caution! Never touch moving pulleys or belts. hey can be very dangerous. Never do
maintenance with engine running.
Attenzione! Non toccare mai pulegge o cinghie in movimento, creano gravi danni alla
persona. Non fare manutenzione col motore in moto.
Attention! Ne jamais toucher ni poulies ni courroies en mouvement, elles peuvent provoquer
des accidents aux personnes. Ne pas faire l’entretien quand le moteur est en marche.
Vorsicht! Nie laufende Riemenscheiben oder Treibriemen anfassen, da es gefährlich ist.
Nie bei laufendem Motor Instandhaltung machen.
¡Atención! No tocar jamás poleas o correas en movimiento, porque pueden crear graves
daños a la persona. No efectuar el mantenimiento con el motor en marcha.
Atenção! Nunca toque nas polias ou correias em movimento devido ao alto risco de
ferimentos. Nunca faça a manutenção da máquina com o motor ligado.
A burst which separates the tyre from the rim parts can cause serious injury or death.
La separazione fra pneumatico e cerchione, causata dall’esplosione del pneumatico, può
provocare serie ferite o addirittura la morte.
La séparation entre le pneu et la jante, provoquée par l’explosion d’une roue peut causer
des dommages, blessures ou la mort.
Die Trennung der Räder von den Felgen durch Explosion kann schwere Verletzungen oder
den Tod verursachen.
La separación entre el neumático y la llanta producida por la explosión del neumático
puede provocar graves herida e incluso la muerte.
A separação entre o pneumático e o aro, provocada pela explosão do pneumático, pode
causar graves ferimentos ou até mesmo a morte.

Prevent battery explosions: keep sparks, lighted matches and open flames away from the
top of the battery. Battery gas can explode.
Per prevenire l’esplosione della batteria, tenete scintille, fiammiferi accesi e fiamme lontani
dalla stessa. Il gas della batteria può esplodere.
Prévenir l’explosion de la batterie: tenir les étincelles, les allumettes et le feu loin de la
batterie. Le gaz de la batterie peut exploser.
Vorbeugung der Batterie-Explosion. Entfernen ie Funken, Zündhölzer und Flammen von
der Batterie. Das Batteriegas kann explodieren.
Para prevenir la explosión de la batería, mantener chispas, cerillas encendidas y llamas
lejos de la misma. El gas de la batería puede explotar.
Para prevenir explosão da bateria ter centelhas, fósforos acendido e chamas longe da
mesma. O gás da bateria poderia explodir.
Handle fuel with care, it is highly flammable: Do not refuel machine while smoking, when
machine is near an open flame or sparks, or when the engine is running. Stop the engine.
Maneggiare il carburante con cura, è altamente infiammabile; non fate rifornimento mentre
fumate, o vicino a fiamme o scintille, o quando il motore è acceso.
Manier avec soin le carburant car c’est très inflammable. Ne pas remplir le réservoir si vous
êtes en train de fumer ou pendant que la machine est près du feu ou d’étincelles ou encore
pendant que la machine travaille. Arrêter le moteur.
Treibstoff vorsichtig handhaben, da er sehr entzündbar ist: beim Tanken nicht rauchen.
Nicht tanken, wenn die Maschine in der Nähe von Flammen oder Funken ist oder wenn der
Motor läuft. Immer den Motor abschalten.
Manejar el combustible con cuidado porque es sumamente inflamable; no repostar
mientras se fuma o cerca de llamas o chispas, o cuando el motor está encendido.
Manuseie o carburante com cuidado, pois este è altamente inflamável; não fume durante o
abastecimento da máquina ou enquanto o motor estiver ligado, não o aproximado de
chama ou de faíscas.
Warning! urning gears, keep your hands and feet away. Do not clean the attachment when
the engine is running.
Attenzione! Organo in rotazione, tenere lontano piedi e mani. Non pulire l'attrezzo col
motore in moto.
Attention! Organ en rotation, ne pas approcher main et pieds. Ne pas nettoyer le moteur
quand le moteur est en marche.
Achtung! Rotierende Klinge, Hände und Füße fernhalten. Niemals bei laufendem Motor
reinigen.
¡Peligro! Órgano cortante. Mantener lejos los pies y las manos. No limpiar la herramienta
con el motor en marcha.
Atenção! Órgão em rotação. Mantenha as mãos e os pés afastados. Não limpe o
equipamento com o motor em movimento.
DANGER! READ THE INSTRUCTION MANUAL. KEEP SAFETY DISTANCES.
PERICOLO! LEGGERE IL MANUALE D’ISTRUZIONE. TENERE LONTANO LE PERSONE.
DANGER! LIRE LE MANUEL D’INSTRUCTIONS. RESPECTER LES DISTANCES DE
SÉCURITÉ
GEFAHR! DIE GEBRAUCHS ANLEITUNG DURCHLESEN. NICHT IN DER NÄHE VON
ANDEREN PERSONEN MÄHEN.
PELIGRO! LEER LAS INSTRUCCIONES. MANTENER ALEJADAS LAS PERSONAS.
PERIGO! LER O MANUAL DE INSTRUÇÕES. MANTER AS PESSOAS AFASTADAS.
Before using the machine, it is mandatory to put on the appropriate individual safety
devices: body protection, protection gloves, security shoes, ear protection.
Prima di utilizzare la macchina, è obbligatorio indossare gli appositi dispositivi di sicurezza
individuali: protezione del corpo, guanti di protezione, calzature di sicurezza, protezione
dell’udito.
Avant d’utiliser la machine, il est obligatoire de mettre les dispositifs individuels de sécurité
appropriés: protection du corps, gants de protection, chaussures de sécurité, protection de
l’ouïe.
Vor dem Gebrauch der Maschine ist es vorgeschrieben, die geeignete persönlichen
chutzkleidung anzuziehen: Körperschutz, chutzhandschuhe, icherheitsschuhe,
Gehörschutz.
Antes de utilizar la máquina es obligatorio ponerse los dispositivos individuales de
seguridad apropiados: protección del cuerpo, guantes de protección, calzado de seguridad,
protección del oído.

DIFFERENTIAL LOCK LEVER
FREE / LOCKED
LEVA BLOCCAGGIO
DIFFERENZIALE
LIBERO / BLOCCATO
MANETTE DE BLOCAGE DU
DIFFÉRENTIEL
LIBRE / BLOQUÉ
DIFFERENTIALSPERRESTANGE
FREI / GESPERRT
VARILLA BLOQUEO
DIFERENCIAL
LIBRE / BLOQUEADO
ALAVANCA DE BLOQUEIO DO
DIFERENCIAL
LIVRE / BLOQUEADO
Fig. 1A
War i g! Tur i g gears, keep your ha ds a d
feet away. Do ot clea the attachme t whe
the e gi e is ru i g.
Atte zio e! Orga o i rotazio e, te ere
lo ta o piedi e ma i. No pulire l'attrezzo col
motore i moto.
Atte tio ! Orga e rotatio , e pas
approcher mai et pieds. Ne pas ettoyer le
moteur qua d le moteur est e marche.
Achtu g! Rotiere de Kli ge, Hä de u d
Füße fer halte . Niemals bei laufe dem
Motor rei ige .
Ate ção! Órgão em rotação. Ma te ha as
mãos e os pés afastados. Não limpe o
equipame to com o motor em movime to.
DANGER! READ THE INSTRUCTION
MANUAL. KEEP SAFETY DISTANCES.
PERICOLO! LEGGERE IL MANUALE
D’ISTRUZIONE. TENERE LONTANO LE
PERSONE.
DANGER! LIRE LE MANUEL
D’INSTRUCTIONS. RESPECTER LES
DISTANCES DE SÉCURITÉ
GEFAHR! DIE GEBRAUCHS ANLEITUNG
DURCHLESEN. NICHT IN DER NÄHE
VON ANDEREN PERSONEN MÄHEN.
PELIGRO! LEER LAS INSTRUCCIONES.
MANTENER ALEJADAS LAS PERSONAS.
PERIGO! LER O MANUAL DE
INSTRUÇÕES. MANTER AS PESSOAS
AFASTADAS.
G85 - G85D
GEAR LEVER
1-2 GEARS
F IN NEUTRAL POSITION
MARCE
1-2 MARCE
F POSIZIONE DI FOLLE
LEVIER DE COMMANDE DE
VITESSE
1-2 VITESSES
F POINT MORT
GANGHEBEL
1-2 GÄNGE
F LEERLAUF
MARCHAS
1-2 MARCHA
F PUNTO MUERTO
VELOCIDADES
1-2 VELOCIDADES
F PONTO MORTO
F
↕2
↕1
DRIVE CLUTCH
INVERTITORE DI MARCIA
INVERSEUR DE MARCHE
FAHRWERK
INVERSOR DE MARCHA
INVERSOR DE MARCHA
5

DRIVE CLUTCH LEVER
FORWARD - BACKWARD
LEVA COMANDO INVERTITORE
AVANTI – RM (RETROMARCIA)
LEVIER INVERSEUR DE MARCHE
AVANT / ARRIÈRE
UMKEHR-SHALTER
VORWÄRTS - RÜCKWÄRTS
PALANCA INVERSOR MARCHA
AVANCE – MARCHA ATRAS
ALAVANCA DE COMANDO DO INVERSOR
AVANÇAR – RECUAR (MARCHA ATRÁS)
ALWAYS USE THE CLUTCH
EITHER TO GO FORWARD OR
BACKWARD
PER L’INVERSIONE DI MARCIA
USARE SEMPRE LA FRIZIONE
UTILISER TOUJOUR
L’EMBRAYAGE POUR INVERSER
LE SENS DE LA MARCHE
ZUR UMKEHR DER RICHTUNG
DAS FAHRWERK IMMER
BENUTZEN
PARA INVERTIR LA MARCHA
USAR SIEMPRE EL EMBRAGUE
PARA A INVERSÃO DE MARCHA
UTILIZAR SEMPRE A
EMBRAIAGEM
GEAR LEVER
1 / 2 / 3 GEARS
F IN NEUTRAL POSITION
MARCE
1 / 2 / 3 MARCE
F POSIZIONE DI FOLLE
LEVIER DE COMMANDE DE
VITESSE
1 / 2 / 3 VITESSES
F POINT MORT
GANGHEBEL
1 / 2 / 3 GÄNGE
F LEERLAUF
MARCHAS
1 / 2 / 3 MARCHA
F PUNTO MUERTO
VELOCIDADES
1 / 2 / 3 VELOCIDADES
F PONTO MORTO
DIFFERENTIAL LOCK LEVER
FREE / LOCKED
LEVA BLOCCAGGIO DIFFERENZIALE
LIBERO / BLOCCATO
MANETTE DE BLOCAGE DU DIFFÉRENTIEL
LIBRE / BLOQUÉ
DIFFERENTIALSPERRESTANGE
FREI / GESPERRT
VARILLA BLOQUEO DIFERENCIAL
LIBRE / BLOQUEADO
ALAVANCA DE BLOQUEIO DO
DIFERENCIAL LIVRE / BLOQUEADO
War i g! Tur i g gears, keep your ha ds a d feet away. Do
ot clea the attachme t whe the e gi e is ru i g.
Atte zio e! Orga o i rotazio e, te ere lo ta o piedi e ma i.
No pulire l'attrezzo col motore i moto.
Atte tio ! Orga e rotatio , e pas approcher mai et pieds.
Ne pas ettoyer le moteur qua d le moteur est e marche.
Achtu g! Rotiere de Kli ge, Hä de u d Füße fer halte .
Niemals bei laufe dem Motor rei ige .
Ate ção! Órgão em rotação. Ma te ha as mãos e os pés
afastados. Não limpe o equipame to com o motor em
movime to.
G107D
WARNING
ALWAYS USE THE
CLUTCH
EITHER TO GO
FORWARD
OR BACKWARD
DRIVE CLUTCH
INVERTITORE DI
MARCIA
INVERSEUR DE
MARCHE
FAHRWERK
INVERSOR DE MARCHA
INVERSOR DE MARCHA
DANGER! READ THE INSTRUCTION MANUAL.
KEEP SAFETY DISTANCES.
PERICOLO! LEGGERE IL MANUALE D'ISTRUZIONI.
TENERE LONTANO LE PERSONE.
DANGER! LIRE LE MANUEL D0INSTRUCTIONS.
RESPECTER LES DISTANCES DE SECURITE.
GEFAHR! DIE GEBRAUCHSANLEITUNG DURCHLESEN.
NICHT IN DER NÄHE VON ANDEREN PERSONEN MÄHEN.
PELIGRO! LEER LAS INSTRUCCIONES.
MANTENER ALEJADAS LAS PERSONAS.
PERIGO! LER O MANUAL DE ISTRUÇÕES.
MANTER AS PESSOAS AFASTADAS.
Fig. 1B
6

Translation of the Original Instructions
ROTAVATOR
G85 - G107D
Dear Customer,
thank you for choosing our rotavator; we are sure that your new machine’s performance will meet
your requirements in full. To ensure optimum service an maintenance of its qualities over time,
rea this manual carefully an follow its instructions. This will give you the best results an protect
your investment. Please keep this manual, which must always accompany the machine.
GENERAL DESCRIPTION AND INTENDED USE
The Grillo G85-107 is a single-axle self-propelle walking tractor complete with a rotary tiller for
tilling soil. These machines are use primarily to prepare the soil (elimination of wee , surface
tilling of the soil) an use in gar ening, for small groun work, refinement work an orchar inter-
rows. The machine is constructe on a chassis an fitte with either a petrol or iesel engine. The
engine rives the wheels an P.T.O, which is usually connecte to a rotary tiller. Other implements
can be connecte to the P.T.O such as a snow thrower, swinging front bla e, cutter bars, rotary
cutters, ploughs, power brushes an sprayer pumps. The Grillo G85 is a pe estrian-controlle
machine, the operator steers the machine via the han le- bar where the controls are mounte .
CAUTION! Before start ng the eng ne, read th s carefully. The
follow ng warn ngs are very mportant n ensur ng safety!
WARNINGS
Caution is the main safeguar in preventing acci ents!
We urge you to rea the warnings that follow when using the rotavator, before starting any work at
all. Improper use of the rotavator an its equipment can be angerous; to re uce the risks to the
minimum, observe the necessary precautions set out below:
1) Rea the whole of this manual before starting the machine or putting it in motion.
2) Pay special attention to the safety warnings an labels.
3) Rotation of the tiller is extremely angerous; never nsert hands or feet under the t ller!
4) Before other people are allowe to use the machine they must first be informe about the safety
regulations an how to use the vehicle.
5) Before starting the engine, make sure that there is no-one nearby, particularly chil ren.
6) Never use the machine when tire an o not rink alcohol.
7) Check the groun before tilling for stones, sticks or foreign bo ies which might amage the
machine or be flung
angerously to some istance uring operation.
8) Before start ng work, put on su table work ng clothes, gloves, heavy footwear and
goggles.
9) Never use the rotavator on steep slopes; it might tip over (max. 25%).
10) Never allow the machine to be use by anyone un er 16 years of age.
11) Never reverse with the engine at high throttle.
12) It is angerous to operate the levers sharply with the engine at maximum r.p.m.
13) Never keep the engine running in oors; you may inhale poisonous gases.
14) Always switch off the engine before filling up with fuel, keep away from sparks or flames an
o not smoke!
15) Avoi fuel spills an after filling the tank clean all spills before starting the engine.
16) The rotating bla es of the mower are very angerous. Never place your hands or feet under
the mower.
17) Store fuel in containers specially constructe for this purpose.
18) Work only in sunlight or with goo artificial light.
IMPROPER USES TO BE AVOIDED
19) Any improper uses causes the machine to become null an voi an the constructor will
ecline all liability.
20) Never use the machine to transport people, animals or objects.
67

Translation of the Original Instructions
FURTHER SAFETY ADVICES
21) Never tamper w th or deact vate the safety dev ces.
22) Never make any adjustments or do any clean ng w th the eng ne runn ng.
23) Never have anyone check the mach ne wh le you are dr v ng w th the eng ne runn ng.
24) The user is always responsible for injury or amage to thir parties. Misshapen or amage
hoes must always be replace an never repaire .
25) Always use original Grillo spare parts.
26) Before starting any work with the machine, check that all the acci ent prevention systems with
which it is equippe are in perfect working or er. They must never be isable or tampere with.
27) Before starting work, check that the nuts an bolts securing the tiller an hoes are perfectly
tight.
28) All protective fittings (hoo s, mu guar s, etc.) must be kept in place uring operation.
29) Never clean the tiller with the engine running.
30) Never use the machine barefoot.
31) Do not use the fast connection or other possible extensions with the rotary hoe since they
coul approach the rotary hoe to the operator’s feet an therefore not comply with the security
regulation EN 709.
32) Never change the engine settings, especially the max. r.p.m.
33) Allow the engine to cool before placing the machine in oors.
34) CAUTION: to re uce the risk of fire, keep the engine, the exhaust pipe an the exhaust
manifol s free from grass, leaves, ust, etc…
35) If you have to empty the fuel tank, o this out oors.
36) Rotovator must be riven by only one operator.
IDENTIFICATION AND SERVICING
IDENTIFICATION
The vehicle’s serial number is punche on the
nameplate on the left-han longitu inal
member of the chassis an on the gearbox
nameplate.
Always state the serial number when or ering
spare parts.
AFTER-SALES SERVICE
This han book provi es instructions for use of the cultivator an for correct basic servicing which
the user can carry out himself.
For all proce ures not escribe in this han book, contact your local ealer.
SPARE PARTS
Always use original spare parts, as they are the only ones to offer complete safety an
interchangeability.
Always state the serial number when or ering.
For engine parts, refer to the specific han book.
GUARANTEE
The guarantee is given in compliance with the current law. The ealer will have to give the client a
copy of the registration car of the machine, which they will print up from the Grillo website.
For the engine the guarantee of the relative manufacturers apply.
ORDERING SPARE PARTS
Always state the machine serial number an the co e number of the part to be replace .
Contact your local ealer. Our a ress is:
GRILLO S.p.A.
Via Cervese 1701 - 47521 CESENA (FC) - ITALY
Tel. 0039 / 0547 / 633111 - Fax 0039 / 0547 / 632011
Web site: www.grillospa.it - E-mail: [email protected]
88

Translation of the Original Instructions
TECHNICAL SPECIFICATIONS G85 – G85D
ENGINE TYPES:
ROBIN SUBARU EX 27
LOMBARDINI 15LD350
Also available with electric system.
MACHINE:
Clutch: active clutch.
Gearbox: 4 spee s – 2 forwar + 2 reverse both as rotavator an as sickle-bar (turning the
han lebars).
Spee s in km/h with engine at 3600 r.p.m. are as follows:
Gears Spee s with tyres 4.00-8
Ist
Iin
Ist REVERSE
IIn REVERSE
1,1
2,6
1,1
2,6
P.T.O.: in epen ent from the gearbox; 965 rpm with engine at 3600 rpm.
Wheels: tyres 4.00-8 /4.00-10 /5.00-10.
Rotary t ller: 58 cm stan ar ; a justable up to 37-47-68 cm.
Handlebar: Si e an height a justment - reversible.
Track: external measurements: with tyres 4.00-8, 42 cm - with wi e steel wheels, 36-44 cm.
Implements and attachments: tiller, ouble tiller, mower bar, snow thrower, plough, furrower,
lawn mower, grass shre er, irrigation pump, spraying pump, towe trailer, rotary tiller support
wheel, towing bar, wheel weights, metal wheels, wee er, container trailer, rake, front scraper,
biological grin ing mill, sweeper.
TECHNICAL SPECIFICATIONS G107D
ENGINE TYPES:
LOMBARDINI 15LD440
ROBIN SUBARU EX 27
Also available with electric system.
MACHINE:
Clutch: active clutch
Gearbox: 6 spee s – 3 forwar + 3 reverse both as rotavator an as sickle-bar (turning the
han lebars). Spee s in km/h with engine at 3600 r.p.m. are as follows:
Gears Spee s with tyres 4.00-8
Ist
Iin
IIIr
Ist REVERSE
IIn REVERSE
IIIr REVERSE
1,1
2,6
4,3
1,0
2,0
3,0
P.T.O.: in epen ent from the gearbox; 965 rpm with engine at 3600 rpm.
Wheels: tyres 4.00-8 /4.00-10 /5.00-10.
Rotary t ller: 58 cm stan ar ; a justable up to 37-47-68 cm.
Handlebar: Si e an height a justment - reversible.
9

Translation of the Original Instructions
Track: external measurements: with tyres 4.00-8, 42 cm - with wi e steel wheels, 36-44 cm.
Implements and attachments: tiller, ouble tiller, mower bar, snow thrower, plough, furrower,
lawn mower, grass shre er, irrigation pump, spraying pump, towe trailer, rotary tiller support
wheel, towing bar, tank mounte on olly, wheel weights, metal wheels, wee er, container trailer,
rake, front scraper, biological grin ing mill, sweeper.
PUTTING THE MACHINE INTO SERVICE
1) Check that the machine has not been amage in transit.
2) Fill with grease the machine PTO flanging all aroun the coupling (fig. 3 no. 20).
3) Select riving han lebar position accor ing to the use, Walking tractor or Motormower, by using
the two levers (fig. 3, 4A no. 10 an no. 12).
4) Mount wheels an implement (e.g. rotary tiller, plough etc.) an tighten the securing nuts
completely.
5) A engine oil, please refer to attache instruction booklet.
6) A gearbox oil - fig. 6 (MP 80W 90 oil, or international equivalent API GL5 oil, US MIL-L-
2105D, quantity 2,2 litres for G85 an 1,9 litres for G85D an G107D.
7) A oil into the air filter in oil bath (for versions provi e with this type of filter), use the same oil
type as the engine oil (fig. 7A).
8) Insert the control levers (fig. 3 no. 13, no. 15 an no. 2).
9) Verify the tyre pressure accor ing to the table provi e below:
TYRE PRESSURE
4.00-8 2 PLY RATING 1,1 BAR
4.00-10 2 “ “ 1,1 “
5.00-10 2 “ “ 1,5 “
5.00-10 2 “ “ 1,5 “
10) In the electric starting versions verify the battery voltage, it must not be lower than 12,5 V,
when require charge the battery, at 12,5 V on slow charge for 2 hours.
IMPORTANT!
During assembly take care not to get the polarity of the battery reverse .
11) Fill the tank with fuel using a funnel provi e with a fine filter.
12) Check liqui levels when the machine is horizontal.
INSTRUCTIONS FOR USE
Before starting the engine always check:
−the oil levels insi e the engine (fig. 5, ref. A) an the gearbox; the level check cap is on the
upper cover (fig. 6); the oil level must be between the two notches.
−that all screws an nuts are well tightene especially those fastening the attachments to the
machine.
−that all levers are in neutral.
−that the air filter ( ry version) is clean (fig. 7). Caution! Never blow the cartri ge with
compresse air; if clogge it must be replace .
−that the air filter (in oil bath version) is clean an its oil at the right level (fig. 7A).
−check the oil level insi e the tiller gearbox (fig. 4 no. 3)
−fill the tank with fuel, using a funnel with very fine filter.
10

Translation of the Original Instructions
STARTING THE PETROL ENGINE
Turn on the petrol cock, push the throttle lever to the mi way position an , if the engine is col ,
engage the choke on the carburettor. Start the engine by pulling har on the pull starter han le (6,
Fig. 3).
STARTING THE DIESEL ENGINE
Push the throttle lever to the mi way position (see engine manual), press the ecompressor lever
on the engine hea until it remains in position an start the engine by pulling har on the pull
starter han le (6, Fig. 3).
STARTING THE MACHINE
Set the gearbox lever in the esire position. If the gear oes not engage imme iately, give a few
light touches on the clutch. The machine moves pressing the lever 27 (fig. 27) an then the clutch
lever (fig. 3 no.1, fig. 4A no.1) until the machine starts moving.
By releasing the re lever, the machine will stop but the engine will keep running an the lever
returns back to position 1 (fig. 3, fig. 4A).
To turn the engine off, turn the switch positione on the han le (21, fig. 3), position OFF for petrol
engines. For Diesel engines, turn the han le to position 25 (fig. 4A).
N.B. - If the P.T.O. s connected the reverse gear cannot be nserted. D sengage the P.T.O.
and then engage the reverse gear.
NOTE: to avo d problems to the clutch dur ng the funct on ng of the mach ne, please keep
the red lever f rmly depressed. Attent on. Do not use the mach ne wh lst only part ally
depress ng the red lever or damage to the clutch may result.
STARTING WORK
Connect the P.T.O., moving the clutch lever slightly if it oes not engage at once. Increase
spee as appropriate an press the clutch lever to start work.
END OF WORK
When work is en e , n order to stop the PETROL ENGINE, set the gear and P.T.O. n neutral
pos t on and leave the handles, then turn the switch inserte in the throttle lever to the position
OFF (fig. 3 n. 21). For DIESEL ENGINES, turn the throttle lever (fig. 4A n. 25).
If your rotovator is fitte with an electric starter you must also turn the ignition key off.
TROUBLESHOOTING
The following is a list of small problems which may occur uring the use of the rotovator, which the
operator himself can reme y.
1) if the petrol eng ne oes not start, check as follows:
– that the fuel tank is at least half full;
– that the petrol cock is turne on;
– that the choke is engage (when the engine is col );
– that fuel is reaching the carburettor;
– that the vent hole on the fuel tank is not blocke ;
– that the mesh filter at the carburettor intake is clean;
– that the carburettor jets are clean. Check by unscrewing them an if irty, clean them with a jet of
air;
– that spark plug is generating a spark. To check this, remove the spark plug, re-connect it to the
electricity supply wire, rest the metal si e on an electrical earth an turn the engine-pulley as if to
start it. If no spark is seen between the electro es, check the connection of the spark plug cable; if
there is still no current replace the spark plug with a new one. If a spark is still not obtaine , the
problem is in the electric system: capacitor, coil, or in some other component. Contact your nearest
service centre or a specialist workshop.
2) if the D esel eng ne oes not start check as follows:
11

Translation of the Original Instructions
– that the fuel tank vent hole is not blocke ;
– that the fuel tank is at least half full.
3) If the gears o not engage:
– regulate the clutch by unscrewing the a juster screw until the clutch release istance is
satisfactory. Remember that there must always be a little slack on the clutch cable.
FOR LONG IDLE PERIODS
In case the machine is not to be use for a long perio , the following precautions are
recommen e :
– empty the fuel tank an the carburettor;
– clean the engine an the machine thoroughly. Oil the han lebar support reversing mechanism.
MAINTENANCE AND LUBRICATION
CAUTION!
- D sconnect the plug before perform ng any clean ng, ma ntenance or repa r operat on.
Always wear su table cloth ng and work ng gloves.
- When the mach ne or part of t s l fted to carry out ma ntenance operat ons, always
remember to use su table f x ng tools such as holders and safety locks.
- When carry ng out ma ntenance operat ons and/or when the mach ne s t lted w thout
safety locks or supports, never leave t unguarded n places where nexper enced people
and ch ldren could have easy access to t.
- Protect the env ronment: carefully d spose of used o ls, petrol and any other pollutant
product!
- Effect ve ma ntenance and correct lubr cat on help to keep the mach ne fully eff c ent.
RUNNING-IN: change the engine oil after the first twenty working hours.
ENGINE - Follow the instructions on lubrication intervals in the relative manual. In general users
are a vise to check the oil level every 8 working hours an to change it every 100 hours. Always
use 15W40. Check the air filter oil level every 8 working hours or more often in very usty
con itions.
Top up with the same oil as for the engine (see engine han book). On versions with ry filter,
replace the cartri ge if clogge ( o not clean with compresse air jets).
GEARBOX - Check the oil level every 50 working hours by removing the cap an checking with
the machine horizontal the oil reaches between the two notches. If necessary a MP 80 W/90
(API GL5 US-MIL-L-2105D) oil.
Change the oil once a year.
ROTARY TILLER - Check the oil level every 50 hours by removing the plug; the oil must almost fill
the rotary tiller box. If necessary a the same oil as for the gearbox.
HELPFUL HINTS FOR PROPER USE:
1) Important! Always use the clutch for forwar an reverse travel.
2) Never leave the out in the rain.
3) Keep the reversing mechanism in the han lebar support clean an well oile .
4) Never force the gearbox if the gear oes not engage; give a succession of little touches on the
clutch.
5) Never strain the engine: if smoke comes out of the exhaust, the engine is toiling an must be
slowe own.
6) Even impossible groun can be tille , but the machine must be well run-in first.
7) Check the tyre pressure often.
12

Translation of the Original Instructions
8) When fitting the implements (e.g. rotary tiller) take care not to amage the centring evice (see
chapter on «Implements»).
END OF SEASON MAINTENANCE
Clean the machine carefully; change the engine, gearbox an tiller gearbox oil. Clean the air filter.
Sharpen an grease the bla es, replacing them if worn.
MAINTENANCE SUMMARY TABLE
PROCEDURE EVERY 8
HOURS
AFTER
20
HOURS
EVERY
50
HOURS
EVERY
100
HOURS
ONCE A
YEAR
OR
EVERY
200
HOURS
Engine oil check the level ●
change ● ●
Air filter
check ●
replace ٭
Spark plug check/a just ●
replace ●
Gearbox oil Check the level ● ●
replace ●
Check that the engine intake gri is
clean ●
Cutter bar
Check bla e
attachment ● ●
grease ●
Check that tines are well-sharpene
an well-fixe ● ●
Lubricate with grease ●
Check clutch clearance (free play) ● ●
● recommen e proce ure
٭ procedure to be carr ed out f necessary
13

Translation of the Original Instructions
IMPLEMENTS
ROTARY TILLER
The rotary tiller is use to break the surface layer of the groun in or er to increase its permeability
an at the same time to ri of wee s. Till in first spee if the soil is har an tough or in secon
spee in soft, san y soil. The working epth can be a juste by lifting or lowering the central knife
situate un er the rotary unit. The tiller cover position will change at the same time. Raise the knife
to increase the epth. Start work with the knife in its lowest position, an then raise it if greater
epth is require (fig. 4B).
N.B. - On hard so ls the mach ne may jump forward. In th s case lower the central kn fe and
f t t nto the th rd hole (f g. 4B). Check that the blades are f tted correctly (see f g. 9).
ADJUSTABLE FURROWER
This implement is specially esigne for preparing furrows for sowing an irrigation. It is mounte
like a plough or a rotary tiller on the implement flange on the back of the gearbox. The furrow wi th
can be regulate from a minimum of 10 cm to a maximum of 30 cm, by changing the position of the
two wings. The epth can be varie from 10 to 20 cm. When working on particularly har soils, till
before furrowing. The results obtainable can be improve by fitting the 5.00-12 tyres an if
necessary the wheel-weights which increase wheel grip (fig. 10).
MOWER BAR
The mower bar which can be attache to the rotovator has a central or si e control. Its strength
an high performance make it the best way of mowing small pieces of lan when it oes not make
economic sense to purchase a motor mower which woul remain unuse for most of the year,
while a rotovator can be use with other implements. The mower bar is attache to rotovator
implement frame instea of the rotary tiller an fixe using the same two nuts. The han lebar must
be turne 180° towar s the engine. Before turning the han lebar engage first gear, then release
the rive ro s.
Once the han lebar has been turne , fit the ro s back into the supports. Now that the han lebar
has been reverse the han lebar support mechanism enables the use of all the rotovator gears,
except the fastest spee which coul be angerous. To rive the mower bar, isconnect the safety
evice which prevents simultaneous engagement of the reverse spee an the P.T.O. (necessary
when using the rotary tiller) by simply removing the screw that blocks the gear lever an stops the
engagement of the two functions together.
Important: when reconnect ng the rotary t ller, the safety dev ce must be set n the or g nal
pos t on. We do not accept any respons b l ty for fa lure to follow th s rule (f g. 2 and f g.
2/A).
Ma ntenance: grease the cross pins every 8 working hours through the grease nipples on the
swinging crank. Grease the mower bar swinging bushing every 50 working hours through the
grease nipple un er the swinging protection. Keep the bla e le ger plates properly a juste . They
must be neither too tight, so that they block the bla e, nor too loose so that there is too much
clearance between them an the bla es. To a just the le ger plates in both irections loosen the
locking bolts (fig. 12) an a just the pressor screw. The le ger plates shoul be replace when
worn even if they are still able to apply pressure against the bla es. Regulate the clearance
between the bla e an the strip by loosening the screws fixing the plates pressing the strip an
moving the strip forwar until it touches the bar which supports the naile bla e section. Then
retighten the pressing plates. To remove the bla e take off the L-shape bla e coupling by
removing the two screws (fig 13 no. 3) an slip off the bla e. Take care to tighten the fixing screws
of the coupling after assembling the bla e again. Always use sharp bla es: the machine will be
subject to less strain an its working life will be longer. Clean the mower bar after every working
ay, removing any remaining pieces of grass or earth; every now an then check that all screws
are tight.
14

Translation of the Original Instructions
SNOW THROWER
This implement (fig. 14) has been especially esigne for this particular rotovator. It is very useful
for clearing snow from yar s, riveways, etc. It consists of a turbine rotary unit enclose in a
special case open at the front, which rotates at high spee , collecting the snow an throwing it
along a pipe. The pipe angle can be a juste to throw the snow in any irection to a istance of 8 -
10 metres.
The snow thrower is fixe to the implement flange using two nuts. The han lebar must be turne
through 180° towar s the engine; for this operation follow the irections given for the mower bar.
To operate the snow thrower, the safety evice preventing simultaneous engagement of reverse
gear an the P.T.O. (necessary with the rotary tiller), must be isconnecte by removing the allen
screw on the PTO lever.
Important: when reconnect ng the rotary t ller, the safety dev ce must be set n the or g nal
pos t on. We do not accept any respons b l ty for fa lure to follow th s rule.
The snow thrower is 70 cm wi e an can clear snow up to 40 cm eep. Wheel weights shoul be
use for best performance. If the snow is very wet, keep the ejection pipe turne forwar to avoi
obstructions at the outlet. The two si e ski s must be a juste so that they just skim level groun
(asphalte streets) or keep the snow thrower high if the groun is uneven.
Ma ntenance: when work is over, remove any snow left in the snow thrower so it cannot freeze
an block the turbine. Do not clean the attachment when the eng ne s runn ng. Attent on,
danger! Do not touch the snow thrower wh le t s work ng.
ATTENTION!
While attaching the ifferent implements to the flange, make sure that the two parts are perfectly
aligne . The nuts of the two stu -bolts must be screwe on by han an then using a wrench so
that they apply pressure to the flange simultaneously.
PLOUGHS
The ploughs esigne for this rotavator have been especially evelope to obtain goo ploughing
without overstraining the operator.
The mo els available are a single-share plough an a 180° roll-over plough. The latter is especially
suitable when working backwar s an forwar s, such as along rows of vines or fruit-trees.
The epth of the furrow obtaine may vary from 10 to 15 cm epen ing on the terrain. Users can
achieve excellent performances using the tyres 5.00-12 an possibly the wheel-weights, which
improve machine's a hesion.
ROTARY CUTTER
The rotary bla e cutter 75cm for the rotovator (fig. 16) is esigne for the maintenance of groun s
with too high grass. The high power available, the riving wheels, the working spee s an the
reverse gear allow operation in the most ifficult con itions without tiring the operator an with
consi erable time saving. The rotary cutter is fixe to the implement flange using two nuts. It is
supplie with the lateral rams for har con itions, or with front support wheels in or er to use it with
low grass an levelle soils. The han lebar must be turne through 180°towar s the engine; for
this operation follow the irections given for the mower bar. The bla e is riven by means of a
bevel gear pair an is equippe with a release mechanism an a brake bla e so that its force of
inertia cannot rag the machine forwar when the clutch is engage . To a just the cutting height
vary the position of the rotary cutter wheel, or of the lateral rams. A version with grass bin is also
available.
Ma ntenance: Keep the lawn mower bla e well sharpene : the cut will be better an the engine
will not strain. Always tighten the two fixing bolts well when fastening or removing the bla e. Check
the two nuts fixing the awn mower to the machine frequently.
Check the gearbox oil level every 50 hours, removing the cap on the top, an make sure that the
oil level is within 50mms of the hole; if the level is lower a 80W/90 (API GL5 US-MIL-L-2105D)
gearbox oil. Change the oil once a year. Attent on! Rotat ng blades are very dangerous, never
15

Translation of the Original Instructions
put hands or feet under the rotary cutter. Do not clean the attachment when the eng ne s
runn ng.
TOWED TRAILER
The trailer esigne for the rotavator is very useful for short hauls aroun the farm. It is easy to
han le, compact an very quickly hitche to the rotavator.
The trailer can be attache irectly to the machine by hitching it to the special towing bar (fig. 17)
leaving the tiller in place. Max capacity: 300kg on flat groun . Do not use the tra ler on slopes
h gher than 5%. passengers are not allowed. The tra ler cannot be used on publ c roads.
WHEEL-WEIGHTS
These are mounte on the wheel rims an fixe with two of the four nuts which fix the wheels
themselves. They increase the weight of the machine an thus its grip, an their use is
recommen e when working with the plough, the a justable furrower, an even the rotary tiller an
the trailer if special performances are require (fig. 18).
SNAP COUPLING
The snap coupling is esigne to allow various implements to be hitche to the machine easily; the
implement is isconnecte by simply pulling a lever, without the ai of spanners. This accessory
consists of two parts, one fixe to the machine an the other to the implement. Users are therefore
a vise to purchase just one piece for the machine, an one for each implement (fig. 19). Grease
every 50 hours.
It can be of two types: 50mm an 60mm.
TOW BAR
The towing bar is nee e to attach the ri ing sulky or the trailer to the machine without removing
the rotary tiller.
This attachment must be fastene to the towing hook on the rotavator (fig. 20).
ROTARY TILLER SUPPORT WHEEL
It is very useful while transferring the machine, because it keeps the rotary tiller off the groun ,
making transfer easier an less tiring (fig. 21).
ALL PURPOSE FLAIL
It is 68cm wi e, has a roller fitte with swinging y tines an is able to cut tall grass, tough stalks
an small shrubs into fine pieces; it can also twigs etc. after pruning. Use with mower bla es
instea of the y tines, it gives excellent results on smooth lawns (fig. 22). Attent on, danger! The
rotat ng blades of the all purpose fla l are h ghly dangerous. Never put hands or feet under
the all purpose fla l. Never clean the attachment when the eng ne s runn ng.
WHEEL EXTENSIONS
These help to wi en the machine’s track an increase its stability on crosswise slopes. They must
be fixe between the wheels an the hubs. The track is wi ene by 6 cm on each si e (fig. 23).
WIDE STEEL WHEELS
These wheels are particularly a visable when working on very har soils with the rotary tiller.
The cross bars place aroun the wheels ig into the groun , giving the machine a firm grip an
preventing the wheels from ski ing (fig. 24).
The wi e steel wheels can be also use when tyres or the narrow steel wheels, might ski or sink
in amp or recently tille groun . The use of wi e steel wheels is recommen e , although only in
these cases.
Otherwise tyres are generally a visable; if special grip is not require , they give the machine more
even traction an form an elastic buffer between the machine an the groun .
Twin rings are also available for fitting to these wheels.
16

Translation of the Original Instructions
ADJUSTABLE WHEELS SPACER
These innovative screw spacers are a visable above all for ploughing.
If you have to change the track gauge, please unlock the two keys kept by the springs, start the
machine, put the first gear, block the ifferential lock an release the clutch when the engine is at
minimum; in this way the track gauge is automatically change .
Attention not to unscrew them completely. Position the keys an respective springs again.
Now you can change the track gauge, lifting the machine an operating manually (fig.25).
BACK-CUTTER FURROWER
This tool is mounte at the rear of the tiller an works in tan em with it. The furrower is esigne to
pro uce irrigation an see rills (fig. 26).
TILTING FRONT BLADE - 125 cm
This highly resistant evice is i eal for removing snow an levelling moun s of soil or gravel. May
be tilte to the right an left (fig. 27).
PIVOTING BRUSH – 100 cm
This brush (fig. 28) can be attache to the machine following the mower bar's instructions. It is very
useful to clean roa s an squares. It can also be use to clean up 10-12 cm high fresh snow an it
can be steere left or right to make rifts.
17

Original Instructions - Istruzioni Originali - Instructions Originales - Original Anleitungen - Instrucciones Originales – Instruções Original
MOTOCOLTIVATORE
G85-G107D
Gentile Cliente,
nel ringraziarLa per la fiducia e la preferenza accordata al nostro motocoltivatore, confidiamo che
l uso di questa sua nuova macchina risponda pienamente alle sue esigenze.
Per l impiego ottimale e per la sua manutenzione nel tempo, la preghiamo di leggere attentamente
e seguire scrupolosamente le indicazioni di questo libretto; ciò le consentirà di ottenere i massimi
risultati e salvaguardare la sua spesa.
La preghiamo di conservare questo libretto, che dovrà sempre accompagnare la macchina.
DESCRIZIONE GENERALE E USO PREVISTO
Il motocoltivatore è una macchina agricola semovente ad un solo asse, equipaggiata con una fresa
per la lavorazione del terreno.
Queste macchine sono impiegate per effettuare lavori di preparazione del terreno (eliminazione di
infestanti, fresatura superficiale) e impiegate per piccole superfici, lavori di rifinitura, nell interfila dei
frutteti e nell orticultura. La macchina è costituita da un telaio portante, sul quale è installato un
motore a scoppio che aziona le ruote e una presa di forza alla quale viene collegata generalmente
una fresa e cui possono essere collegati anche altri utensili come frese da neve, barre falcianti,
trinciaerba, lame neve, aratri, spazzolatrici, pompe irroratrici etc… La macchina è comandata da
un operatore a terra che segue il movimento della stessa guidandola mediante un manubrio, su cui
sono dislocati i comandi.
ATTENZIONE! Leggere attentamente prima di avviare il motore.
Le seguent avvertenze sono mportant per l' ncolum tà dell'operatore!
AVVERTENZE
La prudenza è l arma principale nella prevenzione degli incidenti!
La preghiamo vivamente di leggere con attenzione le seguenti avvertenze, prima ancora di iniziare
il lavoro.
L uso improprio del motocoltivatore e il suo equipaggiamento può risultare dannoso; per ridurre
queste possibilità osservare le precauzioni necessarie di seguito riportate:
1) Leggere questo manuale interamente, prima di accendere e mettere in movimento il
motocoltivatore.
2) Dare particolare attenzione alle ammonizioni e alle etichette di sicurezza attorno alla macchina.
3) La rotazione della fresa è altamente pericolosa, non mettere ma le man o p ed sotto alla
fresa.
4) Prima di fare lavorare col motocoltivatore altre persone bisogna metterle al corrente delle norme
di sicurezza e di come si usa la macchina.
5) Prima di accendere il motocoltivatore verificare che non ci siano persone intorno; specialmente
bambini.
6) Non usare il motocoltivatore quando si è affaticati e non bere alcolici.
7) Controllare il terreno prima di procedere alla fresatura, che non vi siano sassi, bastoni o corpi
estranei, che potrebbero danneggiare la macchina o essere scagliati lontano, e quindi molto
pericolosi.
8) Pr ma d n z are l lavoro, ndossare ndument appropr at da lavoro, guant , scarpon ,
occh al .
9) Non usare il motocoltivatore su forti pendenze, si potrebbe ribaltare (max. 25%).
10) Non fare lavorare ragazzi troppo giovani; è vietato l uso ai minori di 16 anni.
11) Non fare retromarcia col motore accelerato.
12) È pericoloso azionare le leve bruscamente, col motore a massimo regime.
13) Per evitare il pericolo di esalazioni velenose, non adoperare il motore acceso in un locale
chiuso.
18

Original Instructions - Istruzioni Originali - Instructions Originales - Original Anleitungen - Instrucciones Originales – Instruções Original
14) Spegnere sempre il motore prima di fare rifornimento di combustibile, stare lontano da scintille
o fiamme, non fumare!
15) Evitare fuoriuscite di combustibile e dopo aver riempito il serbatoio pulire ogni fuoriuscita prima
di avviare il motore.
16) La rotazione della lama del trinciaerba è altamente pericolosa, non mettere ma le man o
p ed sotto al p atto.
17) Immagazzinare il carburante in contenitori specificatamente costruiti con questo obiettivo.
18) Lavorare solo con la luce del sole o con buona luce artificiale.
USI IMPROPRI DA EVITARE
19) Ogni utilizzo improprio comporta il decadimento della garanzia ed il declino di ogni
responsabilità del costruttore.
20) Non utilizzare mai la macchina per trasportare persone, animali o oggetti.
ULTERIORI ACCORGIMENTI PER LA SICUREZZA
21) Non manomettere o d satt vare d spos t v d s curezza.
22) Non fare nessun t po d regolaz one o pul z a col motore n moto.
23) Non fare controllare la macch na da nessuno mentre s ete alla gu da col motore n moto.
24) L utilizzatore è sempre responsabile dei danni arrecati a terzi.
25) Le zappe deformate o danneggiate devono essere sempre sostituite, mai riparate.
26) Usare sempre ricambi originali Grillo.
27) Prima di cominciare qualsiasi lavoro con la macchina, verificare che tutti i sistemi
antinfortunistici, di cui essa è dotata, siano perfettamente funzionanti. È severamente vietato
escluderli o manometterli.
28) Prima di iniziare il lavoro, controllare che le viti e i dadi di bloccaggio della fresa e delle
zappette siano perfettamente serrati.
29) L attrezzatura protettiva (cofani, parafanghi, ecc.), va assolutamente mantenuta durante i lavori
di zappatura.
30) Non pulire la fresa con il motore acceso.
31) Non utilizzare la macchina a piedi nudi.
32) Non utilizzare l’attacco rapido o eventuali prolunghe con la fresa perché portano la fresa stessa
più vicina ai piedi dell’operatore e quindi non rientra nella normativa per la sicurezza EN 709.
33) Non cambiare le regolazioni del motore, in modo particolare il numero di giri massimo.
34) Far raffreddare il motore prima di mettere la macchina in locali chiusi.
35) ATTENZIONE: per ridurre il pericolo di incendio mantenere il motore, la marmitta e i collettori di
scarico liberi da erba, foglie, polvere ecc..
36) Se dovete svuotare il serbatoio carburante eseguite l’operazione all’aperto.
37) La macchina deve essere condotta da un solo operatore
IDENTIFICAZIONE E ASSISTENZA
IDENTIFICAZIONE
La macchina è fornita di una targhetta posta
sul telaio con il numero di matricola. Questo
numero è indispensabile per ogni richiesta di
intervento tecnico e per l ordinazione dei
ricambi.
SERVIZIO ASSISTENZA
Questo manuale fornisce le indicazioni per l uso del motocoltivatore e per una corretta
manutenzione di base, eseguibile dall utilizzatore.
Per gli interventi non descritti in questo libretto, interpellare il Rivenditore di Zona.
19
This manual suits for next models
2
Table of contents
Languages:
Other Grillo Tiller manuals
Popular Tiller manuals by other brands

MTD
MTD 390 Series Operator's manual

Snapper
Snapper IRT4 Series 2 Safety instructions and operator's manual

Snapper
Snapper 1694151 Operator's manual

EarthQuake
EarthQuake VERSA 20015 SERIES Operator's manual original operating instructions

Poulan Pro
Poulan Pro 190388 owner's manual

Stafor
Stafor ES03B Operating and maintenance instructions