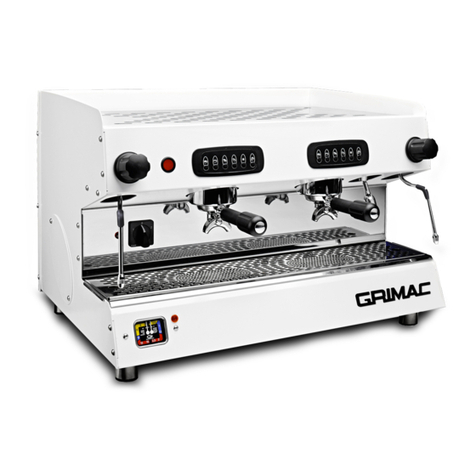
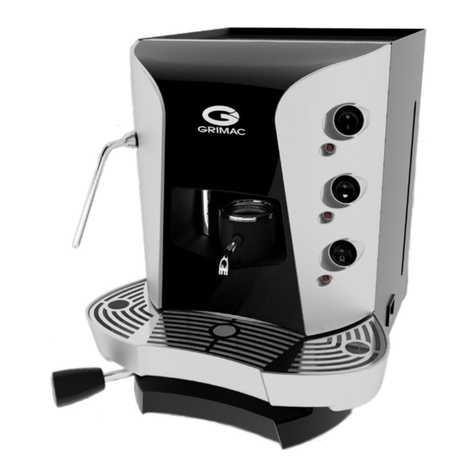
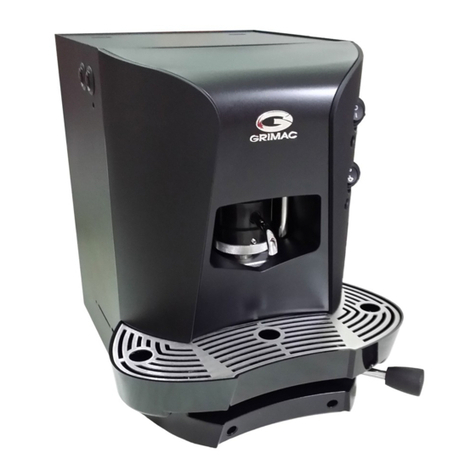
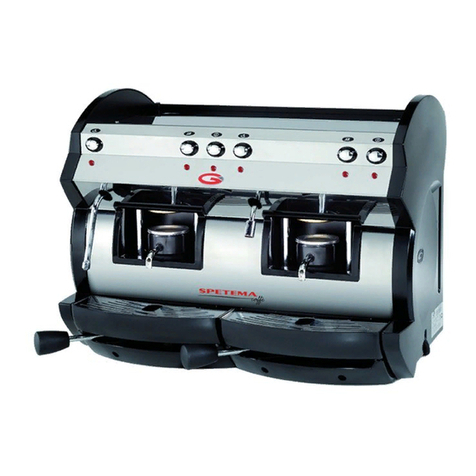
Grimac TWENTY Manual

’
LEV - PUL - ELE
ISTRUZIONI PER L’USO E LA MANUTENZIONE MODELLI:
OPERATING AND MAINTENANCE INSTRUCTIONS MODELS:
MOD.
TWENTY
MOD.
G10
MACHINES FOR ESPRESSO COFFEE
’ EFFACREPENIHCCAM ESPRESSO
MACCHINE PER CAFFÈ ESPRESSO

1
DICHIARAZIONE DI CONFORMITÀ CE
DECLARATION OF CONFORMITYCE
Noi:
We:
Grimac S.p.A.
via Morazzo, 2
40069 - Zola Predosa (BO) ITALY
dichiariamo, sotto la nostra completa responsabilità, che i prodotti
declare, accepting full responsability, that the product
macchine per caffè
Coffee machines
modelli
models
G10
PUL 2/3 ELE 2/3
TWENTY
PUL 1/2compact/2/3/4 LEV 1/2compact/2/3/4 ELE 1/2compact/2/3/4
a cui la dichiarazione si riferisce, sono conformi alle seguenti norme:
to which this declaration relates conforms with the following standard :
EN 12100.1, EN 12100.2, EN 60335-1, EN 60335-2-15,
EN 55014, EN 61000-3, EN 61000-4.
ed ai requisiti delle seguenti direttive CEE
in accordance with the provisions of CEE
2006/42/CE Direttiva macchine
2006/95/CE Direttiva bassa tensione
2004/108/CE Direttiva EMC
97/23/CE Direttiva Ped
Zola Predosa, 02/02/2010 C.E.O. ROBERTO VIDONI

28
Dear Customer,
Grimac S.p.A.
would like to thank you for the choice that you have made and guarantees that
the product that you have purchased is top quality.

29
CONTENTS
ENGLISH
SECTION 0 - INTRODUCTION
4SKRAMERGNINEPO-1.0
5GNICIVRES-2.0
6SLOBMYS-3.0
7SECITONYTEFASLARENEG-4.0
7SREKCITSFONOITISOP-5.0
0.6 -
SAFETY PRECAUTIONS TO BE TAKEN WHEN WORKING ON THE MACHINE
8
8EEFFOCGNIKAMNOSPITLACITCARP-7.0
9SNOITACIFICEPSLACINHCET-8.0
SECTION 1 - TECHNICAL DATA
01NOITAMROFNIDNUORGKCAB-1.1
01GNIKCAPNUDNAYREVILEDGNIKAT-2.1
11NOITALLATSNIDNAGNINOITISOP-3.1
21SKCEHCYRANIMILERP-4.1
SECTION 2 - GENERAL DESCRIPTION
31NOITPIRCSEDLARENEG-1.2
SECTION 3 - USING THE MACHINE
41ENIHCAMEHTGNISU-1.3
3.2 - MACHINE OPERATIONS AND OPERATING INSTRUCTIONS
SECTION 4 - MAINTENANCE
12GNINAELC-1.4
SECTION 5 - ACCESSORIES AVAILABLE ON REQUEST
22RENETFOSRETAW-1.5
32REMRAWPUC-2.5
SECTION 6 - WIRING DIAGRAMS 24
SECTION 7 - WATER AND STEAM CIRCUIT DIAGRAM 25
15

30
SECTION 0 - INTRODUCTION
0.1 - OPENING REMARKS
These Operating Instructions are a guide to using and maintaining the G10 and TWENTY model machines manufactured by
Grimac S.p.A.
.
Before USING OR WORKING ON THE MACHINE in any way, carefully read the whole of this manual.
dnaytilibailermretgnolerusneotderiuqereratahtenihcameeffocehtgnisutuobasgninrawdnaecivda,noitamrofniehtllasniatnoclaunamehT
maximum operating efficiency.
The
Grimac
coffee machines have been designed in such a way that it incorporates all the traditional features of a coffee machine in an Italian bar:
foeeffocsedivorptillaevobatubretaehretawdenilreppoca,ymonotuagnitarepodnaytilibailer,esulanoisseforprofdengisedstraptnenopmoc
superlative quality. The G10 and TWENTY series machines have been designed for people who really know about coffee.
Follow all the advice contained in the manual carefully in order to ensure optimum machine efficiency and in order to ensure that it has a long working
life. Remember that the Operating Instructions are an integral part of the product and must be kept carefully throughout the whole working life of the
machine.
If the machine is passed onto another user or owner the Operating Instructions must go with it.
Should problems or faults arise,
GRIMAC S.p.A.
guarantees that you will be given every possible assistance from our after-sales service centres.

31
0.2 - SERVICING
DATE OF INSTALLATION................................................................... SERIAL NUMBER...........................................................
INSTALLED BY (NAME OF COMPANY)............................................ MODEL............................................................................
TOWN OR CITY................................................................................... TELEPHONE NUMBER...................................................
SERVICE ENGINEER TO BE CONTACTED........................................................................................................................................
SERVICED ON.................................................................................... BY ..................................................................................
SERVICED ON..................................................................................... BY ..................................................................................
HAVE THE COFFEE MACHINE SERVICED AT LEAST ONCE A YEAR BY QUALIFIED SERVICE ENGINEERS

32
0.3 - SYMBOLS
The symbols below are used to draw the reader’s attention to important points regarding personal safety, machine safety and certain operating
conditions.
GENERAL OPERATING NOTICES
GENERAL WARNING
DAMAGE MAY BE CAUSED TO THINGS OR TO THE COFFEE MACHINE
WARNING!
SOURCE OF DANGER TO PERSONS OR THE MACHINE
WARNING!
DANGER OF ELECTRIC SHOCK TO PERSONS OR ELECTRICAL DAMAGE TO THE COFFEE
MACHINE.

33
0.4 - GENERAL SAFETY NOTICES
Any use of the G10 and TWENTY model machine that is not specified in this manual or any use of the product other than the use agreed
upon at the time of purchase exonerates
GRIMAC S.p.A.
from any liability for any harm or injury to persons or damage to things or the machine.
THE ELECTRICAL SYSTEM MUST BE EARTHED.
- Never place hands or metal or other objects inside the machine when it is connected to the electric power supply.
- Always contact our after-sales service centre for any repair or maintenance task that is not described in this manual.
- Before working on the machine in any way, ALWAYS take out the plug from the mains power supply socket.
- Check the power cable regularly. A worn cable is a potential source of electrocution.
- Before using the machine to make coffee, make sure that you are perfectly familiar with the location and function of all the controls and the
machine specifications contained in the OPERATING INSTRUCTIONS.
Certain safety regulations must be adhered to when using this machine.
0.5 - POSITION OF STICKERS
Stickers and plates displaying ‘Notices’ and ‘Warnings’ are located on the machine. Replace them if they become illegible.

34
0.6 - SAFETY PRECAUTIONS TO BE TAKEN WHEN WORKING ON THE MACHINE
- Switch off the machine and disconnect it from the electric power supply before carrying out routine maintenance, special maintenance and general
cleaning operations.
ylreporpybstrapdevorpparerutcafunamybylnodecalperstraptnenopmocynaevah,efilgnikrowgnolasahenihcamehttahterusneotredronI-
qualified service engineers.
- After carrying out any kind of maintenance, ensure that all parts of the machine are in proper working order.
- Repairs to the electrical system must be carried out only by properly qualified service engineers and only after the electric power supply has been
disconnected and the plug has been removed from the supply socket.
- Never use running water on the machine whilst it is switched on or being cleaned.
ottonredronitnegretedlartuendnaretawmrawfoesuehtdnemmocereW.cte,lohocla,srennihttniap,stnevloshtiwenihcamehthsawreveN-
damage the internal and external parts of the machine.
0.7 - PRACTICAL TIPS ON MAKING COFFEE
The G10 and TWENTY
series coffee machines guarantee you a perfect cup of coffee because it uses the same professional standard component
parts as coffee machines in Italian bars. Nevertheless, the user must ensure that the steps prescribed in Section 3, Paragraph 3.1 are strictly
adhered to and in particular the user must ensure that the filter is filled with the correct amount of coffee.

35
mm
mm
mm
litri
V
kW
kW
kW
bar
bar
bar
bar
bar
0.8 - TECHNICAL SPECIFICATIONS
G10 ModelTwenty Model
Units
n
°
mm
mm
mm
litri
V
kW
kW
kW
bar
bar
bar
bar
bar
(*)Use of a pressure reducer is recommended for values higher than those given.
G10 MODELTWENTY MODEL
(*)Use of a pressure reducer is recommended for values higher than those given.
L
510 mm
600 mm
1 2 c 2 3 4
432 602 702 882 1092
600
510
4,9 4,9 10 15 20
110/230/400
2,0 3,3 3,3 4,5 4,5
0,165
0,009 0,018 0,018 0,027 0,036
0,9
1,9
12
0÷4
9÷10
Width
Depth
Height
Capacity
Supply voltage (Volt)
Absorbed power, resistance
Absorbed power, electric pump
Absorbed power, solenoid valve
Operating pressure, water heater
Set pressure, safety valve
Set pressure, heat exchanger safety
valve
Pressure, mains water supply(*)
Pressure, coffee dispensing
Units
n
°
Width
Depth
Height
Capacity
Supply voltage (Volt)
Absorbed power, resistance
Absorbed power, electric pump
Absorbed power, solenoid valve
Operating pressure, water heater
Set pressure, safety valve
Set pressure, heat exchanger safety
valve
Pressure, mains water supply(*)
Pressure, coffee dispensing
3 2
850 660
560 560
520 520
15 10
4,5 3,3
0,027 0,018
230/400
0,165
0,9
1,9
12
0÷4
9÷10
L
520 mm
560 mm

36
SECTION 1 - TECHNICAL DATA
1.1 - BACKGROUND INFORMATION
ehtfotraphcaE.ecrofniwonsdradnatswenehtotmrofnoctahtslairetamdnastraptnenopmocmorfderutcafunamneebsahenihcamsihT
Grimac
otniemoctahtstnemeleehtdnastnenopmocmetsyslacirtceleehtotdiapgniebnoitnettaralucitraphtiwdengisedylluferacneeberoferehtsahenihcam
direct contact with the coffee being dispensed.
1.2 - TAKING DELIVERY AND UNPACKING
The G10 and TWENTY coffee machines are housed in a box that protects it from being
jolted and broken.
Open the box and remove the moveable cardboard protection in order to be able to take
hold of the bottom of the machine with both hands. Lift out slowly and carefully.
Rest the machine on a flat surface or table for the preliminary operations.
First, check that the machine is complete and undamaged.
Also check that underneath the coffee dispenser unit there is the box containing the
accessories that come supplied with the machine. (See figure alongside).
Before connecting the coffee machine to the mains electric power supply, check that the
mains voltage is compatible with the technical specifications.
THE ELECTRICAL SYSTEM MUST BE EARTHED.
ACCESSORIES SUPPLIED WITH THE MACHINE

37
1.3 - POSITIONING AND INSTALLATION
After checking that the machine is complete, locate it in the position in which it will be used. Ensure that the position is stable and safe and allows
enough space for carrying out the different operations (fitting the filter holder, obtaining hot water and steam).
The following appliances must be installed, adjusted and connected to the mains water and electric power supplies by qualified people in strict
compliance with the instructions contained in this manual.
To ensure that the machine works correctly and remains in proper working order, read this manual carefully, adhere to the standards which it sets
and refer to the diagrams it contains.
Place the machine on a flat surface that is out of the reach of children.
To prevent the machine’s being knocked, do not locate it in places where there is a lot of movement to and from or in narrow co rr idors.
Connecting to mains power supply
Connect the power cable to the mains by means of a 24 amp fused switch as shown on the label on the cable.
.
Connecting to the mains water supply
1 - cold water must be supplied to the machine;
2 - check that mains water supply pressure is compatible with the technical specifications for the machine;
3 - connect the drain pipe to the tank underneath the drip tray and do not make tight bends;
4 - Connect the 3/8" hose to the water softener. To do so, follow the instructions you find regarding the water softener
you intend to install. Use of the water softener is necessary to soften the water coming into the machine.
5 - ensure that there is an adequate inclination to enable water to drain away;
out

38
1.4 - PRELIMINARY CHECKS
Check that: the electric plug has been inserted;
the drain pipe is connected to the mains water supply;
the drain pipe has been positioned in the manner specified in the instructions above.

39
SECTION 2 - GENERAL DESCRIPTION
2.1 - GENERAL DESCRIPTION
In order to avoid problems and complications, the motor and the pump have already been installed inside the machine in an accessible position.
When the product leaves the factory it has been fully tested and is ready to be rapidly installed. This allows space to be saved and ensures lower
working noise levels.
MODEL 01GMODEL TWENTY

40
SECTION 3 - USING THE MACHINE
3.1 - USING THE MACHINE
Place the main switch at position 1.
Turn the external water supply knob (where applicable) and turn on the steam tap, let the water flow into the water heater and check the level on
the reading scale. The water level should come roughly half way up the MIN-MAX scale.
Place the resistance switch in the position 2.
Finall
For the Twenty 1unit model, there is no three-position switch available, only an
on/off switch. This model is equipped with a dual sensor that automatically
regulatesthe boiler's filling resistor.
y, shut off the steam tap.
The manometer will indicate that water heater pressure is between 0.9 - 1.2 bar.
Be very careful when dispensing water and steam.
DANGER OF BURNS.
To dispense hot water, turn the central knob
marked with the symbol .
To dispense steam, turn either one of the side handles
marked with the symbol .

41
3.2 - MACHINE OPERATIONS AND OPERATING INSTRUCTIONS
LEV Model
Manual operations with lever operated coffee dispenser unit; thermostatically controlled heat exchanger in water heater maintains water at a constant
temperature. Available only for model Twenty.
Put the required amount of coffee into the filter holder and fit it under the unit. Next, lower the lever (T) relative to the unit used to dispense the coffee.
Similarly, you can stop dispensing the coffee by turning the lever (T) back up.
A
C
TT
E
ND
B
T
B
L
P
MAX
MIN
FE
DN
BC
A- Cup heater switch (optional)
B- Steam knob
C- Hot water knob
D- Water heater pressure gauge
E- Main switch
F- Heating element pilot lamp
L- Boiler water level indicator (where applicable)
N- Coffee dispensing pressure gauge
P- Manually operated knob for supplying water
(where applicable)
T- Start/Stop coffee dispensing lever

42
PUL Model
Semi-automatic continuous dispensing with solenoid valve.
Available in the 1, 2, 2 compact, 3 and 4 unit versions.
Put the required amount of coffee into the filter holder and fit it under the unit. Next, press the push-button (I) relative to the unit used to dispense the
coffee.
You can stop dispensing the coffee by pressing the push-button (I) again.
FE
DN
BC I
A
I C I B
LND
E
MAX
MIN
B
P
A- Cup heater switch (optional)
B- Steam knob
C- Hot water knob
D- Water heater pressure gauge
E- Main switch
F- Heating element pilot lamp
L- Boiler water level indicator (where applicable)
N- Coffee dispensing pressure gauge
P- Manually operated knob for supplying water (where applicable)
I- Start/Stop coffee dispensing switch

43
ELE Model (G10) - Automatic monitoring of the level of the water in the water heater
Electronic model with microprocessor managed control panel with pushbottons that operate independently from one another. It enables varying amounts
of coffee to be dispensed using different dosing patterns. The pushbottons are identified by warning leds.
Put the required amount of coffee into the filter holder and fit it under the unit. Next, press the key (M1....M5) corresponding to the desired delivery on
the relative keyboard. If the wrong selection is made, press the key again to stop supply.
A
C
LN D
E
MAX
MIN
M1 M2 M3 M4 M5 B
M1 M2 M3 M4 M5
B
A- Emergency Start/Stop dispensing switch
B- Steam knob
C- Hot water knob
D- Water heater pressure gauge
E- Main switch
L- Boiler water level indicator (optional)
N- Coffee dispensing pressure gauge
M1 - Coffee dispenser button for a small cup of coffee
M2 - for a big cup of coffee
M3 - for two small cups of coffee
M4 - for two big cups of coffee
M5 - Programming

44
ELE Model (Twenty) - Automatic monitoring of the level of the water in the water heater
Electronic model with microprocessor managed control panel with pushbottons that operate independently from one another. It enables varying amounts
of coffee to be dispensed using different dosing patterns. The pushbottons are identified by warning leds.
Put the required amount of coffee into the filter holder and fit it under the unit. Next, press the key (M1...M5) correspondingto the desired delivery on the
relative keyboard. The LED turning on indicates the delivery mode selected. If the wrong selection is made, press the key again.
If the electonic control system doesn't work, it is possible to brew coffee manually by pushing the "G" button to start brewing coffee and by pushing it
again to stop it.
AAE
CC
LDN
N D
E
MAX
MIN
5M4M3M2M1M5M4M3M2M1M M1 M2 M3 M4 M5
BBB
P
GG G
A- Cup heater switch (optional)
B- Steam knob
C- Hot water knob
D- Water heater pressure gauge
E- Main switch
G- Emergency Start/Stop dispensing switch
L- Boiler water level indicator (optional)
N- Coffee dispensing pressure gauge
P- Manually operated knob for supplying water (where applicable)
M1 - Coffee dispenser button for a small cup of coffee
M2 - for a big cup of coffee
M3 - for two small cups of coffee
M4 - for two big cups of coffee
M5 - Delivery Programming/Stop

45
ELE Model automatic electronic dosing
This reliable, high quality product ensures that Grimac’s new dosing system reduces assembly costs and the amount of space required.
The control panel controls both the coffee supply commands and the electronic controls. Each control panel is completely independent of the others.
If a control panel develops a fault, the others will continue to function as they are independent of one another.
Programming doses:
Press M5 for 5 seconds. The leds will light up, allowing the operator to use the machine.
- Press the required selector button.
- When the selected dose has been reached, press the same pushbutton again (storage in memory OK).
- Repeat the procedure for the other pushbuttons in order to complete all 4 doses.
To interrupt coffee dispensing, press the previously pressed pushbutton again.
For reasons of safety, no more than 3 litres or 4 minutes of continuous dispensing can be programmed.
TWENTY model
Only for Twenty model, the group system on the left programms the other groups present in the machine automatically.
In course of programming, first work at the group on your left and if necessary modify the other groups in order to have different coffee dose.
This manual suits for next models
1
Table of contents
Other Grimac Coffee Maker manuals

Grimac
Grimac G 11 User manual

Grimac
Grimac TWENTY Series PUL 2 Manual

Grimac
Grimac G 11 User manual

Grimac
Grimac TERRY TECH User manual

Grimac
Grimac OPALE User manual

Grimac
Grimac Ambra User manual

Grimac
Grimac TERRY OPALE Capsule User manual

Grimac
Grimac Minigrimac User manual

Grimac
Grimac DADA VAPOR DOPPIA User manual
Grimac
Grimac Espressione BABY GRACE PG User manual