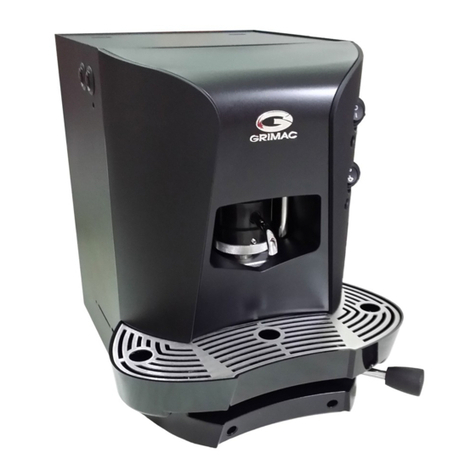
Grimac DADA VAPOR DOPPIA User manual

ISTRUZIONI PER L’USO
Leggere attentamente queste istruzioni d’uso prima di utilizzare la macchina
Dada Vapor Doppia
OPERATING INSTRUCTIONS
Read these instructions carefully before using the machine
ITALIANOENGLISH
MODE D’EMPLOI
Lire attentivement cette notice avant d’utiliser la machine.
FRANÇAIS
BEDIENUNGSANLEITUNG
Diese Bedienungsanleitung ist vor dem Gebrauch der Vorrichtung aufmerksam zu lesen.
DEUTSCH
INSTRUCCIONES DE USO
Leer atentamente estas instrucciones de uso antes de utilizar la máquina
ESPAÑOL

9
10
21
54
1211
3
6
7 8

2019
14 15
22 23 24
16 17 18
21
13

4
Coperchio serbatoio acqua
Leva chiusura Porta
cialda sinistra
Leva chiusura Porta cialda destra
Griglia e vasca raccogli
gocce sinistra
Griglia e vasca raccogli gocce destra
Vite grano sinistro
Vite grano destro
Porta cialda sinistro
Erogatore Vapore
Beccuccio erogatore
sinistro
Beccuccio erogatore destro
Erogatore acqua calda
N°2 Serbatoi acqua (interno)
Spia ON/OFF gruppo sinistro
Spia ON/OFF gruppo destro
Spia gruppo sinistro pronto Spia gruppo destro pronto
Spia per acqua calda in erogazione
Tasto ON/OFF gruppo destro
Tasto ON/OFF gruppo sinistro
Tasto caè gruppo destro
Tasto caè gruppo sinistro
Tasto acqua calda
Cavo di alimentazione
Chiave regolazione
Spia vapore pronto
Tasto vapore/cappuccino

5
ITALIANO
1. INFORMAZIONI GENERALI
1.1. Costruttore
Grimac S.p.A. – Via Morazzo, 2 -40069 Zola Predosa (Bologna)
Italy –Tel. +39 051 6167069 – Fax +39 051 750996
1.2. Generalità
La macchina da caè è destinata alla preparazione di caè
espresso con l’utilizzo di cialde compatibili, acqua calda e va-
pore.
Il Cliente deve leggere con estrema attenzione le informazioni
riportate nel presente Manuale.
Questo Manuale ha lo scopo di fornire al Cliente tutte le informa-
zioni necessarie all’installazione, la manutenzione e l’uso della
macchina da caè.
In caso di dubbi sulla corretta interpretazione delle istruzioni,
interpellare il Rivenditore per ottenere i necessari chiarimenti.
Il Manuale d’istruzioni deve essere conservato nelle immediate
vicinanze della Macchina.
Conservare il manuale in zone protette da umidità e calore, in
modo tale che non ne venga pregiudicata la qualità della pubbli-
cazione e la leggibilità in tutte le sue parti.
1.3. Simboli utilizzati
PERICOLO GENERICO
Indica un pericolo con rischio, anche mortale, per l’U-
tilizzatore. In questo caso si deve prestare la massima
attenzione e si devono attuare tutti gli interventi per operare in
modo sicuro.
AVVERTENZA
Indica un’avvertenza od una nota su funzioni chiave o su
informazioni utili.
Prestare la massima attenzione ai blocchi di testo indicati da
questo simbolo.
1.4. Garanzia
La garanzia ha una durata di 12 mesi dalla data di acquisto ed è
estesa a tutte le parti meccaniche ed elettriche. Decade qualora
l’apparecchio non venga utilizzato in modo appropriato o mano-
messo da personale non qualicato. Sono altresì escluse le parti
danneggiate a causa della mancata pulizia della macchina. Le
parti da noi ritenute difettose saranno sostituite gratuitamente.
Le spese di trasporto sono a carico dell’acquirente. I dati e le
caratteristiche indicate nel presente manuale non impegnano la
ditta costruttrice che si riserva il diritto di apportare modiche
ai propri modelli in qualsiasi momento. Inoltre non si assume
alcuna responsabilità per danni a persone o cose derivanti dalla
mancata osservanza delle norme riportate nel presente manua-
le.
2. DATI TECNICI
Alimentazione,Tensione e Potenza nominale
Vedi targhetta posta sull’apparecchio
Dimensioni (Altezza x Larghezza x Profondità) (mm)
320 x 450 x 350
Peso (kg)
24 Kg
Capacità serbatoio acqua (Litri)
2 - per ogni serbatoio
Lunghezza cavo (m)
1,5
Scambiatore/i
Ottone
Pressione pompa (bar)
17
Dispositivi di sicurezza
Termostato a riarmo manuale /
Automatico
I dati e le caratteristiche indicate non impegnano la ditta co-
struttrice la quale si riserva il diritto di apportare modiche in
qualsiasi momento.

6
3. NORME DI SICUREZZA
• L’apparecchiatura è intesa per un utilizzo da ucio, casa e
applicazioni simili. È vietato apportare modiche tecniche e
ogni impiego illecito, a causa dei rischi che essi comportano!
L’apparecchio non è destinato ad essere utilizzato da persone
(compresi i bambini) con ridotte capacità siche, mentali o
sensoriali o con esperienza e/o competenze insucienti, a
meno che non siano sotto la supervisione di una persona re-
sponsabile della loro sicurezza o non vengano da essa istruite
sull’uso dell’apparecchio.
• Il collegamento alla rete elettrica deve essere eseguito in
conformità alle norme di sicurezza vigenti nel paese d’utiliz-
zazione.
• La presa, alla quale collegare la macchina, deve essere:
- conforme al tipo di spina installata nel medesimo;
- dimensionata per rispettare i dati della targhetta dati
posta sull’apparecchio.
- collegata ad un eciente impianto di messa a terra.
• Il cavo d’alimentazione, non deve:
- entrare in contatto con qualsiasi tipo di liquido: pericolo
di scosse elettriche e/o incendio;
- essere schiacciato e/o entrare in contatto con superci
taglienti;
- essere utilizzato per spostare la macchina;
- essere utilizzato se risulta danneggiato. Se il cavo d’a-
limentazione è danneggiato, deve essere cambiato dal
produttore o dal suo servizio assistenza clienti;
- essere manipolato con le mani umide o bagnate;
- essere avvolto in una matassa quando la macchina è in
funzione.
- essere manomesso.
• È vietato:
- installare la macchina con modalità dierenti da quelle
descritte.
- inserire le dita e/o altri oggetti all’interno del vano cial-
de. Pericolo di scottature!
- installare la macchina in zone nelle quali può essere uti-
lizzato un getto d’acqua.
- utilizzare la macchina all’esterno in prossimità di sostan-
ze inammabili e/o esplosive.
- lasciare alla portata dei bambini sacchetti di plastica,
polistirolo, chiodi ecc. in quanto sono fonti di potenziali
pericoli.
- lasciare che i bambini abbiano la possibilità di giocare e
sostare nelle vicinanze della macchina. I bambini non si
rendono conto del pericolo connesso agli elettrodome-
stici;
- utilizzare ricambi non consigliati dalla ditta costruttrice.
- apportare qualsiasi modica tecnica alla macchina.
- immergere la macchina in qualsiasi tipo di liquido.
- lavare la macchina con un getto d’acqua.
- utilizzare la macchina in modi dierenti da quelli de-
scritti nel manuale.
- utilizzare la macchina in condizioni psicosiche alterate;
sotto l’inuenza di droghe, alcool, psicofarmaci, ecc.
- installare la macchina sopra ad altre apparecchiature.
- l’utilizzo della macchina in atmosfera esplosiva, aggres-
siva o ad alta concentrazione di polveri o sostanze oleose
in sospensione nell’aria;
- l’utilizzo della macchina in atmosfera a rischio d’incen-
dio;
- l’utilizzo della macchina per erogare sostanze non ido-
nee alle caratteristiche della stessa.
- l’utilizzo della macchina in luoghi con scarsa illumina-
zione.
• Prima di pulirla accertarsi che la macchina sia spenta e che la
spina sia staccata dalla presa di corrente; non lavare la mac-
china con benzina e/o solventi di qualsiasi natura.
• Ogni riparazione può essere eseguita solo da un Centro Assi-
stenza Autorizzato dal Costruttore e/o comunque da perso-
nale specializzato ed addestrato.
• Non ostruire le griglie poste nella macchina.
• Non collocare la macchina vicino ad impianti di riscaldamen-
to (come stufe o caloriferi).
• In caso di incendio utilizzare estintori ad anidride carbonica
(CO2). Non utilizzare acqua od estintori a polvere.

7
ITALIANO
4. INSTALLAZIONE MACCHINA
Nota: nella macchina possono essere presenti
delle tracce di caè e/o acqua, queste sono ricon-
ducibili al collaudo eettuato dalla ditta Costruttrice per
garantire la massima qualità del prodotto.
Prima della messa in funzione, si deve procedere ad una corretta
installazione della macchina.
Dopo aver estratto la macchina dall’imballo, procedere come
segue:
• sistemare la macchina su un piano orizzontale stabile;
• accertarsi che non sia accessibile ai bambini;
• accertarsi che vi sia lo spazio suciente per eettuare tutte
le operazioni richieste (uso, manutenzione, ecc..);
• tenerla lontano da superci calde o da amme libere; tenere
la macchina ad una distanza di circa 15 centimetri da altri
apparecchi;
• accertarsi che la macchina sia spenta e che tutti gli interrut-
tori siano in posizione OFF.
• (Fig.1) rimuovere la chiave a brugola presente sul lato supe-
riore della macchina e rimuovere tutte le pellicole di prote-
zione situate sulle lamiere.
É bene, inoltre, evitare di collocare la macchina in luoghi di pas-
saggio o corridoi stretti per evitare che venga urtata.
Prima di porre in funzione la macchina per la
prima volta, si rende necessario procedere ad
un’accurata pulizia delle parti componenti la stessa; per
maggiori dettagli consultare il relativo paragrafo.
Consigliamo di conservare l’imballo per successivi spostamenti
o trasporti.
4.1. Riempimento serbatoio acqua
Per far funzionare la macchina si devono riempire i 2 serbatoi
dell’acqua. Prima, accertarsi sempre che la macchina sia spenta
e la spina staccata.
Attenzione: per riempire il serbatoio, utilizzare
sempre e solo acqua fresca potabile; acqua cal-
da o gassata possono danneggiare la macchina. Prima di
mettere in funzione la macchina, vericare che sia sem-
pre presente una quantità di acqua suciente.
N.B. utilizzare la macchina senza acqua nel serbatoio
comprometterebbe il corretto funzionamento della mac-
china stessa.
• (Fig.2) - Rimuovere il coperchio esterno superiore in metallo.
• (Fig.3) - Rimuovere i coperchi dei 2 serbatoi.
• (Fig.4) - Slare i tubi che sono presenti all’interno dei serbatoi.
• (Fig.5) - Estrarre i ltri addolcitori che sono presenti nei ser-
batoi ed immergerli in acqua per circa 30 minuti.
In ogni serbatoio è presente il numero esatto di
ltri che devono essere installati successivamente.
• (Fig.6) - Dopo aver estratto i tubi ed i ltri, estrarre i serbatoi
dalla macchina.
• (Fig.7) - Riempire i serbatoi con acqua fresca potabile.
• Inserire i serbatoi pieni nella macchina.
• (Fig.8) - Quando sono pronti, inserire i ltri nei tubi (un ltro
per ogni tubo); successivamente inserire i tubi nei serbatoi.
• (Fig.3) - Posizionare i coperchi nei serbatoi.
• (Fig.9) -Vericare che i tubi NON siano schiacciati e che l’ac-
qua non strabordi dai serbatoi.
• (Fig.2) - Posizionare il coperchio esterno
superiore
nella
macchina.
Prima di procedere al collegamento elettrico
della macchina e alla messa in funzione della
stessa , accertarsi che tutti i pulsanti siano nella posizio-
ne di OFF.
4.2. Collegamento elettrico
Attenzione: la corrente elettrica può essere
pericolosa! Di conseguenza, attenersi sempre e
scrupolosamente alle norme di sicurezza. Non usare mai
cavi difettosi.
La tensione di funzionamento dell’apparecchio è stata impostata
in fabbrica; occorre vericare che la tensione di rete corrisponda
alle indicazioni riportate sulla targhetta dei dati tecnici.
Prima di collegare la macchina alla rete elettrica, ci si deve assi-
curare che tutti i tasti non siano inseriti, e che quindi i tasti siano
nella posizione OFF.
• Inserire la spina del cavo elettrico in una presa di corrente a
muro adeguata.
Prima di procedere all’accensione e all’utilizzo
della macchina, vericare che la vaschetta rac-
cogli gocce sia completamente inserita nella sua sede;
attenzione un non corretto inserimento della vaschetta
potrebbe causare lo sgocciolamento dell’acqua di scarico
sul banco.

8
5. USO DELLA MACCHINA
La macchina è composta da due gruppi che pos-
sono funzionare indipendentemente e separa-
tamente l’uno dall’altro. Il gruppo destro eroga caè
e acqua calda, il gruppo di sinistro caè e vapore per la
preparazione di cappuccini.
5.1.A Accensione (Gruppo sinistro)
Per accendere e rendere operativo il gruppo sinistro procedere
come segue:
• (Fig.10) - Premere il tasto ON/OFF e portarlo nella posizio-
ne“I”; le spie si accendono; in questa fase la macchina si sta
scaldando.
• (Fig.12) - Spostare la leva del gruppo sinistro verso destra
no a chiudere il porta cialda.
• (Fig.13) - Premere subito il tasto caè in posizione (I); con
questa procedura si carica il circuito dell’acqua.
• (Fig.13) - Dopo 30 secondi, premere nuovamente il tasto
caè in posizione (0) per terminare la fase di caricamento del
circuito.
• (Fig.14) - Spostare la leva di chiusura del gruppo sinistro
verso sinistra.
• Attendere che la spia “macchina pronta”si spenga; a questo
punto la macchina è pronta.
Alla prima accensione della macchina o nel caso di
prolungato inutilizzo della stessa, si consiglia, per
facilitare il caricamento del circuito dell’acqua, di simula-
re delle brevi (a scatti) erogazioni del caè senza cialda;
con la leva posta a sinistra, quindi a gruppo aperto.
5.1.B Accensione (Gruppo destro)
Per accendere e rendere operativa il gruppo destro procedere
come segue:
• (Fig.10) - Premere il tasto ON/OFF e portarlo nella posizione
“I”; le spie (ON/OFF e macchina pronta) si accendono; in que-
sta fase la macchina si sta scaldando.
• (Fig.19) - Posizionare una tazza/bricco sotto all’erogatore
acqua calda.
• Tenere premuto il tasto acqua calda per iniziare l’erogazione
dell’acqua calda.
• Dopo 30 secondi rilasciare il tasto acqua calda per terminare
l’erogazione.
• Attendere che la spia “macchina pronta”si spenga; a questo
punto la macchina è pronta.
5.2. Erogazione caffè
La macchina funziona solo con cialde compatibili.
É vietato utilizzare cialde dierenti da quelle con-
sigliate. Ogni cialda può essere utilizzata solo per l’ero-
gazione di un caè; non riutilizzare le cialde già usate.
Attenzione: NON inserire le dita all’interno del
porta cialde; Pericolo di scottature!
In questo caso sarà mostrato come erogare il caf-
fè dal gruppo destro; per erogare con il gruppo
sinistro eseguire le medesime procedure utilizzando gli
opportuni comandi.
• Accertarsi che il porta cialde sia libero e pulito.
• (Fig.11) - Posizionare una cialda nel porta cialde.
• (Fig.12) - Spostare la leva verso destra no a chiudere il por-
ta cialda.
• (Fig.13) - Posizionare la tazzina sopra la griglia appoggia
tazze; assicurarsi che sia posizionata nel centro della griglia.
• Premere il tasto caè in posizione (I); inizia l’erogazione del
caè.
• (Fig.13) - Quando è stata raggiunta la quantità di caè de-
siderata, premere nuovamente il tasto caè in posizione (0)
per terminare l’erogazione.
• Prelevare la tazzina.
• (Fig.14) - Spostare la leva di chiusura verso sinistra per apri-
re il porta cialde; prelevare la cialda usata e buttarla in un
apposito contenitore.
5.3. Erogazione acqua calda
(Solo Gruppo destro)
Attenzione: Non toccare il beccuccio d’erogazione
dell’acqua: pericolo di scottature! All’inizio o du-
rante l’erogazione vi possono essere degli spruzzi di acqua
calda.
Il gruppo destro consente d’erogare una quantità di acqua per la
preparazione di tè o tisane.
• Assicurarsi che la macchina sia calda e pronta per il funziona-
mento. La Spia acqua calda è spenta.
• (Fig.19) - Posizionare una tazza sotto all’erogatore acqua
calda.
• (Fig.19) - Tenere premuto il tasto acqua calda per iniziare
l’erogazione dell’acqua calda.

9
ITALIANO
• Quando è stata raggiunta la quantità di acqua calda deside-
rata,rilasciareil tasto acqua calda per terminarel’erogazione.
• Rimuovere la tazza con l’acqua calda.
La macchina è pronta per un’altra erogazione.
5.4. Erogazione Vapore
(Solo Gruppo sinistro)
Attenzione: Non toccare l’erogatore del vapore:
pericolo di scottature! All’inizio o durante l’eroga-
zione vi possono essere degli spruzzi di acqua calda. Utiliz-
zare l’erogatore vapore con la lancia rivolta verso il basso.
Ilgruppo sinistro consented’erogare una quantità di vaporeper il
riscaldamento di bevande o per la preparazione di cappuccini.
• Assicurarsi che la macchina sia calda e pronta per il funziona-
mento. La Spia“Vapore”è spenta.
• Versare la bevanda da riscaldare in una tazza.
Nel caso si voglia montare del latte, assicurarsi
che sia a temperatura di frigorifero e che non su-
peri 1/3 della capacità del contenitore in uso. Si consiglia
l’utilizzo di latte intero perchè possiede una maggiore
capacità di montatura.
• (Fig.20) - Immergere il contenitore nell’erogatore vapore.
• Premere il tasto vapore per iniziare l’erogazione.
• Per migliorare il riscaldamento muovere il contenitore con
leggeri movimenti circolari.
• Terminato il riscaldamento premere il tasto vapore per fer-
mare l’erogazione del vapore.
• Rimuovere il contenitore.
La macchina è pronta per un’altra erogazione dopo che si è spen-
ta le relativa spia.
(Fig.21)-Quandovieneterminatalapreparazione
delle bevande e non si desidera utilizzare subito
l’erogatore vapore, si deve procedere alla sua pulizia con
un panno umido; pericolo scottature (la lancia brucia!).
5.5. Versione macchina Cappuccinatore
Attenzione: all’inizio o durante l’erogazione vi
possono essere degli spruzzi di acqua calda. NON
erogare vapore se il cappuccinatore è smontato.
La versione Dada Vapor Doppia consente, a richiesta, di avere la
macchina con il cappuccinatore al posto della lancia vapore.
Il cappuccinatore è stato studiato per la prepara-
zione esclusiva dei cappuccini e NON è possibile
utilizzarlo per la preparazione di altre bevande.
• Assicurarsi che la macchina sia calda e pronta per il funziona-
mento. La Spia“Vapore”è spenta.
• (Fig.23) - Inserire un contenitore sotto al cappuccinatore.
• Immergere il tubo di aspirazione del cappuccinatore nel con-
tenitore del latte.
• (Fig.20) - Premere il tasto vapore.
• Il latte montato inizia a fuoriuscire dal cappuccinatore.
• (Fig.24) - Agire sul perno per regolare il volume della schiu-
ma; sollevando il perno si aumenta la schiuma nel latte.
Attenzione a non estrarre troppo o completamente
lo spillo.
• (Fig.20) - Per terminare l’erogazione del latte premere nuo-
vamente il tasto vapore.
Terminata l’erogazione, immergere il tubo di aspirazione in un
contenitore pieno di acqua potabile fresca. Premere il tasto va-
pore ed erogare acqua no a quando esce acqua pulita.
Per terminare l’erogazione premere nuovamente il tasto vapore.
Settimanalmente il cappuccinatore deve essere
smontato e lavato completamente.

10
6. MANUTENZIONE DELLA MACCHINA
La pulizia della macchina deve essere eseguita
solo quando la macchina è fredda e scollegata
dalla rete elettrica.
• Non utilizzare alcol etilico, solventi, spugne abrasive e/o
agenti chimici aggressivi.
• Non immergere la macchina in acqua e non asciugare i com-
ponenti in un forno convenzionale e/o a microonde.
• Giornalmente, si consiglia di cambiare l’acqua all’interno del
serbatoio; non riutilizzare l’acqua recuperata dal serbatoio
per scopi alimentari.
• (Fig.22) - Giornalmente, si consiglia di estrarre le vasche
raccogli gocce e le griglie, vuotarle e lavarle con acqua fresca
potabile. Attenzione alla movimentazione della va-
schetta nel caso sia troppo piena.
• Le vaschette raccogli gocce vanno comunque svuotate tutte
le volte che si riempiono e sempre prima che siano completa-
mente piene.
Nota: periodicamente si consiglia di far eseguire
un ciclo di decalcicazione ad un tecnico specia-
lizzato per mantenere la vostra macchina in perfetta
ecienza.
6.1. Pulizia filtri Porta cialde
Attenzione: prima di procedere con questa ope-
razione, spegnere la macchina e staccare la spi-
na dalla presa di corrente. Attendere che la macchina si
sia freddata.
• Ogni giorno, a ne giornata, dopo aver erogato l’ultimo
caè eseguire un lavaggio veloce del ltro di ogni gruppo.
Eseguire le operazioni normali per l’erogazione di un caè
ma senza inserire la cialda. Erogare circa una tazza di acqua.
• In ogni caso, almeno una volta a settimana si deve proce-
dere alla pulizia del ltro presente in ogni porta cialda.
• La pulizia del ltro è molto importante per mantenere
sempre alto il livello qualitativo del caè erogato dalla
macchina.
• Per procedere alla pulizia del ltro, lo si deve smontare
dal portacialde.
• (Fig.17) - Per smontarlo, utilizzare un piccolo cacciavite
e fare leva sul bordo esterno.
• (Fig.18) - Rimuovere il ltro dal porta cialda.
• Successivamente vericare lo stato del ltro e lavarlo
con acqua tiepida.
• Per una pulizia più accurata si può utilizzare uno spazzo-
lino da denti con setole dure.
Nota:se il ltro risulta deterioratoodanneggiato,
occorre sostituirlo con uno nuovo.
É vietato lasciare le cialde all’interno del porta
cialde durante i periodi d’inattività.
6.2 Regolazione filtro porta cialde
Attenzione: prima di procedere con questa ope-
razione si deve spegnere la macchina ed atten-
dere che questa si sia freddata. In caso contrario utilizza-
re dei guanti protettivi adeguati.
Ogni ltro porta cialde deve essere regolato in
modo indipendente. Viene mostrata la sola re-
golazione del ltro destro, per la regolazione del ltro
sinistro agire sui rispettivi comandi.
Il ltro porta cialde, in fase di collaudo, è stato tarato adeguata-
mente; ciononostante, durante il normale funzionamento, si può
avere la possibilità di una ulteriore regolazione.
La necessità di regolare il portacialde viene evidenziata da un
tralaggio di caè dal portacialde durante l’erogazione.
Nota: la regolazione deve essere eettuata solo
ed esclusivamente in caso di tralaggi.
Per eliminare il gioco formatosi, procedere come segue:
• (Fig.15) - spostare leggermente la leva del gruppo destro
verso destra no a scoprire il grano.
• Con la chiave a brugola, svitare il grano di bloccaggio del
gruppo destro, facendo però attenzione a non svitarlo com-
pletamente per non rischiare che cada o vada perso.
• (Fig.16) - Tenendo sempre in posizione la leva, provare a
girare la ghiera:
Provare a chiudere il portacialde destro utilizzando la leva
inserendo la cialda che state utilizzando.
- in senso antiorario (o verso destra), per stringere la pre-
sa del portacialde
- in senso orario (o verso sinistra) per allargare la presa.
Il tutto facendo particolare attenzione a non esagera-
re, rendendo la chiusura troppo stretta o troppo lenta
11
ITALIANO
e quindi il serraggio della leva troppo duro o troppo
morbido.
• Eseguire questa regolazione no a quando non si trova la
posizione ideale.
• Terminata la regolazione serrare il grano svitato in preceden-
za.
Nota: se la causa del tralaggio non è dovuta ad
un aumento del gioco del meccanismo occorre
chiamare un tecnico specializzato per la sostituzione del-
la guarnizione.
6.3. Pulizia filtro addolcitore
Nei serbatoi dell’acqua sono presenti dei ltri che addolciscono
l’acqua.
La durata di questi ltri varia a seconda del tipo di ltro e della
durezza dell’acqua.
E’necessario sostituire periodicamente i ltri.
Per ulteriori informazioni in merito all’utilizzodei ltri contattare
la Casa Costruttrice.
Nota: la durata dei ltri dipende dalla loro cor-
retta manutenzione e dalla durezza dell’acqua
utilizzata.
6.4. Pulizia Telaio
Per mantenere pulito il telaio della macchina, utilizzare un pan-
no umido con detergente neutro.
É vietato smontare parti della macchina per pro-
cedere alla loro pulizia.
7. DEMOLIZIONE
Le apparecchiature elettriche ed elettroniche devono essere
smaltite secondo la Direttive Europea 2002/96/CE.
Tale apparecchiature NON possono essere smaltite secondo il
normale usso dei riuti solidi urbani, ma devono essere raccolti
separatamente per ottimizzare il recupero e il riciclaggio dei ma-
teriali con i quali sono costruiti.
Il simbolo
del cestino barrato è riportato su tutti i
prodotti per ricordare gli obblighi di raccolta separata. Osservan-
do correttamente tutte le disposizioni riguardo lo smaltimento
dei vecchi prodotti, si contribuirà a salvaguardare l’ambiente.
8. RICERCA GUASTI
GUASTO SOLUZIONE
La macchina non si accende. Vericare che la macchina sia collegata alla rete elettrica.
Non è possibile inserire la cialda. Vericare che la cialda sia compatibile.
Vericare che la cialda sia stata inserita per il verso mostrato in gura.
La macchina non eroga caè. Vericare che sia presente l’acqua nel serbatoio.
Vericare che i tubi siano inseriti nel serbatoio e che non siano schiacciati.
Vericare che la cialda sia presente nella macchina.
Perdita acqua sul fondo.
Controllare che la vaschetta raccogli gocce sia completamente inserita.
Per i guasti non contemplati dalla suddetta tabella o in caso che i rimedi suggeriti non li risolvano, contattate il ri-
venditore.

12
Water tank lid
Pod holder left closing
lever
Pod holder right closing lever
Left drip tray and grill
Right drip tray and grill
Left dowel screw
Right dowel screw
Left pod holder
Steam wand
Left dispensing spout
Right dispensing spout
Hot water wand
2 water tanks (internal type)
Left group ON/OFF indicator light
Right group ON/OFF indicator
light
Left group ready indicator light Right group ready indicator light
Hot water dispensing indicator light
Right group ON/OFF button
Left group ON/OFF button
Right group brew button
Left group brew button
Hot water button
Power cord
Adjustment wrench
Steam ready indicator light
Steam/cappuccino button

13
ENGLISH
1. GENERAL INFORMATION
1.1. Manufacturer
Grimac S.p.A. – Via Morazzo, 2 -40069 Zola Predosa (Bologna)
Italy –Tel. +39 051 6167069 – Fax +39 051 750996
1.2. General Information
This coee machine is designed to brew espresso coee using
compatible pods, hot water and steam.
The Customer needs to carefully read the information contained
in this Manual.
This Manual is intended to provide the Customer with all the
necessary information for installation, maintenance and use of
the coee machine.
In case of any doubt about the correct interpretation of instruc-
tions, contact the Dealer to obtain the necessary clarication.
The Instruction Manual must be stored near the Machine.
Keep the manual protected from humidity and heat so that its
print quality and readability, in all its parts, will not be dam-
aged.
1.3. Used Symbols
GENERAL DANGER
Indicates danger, even a fatal risk for the User. In such
case, you must be extremely careful and perform all
proper actions in order to work in a safe way.
WARNING
Indicates a warning or a note on key functions or useful
information.
Pay careful attention to the blocks of text indicated by this sym-
bol.
1.4. Warranty
The warranty period lasts 12 months from the date of purchase
and applies to all mechanical and electrical parts. It becomes
void if the equipment is not properly used or is tampered with
by non-qualied personnel. Damaged parts are also excluded
due to the lack of cleaning the machine. The parts that we nd
defective will be replaced for free.
Transport expenses are paid by the purchaser. The data and
features indicated in this manual do not bind the manufactur-
ing company which reserves the right to modify its products at
any time. Furthermore, it has no responsibility for the damages
caused to people or to objects because of non-compliance to
manual regulations.
2. TECHNICAL SPECIFICATIONS
Power supply, Nominal voltage and Power rating
See label on the appliance
Sizes (Height xWidth x Depth) (mm)
320 x 450 x 350
Weight (kg)
24 kg
Tank capacity (Litres)
2 - each tank
Power cord length (m)
1.5
Exchanger/s
Brass
Pump pressure (bar)
17
Safety devices
Thermostat with manual reset /
Automatic type
The data and features indicated do not bind the manufacturing
company, which reserves the right to modify its products at any
time.

14
3. SAFETY REGULATIONS
• This coee machine is intended for oce, home and other
similar uses. Do not make any technical changes or use the
machine for unauthorised purposes since this would create
serious hazards! The appliance is not to be used by persons
(including children) with reduced physical, mental or senso-
ryabilitiesor with scarceexperienceand/orexpertise,unless
they are supervised by a person responsible for their safety,
or they are instructed by this person on how to properly use
the machine.
• Connection to the electrical network should be made in
compliance with the safety regulations in force in the coun-
try where the machine is used.
• The socket to which the machine is connected must be:
- Compatible with the type of plug installed on the ma-
chine.
- Suitably sized to comply with the data on the plate at-
tached to the appliance.
- Connected to an ecient earthing system.
• The power cord must not:
- Come into contact with any type of liquid: Danger of
electric shocks and/or re.
- Be crushed and/or come into contact with sharp sur-
faces.
- Be used to move the machine.
- Be used if damaged. If the power cord is damaged, it
must be replaced by the manufacturer or by its author-
ised service centre.
- Be handled with damp or wet hands.
- Be wound in a coil when the machine is in use.
- Be tampered with.
• It is forbidden to:
- Install the machine in dierent ways than those de-
scribed.
- Insert your ngers and/or any other object into the pod
compartment. Danger of scalding!
- Install the machine in a location where water jets may
be used.
- Use the machine outdoors, next to ammable and/or
explosive materials.
- Leave plastic bags, polystyrene, nails, etc. within the
reach of children as they can cause potential hazards.
- Let children play and stand near the machine. Children
are not aware of the risks related to electric household
appliances.
- Use spare parts not recommended by the manufactur-
ing company.
- Make any technical modications to the machine.
- Immerse the machine in any kind of liquid.
- Wash the machine using a water jet.
- Use the machine in ways dierent than those described
in the manual.
- Use the machine in altered psychophysical conditions,
under the inuence of drugs, alcohol, medicine etc.
- Install the machine on top of other appliances.
- Use the machine in explosive or harsh environments, or
with high concentration of dust or oily substances sus-
pended in the air.
- Use the machine in an environment in which a risk of re
exists.
- Use the machine to dispense substances other than
those it is designed for.
- Use the machine in locations with insucient lighting.
• Before cleaning, ensure that the machine is o and the plug
is disconnected from the power socket; do not wash the ma-
chine with fuel and/or solvents of any kind.
• Each repair can only be performed by a Service Centre Au-
thorised by the Manufacturer and/or by specialised and
trained personnel.
• Do not clog grills placed in the machine.
• Do not place the machine near heating equipment (such as
stoves or radiators).
• In case of re, use carbon dioxide (CO2) extinguishers. Do not
use water or dry powder extinguishers.

15
ENGLISH
4. INSTALLING THE MACHINE
Note: In the machine there may be traces of cof-
fee and/or water, these are due to the testing
conducted by the Manufacturer to guarantee maximum
product quality.
Correctly install the machine before starting it.
After removing the machine from the packaging, proceed as fol-
lows:
• Place the machine on a stable horizontal surface.
• Make sure it is not accessible to children.
• Make sure there is enough space to perform all required op-
erations (use, maintenance, etc.).
• Keep it away from hot surfaces or open ames; keep the
machine at a distance of approximately 15 centimetres from
other devices.
• Make sure the machine is turned o and all switches are in
OFF position.
• (Fig.1) Remove the Allen wrench from the upper side of the
machine and all the protective lms from the metal sheets.
Itis also advisable to avoidplacing the machine in spaces of tran-
sit or narrow hallways, to avoid being struck.
Before operating the machine for the rst time, it
is necessary to carry out a thorough cleaning of its
parts. For further details, see the related section.
We recommend keeping the packaging for future transfers or
transportation.
4.1. Filling the Water Tank
To operate the machine, ll the 2 water tanks. First of all, always
make sure that the machine is o and the plug is disconnected.
Warning: To ll the tank always and only use
fresh drinking water, as hot water or carbon-
ated water may damage the machine. Before starting
the machine, make sure that there is always a sucient
quantity of water.
Note: The use of the machine without water in the tank
may aect the correct functioning of the machine.
• (Fig.2) - Remove the metal upper outer lid.
• (Fig.3) - Remove the 2 water tank lids.
• (Fig.4) - Remove the hoses from the inside of the tanks.
• (Fig.5) - Remove the softener lters from the tanks and im-
merse them in water for about 30 minutes.
Every tank contains the exact number of softener
lters that have to be installed later.
• (Fig.6) - After removing the hoses and the lters, remove
the tanks from the machine.
• (Fig.7) - Fill in the tanks with fresh drinking water.
• Insert the lled tanks in the machine.
• (Fig.8) - When they are ready, insert the lters into the
hoses (one lter for each hose) and then place the hoses in
the tanks.
• (Fig.3) - Place the tank lids.
• (Fig.9) - Make sure that the hoses are NOT crushed and that
no water comes out of the tanks.
• (Fig.2) - Place the upper outer lid on the machine.
Before plugging and starting the machine make
sure that all the buttons are in the OFF position.
4.2. Electrical Connection
Warning: Electric power may be very dangerous!
It is therefore necessary to strictly follow the
safety regulations. Do not use faulty power cords.
The operating voltage of the appliance has been pre-set by the
manufacturer. Make sure that the mains voltage corresponds to
the specications on the technical data plate.
Before connecting the machine to the electrical network, make
sure that all buttons are not pressed, therefore being in the OFF
position.
• Insert the other plug of the power cord into a suitable wall
socket.
Before switching on and using the machine,
check that the drip tray is fully inserted into its
seat. Warning! An incorrect placement of the tray may
cause spilling of the discharge water on the set.

16
5. USE OF THE MACHINE
The machine is made up of two groups that can
work independently and separately. The right
group brews coee and dispenses hot water, while the
left group brews coee and dispenses steam to prepare
cappuccinos.
5.1.A Switching On (Left Group)
To switch on and operate the left group proceed as follows:
• (Fig.10)- Press the ON/OFF button and turn it to the“I”posi-
tion. The indicator lights turn on. In this phase the machine
is warming up.
• (Fig.12) -Turn the left group lever to the right until the pod
holder is closed.
• (Fig.13) - Immediately press the brew button in (I) position;
this procedure will prime the water circuit.
• (Fig.13) - After 30 seconds press the brew button again in
(0) position to complete the circuit priming.
• (Fig.14) -Turn the left group closing lever to the left.
• Wait until the "machine ready" indicator light turns o. The
machine is now ready.
At the rst use of the machine or in case of a long
period of inactivity, in order to facilitate the wa-
ter circuit priming, it is recommended to simulate short
(in steps) coee brewings without the pod; with the le-
ver on the left, therefore with the group open.
5.1.B Switching On (Right Group)
To switch on and operate the right group proceed as follows:
• (Fig.10)- Press the ON/OFF button and turn it to the“I”posi-
tion. The indicator lights (ON/OFF and machine ready) turn
on. In this phase the machine is warming up.
• (Fig.19) - Place a cup/jug under the hot water wand.
• Press and hold the hot water button to start dispensing hot
water.
• After 30 seconds release the hot water button to stop dis-
pensing.
• Wait until the "machine ready" indicator light turns o. The
machine is now ready.
5.2. Coffee Brewing
The machine works only with compatible pods.
It is forbidden to use dierent pods than those
recommended. Each pod can be used only for one coee
brewing. Do not reuse the already used pods.
Warning: DO NOT insert your ngers into the pod
holder. Risk of scalding!
The procedures to brew coee from the right
group are explained here. The same procedures
have to be followed to brew from the left group, using
the appropriate controls.
• Make sure that the pod holder is clean and unobstructed.
• (Fig.11) - Place one pod in the pod holder.
• (Fig.12) - Turn the lever to the right until the pod holder is
closed.
• (Fig.13) - Place the cup over the cup holder grill. Make sure
it is positioned in the centre of the grill.
• Press the brew button in (I) position. The machine starts
brewing coee.
• (Fig.13) - When the desired amount of coee has been
brewed, press the brew button again in (0) position to stop
brewing.
• Remove the coee cup.
• (Fig.14) - Turn the closing lever to the left to open the pod
holder. Remove the used pod and throw it into a container.
5.3. Hot Water Dispensing
(Right Group Only)
Warning: Do not touch the water dispensing
spout. Danger of scalding! At the beginning or
during dispensing there may be spurts of hot water.
The right group allows dispensing a certain amount of water for
preparing tea or infusions.
• Make sure the machine is warm and ready for use. The hot
water indicator light is o.
• (Fig.19) - Place a cup under the hot water wand.
• (Fig.19) - Press and hold the hot water button to start dis-
pensing hot water.
• When the desired amount of hot water has been dispensed,
release the hot water button to stop dispensing.

17
ENGLISH
• Remove the cup with hot water.
The machine is ready for another dispensing.
5.4. Steam Dispensing
(Left Group Only)
Warning: Do not touch the steam wand. Danger
of scalding! At the beginning or during dispens-
ing there may be spurts of hot water. Use the steam
wand pointing down.
The left group allows dispensing a certain amount of steam for
heating beverages or preparing cappuccinos.
• Make sure the machine is warm and ready for use. The
“Steam”indicator light is o.
• Pour the beverage to be heated in a cup.
If you need to froth milk, make sure it is at fridge
temperature and it does not exceed 1/3 of the
capacity of the container in use. We recommend using
whole milk, which gives better frothing results.
• (Fig.20) - Immerse the steam wand into the container.
• Press the steam button to start dispensing.
• To improve the heating remove the container with light cir-
cular movements.
• Once the heating is nished, press the steam button to stop
dispensing steam.
• Remove the container.
The machine is ready for another dispensing after the relevant
indicator light turns o.
(Fig.21) - Once you have prepared your bever-
age and you do not wish to immediately use the
steam wand, clean it with a damp cloth. Danger of scald-
ing (the wand burns!).
5.5. Machine Version with Cappuccina-
tore
Warning: At the beginning or during dispensing
there may be spurts of hot water. DO NOT dis-
pense steam if the Cappuccinatore is not mounted.
Upon request, the Dada Vapor Doppia version is also available
with the Cappuccinatore instead of the steam spout.
The Cappuccinatore has been designed to prepare
only cappuccinos. You cannot use it for the prepa-
ration of other beverages.
• Make sure the machine is warm and ready for use. The
“Steam”indicator light is o.
• (Fig.23) - Place a container under the Cappuccinatore.
• Immerse the Cappuccinatore suction tube into the milk con-
tainer.
• (Fig.20) - Press the steam button.
• The frothed milk begins to come out of the Cappuccinatore.
• (Fig.24) - Adjust the froth quantity by using the pin.
By gently lifting the pin, the quantity of froth increases.
Be careful not to pull the pin too much or complete-
ly.
• (Fig.20) - To stop dispensing milk press the steam button
again.
After dispensing, immerse the suction tube into a container full
of fresh drinking water. Press the steam button and dispense
water until clean water comes out.
To stop dispensing press the steam button again.
The Cappuccinatore must be removed and com-
pletely washed once a week.

18
6. MACHINE MAINTENANCE
Clean the machine only when the machine is
cold and disconnected from the electrical net-
work.
• Do not use spirit, solvents, scouring pads and/or aggressive
chemical agents.
• Do not immerse the machine in water and do not dry its
components using a microwave and/or a standard oven.
• It is recommended to change the water inside the tank every
day. Do not reuse the water recovered from the tank for food
use.
• (Fig.22) - We recommend removing the drip trays and the
grills every day, emptying them and washing them with
fresh drinking water.
Be careful when handling a tray that is too full.
• The drip trays should be emptied each time they ll up and
always before they are completely full.
Note: Periodically, it is advisable that a special-
ised technician performs a descaling cycle to
maintain the machine in perfect operating conditions.
6.1. Cleaning the Pod Holder Filter
Warning: Before proceeding with this opera-
tion, turn o the machine and pull the plug from
the socket.Wait until the machine is cold.
• At the end of each day, after the last coee has been brewed,
perform a quick wash of each group lter.Perform the nor-
mal steps for brewing a coee but without inserting the
pod. Dispense about a cup of water.
• However, at least once a week, the lter present in each
pod holder must be cleaned.
• Cleaning the lter is very important to keep a high qual-
ity of the coee brewed by the machine.
• To clean the lter, remove it from the pod holder.
• (Fig.17) - To dismount it, use a small screwdriver and
pry on the outer edge.
• (Fig.18) - Remove the lter from the pod holder.
• Then check the lter condition and wash it with luke-
warm water.
• For a more thorough cleaning you can use a toothbrush
with sti bristles.
Note: If the lter is deteriorated or damaged, re-
place it with a new one.
It is forbidden to leave the pods inside the pod
holder during periods of inactivity.
6.2 Adjusting the Pod Holder Filter
Warning: Before proceeding with this opera-
tion, turn o the machine and wait until it is
cold. Otherwise, use appropriate protective gloves.
Each pod holder lter has to be adjusted sepa-
rately. Only the procedure to adjust the right
lter is shown here. To adjust the left lter, use the rel-
evant controls.
The pod holder lter has been properly calibrated during the
test phase; nevertheless, it may need further adjustment during
normal functioning.
The need to adjust the pod holder comes from a seep of coee
from the pod holder during brewing.
Note: The adjustment must be done only and ex-
clusively in case of leakages.
To eliminate the clearance, follow these steps:
• (Fig.15) - Move the right group lever slightly to the right
until you can see the dowel.
• Using the Allen wrench, unscrew the locking dowel taking
care not to unscrew it completely to avoid falling or getting
lost.
• (Fig.16) - Keeping the lever in position, try to turn the ring:
Try and close the right pod holder with the lever and insert-
ing the pod you are using.
- Counter-clockwise (or to the right), to tighten the grip of
the pod holder
- Clockwise (or to the left), to loosen the grip.
Make sure not to exaggerate, making the closure too
tight or too slow, and, therefore, tightening the lever
too hard or too soft.
• Continue this adjustment until the ideal position is found.
• Once the adjustment is done, x the once unscrewed dowel.

19
ENGLISH
Note: If the leakage is not due to an increased
mechanism clearance, you need to call a special-
ised technician to replace the gasket.
6.3. Cleaning the Softener Filter
There are some lters which soften the water in the water tank.
The life span of these lters varies depending on the type of lter
and the hardness of water.
It is necessary to replace the lters regularly.
For further information on the use of lters contact the Manu-
facturer.
Note:The lters’life span depends on their proper
maintenance and on the hardness of the water
used.
6.4. Cleaning the Machine Housing
To keep the machine housing clean, use a damp cloth with neu-
tral detergent.
It is forbidden to dismount machine parts when
cleaning them.
7. DISPOSAL
The electric and electronic equipment must be disposed of ac-
cording to the European Directive 2002/96/EC.
Such appliances CANNOT be disposed of as normal solid urban
garbage, but they must be collected separately to optimize the
recovering and recycling of materials they are made of.
The crossed-out bin symbol
is marked on all products
to remind the need of a separate collection. Following correctly
all provisions about the disposal of old products, you will con-
tribute in saving the environment.
8. TROUBLESHOOTING
PROBLEM SOLUTION
The machine does not turn on. Check that the machine is connected to the electrical network.
It is not possible to insert the pod. Make sure that the pod is compatible.
Check that the pod is inserted as shown in the gure.
The machine does not brew coee. Check that there is water in the water tank.
Check that the hoses are inserted in the tank and are not crushed.
Check that the pod is in the machine.
Leakage of water at the bottom. Check that the drip tray is fully inserted.
Please contact the dealer for any problems not covered in the above table or when the suggested solutions do not
solve the problem.

20
Couvercle du réservoir à eau
Levier de fermeture porte-
dosettes de gauche
Levier de fermeture porte-dosettes de droite
Grille et bac d’égoutte-
ment de gauche
Grille et bac d’égouttement de droite
Vis goujon de gauche
Vis goujon de droite
Porte-dosettes de
gauche
Buse de vapeur
Buse de gauche
Buse de droite
Buse d’eau chaude
N° 2 réservoirs à eau
(interne)
Voyant ON/OFF groupe de gauche
Voyant ON/OFF groupe de
droite
Voyant de groupe de gauche prêt Voyant de groupe de droite prêt
Voyant eau chaude en distribution
Touche ON/OFF groupe de
droite
Touche ON/OFF groupe de gauche
Touche café groupe de droite
Touche café groupe de gauche
Touche eau chaude
Câble d’alimentation
Clé de réglage
Voyant vapeur prête
Touche vapeur/cappuccino
Table of contents
Languages:
Other Grimac Coffee Maker manuals

Grimac
Grimac TWENTY Manual

Grimac
Grimac TERRY TECH User manual

Grimac
Grimac G 11 User manual

Grimac
Grimac TERRY OPALE Capsule User manual

Grimac
Grimac OPALE User manual

Grimac
Grimac TWENTY Series PUL 2 Manual

Grimac
Grimac Espressione BABY GRACE PG User manual

Grimac
Grimac G 11 User manual

Grimac
Grimac Ambra User manual

Grimac
Grimac Minigrimac User manual
Popular Coffee Maker manuals by other brands

Metos
Metos MELITTA CUP BREAKFAST Installation and operation manual

Farberware
Farberware FES15B Use & care instructions

Cuisinart
Cuisinart CHW-12C Instruction booklet

Tower Hobbies
Tower Hobbies T13010 Safety and instruction manual

Rex-royal
Rex-royal CoffeeBadge S1 CT user manual

Philips
Philips Saeco Intelia HD8752 CHEAT SHEET