manuals.online logo
Brands
  1. Home
  2. •
  3. Brands
  4. •
  5. Grizzly
  6. •
  7. Switch
  8. •
  9. Grizzly T33308 User manual

Grizzly T33308 User manual

This manual suits for next models

1

Other Grizzly Switch manuals

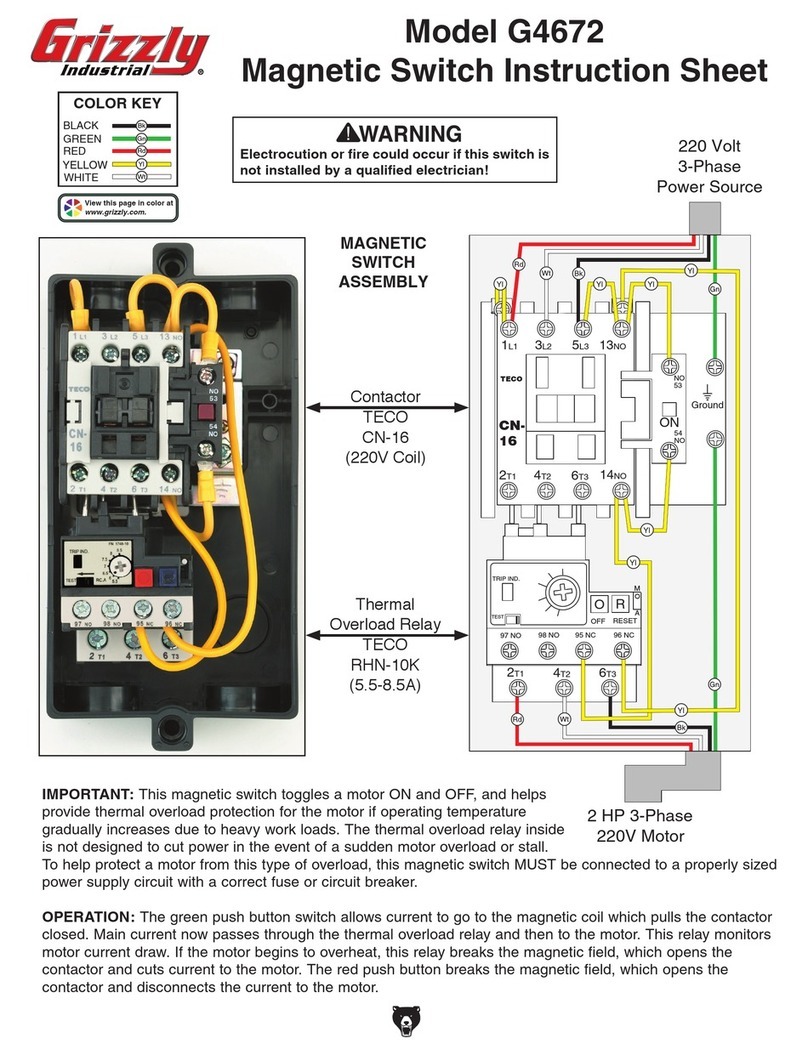
Grizzly G4672 User manual

Grizzly

Grizzly G4672 User manual

Grizzly G4671 User manual

Grizzly

Grizzly G4671 User manual

Grizzly T20550 User manual

Grizzly

Grizzly T20550 User manual

Grizzly H8243 User manual

Grizzly

Grizzly H8243 User manual

Grizzly G8291 User manual

Grizzly

Grizzly G8291 User manual

Grizzly H8241 User manual

Grizzly

Grizzly H8241 User manual

Grizzly T33907 User manual

Grizzly

Grizzly T33907 User manual

Grizzly H8242 User manual

Grizzly

Grizzly H8242 User manual

Grizzly G8292 User manual

Grizzly

Grizzly G8292 User manual

Grizzly Double Mini On/Off h8245 User manual

Grizzly

Grizzly Double Mini On/Off h8245 User manual

Grizzly H8246 User manual

Grizzly

Grizzly H8246 User manual

Grizzly G8291 User manual

Grizzly

Grizzly G8291 User manual

Grizzly G4573 User manual

Grizzly

Grizzly G4573 User manual

Grizzly G4572 User manual

Grizzly

Grizzly G4572 User manual

Grizzly G4571 User manual

Grizzly

Grizzly G4571 User manual

Grizzly G8290 User manual

Grizzly

Grizzly G8290 User manual

Grizzly H8239 User manual

Grizzly

Grizzly H8239 User manual

Grizzly H8238 User manual

Grizzly

Grizzly H8238 User manual

Grizzly T25448 User manual

Grizzly

Grizzly T25448 User manual

Grizzly G4571 User manual

Grizzly

Grizzly G4571 User manual

Grizzly G4674 User manual

Grizzly

Grizzly G4674 User manual

Grizzly G4572 User manual

Grizzly

Grizzly G4572 User manual

Grizzly G8992 User manual

Grizzly

Grizzly G8992 User manual

Grizzly G4573 User manual

Grizzly

Grizzly G4573 User manual

Popular Switch manuals by other brands

SMC Networks SMC6224M Technical specifications

SMC Networks

SMC Networks SMC6224M Technical specifications

Aeotec ZWA003-S operating manual

Aeotec

Aeotec ZWA003-S operating manual

TRENDnet TK-209i Quick installation guide

TRENDnet

TRENDnet TK-209i Quick installation guide

Planet FGSW-2022VHP user manual

Planet

Planet FGSW-2022VHP user manual

Avocent AutoView 2000  AV2000BC AV2000BC Installer/user guide

Avocent

Avocent AutoView 2000 AV2000BC AV2000BC Installer/user guide

Moxa Technologies PT-7728 Series user manual

Moxa Technologies

Moxa Technologies PT-7728 Series user manual

Intos Electronic inLine 35392I operating instructions

Intos Electronic

Intos Electronic inLine 35392I operating instructions

Cisco Catalyst 3560-X-24T Technical specifications

Cisco

Cisco Catalyst 3560-X-24T Technical specifications

Asante IntraCore IC3648 Specifications

Asante

Asante IntraCore IC3648 Specifications

Siemens SIRIUS 3SE7310-1AE Series Original operating instructions

Siemens

Siemens SIRIUS 3SE7310-1AE Series Original operating instructions

Edge-Core DCS520 quick start guide

Edge-Core

Edge-Core DCS520 quick start guide

RGBLE S00203 user manual

RGBLE

RGBLE S00203 user manual

Thrustmaster FLIGHT SIMULATOR X quick guide

Thrustmaster

Thrustmaster FLIGHT SIMULATOR X quick guide

Southwire SURGE GUARD 41390 RVC troubleshooting guide

Southwire

Southwire SURGE GUARD 41390 RVC troubleshooting guide

Buhler Nivotemp NT 61 Brief instructions

Buhler

Buhler Nivotemp NT 61 Brief instructions

Kramer VS-41HDCP user manual

Kramer

Kramer VS-41HDCP user manual

Techly IDATA AU-270 user manual

Techly

Techly IDATA AU-270 user manual

Belkin F1U109 user manual

Belkin

Belkin F1U109 user manual

manuals.online logo
manuals.online logoBrands
  • About & Mission
  • Contact us
  • Privacy Policy
  • Terms and Conditions

Copyright 2025 Manuals.Online. All Rights Reserved.

For questions or help with this product contact Tech Support at (570) 546-9663 or techsupport@grizzly.com
MODEL T33308/T33310
DUST COLLECTOR
REMOTE SWITCH
INSTRUCTIONS
To ensure safe operation:
• Only connect switch box to power supply
that meets listed specifications.
• Do not connect switch box to dust collec-
tor with a motor that exceeds listed speci-
fications for horsepower or amperage.
• Never leave dust collector running while
unattended. Wood dust is highly flamma-
ble, and you must always be present while
the dust collector is running to promptly
respond in the event of a fire.
• This remote switch is ONLY designed to
be used on dust collectors with standard
ON/OFF toggle or push-button switches—
not those with magnetic switches.
• If you are unsure about the type of switch
your dust collector has, contact the dust
collector manufacturer for more information.
• Do not use this switch box for applications
other than dust collectors, as it may cause
the unit to fail and will void the warranty.
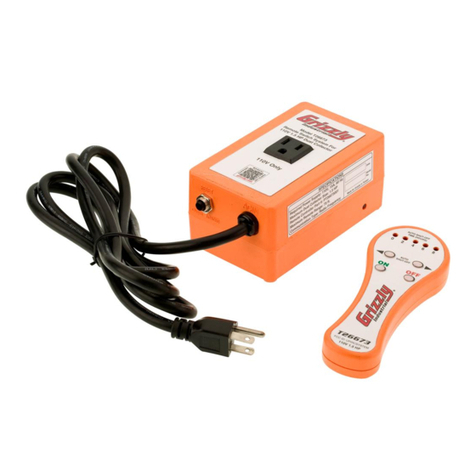
Figure 1. Model T33308/T33310 Dust Collector
Remote Switch components.
V2.03.22
COPYRIGHT © APRIL, 2022 BY GRIZZLY INDUSTRIAL, INC.
NO PORTION OF THIS MANUAL MAY BE REPRODUCED IN ANY SHAPE
OR FORM WITHOUT THE WRITTEN APPROVAL OF GRIZZLY INDUSTRIAL, INC.
(FOR MODELS MFD. SINCE 2/22) #MN22313 PRINTED IN TAIWAN
***Keep for Future Reference***
Model T33308:
Required Power Supply .....120V, 15A, 60 Hz
Outlet Type ................................. NEMA 5-15
Max. Dust Collector HP ..................... 1.5 HP
Replacement Remote Control ..........T33309
Model T33310:
Required Power Supply .... 240V, 20A, 60 Hz
Outlet Type .................................NEMA 6-20
Max. Dust Collector HP ........................ 3 HP
Replacement Remote Control ...........T33311
Remote Battery ......................................A27 12V
Communication Type ........Radio Frequency (RF)
Max. Communication Distance ................... 75 ft.
Specifications
The Model T33308/T33310 Dust Collector Remote
Switch (see Figure 1) allows you to remotely turn
a dust collector ON/OFF from a distance of up to
75 feet.
Read and understand this document before instal-
lation to ensure you understand how to safely use
the remote, and that this switch box fits the intend-
ed application.
Introduction
V1.04.22
-2- Model T33308/T33310 (Mfd. Since 02/22)
Figure 2. NEMA 5-15 plug and receptacle for
Model T33308.
Grounding Prong
Neutral Hot
5-15 PLUG
120V
GROUNDED
5-15 RECEPTACLE
For T33308
3. Make sure dust collector ON/OFF switch is
in OFF position, then plug dust collector into
switch box.
Figure 3. NEMA 6-20 plug and receptacle for
Model T33310.
Grounding Prong
Current Carrying Prongs
6-20 PLUG
240V
GROUNDED
6-20 RECEPTACLE
For T33310
Figure 4. Remote control.
Green
Button
Red
Button
The remote control and switch box come pre-pro-
grammed from the factory and are ready for use.
No additional programming is necessary.
To operate remote control:
1. Move dust collector ON/OFF switch to ON
position.
2. Press green button on remote control to turn
dust collector ON (see Figure 4).
3. Press red button on remote control to turn
dust collector OFF (see Figure 4).
Note: Buttons labeled "C" and "D" are not func-
tional on this remote.
OperationInstallation
1. Place switch box in a dry, protected location
within reach of power receptacle and dust
collector power cord.
2. Plug switch box into proper power receptacle
(see Figures 2–3).
Note: This remote control operates on a radio
frequency and has a range of 75 feet. It does not
need to be aimed at the switch box to operate.
Model T33308/T33310 (Mfd. Since 02/22) -3-
2. Immediately press green button on remote
control (see Figure 4 on Page 2) and release
it. You will hear two beeps. After three to five
seconds, you will hear three more beeps.
Remote control is now programmed.
Note: If green button is not pressed within
three to five seconds, you will hear three
beeps. Remote control is not programmed.
Return to Step 1 and begin again.
The remote control is powered by a 12V type A27
battery. If the switch box stops responding to the
remote control, replace the battery as the first
course of action.
Replacing Remote Control Battery
Items Needed Qty
Phillips Head Screwdriver #00 .......................... 1
A27 12V Battery ................................................ 1
To replace remote control battery:
1. Turn remote control face down, remove (3)
Phillips head screws, then remove battery
cover.
2. Replace battery, then re-assemble remote
control.
The switch box is equipped with a reset button
that allows the system to be restarted after the
overload protection has tripped. To reset, place
the dust collector ON/OFF switch in the OFF posi-
tion, wait a few minutes for the system to cool,
then press the reset button. If the button does not
stay depressed, allow the system to cool longer,
then try again.
Resetting Switch Box Circuit Breaker
Figure 5. Location of programming button and
circuit breaker reset button.
Programming Button
Reset Button
Programming Switch Box
The following steps can be used to reprogram
the switch box to work with a replacement remote
control or as a troubleshooting procedure if the
switch box does not respond to commands from
the original remote control.
Note: Switch box can only be programmed to
one remote control at a time. If remote control is
lost or damaged, the replacement will have to be
programmed before it can be used. See specifica-
tions on Page 1 of these instructions for replace-
ment part numbers.
To program switch box:
1. Press programming button on side of switch
box (see Figure 5) for approximately one
second, then release. You will hear one
beep.
Unprogramming Switch Box
The switch box can be unprogrammed so it will
not operate with any remote control. In this event,
the switch box will have to be reprogrammed
again to operate with a remote control.
To unprogram switch box:
1. Press and hold programming button (see
Figure 5) on switch box for approximately five
seconds. You will hear one initial beep fol-
lowed by three more beeps about eight sec-
onds later. Switch box is now unprogrammed.
-4- Model T33308/T33310 (Mfd. Since 02/22)
Symptom Possible Cause Possible Solution
Switch box will not
turn ON.
1. Remote control out of range of switch.
2. Switch box not connected to power.
3. Remote control not programmed to operate
switch.
4. Remote control battery weak/dead.
5. Switch box circuit breaker tripped or at fault.
6. Power supply circuit breaker tripped or fuse
blown.
7. Remote control/switch box at fault.
1. Operate remote control within 75 ft. of switch.
2. Connect switch box to correct power source (Page 2).
3. Program remote control to operate switch (Page 3).
4. Replace remote control battery (Page 3).
5. Press reset button on switch box (Page 3).
6. Ensure circuit is free of shorts. Reset circuit breaker
or replace fuse.
7. Test/replace.
Dust collector will
not turn ON.
1. Dust collector not connected to switch box.
2. Switch box not connected to power.
3. Dust collector ON/OFF switch not in ON
position.
4. Power supply circuit breaker tripped or fuse
blown.
5. Dust collector at fault.
1. Properly connect dust collector to switch box
(Page 2).
2. Connect switch box to correct power source (Page 2).
3. Move dust collector ON/OFF switch to ON position.
4. Ensure circuit is free of shorts. Reset circuit breaker
or replace fuse.
5. Refer to dust collector manual for troubleshooting;
contact dust collector manufacturer for help.
Troubleshooting
Review the troubleshooting procedures in this subsection if a problem develops. If you need additional help
with a procedure, call our Technical Support at (570) 546-9663.
Note: Please gather the serial number and manufacture date of your switch before calling.