Gude NTS 1200 User manual

NTS 1200
#16713
© Güde GmbH & Co. KG - Birkichstrasse 6 - D-74549 Wolpertshausen - Deutschland
English GB
Translation of original Operating Instructions
WET/DRY VACUUM CLEANER

4
1
5
1
2
3
6 7
8
9
11
10
13
12

A
B
C
D
E

Introduction
To enjoy your new WET/DRY VACUUM CLEANER as
long as possible, please read carefully the Operating
Instructions and the attached safety instructions before
using it. Further, we recommend keeping the Operating
Instructions to recall the product features in the future.
Within the continuous product development, we
reserve the right to make technical changes to
improve it.
Any reprints, even partial, are subject to approval.
Supply includes
Take the appliance out of the transport package and check
it whether there are the following parts:
•NTS 1200 Wet/Dry Vacuum Cleaner
•Paper filter bag
•Foam filter
•Floor nozzle (for wet/dry vacuuming)
•1.5 m suction hose
•3-piece suction tube
•Original Operating Instructions
Please contact your dealer if any parts are missing or are
damaged.
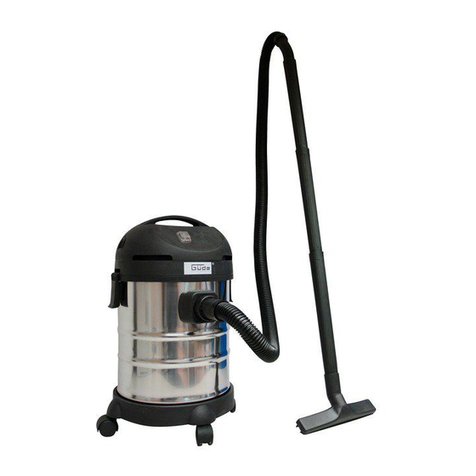
Appliance description (pic. 1)
1. Upper part of vacuum cleaner
2. On/Off
3. Tank
4. Paper filter bag
5. Foam filter
6. Guide wheels
7. Floor nozzle
8. Suction hose connection
9. 3-piece suction tube
10. Suction hose
11. Carrying handle
12. Blowing handle
13. Closures
NTS 1200 wet/dry vacuum cleaner technical
specifications
Connection: 230 V / 50 Hz
Engine output: 1,200 W
Protection type/class: IPX4 / II
Vacuum: 140 mbar / 14 kPa
Cable length: 4 m
Nominal width of
accessory equipment: 36 mm
Tank capacity: 20 l
Weight: 6 kg
Dimensions: LxWxH 350 x 350 x 500 mm
Safety instructions
Please read all safety instructions and directives
before using the vacuum cleaner. The failure to follow
the safety instructions and directives may result in electric
shock, fire and/or serious injuries.
Keep these instructions for future reference.
•Do not vacuum harmful substances, e.g. beech
or oak wood dust, stone dust, asbestos. These
substances are carcinogenic.
•CAUTION! The vacuum cleaner is not suitable
for vacuuming dangerous dust. Do not use the
vacuum cleaner to vacuum flammable or
explosive liquids, e.g. petrol, oil, alcohol,
solvents. Do not vacuum hot or burning dust.
Do not use the vacuum cleaner in an
environment with a risk of explosion. Dust,
fumes and liquids may ignite or explode.
•Do not expose the vacuum cleaner to rain and
wet.Water in the vacuum cleaner increases the
risk of electric shock.
•Safety switch against stray current to be
necessarily used. Using a safety switch against
stray current reduces the risk of electric shock.
•Plug the vacuum cleaner to a properly
grounded system. The outlet and extension cable
must have a functional protective conductor.
•The feeder cable must be regularly checked for
any damage, e.g. production of scratches or
aging. If you find any damage, the cable must
be replaced before using the appliance again.
•Do not cross or otherwise deform the cable. Do
not use the cable to pull the plug out of socket
and move the vacuum. A cable that is damaged
increases the risk of electric shock.
•Pull the plug out of socket before cleaning or
repairing the vacuum cleaner or before
replacing any accessory part.
•Provide adequate ventilation in the place of
your work.
•This vacuum cleaner has not been designed to
be used by persons (including children) with
limited physical, sensory and mental skills or
insufficient experience and knowledge, unless
they use the appliance under the supervision
of a safety engineer and have received
instructions from the engineer on how to use
the appliance.
•Have the vacuum cleaner repaired by qualified
authorised staff, using original spare parts
only. This will make sure the vacuum cleaner
safety is provided.
•CAUTION! Switch the vacuum cleaner
immediately off if foam or water is leaking.
•Follow the instructions for regular cleaning of
the water level limiter and check it for any
damage.
•Caution! Depending on the surface quality,
the tank may get statically charged through the
guide wheels when moved. This is no defect
and not dangerous.
Marking
Product safety:
Product corresponds to
applicable EU standards Protection class II
Prohibitions:
Protect against rain, wet
and weather conditions. The appliance must not be
used by children
Warning:
Warning/Caution Warning against
dangerous voltage
8

Commands:
Read carefully the Operating
Instructions. Learn carefully
how the appliance is used
before using it.
Environment protection:
Dispose waste professionally
so as not harm the
environment.
Packing cardboard
material may be delivered
to collecting centres for
recycling.
Any defective and/or
disposed electric or electronic
devices must be delivered to
respective collection centres.
Package:
Protect against moisture This side up
Interseroh-Recycling
Technical specifications:
Connection Engine output
Vacuum Nominal width of
accessory equipment
Tank capacity Weight
Training
Please read carefully the Operating and servicing
instructions. Familiarise thoroughly with the controls and
proper use of the appliance. You must know how the
appliance works and how to switch the controls
immediately off. Never let children work with the appliance.
Never let adults work with the appliance if not trained
properly. Do not let any persons, especially small children
and pets, to the place of your work. Be careful to prevent
any slipping or falling down.
Use as designated
The appliance has been designed for sucking and blowing
of harmless and non-flammable liquids. Use the vacuum
cleaner only when knowing all of its functions and when
you are able to use them with no limitation or after
receiving appropriate instructions.
The appliance cannot be used for works other than for
which the appliance has been designed and that are
specified in the Operating Instructions. Any other use will
be considered a use in conflict with the designation. The
manufacturer will not be liable for any consequential
damage and injuries. Please be sure to know that the
appliance has not been designed for industrial purposes.
Assembly (picture 1)
Pull the plug out of socket before any work on
the vacuum cleaner.
Installing the guide wheels (pic. A.1 – A.5)
•Take the appliance out of the package.
•Open the closures and remove the upper part of
the vacuum cleaner.
•Fit the guide wheels in appropriate holes
underneath the vacuum cleaner.
Fitting the foam filter (wet vacuuming only)
(pic. A.6a)
•Fit the foam filter on the bag.
Changing/fitting the paper filter bag
(dry vacuuming only) (pic. A.6b)
•Pull the dust bag off the connecting flange to the
back. Close the dust bag opening by tipping the
cover. Remove the closed dust bag off the vacuum
cleaner.
•Fit a new dust bag on the connecting flange of the
vacuum cleaner. Make sure the dust bag fits tightly
along its entire length to the inner tank wall. Fit in
the upper part of the vacuum cleaner.
•Close the closures.
Installing/removing the suction hose (pic. A.9 + A.10)
•Insert the suction hose in the hose fixture and
secure it by turning clockwise.
•Push the suction tubes firmly into each other.
•To remove the suction hose, turn it counter-
clockwise and take it out.
Operation
Putting the appliance into operation
Respect the system voltage! The current source
voltage must correspond to the details on the vacuum
cleaner type label. Vacuum cleaners labelled 220-240V
may also be plugged to 220V.
Safety switch against stray current to be
necessarily used. Using a safety switch against stray
current reduces the risk of electric shock.
CAUTION! The vacuum cleaner is not suitable for
vacuuming dangerous dust. Do not use the vacuum
cleaner to vacuum flammable or explosive liquids, e.g.
petrol, oil, alcohol, solvents. Do not vacuum hot or
9

burning dust. Do not use the vacuum cleaner in an
environment with a risk of explosion. Dust, fumes and
liquids may ignite or explode.
The vacuum cleaner must not be used as a water
pump. The vacuum cleaner has been designed for
sucking a mixture of water and air.
Pull the plug out of socket before any work on
the vacuum cleaner.
Switch the vacuum cleaner immediately off if foam or
water is leaking and empty the tank. Otherwise, the
vacuum cleaner could get damaged.
Dry vacuuming (pic. B)
Insert the paper filter bag for dry vacuuming.
Switching the appliance on/off
To put the vacuum cleaner into operation, put the On/Off
button to the "I" position.
To switch the vacuum cleaner off, put the On/Off button to
the "0" position.
Wet vacuuming (pic. C)
Remove the paper filter bag and empty the tank before wet
vacuuming. Now fit in the foam filter to the bag, fit in the
upper part of the vacuum cleaner and close the closures.
Switching the appliance on/off
To put the vacuum cleaner into operation, put the On/Off
button to the "I" position.
To switch the vacuum cleaner off, put the On/Off button to
the "0" position.
After wet vacuuming, empty the tank, wipe it out with a
cloth and clean the foam filter and let it dry out.
Blowing (pic. D)
To use the blowing function, the hose must be secured in
the blowing fixture. Start the blowing function with the
On/Off button.
Warranty
The warranty exclusively applies to material or
manufacturing defects. The original proof of purchase
including the date of purchase must be submitted when
lodging a claim in the warranty period. The warranty does
not cover any unauthorised use such as appliance
overload, violent use, damage by a foreign person or an
undesirable item. The failure to follow the Operating
Instructions and assembly instructions and common wear
and tear are also excluded from the warranty.
Behaviour in case of emergency
Provide necessary first aid treatment corresponding to the
injury nature and seek qualified medical help as soon as
possible.
Protect the injured person from other injuries and calm
him/her down.
In case of accident, first aid kit must always be
available in the place of your work in accordance with
DIN 13164. Material taken out of the first aid kit needs
to be supplemented right away.
Please provide the following details if help is needed:
1. Place of accident
2. Accident nature
3. Number of injured persons
4. Injury type
Disposal
The disposal instructions are based on icons placed on the
appliance or its package. The description of the meanings
can be found in the “Marking“ section.
Transport package disposal
The package protects the appliance against damage
during transport. Packing materials are usually chosen
depending on their environmental friendliness and disposal
method and can therefore be recycled.
Returning the package to material circulation saves raw
materials and reduces waste disposal costs.
Parts of packages (e.g. foils, styropor®) can be dangerous
to children. Risk of suffocation!
Keep parts of packages away from children and dispose
them as soon as possible.
Operator requirements
The operator must carefully read the Operating
Instructions before using the appliance.
Qualification
No special qualification is necessary for using the
appliance apart from detailed instruction by an expert.
Minimum age
The appliance can only be operated by persons over 18
years of age. An exception includes youngsters operating
the appliance within their professional education to
achieve necessary skills under trainer's supervision.
Training
Using the appliance only requires appropriate instructions
by a professional or reading the Operating Instructions.
No special training necessary.
Maintenance
Do you have any technical questions? A claim? Do you
need spare parts or the Operating Instructions?
You will be helped quickly and without needless
bureaucracy at our webpage www.guede.com in the
Services part. Please help us be able to assist you. To
identify your appliance when claimed, we need to know its
serial No., order No, and year of production. All these
details can be found on the type label. Enter the details
below for future reference.
Serial No.
Order No.
Year of production:
Tel. +49 (0) 79 04 / 700-360
Fax: +49 (0) 79 04 / 700-51999
Servicing and cleaning (pic. E)
Pull the plug out of socket before any work on
the vacuum cleaner.
Keep the vacuum cleaner and ventilation slots clean to
make sure the vacuum cleaner works properly and
safely.
10

Any servicing work not explicitly specified in this manual
must be performed by a professional as there may be
dangerous situations the operator is unable to handle.
Spare parts may only be replaced by a professional.
Tank
From time to time, wipe the tank with a common, non-
abrasive cleaning agent and let it dry out.
Foam filter
After wet vacuuming, wash the foam filter in fine solution
and let it dry out.
Troubleshooting
The table shows possible failures and their remedies.
Pull the plug out of socket before any work on the
vacuum cleaner.
Failures Remedy
Is the upper part of the
vacuum cleaner fitted
properly?
Is the hose system
obstructed?
Are the suction tubes
connected firmly and
properly to each other?
Is the tank full?
Inadequate suction power
Is the dust bag full?
Regular emptying guarantees optimum suction power. If
the suction power is still not adequate, you should ask a
professional to help you.
EU DECLARATION OF CONFORMITY
We,
Güde GmbH & Co. KG
Birkichstrasse 6 D74549 Wolpertshausen
Germany,
hereby declare that the design of the appliances below
corresponds to the applicable requirements of the basic
EU safety and hygiene directives.
In case of alternation of the appliance, not agreed
upon by us, this Declaration will lose its validity.
Appliance description:
NTS 1200 WET/DRY VACUUM CLEANER
Art. No.
#16713
Applicable EU Directives:
2004/108/EG
2006/95/EG
Applicable harmonised standards:
EN 55014-1:2006
EN 55014-2:1997/+A1:2001
EN 61000-3-2:2006
EN 61000-3-3:1995/+A1:2001/+A2:2005
EN 60335-2-2:2003+A1:04+A2:06
EN 60335-1:2002+A11, A1:04+A12, A2:06+A13:08
EN 62233:2008
Date/authorised signature: 22 August 2011
Title of signatory: Managing Director
Mr Arnold
Technical documentation: J. Bürkle FBL; QS
11
Other manuals for NTS 1200
1
Table of contents
Other Gude Vacuum Cleaner manuals

Gude
Gude GAA 50 User manual

Gude
Gude GA 18L Wiring diagram

Gude
Gude NTS 1200 Wiring diagram

Gude
Gude GNTS 12 L User manual

Gude
Gude GA 1000 D User manual

Gude
Gude GAA 65.1 User manual

Gude
Gude NTS 18-201-05 User manual

Gude
Gude MULTICLEAN 3000 3 in 1 User manual

Gude
Gude GA 18 L 1200 W User manual

Gude
Gude GAA 65 User manual