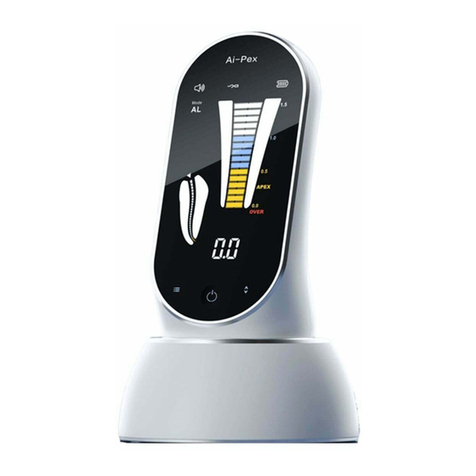
Guilin Woodpecker Medical Instrument DTE Dpex I User manual


Contents
1 Introduction………………………………………………………………1
1.1 Description of the device………………………………………………1
1.2 Model and dimensions…………………………………………………1
1.3 Components……………………………………………………………1
1.4 Structure…………………………………………………………………3
1.5 Intended use……………………………………………………………4
1.6 Contraindication…………………………………………………………4
1.7 The classication of the device…………………………………………4
1.8 The main technical specications………………………………………5
2 Notice of installing and using the device…………………………………5
3 Installation of the device…………………………………………………7
3.1 Battery installation………………………………………………………7
3.2 The Connection of the Measuring Wire…………………………………7
3.3 Check the machine by tester……………………………………………10
3.4 Demonstration function………………………………………………10
4 Product function and operation…………………………………………11
4.1 Usage requirements……………………………………………………11
4.2 Instruction……………………………………………………………14
5 Trouble shooting…………………………………………………………16
6 Cleaning and sterilization………………………………………………20

7 Storage, maintenance and transportation…………………………………20
7.1 Storage…………………………………………………………………21
7.2 Maintenance……………………………………………………………21
7.3 Transportation…………………………………………………………21
8 Environmental protection………………………………………………22
9 After service………………………………………………………………22
10 For technical data, please contact………………………………………22
11 Declaration of conformity………………………………………………22
12 Symbol instructions……………………………………………………28
13 Statement………………………………………………………………29

1
1 Introduction
1.1 Description of the device
Apex locator is a supporting equipment of the endodontic treatment, through the
measurement of the length of apical teeth, helping the dentist to nish the endodontic
treatment.
Features of the device:
a) Equipped with clear bright LCD, clear image and different color indicate the
trajectory of the le clearly.
b) Based on advanced multiple frequency network impedance measurement
technology and automatic calibrating ensures the measurements are accurate.
c) The accessories of the “Dpex I” can be autoclaved under the high temperature and
high pressure. Avoiding cross infection effectively.
1.2 Model and dimensions
1.2.1 Model: Dpex I
1.2.2 Dimensions: 105mm (length) × 142mm (width) × 40mm (height)
1.2.3 Weight: 395g
1.3 Components
1.3.1 Structure of the Dpex I

2
Picture 1

3
Picture 2
1.4 Structure
Dpex I is composed of main unit, measuring wire,
lip hooks, le clip, measuring le, etc..
Measuring wire
File clip
Lip hook
Measuring le
Tester
Picture 3

4
1.5 Intended use
This equipment applies to the measurements below:
1.5.1 Measurement of the endo length of all kinds of the tooth with pulpitis, pulp
necrosis, periapical periodontitis.
1.5.2 Measurement of the endo length before restoration of post crown.
1.5.3 Measurement of the endo length of transplantation and re-transplantation.
1.6 Contraindication
We do not advise the use of Dpex I on patients tted with pacemakers (or other
electrical equipment) or on those patients who was advised not to use the electric
equipment (like electric shaver, electric blower) for safety reasons.
1.7 The classication of the device
1.7.1 Internal power device
1.7.2 Type BF device
1.7.3 Device not suitable for being used in the presence of a ammable anesthetic
mixture with air or with oxygen or nitrous oxide.
1.7.4 Degree of protection against harmful ingress of water: Ordinary equipment
(IPX0)
1.7.5 Operation mode: Continuous operation

5
1.8 The main technical specications
1.8.1 Power: 3 pieces AAA alkaline batteries
1.8.2 Power consumption: ≤0.3W
1.8.3 Screen: 4.9’’ LCD
1.8.4 Buzzer alert: The buzzer will alert when the endo le is less than 2mm to the
apex.
1.8.5 Operation condition
a) Environment temperature: +5℃+40℃
b) Relative humidity: ≤80%.
c) Atmosphere pressure: 70kPa-106kPa
2 Notice of installing and using the device
2.1 Please read the instruction manual carefully before the operation.
2.2 The le clip, lip hook and measuring le are reusable. Please make sure they
are autoclaved under high pressure and high temperature before each operation. The
endo les should not be used more than 3 times.
2.3 Power Supply: 3 pcs of 1.5V LR03 alkaline battery. Please change them when
their voltage is not enough to support the equipment.
Notice: Please handle the batteries according to the local laws.
2.4 The batteries must be taken out for storage when the device is not used for a long
time.

6
2.5 Please use original components, the components made by other company may
cause inaccurate measurement or un- measurable.
2.6 Avoid the connection between the outside and inside liquid of endodontic during
measuring in order to avoid the measuring difference.
2.7 Keep endo le and le clip away from any other metal or instruments.
2.8 If the equipment indicates the endo le cut through the apex hole though the
le does not reach apex yet, it shows or indicates that there is left pulp or other
electrolyte.
2.9 To ensure that short circuits do not impair the measurements, be particularly
careful with patients tted with metal crowns or bridges. Please conrm the wetness
of the endo to ensure the reliability of the measuring. If it is conrmed that the endo
le hasn't reached the apex yet the data showed on the apex locator is too low, please
check whether the endo is too dry and conrm it with X-ray.
2.10 This device have electromagnetic interference, the patient or doctor who with
a heart pace maker are forbidden to use this device and the device is susceptible to
other device which produces electromagnetic interference. The operation under such
environment should be cautious.
2.11 The guarantee is valid for normal usage conditions. Any disassembly will
render the guarantee void, the professionals of Woodpecker company will offer the
repair service during in guarantee period.
2.12 Any modication will render the guarantee void and may cause harm to the
patient.

7
3 Installation of the device
3.1 Battery installation
Attention: As batteries are not installed on delivery, you need to remove the battery
cover and install 3 AAA alkaline batteries.
3.1.1 Hold the shell, and push the button at the bottom of the device toward the LCD
screen.
3.1.2 Push the battery cover and take it away from the unit.
3.1.3 Install 3 AAA alkaline batteries correctly according to the battery polarity
labeled on the shell.
3.1.4 Attention: Do not invert the anode(+) and cathode (-).
3.1.5 Install the battery cover by pressing its convex part to the concave part of the
device.
3.2 The Connection of the Measuring Wire
3.2.1 Insert the plug of the measuring wire into the right side socket of the unit.
Attention:
a) Please be careful to use the device, keep it stable and avoid hit. Incautious use will
lead to the damage or the failure of the machine.
b) Measurement cannot be operated without the complete insertion of the plug.

8
c) After the plug is inserted, please be sure not
to hit or falling any object on the plug,
3.2.2 Insert the le clip and lip hook respectively
into the two sockets of the measuring wire.
[Picture 4]
Attention:
Be sure not to pull the wire when inserting or
pulling out the measuring wire and the le clip. [Picture 5(a).
Correct operation showed as in picture 5(b).
Picture 5 Picture 6
3.2.3 The Operation Conrmation of the Device Before Use
a) Press the power switch. Make sure the scene of measuring the length of the root
canal displayed on the LCD screen.
The device will shutdown automatically after 5 minutes without operation. [Picture 6]
Picture 4

9
b) Make sure if the plug of the measuring wire is inserted
into the socket correctly.
c) Make sure if the le clip and lip hook are connected
well to the measuring wire.
d) Make the lip hook touch the bent wire of the le clip
[as showed in picture 7]. To conrm all the instruction
bars are displayed on the LCD screen. [as showed in
picture 8(c)] A continuous beep sound will be generated
during the operation.
picture 8 a b c
3.2.4 Explanations on the interfaces displayed
a) The screen displays the front region of the apical foramen by instruction bars.
Please refer to the white region as showed. [Picture 8(a)]
b) The le has gone to the position near by the apical foramen when the green bars
displayed [Picture 8(b)].
c) The le has exceeded the apical foramen when the red bars displayed. A
continuous beep sound will be generated at the same time [Picture 8(c)].
Picture 7

10
3.3 Check the machine by tester
3.3.1 The tester is used for checking machine,
the operation show as below.
3.3.2 Pulling out the measuring wire from
machine and then shut down the machine by
using Power on/off button.
3.3.3 Connect the tester to the machine.
3.3.4 Turn on the machine, while the green bars displayed the machine work well. [as
showed in picture 9]
3.4 Demonstration function
3.4.1 The demonstration function can show the simulation of le’s movement. The
operation is as bellow.
3.4.2 Move away the measuring wire from machine.
3.4.3 Press the Power on/off button, turn on the machine.
3.4.4 Press the demonstration function button with one second and then we can enter
the demonstration mode.
4.4.5 Press the demonstration function button again while demonstrating, the
function will be turned off.
Picture 9

11
4 Product function and operation
4.1 Usage requirements
4.1.1 The operation should according to the manual.
4.1.2 The dentists should have the knowledge of teeth position and average length
and the skill to operate the device.
4.1.3 A fully exposed access cavity to show the pulpal cabin.
4.1.4 A X-ray photo to show the whole length and root canal of the teeth.
4.1.5 The endo le should not be too big or too small to avoid cutting through the
apical foramen.
4.1.6 Mark an anatomized symbol on the diseased tooth and memorize it on the case
history. This symbol should be marked on the health bridge or on the tooth lled
integrated. The position of the mark should be on the incisal edge of the anterior
tooth or on the spire of the molars. For those bridge that's broken obviously, this
symbol should be on the tooth surface supported by the dentin instead of on the
suspended enamel.
4.1.7 The acute inammation surrounding the apex has been gone and the infected
material has been cleaned. It is also necessary to get rid of the pulp and necrosis
tissue.
4.1.8 The following cases are not suited for a normal measurement:
a) The size of the root canal is big
Teeth with periapical pathosis root resorption, or root hypoplasia. In this case, the

12
measurement result of the length of the root canal will be shorter than real because
of the hypoplasia of the root [Picture 10].
b) Bleeding or the blood overow from the apical foramen.
In this case, the blood will overow from the root canal and reaches gingival that the
blood and the gingival will be on a conducting state which will cause an inaccurate
result while measuring. The measurement can be continued when the bleeding is
stopped [Picture 11].
c) The tooth crown is broken
The tissue of the gingival may reach the cavity of the endo hole at the broken point
which will cause inaccurate because of the electronic conduction. The measurement
can be continued when the crown is xed by gypsum or other insulators [Picture 12].
d) There is a crack on the tooth root
In this case, the crack may cause the electric leakage which will affect the accuracy
of measurement [Picture 13].
e) A retreatment to an endo which was lled with condensation

13
Clean the remaining material in the root canal and ll it with little normal saline
before a measurement [Picture 14].
f) There is a metal crown which has connected to the gingival.
It will cause an inaccurate when the endo le touches metal crown [Picture 15].
Sometimes, the results of the EMR and
X-rays are not meet each other, which is
neither the machine is abnormal, nor the
photo is incorrect taken. The actual position
of the apical foramen is different from the
anatomical one, it is very common that the
apical slightly to the side of the root canal
crowns. In this case, according to the
shooting angle as the bellowing picture
showed, it will cause the illusion that the

14
front tip of the root canal haven’t reached the canal
tip. [Picture 16]
(Since of the angle of X-rays, sometimes it can’t
take photo of the apical appropriate, so it can’t show
the accurate position of the apical foramen.)
4.2 Instruction
4.2.1 Insert the plug of measuring wire into the
socket in the side of main unit. Turn it on. The
battery is on the left of screen.
4.2.2 The equipment is in the normal condition. The
equipment shuts down after 5 minutes without use.
4.2.3 The volume is adjustable. Please press the
volume bottom for a setting.
4.2.4 Hang the lip hook on the lip, make sure it
contact the oral mucosa as a reference electrode
[Picture 17].
4.2.5 Clip the le with le clip, approach to the
apex, then there will be continuous alarm when the
distance is less than 2mm [Picture 18].
Attention:
a) When grip the root canal with a needle le, please

15
grip the upper of the metal part(near the root canal at the needle handle). If you grip
the lower part (blade or moving part), it will wear the metal part of the le folder and
the resin part. [Picture 19]
b) When measuring, please don’t use the needle le with metal handle. If you
operate the device without the dentistry glove, it will cause leakage phenomenon and
result of measurement is inaccurate. Therefore, please use the resin needle le and
remember don’t touch the metal part with nger.
c) Please don’t use the worn le clip, and it will make the result of measurement
inaccurate.
d) Please reference the [Picture 20(a)] to grip the needle le. If as [Picture 20(b)], it
can’t make the measurement inaccurate and the root needle le‘s apical will break
easily.
4.2.6 When the le reaches the apex, adjust the rubber piece set on the endo le to
the reference point (incision edge or fossa edge), then pull out the endo le, measure
the length between the top of the le and the rubber piece, and this is the working

16
length of the tooth. It also can use the measuring instead of le clip, when it is
inconvenient to measure the back teeth [Picture 21].
4.2.7 The components that touch body must be autoclaved under high temperature
and high pressure. The shell and measuring wire should be cleaned every month by
75% alcohol.
Attention: Please avoid the seal when cleaning.
5 Trouble shooting
Phenomena of troubles Possible cause Solutions
No power and no signal on the
screen after the power on.
1. If the battery is placed
correctly?
2. If the battery is empty?
1. Re-install the batteries;
2. Replace the batteries by
new ones.
The length of the root canal
cannot be measured.
1. If the measuring wire is
connected correctly?
2. If the measuring wire is
broken?
Conrm the measuring wire
is plugged rmly, link the
lip hook with the le clip to
check if the measuring wire is
broken.
No sound of alarm. If the volume is set at “mute”? Adjust the sound level.

17
Phenomena of troubles Possible cause Solutions
Display not steady while
measuring: the measurement
result is rather longer or
shorter; numerical display
irregular.
If the connection between the
lip hook and the oral mucosa
is ok?
Make sure the lip hook has
contacted the oral mucosa at a
good position.
Is there a blood/saliva
overowing, glued to the
crown?
Blood, liquid overow from
the root canal, glued to the
crown or the tooth neck, will
cause short-circuit then cause
the in-normal phenomena.
Cleaning the blood and the
liquid.
If the root canal is lled with
blood, liquid?
Once the endo needle contact
the surface of the root canal
which ll with blood, liquid,
it will display “OVER”
immediately. In this case, push
the needle to the apical root
canal, then the display will
be normal, you can measure
the length of the root canal
correctly.
Table of contents
Other Guilin Woodpecker Medical Instrument Medical Equipment manuals
Guilin Woodpecker Medical Instrument
Guilin Woodpecker Medical Instrument DTE User manual
Guilin Woodpecker Medical Instrument
Guilin Woodpecker Medical Instrument Ai-Pex User manual

Guilin Woodpecker Medical Instrument
Guilin Woodpecker Medical Instrument Ai-Motor MotoPex User manual
Guilin Woodpecker Medical Instrument
Guilin Woodpecker Medical Instrument Endo Radar Plus User manual

Guilin Woodpecker Medical Instrument
Guilin Woodpecker Medical Instrument Fi-E User manual

Guilin Woodpecker Medical Instrument
Guilin Woodpecker Medical Instrument Fi-P WP4004 User manual

Guilin Woodpecker Medical Instrument
Guilin Woodpecker Medical Instrument EndoMatic User manual