GVI Security GV-NC-201VA User manual

WWW.GVISS.COM
GV-NC-201VA
1.3 Megapixel,Auto Focus Dome Camera
QUICK START GUIDE

GVI Security • Toll Free: 888-595-2288 • Fax: 972-245-7333
This product specications and manual are also available in pdf format at www.gviss.com
The information is subject to change without notice • v2.23.10
2
1. Review Package Contents
2. Make Connections to Camera
Connector Pin No. Definition Remarks
Reset Button - Restore to factory defualt
BNC - Analog Video Output
Alarm I/O
1 Output+
Alarm Connection
2 Output-
3 Input+
4 Input-
Audio I/O
1 Input
Two-way audio transmission
2 GND
3 Output (R)
4 Out (L)
Power
DC
12V
1 Power
Power Connection
2 Reserved
3 GND
AC
24V
1 Power-1
2 Earth GND
3 Power-2
RJ45 - 10/100 Ehternet / PoE
Dome Camera Power Cable Self Tapping Screws (x4) Plastic Screw Anchors (x4)
Security Torx Rubber Washers (x6) CD (bundled software and
documentation
Quickstart Guide

GVI Security • Toll Free: 888-595-2288 • Fax: 972-245-7333
This product specications and manual are also available in pdf format at www.gviss.com
The information is subject to change without notice • v2.23.10 3
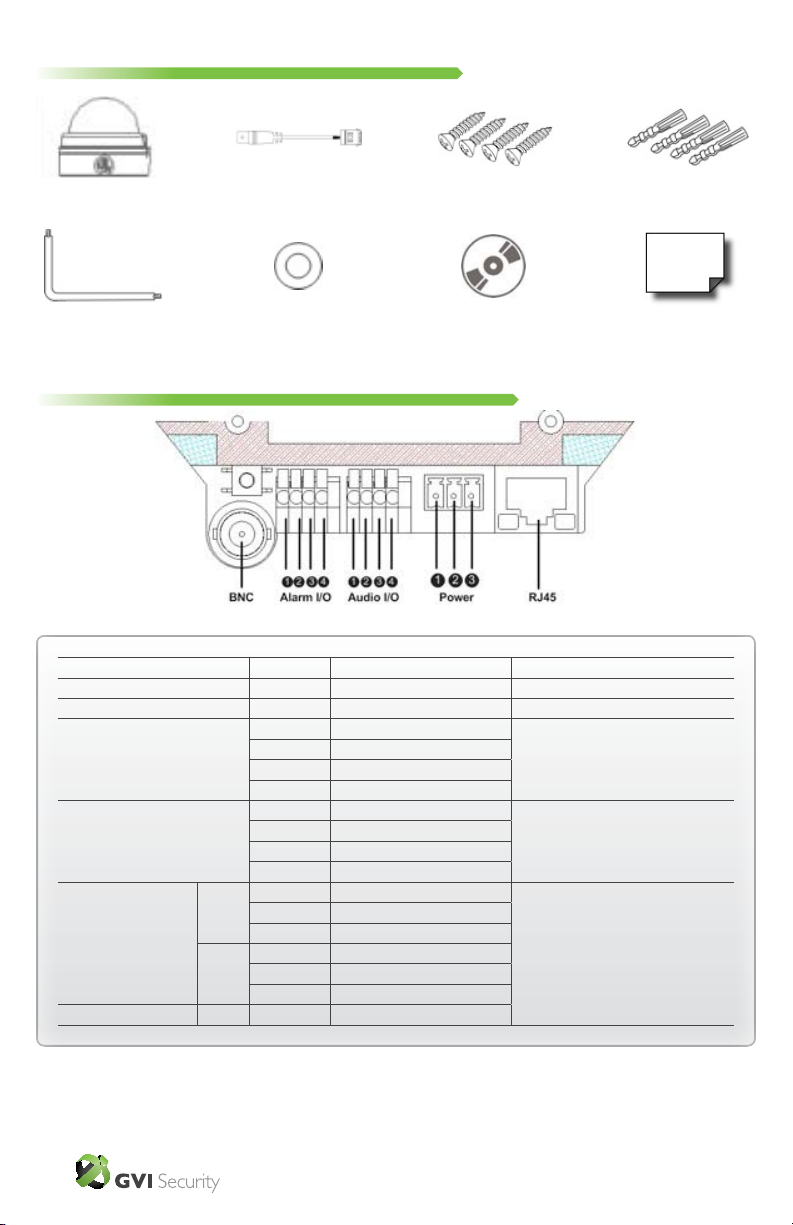
•Connectthecameratothenetworkusingashielded
networkcable(CAT5e/CAT6)
•Optionally–connectexternalinput/outputdevices,e.g.
alarm devices
•Optionally–connectanactivespeakerand/orexternal
microphone
•PowerthecameraeitherthroughPOE(PowerOver
Ethernet),12VDCor24VACpowersources,thePOE
connectionwouldbeautodetectedbythecamera.
3. Assign an IP Address
MostnetworkstodayhaveaDHCPserverthatautomaticallyassignsIPaddressesto
connecteddevices.IfyournetworkdoesnothaveaDHCPservertheautoIPcamerawill
use192.168.0.250asthedefaultIPaddress.
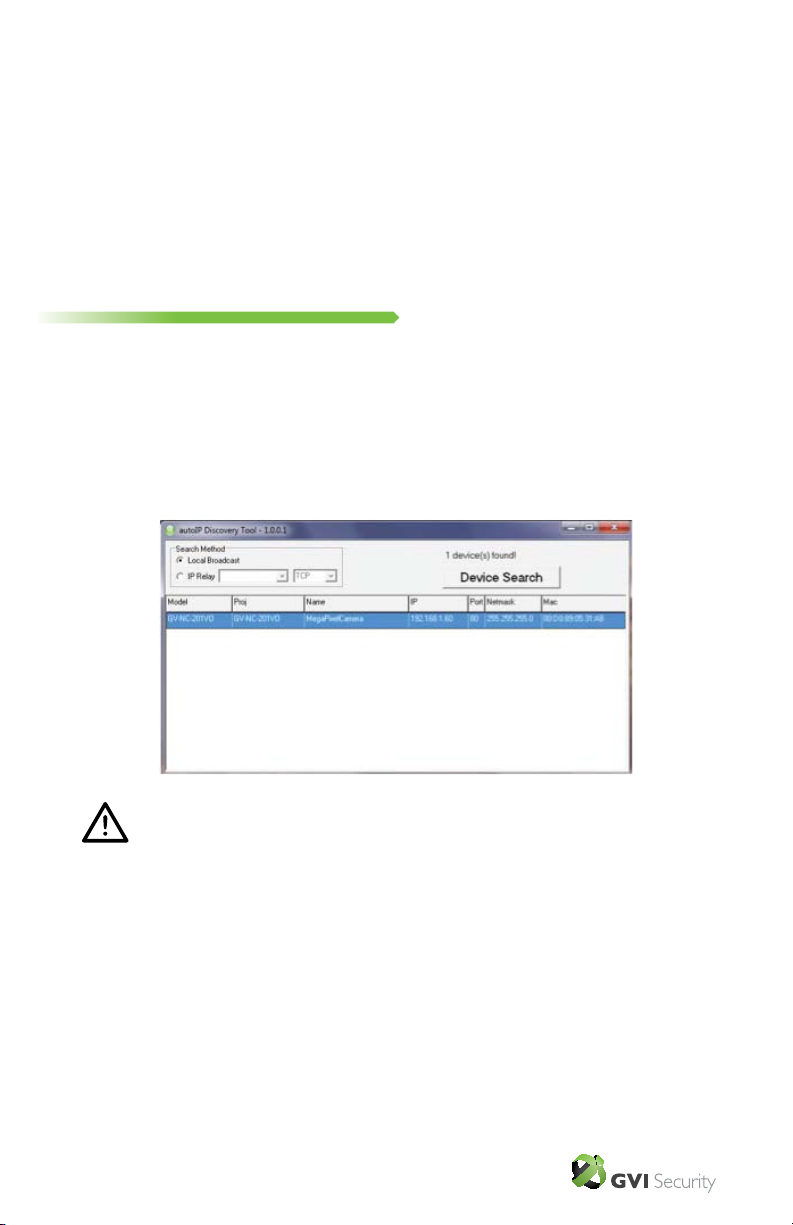
TheautoIPDiscoveryToolcanbeusedtoassignanewIPaddress.Thetoolisavailable
ontheCDsuppliedwiththisproductoritcanbedownloadedfromhttp://www.gviss.
com/support/ip_support.php.
Note:ThecomputerrunningtheautoIPDiscoveryToolmustbeonthe
samenetworksegment(physicalsubnet)astheautoIPcameras.
•VerifythattheautoIPcamerasareconnectedtothe
network,andthatthepowerhasbeenapplied.
•OpentheautoIPDiscoveryTool
•Click“DeviceSearch”tolistalloftheautoIPcamerason
thenetwork.
•RightclickonthedesiredautoIPcameraandselect
“NetworkSetup”toadjustthenetworksettings.

GVI Security • Toll Free: 888-595-2288 • Fax: 972-245-7333
This product specications and manual are also available in pdf format at www.gviss.com
The information is subject to change without notice • v2.23.10
4
4. Adjust Internet Browser And ActiveX Settings
ActiveX Controls and Plug-ins Settings
Step1:StarttheInternetExplorer(IE).
Step2:Select<Tools>fromthemainmenuofthebrowser.ThenClick<InternetOptions>.
Step3:Clickthe<Security>tabandselect“Internet”,andclick<Customlevel>tochangeActiveX
settings.
Step4:Set“ActiveXcontrolsandplug-ins”itemsto<Prompt>or<Enable>.
5. Log In To The Camera
Login ID & Password
•Keyinthecamera’sIPaddresswithintheURLbarof
yourWebbrowserwindowandpress“Enter.”
•Enterthedefaultusername(Admin)andpassword
(1234)asprompted.Notethattheusernameiscase
sensitive.
Install the ActiveX control
•Afterconnectingtothecamera,therequestforinstalling
theActiveXcontrolwillappearjustbelowtheURLbar.
•RightClickontheinformationbar,andpress“Install
ActiveXControl”.
•Followonthescreeninstructionsuntiltheinstallationof
theActiveXcontrolsarecompleted.
Table of contents