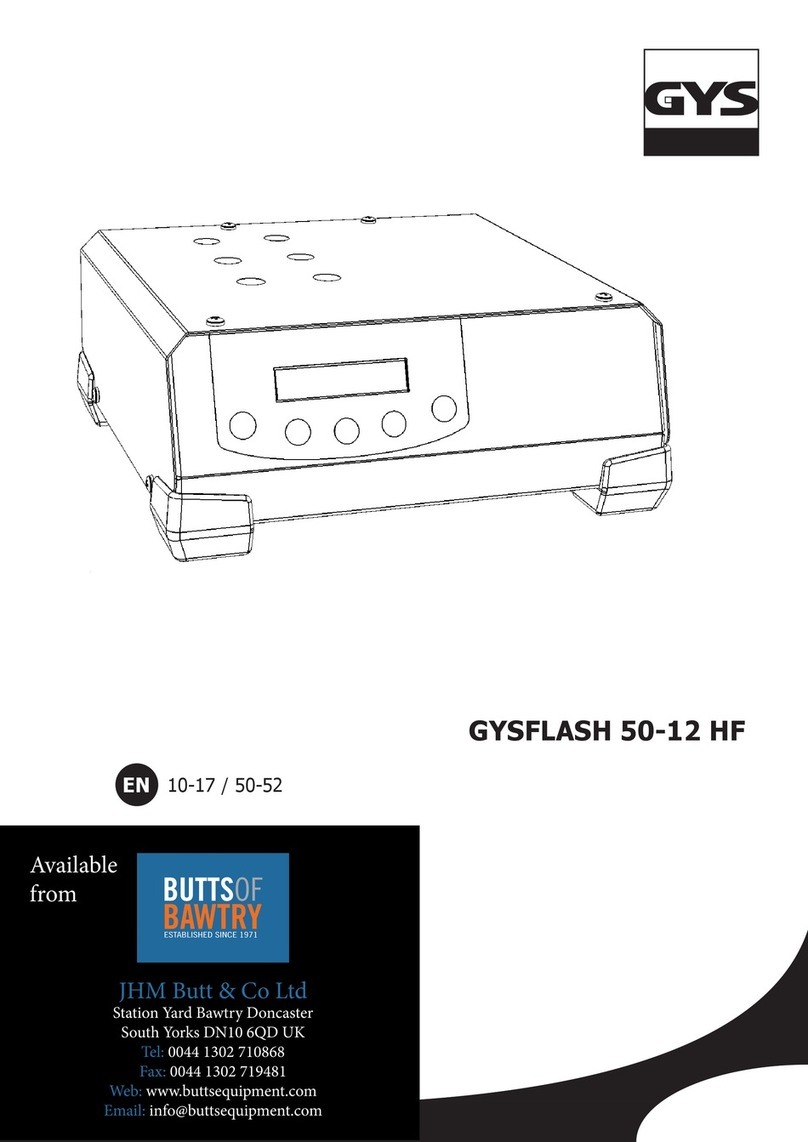
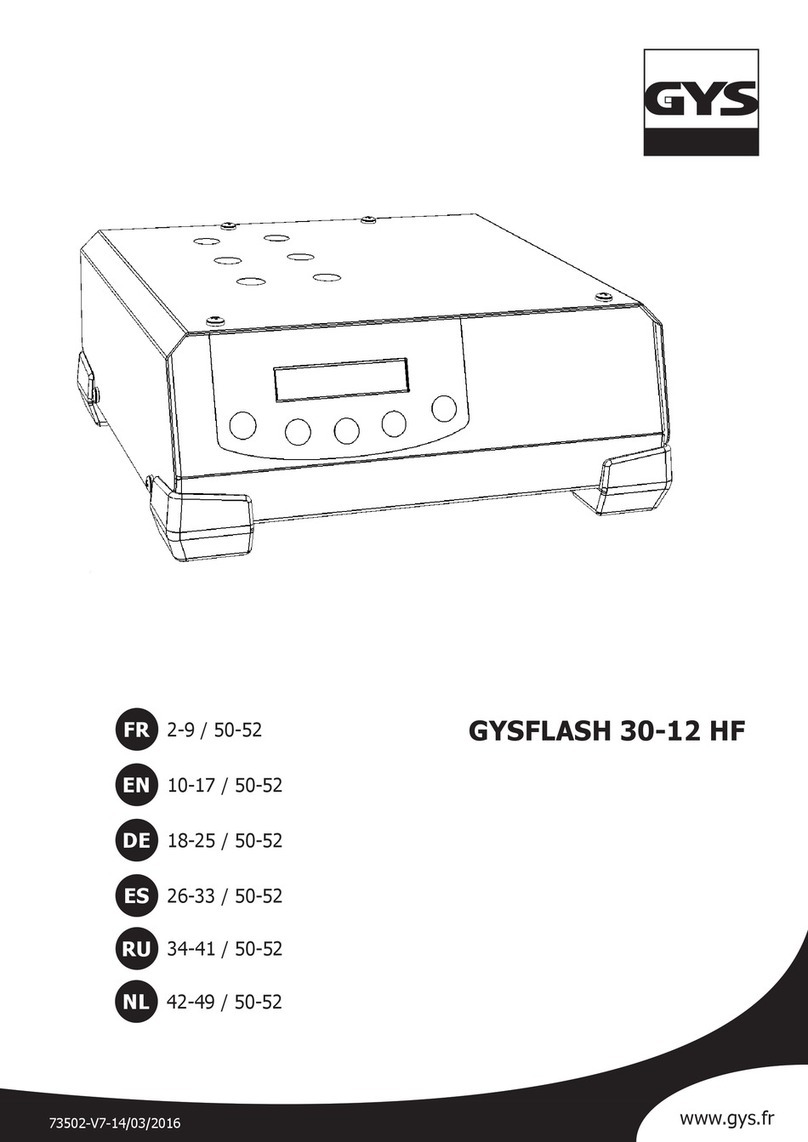
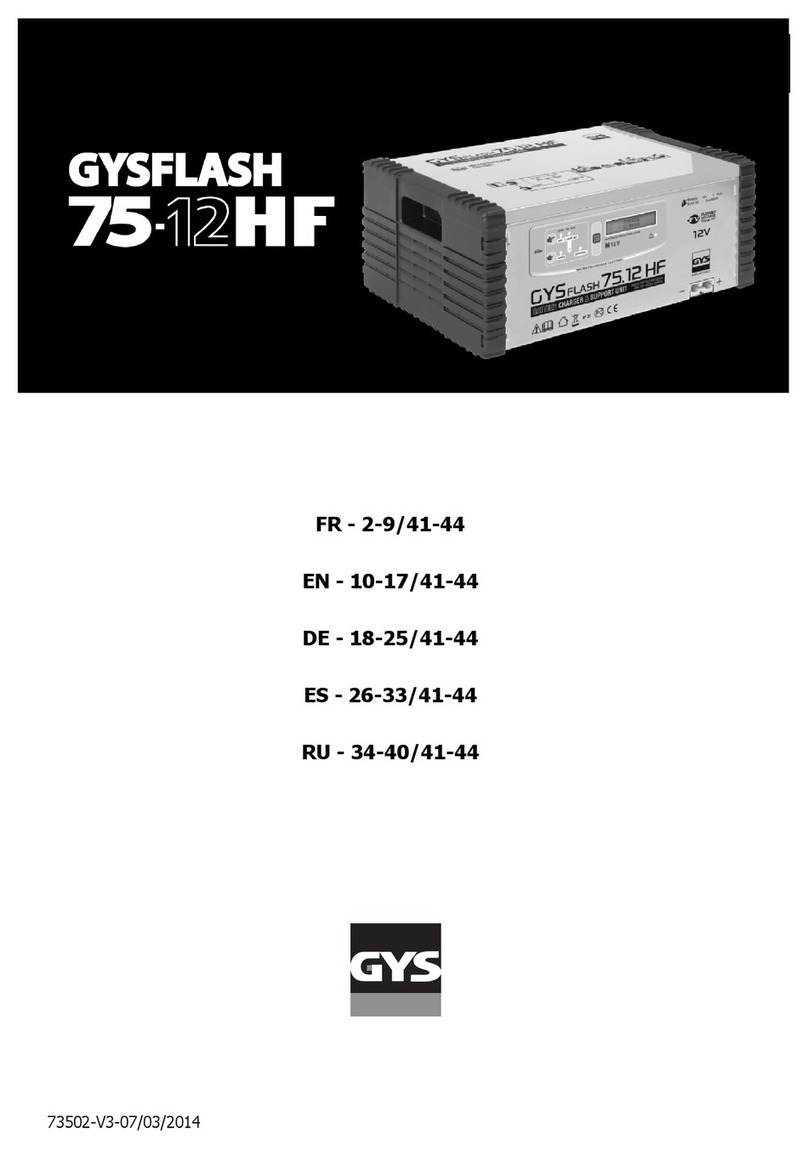
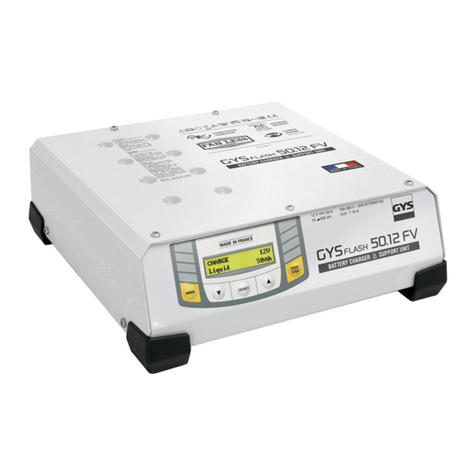
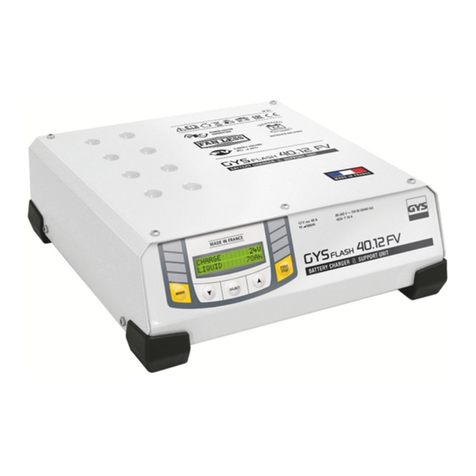
GYS GYSFLASH 30.12 HF User manual

1
FR - 2-9 / 42-44
EN - 10-17 / 42-44
DE - 18-25 / 42-44
ES - 26-33 / 42-44
RU - 34-41 / 42-44
73502
-
V
1
-
11/10
/2013
GYSFLASH 30-12 HF
30-24 HF

2
Ce manuel d'utilisation comprend des indications sur le fonctionnement de votre appareil et les
précautions à suivre pour votre sécurité. erci de le lire attentivement avant la première utilisation et
de le conserver soigneusement pour toute relecture future.
DESCRIPTION GENERALE
Les GYSFLASH 30-12 HF et 30-24 HF sont des alimentations stabilisées de forte puissance basées sur
la technologie S PS (Switch ode Power Supply).
Conçus pour soutenir les batteries 12V ou 24V (liquide/AG /gel) des véhicules en phase de
diagnostique, ils garantissent aussi une qualité de charge idéale pour l’entretien des modèles les plus
évolués. Ces chargeurs peuvent recevoir des câbles de sortie jusqu’à 2x5m en 16mm². Le
changement des câbles batterie nécessite un réétalonnage (cf. page 6).
Ils sont considérés comme des appareils fixes et non comme des appareils mobiles.
Ces appareils disposent de 5 modes :
- M de Charge : pour recharger les batteries de démarrage à électrolyte liquide ou gel (plomb,
plomb Calcium, plomb Calcium-Argent, AG …) de 10 Ah à 400 Ah en 12V et 10Ah à 200Ah en
24V (uniquement pour le GYSFLASH 30-24HF).
- M des alimentati n « Diag » et « Diag + » véhicules à l’arrêt : GYSFLASH 30-12 HF et
30-24HF subviennent aux besoins d’énergie jusqu’à 30A pour assurer à la batterie la
compensation de courant utilisé pour tester les gros consommateurs (ventilation moteur, lève-
vitre, suspension électriques, etc.). Le mode « Diag+ » permet de définir précisément la tension
à délivrer durant cette phase.
- M de Change batterie : Compense les besoins électriques afin d’éviter la perte de la mémoire
du véhicule lors d’un remplacement de batterie.
-M de alimentati n « Sh wr m » : assure à la batterie une compensation de courant lors
de l’utilisation des accessoires électriques d’un véhicule de démonstration (lève vitre, chauffage,
rétroviseurs, …). Dans ce mode, la tension peut être définie précisément suivant le besoin.
Ce chargeur est équipé d’une fonction de redémarrage automatique permettant, en mode Charge et
Showroom, de relancer automatiquement le chargeur en cas de coupure de courant.
La fonction « Showroom only », si elle est activée, restreint le chargeur au mode Showroom
uniquement, afin de faciliter son utilisation pour les démonstrateurs de véhicules.
MISE EN ROUTE ET NAVIGATION
1 Brancher le chargeur sur la prise secteur. Tension secteur monophasée 230V±15%
(50/60Hz)
2 Positionner l’interrupteur sur « ON ».
Affichage pendant 3s « GYSFLASH 30-12HF Vx.x » ou « GYSFLASH 30-24HF Vx.x »
3
Choisir ensuite le mode souhaité. Le chargeur se positionnera par défaut sur la
dernière configuration utilisée.
Le bouton mode vous permettra d’accéder aux différents menus :
Charge > Diag > Diag+ > Showroom > Change Batterie
Pour atteindre le menu configuration appuyer 3 secondes sur le bouton mode :
3 sec - Configuration

3
MODE CHARGE
Le produit autorise la recharge de la batterie seule ou connectée du véhicule.
Respecter l’ordre de mise en route.
Réglage de la Charge :
Avant de débuter la charge, assurez-vous que la charge est correctement paramétrée (tension de la
batterie, courbe de charge et capacité de la batterie).
Sur ce chargeur, 3 courbes de charge sont disponibles :
−Easy : courbe simplifiée adaptée à toutes les batteries au plomb et qui ne nécessite pas de
connaitre la capacité de la batterie. Toutefois pour une optimisation maximale de la charge, il est
recommandé, lorsque cela est possible, d’utilisé les courbes de charge liquide ou gel/AG .
−liquide : courbe de charge pour les batteries ouvertes, avec bouchon (Plomb, plomb calcium,
plomb calcium argent…). Pour cette courbe, la capacité de la batterie en Ah doit être renseignée.
−gel/AGM : courbe de charge pour les batteries étanches (batterie gel, sans entretien, AG …).
Pour cette courbe, la capacité de la batterie en Ah doit être renseignée.
Mise en r ute :
• Brancher les pinces : rouge sur
le (+) et noir sur le (-) de la
batterie.
• Appuyer sur START/STOP pour
débuter la charge, une barre de
chargement s’affiche.
• Appuyer de nouveau pour
interrompre la charge.
Uniquement pour le
Gysflash 30-24 HF
Uniquement po
ur les courbes
liquide et gel/AG
R
EGLAGE MODE CHARGE SELON LE TYPE DE BATTERIE
MISE EN ROUTE DE LA CHARGE
CHARGE
CHARGE
CHARGE
CHARGE
CHARGE
CHARGE
gel/AGM
gel/AGM
gel/AGM
gel/AGM
gel/AGM
gel/AGM

4
NB : En fin de charge (100%), le chargeur maintient le niveau de charge de la batterie en appliquant
une tension de floating.
Précauti n : Vérifier le niveau de l’électrolyte pour les batteries ouvertes. Compléter les niveaux si
nécessaire avant la charge.
MODE ALIMENTATION DIAG ET DIAG+
Véhicules à l’arrêt, le GYSFLASH compense le courant utilisé (jusqu’à 30A) pour tester les gros
consommateurs : ventilation moteur, lève-vitre, suspension électriques etc… en délivrant une tension
stabilisée :
- 13,5V (fonction Diag)
- 12V à 14,8V (fonction Diag+).
Réglage de la tensi n (uniquement en Diag+) :
Le mode Diag+ permet de configurer la tension de 12 à 14,8V par pas de 0,1 selon les préconisations
du constructeur :
Mise en r ute :
• Brancher les pinces : rouge sur
le (+) et noir sur le (-) de la
batterie.
• Appuyer sur Start/Stop pour
lancer le mode.
• Durant l’utilisation, le courant
consommé et la tension
instantanée s’affiche.
Précauti n : Avant de lancer la fonction Diag, un courant affiché supérieur à 10A signifie que votre
batterie est déchargée. Votre GYSFLASH va alors délivrer un courant de recharge. Vérifier qu’il n’y a
pas de consommateur sur le véhicule. Attendre que l’intensité passe sous les 10A pour lancer votre
opération de diagnostique.
MODE ALIMENTATION SHOWROOM
Véhicules à l’arrêt, le GYSFLASH compense le courant utilisé (jusqu’à 30A) pour tester les gros
consommateurs : chauffage, lève-vitre, tableau de bord, etc… d’un véhicule de démonstration en
délivrant une tension stabilisée réglable de 12V à 14.8V.
R
EGLAGE MODE DIAG
+
DIAG
+
DIAG
+
DIAG
DIAG
MISE EN ROUTE DIAG

5
Réglage de la tensi n :
Il est possible configurer la tension de 12 à 14,8V par pas de 0,1 selon les préconisations du
constructeur :
Mise en r ute avec batterie:
• Brancher les pinces : rouge
sur le (+) et noir sur le (-) de la
batterie.
• Appuyer sur Start/Stop pour
lancer le mode.
• Durant l’utilisation, le courant
consommé et la tension
instantanée s’affiche.
Mise en r ute sans batterie (n n-rec mmandé):
Il est possible de lancer l’alimentation sans batterie en appuyant sur START/STOP pendant 3
secondes. L’indication « no battery » s’affiche alors durant 1 seconde avant de lancer l’alimentation.
Attenti n : une inversion de polarité peut être néfaste pour l’électronique du véhicule.
Précauti n : Avant de lancer la fonction Showroom, un courant affiché supérieur à 10A signifie que
votre batterie est déchargée. Votre GYSFLASH va alors délivrer un courant de recharge. Vérifier qu’il
n’y a pas de consommateur sur le véhicule. Attendre que l’intensité passe sous les 10A pour utiliser
les organes électriques du véhicule.
MODE CHANGE BATTERIE
Le GYSFLASH assure l’alimentation stabilisée des besoins électriques du véhicule pendant le
changement de la batterie afin de sauvegarder les mémoires.
Sélecti n de la tensi n (uniquement p ur le GYSFLASH 30-24HF) :
Sur le GYSFLASH 30-24HF, il est possible de choisir entre 12V et 24V pour le changement de batterie :
CHANGE BATTERIE
CHANGE BATTERIE
REGLAGE MODE CHANGE BATTERIE
SHOWROO
SHOWROO
MISE EN ROUTE SHOWROOM
R
EGLAGE MODE SHOWROOM
SHOWROO
SHOWROO

6
Mise en r ute :
•
Connecter
:
1 : la pince noire sur le châssis du véhicule.
2 : La pince rouge sur l’extrémité de la cosse connectée au + de la batterie, de telle sorte que le
remplacement de la batterie soit possible sans que la pince ne se détache.
• Appuyer sur START/STOP pour
lancer le mode.
• Durant l’utilisation, le courant
consommé et la tension
instantanée s’affiche.
• Remplacer votre batterie, en respectant les polarités. Lors de la manipulation, attention à ne pas
déconnecter les pinces du chargeur sous risque de perdre les mémoires de l’électronique.
Attenti n : une inversion de polarité peut être néfaste pour l’électronique du véhicule.
MENU CONFIGURATION
Accès au menu c nfigurati n:
Appuyer 3 secondes sur « ODE »
Pour naviguer dans les sous menus de configuration appuyer sur Select :
langues > redémarrage > lock showroom > contrôle des câbles
S us-menu :
Langues
Ce menu permet de choisir la langue de l’afficheur.
Redémarrage aut matique :
Le redémarrage automatique ne fonctionne qu’en mode « showroom » et « charge ». Cette
fonctionnalité permet, en cas de coupure de courant, le redémarrage automatique du chargeur
ainsi que la reprise de charge.
D’origine, cette fonction est active=> Afficheur « Configuration | Redémarrage : ON ».
L ck Sh wr m:
Permet de verrouiller l’appareil sur le mode Showroom. (Évite les erreurs de manipulations)
Racc urci L ck Sh wr m :
Il est possible d’activer la fonction Lock Showroom sans entrée dans le menu configuration.
• Eteindre l’appareil (interrupteur sur la position OFF)
• Appuyer sur ODE
• Basculer l’interrupteur en position ON, tout en conservant l’appui sur ODE.
Affichage pendant 3s « GYSFLASH 30-12HF Vx.x » ou « GYSFLASH 30-24HF Vx.x »
• Rester appuyé sur ODE jusqu’à ce que le produit affiche « lock showroom: Y »
C ntrôle des câbles :
Ce mode doit être utilisé lors de toutes modifications de câbles de sortie. Le GYSFLASH peut
recevoir des câbles jusqu’à 2x5m en 16mm².
OK : L’étalonnage s’est effectué correctement.
FAIL : Un problème est survenu lors de l’étalonnage des câbles. Dans ce cas, l’étalonnage est
réinitialisé sur le réglage usine. Vérifier que les câbles sont en bonne état et correctement mis en
court-circuit et recommencer l’opération.
Appuyer sur le bouton « ODE » pour sortir du sous-menu « Configuration ».
CHANGE BATTERIE
CHANGE BATTERIE
MISE EN ROUTE CHANGE BATTERIE

7
PROTECTIONS
Ces appareils sont protégés contre les courts-circuits, inversions de polarité. Ils disposent d’un
système anti-étincelle qui évite toutes étincelles lors du branchement du chargeur sur la batterie. Sans
tension aux pinces, ils ne délivrent pas de courant par sécurité. Ces chargeurs sont protégés par un
fusibles internes 40A (ref. 051386), contre les erreurs de manipulation.
ANOMALIES, CAUSES, REMEDES
ANOMALIES CAUSES REMEDES
1 Affichage clignotant :
« #erreur (+)
(-) »
+ signal sonore
Inversion de polarité sur les pinces Brancher la pince rouge au (+) et la pince
noire au (-) de la batterie
2
Affichage clignotant :
« #erreur U>16V » ou
« #erreur U>31V »
+ signal sonore
Tension de batterie trop élevée Chargeur non adapté ou configuré en 12V pour
une batterie 24V
3 Affichage clignotant :
« #erreur batterie »
+ signal sonore
Batterie est en court-circuit ou
endommagée. Batterie à remplacer.
Batterie non connectée ou pinces
en court-circuit Vérifier le branchement des pinces de charge.
Batterie 6V connectée Chargeur non adapté.
CONFIGURATION
CONFIGURATION
CONFIGURATION
CONTROLE CABLES
CONTROLE CABLES
CONTROLE CABLES
Court-circuiter
les pinces et
Appuyer sur START
Court-circuiter
Anglais
Français
Allemand
Néerlandais
Espagnol
Portugais
Italien
Russe
Français
Redémarrage
:
Lock showroom :
Appuyer sur START
REGLAGE MODE CONFIGURATION
English
Français
Deutsch
Nederlands
Espanol
Portugues
Italiano
Russian

8
4 Affichage clignotant :
« >30A »
+ signal sonore
Consommation excessive par
rapport à la puissance du chargeur Arrêter certains consommateurs pour arriver à
une situation normale.
5
Le GYSFLASH délivre un fort
courant (entre 10A et 30A)
alors que vous n’avez pas
encore lancé votre outil de
diagnostic
De nombreux consommateurs sont
actifs sur le véhicule.
Fonctionnement normal du GYSFLASH. Couper
les consommateurs pour vérifier que la batterie
ne soit pas trop déchargée (voir cause n°2)
Batterie déchargée
Votre batterie est profondément déchargée, le
GYSFLASH délivre un courant pour la
recharger. Attendre que le courant soit sous les
10A pour lancer le diagnostique.
6 Affichage durant 1sec :
« n battery »
+ signal sonore
Le mode Showroom est en
fonctionnement « no battery »
Showroom sans batterie : fonctionnement
normal du GYSFLASH.
Pour désactiver la fonction « no battery »,
appuyer sur START/STOP, et ré-appuyer de
nouveau sur START/STOP pour lancer le mode
Showroom avec batterie.
7 L’appareil est bloqué en mode
Showroom Lock Showroom actif Fonctionnement normal du GYSFLASH.
Se référer au menu configuration pour
désactiver la fonction.
8 L’afficheur indique :
« #erreur temp(°C) »
+ signal sonore
Ventilateur défectueux Contacter le revendeur
Exposition prolongée au soleil
Ne pas laisser l’appareil au soleil
Laisser le produit allumé jusqu’à ce que le
défaut disparaisse. (Possibilité d’arrêter le
signal sonore en appuyant sur START/STOP)
9 L’afficheur indique :
« #erreur IHM »
+ signal sonore Problème électronique Contacter le revendeur
10 L’appareil semble fonctionner
normalement mais ne délivre
plus de tension sur les pinces auvaise manipulation Changer le fusible interne par une personne
qualifiée (réf. 054646 : 40A)
11 L’appareil n’affiche rien
fusible d’entrée HS Changer le fusible d’entrée par une personne
qualifiée (fusible temporisé 6.3A 5x20 réf.
054578)
Réseau électrique défectueux Vérifier que la tension du réseau électrique est
comprise entre 180 et 260V
AVERTISSEMENTS
Gaz explosif, éviter les flammes et les étincelles. Pendant la charge, la batterie doit être placée
dans un emplacement bien aéré.
Risque de projection acide.
ettre à l’abri de la pluie et de l’humidité.
Votre chargeur doit être raccordé à un socle de prise de courant relié à la terre.
Si le câble d’alimentation est endommagé, ou si le fusible interne est fondu (ref 051386), il doit être
remplacé par le fabricant, son service après vente ou une personne de qualification similaire, afin
d’éviter un danger.
A n'utiliser en aucun cas pour charger des piles ou des batteries non-rechargeables.
La borne de la batterie non reliée au châssis doit être connectée la première. L’autre connexion doit
être effectuée sur le châssis loin de la batterie et de la canalisation de combustible. Le chargeur de
batterie doit alors être raccordé au réseau.
Après l’opération de charge, débrancher le chargeur du réseau, puis retirer la connexion du châssis
et la connexion de la batterie, dans l’ordre indiqué.
L’appareil doit être placé de façon telle que la fiche de prise de courant soit accessible.

9
Cet appareil n’est pas prévu pour être utilisé par des personnes (y compris les enfants) dont les
capacités physiques, sensorielles ou mentales sont réduites, ou des personnes dénuées
d’expérience ou de connaissance, sauf si elles ont pu bénéficier, par l’intermédiaire d’une personne
responsable de leur sécurité, d’une surveillance ou d’instructions préalables concernant l’utilisation
de l’appareil
Produit faisant l’objet d’une collecte sélective. Ne pas jeter dans une poubelle domestique.
Ne pas mettre les pinces en court circuit pendant la charge.
CONDITIONS DE GARANTIE
La garantie couvre tout défaut ou vice de fabrication pendant 1 an, à compter de la date
d’achat (pièces et main d’œuvre).
La garantie ne couvre pas les erreurs de tension, incidents dus à un mauvais usage, chute,
démontage ou toute autre avarie due au transport.
La garantie ne couvre pas l’usure normale des pièces (Ex. : câbles, pinces, etc.).
En cas de panne, retournez l’appareil au point S.A.V GYS, en y joignant :
-Un justificatif d’achat daté (ticket de sortie de caisse, facture….)
-une note explicative de la panne.
Attention : notre SAV n’accepte pas les retours en port dû.
Après la garantie, notre SAV assure les réparations après acceptation d’un devis.
Contact SAV : Société Gys-134 Bd des Loges
BP 4159-53941 Saint-Berthevin Cedex
Fax: +33 (0)2 43 01 23 75
ATTESTATION DE CONFORMITE
La société GYS atteste que les chargeurs décris dans ce manuel :
GYSFLASH 30-12 HF / GYSFLASH 30-24 HF
Sont fabriqués conformément aux exigences des directives européennes suivantes :
- Directive Basse Tension : 2006/95/CE du 12/12/06.
- Directive CE : 2004/108/CE du 15/12/2004- 03/05/1989.
Ils sont pour cela conformes aux normes harmonisées :
- EN 60335-2-29 & EN 55014-1 / EN 55014-2
– EN61000-3-2 - EN61000-3-3 – EN62233
Date de marquage CE : 2013.
01/10/13 Nic las BOUYGUES
S ciété GYS Président Directeur Général
134 BD des L ges
53941 Saint Berthevin

10
This manual contains safety and operating instructions. Read it carefully before using the charger for
the first time and keep it in a safe place for future reference.
GENERAL DESCRIPTION
GYSFLASH 30-12 HF and 30-24 HF provide a high powered stabilised power supply incorporating
S PS (Switch ode Power Supply) technology.
Designed to sustain 12V or 24V batteries (liquid/AG /gel) for vehicles during diagnostic work, and will
ensure an ideal charging cycle for battery maintenance for the most modern vehicles and battery
types. These chargers can be fitted with cables up to 2x5m in 16mm². Changing battery cables
requires recalibration (cf. page 6).
These devices have 5 modes :
- Charge M de: to charge liquid or gel electrolyte (lead, lead Calcium, lead Calcium-silver,
AG …) starter batteries from 10 Ah to 400 Ah in 12V and from 10Ah to 200Ah in 24V (only for
GYSFLASH 30-24HF).
- Diag M de and Diag + M de: on a stationary vehicle GYSFLASH 30-12 HF and 30-24HF
supply up to 30A to ensure compensation of the current used by high-energy consumers (engine
fan, window regulator, electronic suspension, etc). Diag+ ode enables the user to set the
desired regulated voltage level in the range 12V to 14.8V.
- Change battery M de: ensures a stabilised power supply to the vehicle during battery
replacement to preserve memory settings.
-« Sh wr m » M de: compensation of the current used by energy consumers when showing
the vehicle (window regulator, heating, mirrors, etc) enabling permanent display of the vehicle
with power on.
These devices have an automatic restart feature allowing, in the Charge ode and Showroom ode,
to automatically restart the device in case of power cut.
The function "Showroom only", if activated, restricts the device to Showroom ode only, to facilitate
its use for vehicles demonstrators.
START UP
1 Connect the charger to the mains. Single phase mains voltage 230V±15% (50/60Hz)
2
Switch "ON".
Within 3s the display will show "GYSFLASH 30-12HF Vx.x" or "GYSFLASH 30-24HF
Vx.x"
3
Select the required mode. If no modes are selected the charger will default to the
last setting used.
Push the ode button to access to the selection menu:
Charge > Diag > Diag+ > Showroom > Battery change
To access the selection menu press and hold the ode button for 3 seconds:
3 sec - Configuration

11
CHARGE MODE
This product will charge the battery safely even if the battery is still in the vehicle.
Ensure that the correct sequences are followed.
Charge c nfigurati n :
Before starting to charge the battery, ensure that the charger has been correctly set (battery voltage,
charging curve and battery capacity).
3 charging curves :
−Easy: simplified curve, suitable for every lead battery and which for it is not a required to know
the battery capacity. However for a maximum charge optimization, it is recommended when
possible to use the liquid or gel/AG batteries charging curves.
−Liquid: charging curve for vented battery (lead, lead calcium, lead calcium-silver, etc). For this
charging curve the battery capacity in Ah must be selected.
−
Gel/AGM: charging curve for sealed battery (gel, maintenance free, AG …). For this charging
curve the battery capacity in Ah must be selected.
Start up :
• Connect the clamps: red (+)
and black (-) of the battery.
• Push the START/STOP button
to start charging. A loading bar
displays.
• Push the START/STOP button
again to stop the charge.
Only for Gysflash 30-24 HF
Only for liquid and gel/AG
charging curves
CHARGE MODE CONFIGURATION DEPENDING ON THE
BATTERY TYPE
.
CHARGE MODE START UP
CHARGE
CHARGE
CHARGE
CHARGE
CHARGE
CHARGE
gel/AGM
gel/AGM
gel/AGM
gel/AGM
gel/AGM
gel/AGM

12
NB: When the charge ends (100%), if the battery remains connected the charger maintains the
charge level of the battery by applying a floating voltage.
Precauti n: Check the electrolyte level and fill if necessary before charging.
DIAG MODE AND DIAG+ MODE
On a stationary vehicle, the GYSFLASH supplies up to 30A to ensure compensation of the current used
by high-energy consumers (engine fan, window regulator, electronic suspension, etc…) by charging at
a steady voltage:
- 13.5V (Diag ode)
- 12V to 14.8V , user defined (Diag+ ode)
V ltage adjustment ( nly in Diag+ M de):
The Diag+ ode allows user to specify the voltage delivered to the battery from 12 to 14.8V in
increments of 0.1V according to the manufacturers’ specifications:
Start up :
• Connect the clamps: red (+)
and black (-) of the battery.
• Push the Start/Stop button.
• During use, the current
consumed and the instantaneous
voltage are displayed.
Precauti n: Before using the Diag ode. If the screen displays a current higher than 10A, it
indicates the battery is discharged. The device will start charging automatically. Check all electrical
consumers are switched off on the vehicle. Wait until the current falls below 10A and then re-launch
the diagnostic.
SHOWROOM MODE
On a stationary vehicle, the GYSFLASH supplies up to 30A to ensure compensation of the current used
by high-energy consumers (engine fan, window regulator, electronic suspension, etc…) by charging at
a steady voltage adjustable from 12V to 14.8V
DIAG
+
MODE CONFIGURATION
DIAG
+
DIAG
+
DIAG
DIAG
DIAG MODE START UP

13
V ltage adjustment:
It is possible to adjust the voltage from 12 to 14.8V in increments of 0.1V according to the vehicle
manufacturers’ specifications:
P wer Supply with battery:
Connect the clamps: red (+)
and black (-) of the battery.
• Push the Start/Stop button.
• During use, the current
consumed and the
instantaneous voltage are
displayed.
P wer Supply with ut battery (n t-rec mmended):
It is possible to supply the vehicle without battery by pushing the "START/STOP" button for 3
seconds. The screen displays "no battery" for 1 second before starting to supply the vehicle.
Warning : Reverse polarity could damage the vehicle’s electronics.
Precauti n: Before using the Showroom ode. If the screen displays a current higher than 10A, it
indicates the battery is discharged. The device will start charging automatically. Check all electrical
consumers are switched off on the vehicle. Wait until the current falls below 10A before using the car
electronics.
BATTERY CHANGE MODE
The GYSFLASH ensures a stabilised power supply to the vehicle during battery replacement to
preserve memory settings.
V ltage selecti n ( nly f r the GYSFLASH 30-24HF):
On the GYSFLASH 30-24HF, it is possible to select 12V or 24V to change the battery:
CHANGE BATTERY
CHANGE BATTERY
BATTERIE CHANGE MODE CONFIGURATION
SHOWROO
SHOWROO
SHOWROOM MODE START UP
SHOWROOM MODE CONFIGURATION
SHOWROO
SHOWROO

14
Instructi ns:
• Connect
:
1 : The black clamp to the vehicle chassis.
2 : The red clamp to the end of the lug connected to the "+" battery terminal, in such a way that the
battery can be changed without disconnecting the clamp.
• Press the START/STOP button.
• During use, the current
consumed and the instantaneous
voltage are displayed.
• When changing the battery ensure the polarity is correct. While exchanging the batteries, be careful
not to disconnect the charger clamps as it can cause the loss of electronic data.
Cauti n: polarity reversal can be harmful to the vehicle electronics.
CONFIGURATION MENU
Access
t c nfigurati n menu:
Press the " ode" button for 3
seconds
To access to the sub menu press the "Select" button
:
languages > restart > lock showroom > cables testing
Sub menu:
Languages :
This menu allows selecting the language.
Aut matic restart :
Automatic restart only works with "Showroom" ode and "Charge" ode. This feature allows in
case of power cut the charger to restart automatically and to restart charging automatically.
This feature is set as default => Display "Configuration | Restart : ON".
L ck Sh wr m :
To lock the device on Showroom ode (to avoid mishandling)
Sh rtcut t L ck Sh wr m :
The "Lock Showroom" feature can be activated without accessing the configuration menu.
• Turn the device off (Switch to the OFF position)
• Push the ODE button
• Turn the switch ON, while the ODE button is still pressed. The screen displays
"GYSFLASH 30-12HF Vx.x" or "GYSFLASH 30-24HF Vx.x" for 3 seconds.
• Hold the ODE button unit the screen displays "lock showroom: Y"
Cable calibrati n :
This mode must be used each time the cables are changed. The GYSFLASH can be fitted with
cables up to 2x5m in 16mm².
OK : The calibration was successful.
FAIL : A problem occurred during the calibration. In this case, the calibration is reset to the factory
setting. Check that the cables are in good condition and properly put in short-circuit and repeat the
procedure.
Push the " ODE" button to exit the "Configuration" sub menu.
CHANGE BATTERY
CHANGE BATTERY
B
ATTERY CHANGE MODE START UP

15
PROTECTION
These devices are protected against short-circuits, polarity inversions and engine starts. They have
an anti-spark feature which prevents sparks whilst connecting the Gysflash to the battery. The
Gysflash will not deliver current if there is no battery detected (no voltage in the clamps). The charger
is protected with an internal 40A fuse (ref. 051386), against mishandling.
TROUBLESHOOTING
ANOMALIES CAUSES REMEDIES
1 Display flashing :
"
#err r (+)
(-)
"
+ warning sound
Polarity reversal of the clamps Connect the red clamp on (+) and the black
clamp on (-) of the battery
2
Display flashing :
"
#err r U>16V
"
or
"
#err r U>31V
"
+ warning sound
The battery voltage is too high Charger not compatible or not set up in 12V for
a 24V battery
3 Display flashing :
"
#err r battery
"
+ warning sound
Battery is in short-circuit or
damaged Replace the battery
Battery not connected or clamps in
short-circuit Check the clamps are correctly connected
Battery 6V connected Charger not compatible
SETTINGS
SETTINGS
SETTINGS
CABLES TESTING
CABLES TESTING
CABLES TESTING
Short-circuit the
clamps and push the
START button
Short-circuit
Anglais
Français
Allemand
Néerlandais
Espagnol
Portugais
Italien
Russe
English
Restart
:
Lock showroom :
Push the START button
CONFIGURATION MODE ADJUSTMENT
English
French
German
Dutch
Spanish
Portugues
Italian
Russian

16
4 Display flashing :
"
>30A
"
+ warning sound
Electrical consumption greater than
the capacity of the charger Switch off electrical consumers (i.e Headlights)
before re-trying
5 The GYSFLASH delivers a high
current (between 10A and 30A)
when not in diagnostic mode
any electrical consumers in the
vehicle are active
Normal use of the Gysflash 75-12HF. Switch off
all electrical consumers in your vehicle to check
if your battery is not deeply discharged (see
cause n°2).
Battery discharged
Your battery is deeply discharged; the Gysflash
75-12HF will start charging automatically. Wait
until the current is below 10A before starting
diagnostics on your vehicle.
6 Screen displays for 1sec :
"
n battery
"
+ warning sound
The Showroom ode is in use
"
no
battery
"
Showroom without battery : normal use of the
GYSFLASH.
To disable the function
"
no battery
"
, push the
START/STOP button, and push the
START/STOP button again to start the
Showroom ode with the battery
7 The device is locked in
Showroom mode Lock Showroom is activated
Normal use of the GYSFLASH.
Refer to the configuration menu to disable the
function
8 Screen displays :
"
#err r temp(°C)
"
+ warning sound
Failed fan Contact your retailer
Prolonged exposure to sunlight
Do no leave the device exposed to sunlight.
Leave the device switched on until the error
code disappears (warning sound can be
stopped by pushing the START/STOP button)
9 Screen displays :
"
#err r IHM
"
+ warning sound
Electronic fault Contact your retailer
10 The device seems to work
perfectly fine but does not
deliver current to clamps ishandling Change the internal fuse by a qualified person
(ref. 054646 : 40A)
11 The device display is blank
Input fuse out of order Arrange for a qualified person to change the
input fuse (fuse 6.3A 5x20 ref. 054578)
Electrical network fault Check the voltage of the electrical network is
between 180 and 260V
WARNINGS
▪ Explosive gas, avoid flame and sparks. During the charge, the battery must be placed in a well
ventilated area.
▪ Protected against rain and moisture.
▪ The charger must be connected to an EARTHED power supply.
▪ If the electricity supply cable is damaged, or if the internal fuse has blown (ref 054651), it must be
replaced by the manufacturer, its after sales service, or a person with the same qualifications to avoid
danger.
▪ Do not use to charge small batteries (i.e those with a capacity less than the minimum stated on the
Gysflash), or non rechargeable batteries.
▪ Always ensure the Red clamp is connected to the "+" battery terminal first.
▪ If it is necessary to connect the black clamp to the vehicle chassis, make sure it is a safe distance
from the battery and the fuel/exhaust pipe.
▪ After charging, disconnect the charger from the outlet, then disconnect the clamp from the frame
and the battery in the indicated order.
▪ The charger must be placed so that the socket is always accessible.

17
▪ This charger is not a toy.
▪This product should be disposed of at an appropriate recycling facility - do not dispose of in domestic
waste.
▪ Do not short-circuit the clamps during use.
DECLARATION OF COMPLIANCE
The GYS Company testifies that the chargers described in this manual :
GYSFLASH 30-12 HF / GYSFLASH 30-24 HF
Are manufactured in compliance with the requirements of the following European directives :
- Low Voltage Directive : 2006/95/CE du 12/12/06.
- E C Directive : 2004/108/CE du 15/12/2004- 03/05/1989.
Therefore they comply with the following harmonized standards :
- EN 60335-2-29 & EN 55014-1 / EN 55014-2
– EN61000-3-2 - EN61000-3-3 – EN62233
aking dates CE : 2013.
01/10/13 Nic las BOUYGUES
S ciété GYS Président Directeur Général
134 BD des L ges
53941 Saint Berthevin

18
Diese Betriebsanleitung enthält Sicherheits- und Betriebshinweise. Bitte lesen Sie diese Anleitung
aufmerksam durch, bevor Sie das Gerät zum ersten al benutzen und bewahren Sie sie sorgfältig
auf.
BESCHREIBUNG
GYSFLASH 30-12 HF und 30-24 HF sind leistungsstarke Gleichspannungsquellen mit S PS Technologie
(Switch ode Power Supply), konzipiert um die Leistung von 12 und 24V Batterien (flüssig/AG /Gel)
während der Diagnose aufrecht zu erhalten.
Es sichert eine optimale Ladequalität für die Wartung von Batterien der neuesten Technologie. An
diesem Batterieladegerät können Ladestromkabel bis 2x5m in 16mm² angeschlossen werden. Bei
jedem Kabelwechsel muss eine Neukalibrierung vorgenommen werden.(s. Seite 22).
Das GYSFLASH 30-12 HF/ 30-24 HF wird als stationäres und nicht als mobiles Gerät betrachtet.
Es verfügt über 5 odi :
- Ladem dus : um Startbatterien mit Säure- oder Gel-Elektrolyt (Blei, Blei-Kalzium, Blei Kalzium-
Silber, AG …) von 10 bis 400Ah in 12V und 10 bis 200Ah in 24V (gilt nur für das GYSFLASH 30-
24 HF) aufzuladen.
- Diagn sem dus, Diag + M dus : GYSFLASH 30-12 HF und 30-24 HF stützen und versorgen
die Bordbatterie während der Diagnose bei otorstillstand an sämtlichen elektronischen
Verbrauchern bis 30A ( otorkühlung, Fensterheber, Bordelektronik, usw.). Der Diag + odus
ermöglicht die Einstellung der Diagnosespannung von 12 bis 14,8V
- Batteriewechselm dus: sichert während des Ausbaus der Batterie eine stabile Netzspannug
der elektrischen Verbraucher, um den Verlust von Speicherinformationen zu vermeiden.
-Sh wr m M dus : garantiert der Batterie eine Stromkompensation während der Präsentation
der Verbraucher eines Vorführwagens (Fensterheber, Heizung, Außenspiegel,....)
Die Geräte verfügen über eine automatische Neustartfunktion, so dass im Falle eines Stromausfalls
z.B. der Lademodus oder Showroom odus neugestartet wird.
Die Funktion « Showroom only « beschränkt die Stromversorgung auf ein inimum, um Kfz-
Vorführungen zu ermöglichen.
NETZANSCHLUSS - INBETRIEBNAHME
1 Schließen Sie das Batterieladegerät an die Netzspannung an. 230V±15% (50/60Hz)
2
Schalten Sie auf «
ON
».
In 3 Sekunden erscheint auf dem Display « GYSFLASH 30-12 HF Vx.x » oder
« GYSFLASH 30-24 HF Vx.x »
3
Stellen Sie den gewünschte
n
odus ein. Werden die odi nicht spezifisch
ausgewählt, greift das Gerät auf die zuletzt benutzten Einstellungen zurück (außer
Diag +).
Drücken Sie den « ode » Knopf um in folgendes enü zu gelangen :
Charge > Diag > Diag+ > Showroom > Batterie tauschen
Um in die Einstellungen zu gelangen, halten Sie den Kopf 3 sek. gedrückt :
3 sec - Einstellungen

19
LADEMODUS
Das Gerät ermöglicht das gefahrlose Aufladen der Batterie, auch wenn diese im Fahrzeug verbleibt.
Bitte beachten Sie die folgenden Punkte :
Ladeeinstellung :
Bevor Sie mit der Ladung beginnen, stellen Sie sicher, dass das Ladegerät korrekt eingestellt ist
(Batteriespannung, Ladekurve und Batteriekapazität)
Im Ladegerät sind 3 Ladekurven einstellbar :
−Easy : vereinfachte Ladekurve, geeignet für alle Bleibatterien und für Batterien, deren Kapazität
man nicht kennt. Für eine optimale Ladung ist es jedoch besser, wenn man die Liquid- oder
Gel/AG -Ladekurve nutzt.
−Liquid : Ladekurve für belüftete Batterien (Blei, Blei-Kalzium, Blei-Kalzium-Silber,etc…). Für diese
Ladekurve muss die Batteriekapazität in Ah ausgewählt werden.
−Gel/AGM : Ladekurve für wartungsfreie Batterien (Gel, AG …). Für diese Ladekurve muss die
Batteriekapazität in Ah ausgewählt werden.
Erste Schritte :
• Verbinden Sie die
Ladeklemmen: rot (+) und
schwarz (-) mit der Batterie
• Drücken Sie START/STOP um
den Ladevorgang zu Starten. Es
wird ein Ladebalken angezeigt.
• Zum Beenden drücken Sie
START/STOP.
Nur beim
Gysflash 30
-
24 HF
Nur bei den Kurve
n liquid
und Gel/AG
L
ADEMODUS
-E
INSTELLUNG ABHÄNGIG VOM
B
ATTERIETYP
E
RSTE
S
CHRITTE
I
M
L
ADEMODUS
L
ADUNG
L
ADUNG
L
ADUNG
L
ADUNG
L
ADUNG
LADUNG
Gel/AGM
Gel/AGM
Gel/AGM
Gel/AGM
Gel/AGM
Gel/AGM

20
NB : Wenn die Ladung vollständig geladen ist (100%) und die Batterie angeschlossen bleibt, bleibt der
Ladezustand der Batterie durch den « Floating odus » erhalten.
V rsicht : Prüfen Sie gegebenenfalls den Säurezustand vor dem Ladevorgang.
DIAGNOSEMODUS UND DIAG + MODUS
Während der Diagnose bei otorstillstand hält das GYSFLASH 30-12 HF/ 30-24 HF die
Stromversorgung der Bordbatterie für elektrische Verbraucher ( otorkühlung, Fensterheber,
Bordelektronik, usw.) von bis zu 30A aufrecht. Es hält eine konstante Spannung von :
- 13,5V (Diagnosemodus)
- 12V bis 14,8V (Diag+ odus).
Spannungseinstellung (nur im Diag+ M dus verfügbar) :
Der Diag + odus ermöglicht dem Benutzer, die gelieferte Spannung an der Batterie von 12 bis 14,8V
in Schritten von 0,1V nach Spezifikation der Hersteller einzustellen :
Erste Schritte :
• Verbinden Sie die
Ladeklemmen: rot (+) und
schwarz (-) mit der Batterie
• Drücken Sie den START/STOP
Knopf.
• Der momentan verbrauchte
Strom und die momentane
Spannung werden angezeigt.
V rsicht : Wenn zu Beginn der Diag-Funktion mehr als 10A Stromverbrauch angezeigt werden,
bedeutet dies, dass die Batterie entladen ist. Das GYSFLASH wird automatisch einen Ladevorgang
beginnen. Prüfen Sie, ob alle elektrischen Verbraucher im Fahrzeug ausgeschaltet sind. Warten Sie,
bis der Strom unter 10A liegt, ehe Sie die Diagnose durchführen.
SHOWROOM MODUS
Bei otorstillstand ermöglicht das GYSFLASH die Nutzung elektrischer Verbraucher ( otorkühlung,
Fensterheber, Bordelektronik, usw..) mit einem konstanten Strom von bis zu 30A bei einer
einstellbaren Spannung von 12 bis 14,8V.
Spannungseinstellbereich :
Es ist möglich, die Spannung an der Batterie von 12 bis 14,8V in Schritten von 0,1V nach Spezifikation
des jeweiligen Herstellers einzustellen :
E
INSTELLUNGEN
D
IAG
+
M
ODUS
DIAG
+
DIAG
+
DIAG
DIAG
S
TART
D
IAGNOSEMODUS
Other manuals for GYSFLASH 30.12 HF
3
This manual suits for next models
1
Table of contents
Languages:
Other GYS Power Supply manuals

GYS
GYS GYSFLASH 102.12 HF User manual

GYS
GYS GYSFLASH 100.12 HF User manual

GYS
GYS Gysflash 75-12 HF User manual

GYS
GYS GYSFLASH 40-12 FV User manual

GYS
GYS GYSFLASH 30.12 HF User manual

GYS
GYS NOMAD POWER PRO TRUCK 027527 User manual

GYS
GYS Gysflash 70-24 HF Maintenance and service guide

GYS
GYS GYSFLASH 50-12 HF User manual

GYS
GYS GYSFLASH 50-12 HF User manual