manuals.online logo
Brands
  1. Home
  2. •
  3. Brands
  4. •
  5. GYS
  6. •
  7. Welding System
  8. •
  9. GYS GYSPOT 2400 User manual

GYS GYSPOT 2400 User manual

GYS S71
Last update :
28/02/06
USER'S MANUAL FOR
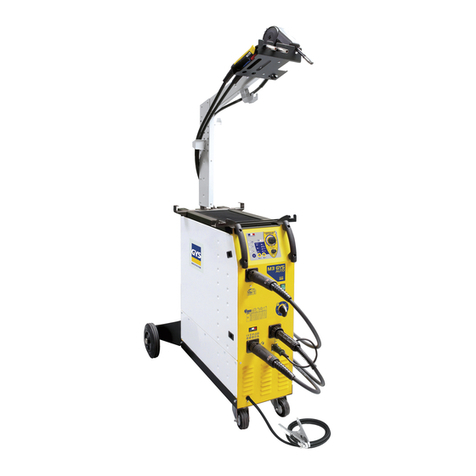
SPOT WELDING MACHINE
GYSPOT 2400
Nomenclature n°72234
Thank you for your choice ! Before installing and using the product or before maintenance, please read carefully the
following safety recommendations in order to avoid accidents to the users or damage the welding installation.
On no account GYS can be responsible for the damages occurring to persons or things after the use of the machine in the
following circumstances :
- Modification or neutralization of safety elements,
- Non-respect of the recommendations written in the user's manual,
- Modification of the characteristics of the product,
- Use of accessories different from the ones delivered by GYS,
- Non-respect of the regulations and particular dispositions in the country where the machine is installed.
III /
PRESENTATION
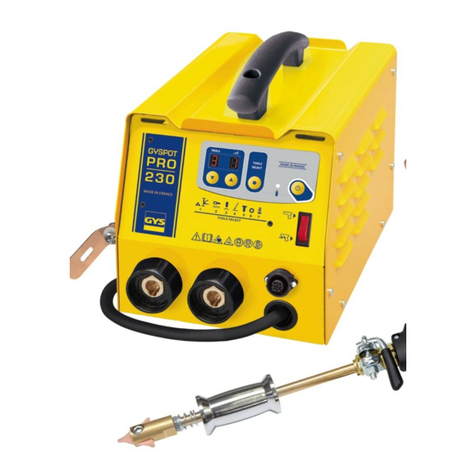
This device has been designed to eliminate bumps and shocks from steel car body.
IV /
SAFETY NORMS AND GENERAL PRECAUTIONS
GENERALITIES
- Before dismounting the device body, unplug the alimentation cable.
- Operators should have received the appropriate training.
- Maintenance and reparations can only be carried out by qualified persons.
- The operator is responsible for respect of the car manufacturer’ recommendations, concerning the protection of electrical
and electronic equipments (car computer, car radio, alarm, air bag, etc…).
- The secondary conductors can reach a very high temperature and remain hot very long after having stopped the machine.
Be careful : high risk of burns.
- It is necessary to make a regular preventive maintenance.
ELECTRICITY
- Check that the unit is connected to the earth and that the connection to the earth is in good condition.
- Check that the workbench is connected to the earth.
- Make sure that the operator makes no contact with the metal parts to be welded without any protection or with wet clothes.
- Avoid being in contact with the welding part.
- Don’t make spot welding operations in very wet areas or on a wet floor.
- Don’t weld with worn out cables. Check that there is no default with the isolation with stripped cables or with loose
connections, and that there is no cooling liquid leak.
- Before controlling, repairing or changing electrodes, please switch off and disconnect the unit directly from the plug.
EYE AND BODY PROTECTION
- During the welding process, the operator must be protected from the eventual flashes of the electrical arc with protection
clothes like leather gloves, welding aprons, safety shoes, welding helmets or glasses for filtering radiations and projections.
In the same way, during operations of rubbing and hammering, the operator must wear eye protection.
- Don’t wear rings, watches, or jewellery, which are current lead and can create burns.
- All the protection boards must be in good condition and maintained in place.
Never look at a welding arc without any eye protection.
Protect the environment near the product against projections and reflections.
SMOKES AND GAS
- Welding operations cause the emission of toxic smokes and harmful metallic dusts. Use the device in a sheltered place
equipped with smoke aspirators.
- The operator must wear an anti smoke mask.
- The welding material must be degreased and cleaned in order to limit the toxic gas emission during the welding process.
FIRE
- Make sure that the sparks won’t cause fire especially near inflammable material.
- Check that fire extinguishers are near the operator.
- Leave the product in a place with air sniffers.
- Don’t weld neither on containers of combustibles and lubricants, even empty, nor on containers with inflammable material.
- Don’t weld in an atmosphere full of inflammable gas or fuel steam.
ELECTRO-MAGNETIC COMPATIBILITY
Nearby the spot-welding machine, check that:
- there is no other power supply cable nor control lines, nor phone cables, nor radio or TV reception appliances, nor watches,
nor mobile phones, nor magnetic cards, nor computers nor any other electronic appliance.
- there is in the surroundings (minimum 3 meters of each point of the product) no persons using active medical appliances
(pacemakers, acoustic prosthetics).
Make supplementary protections if there are other products being used in the same environment.
III / DECLARATION OF CONFORMITY
The device described in this manual is conform to the directives EEC 83/336
(Electromagnetic compatibility) and 73/23 (Low Tension) for a professional or advanced use.
This conformity was established in respect to norms EN 50063 of July 1990 (directive Low
Tension) and EN 50199 (directive electromagnetic compatibility).
IV / CONNECTION OF THE ELECTRIC ALIMENTATION
Single phase alimentation 230V 50Hz protected by a 16A circuit-breaker.
If the device gets the installation protection circuit-breaker to switch on, check that the caliber
of the circuit-breaker is good (16A).
V / DESCRIPTION OF THE MACHINE
Detection of main
tension indicator Potentiometer to set
spot duration
Range 2 : levelling
and welding of
undulated wire
Thermal
protection
indicator
Range 1 : welding
of "stars" and
"butterflies".
VI / USE
Connect the copper earth pad with the terminal of the generator cable.
Firmly fix the earth pad, as close of the working area as possible.
Select the mode to be used thanks to the setting potentiometer :
- Range 1 (left) : welding of stars or "butterflies" for metal sheet pulling operations,
- Range 2 (right) : welding of undulated wire or levelling of shocks with the appropriate
copper cap.
Do not set the potentiometer between two setting ranges. In that position, the device does not
make any welding spot.
Place the appropriate tool on the extremity of the gun and firmly tighten the mandrel screw.
Place the electrode on the metal sheet to be repaired. The device will automatically make the
welding spot. To make another point, remove the electrode from the metal sheet during a
short period and place it back.
Thermal protection : in the case of an intensive use, an internal dispositive allows to stop the
device so that it can cool down. A yellow indicator will switch on, on the front panel. The cut
can last several minutes.

Other GYS Welding System manuals

GYS PORTASPOT 230 User manual

GYS

GYS PORTASPOT 230 User manual

GYS GYSPOT ARCPULL 350 User manual

GYS

GYS GYSPOT ARCPULL 350 User manual

GYS TIG 250 AC/DC User manual

GYS

GYS TIG 250 AC/DC User manual

GYS EXAGON 400 FLEX CC/CV User manual

GYS

GYS EXAGON 400 FLEX CC/CV User manual

GYS Gysmi E200 FV User manual

GYS

GYS Gysmi E200 FV User manual

GYS EASYCUT 40 User manual

GYS

GYS EASYCUT 40 User manual

GYS Smartmig 142 User manual

GYS

GYS Smartmig 142 User manual

GYS VAS 821 005 80 023 User manual

GYS

GYS VAS 821 005 80 023 User manual

GYS FLEX 250 CEL User manual

GYS

GYS FLEX 250 CEL User manual

GYS 85A User manual

GYS

GYS 85A User manual

GYS MULTIWELD 250T User manual

GYS

GYS MULTIWELD 250T User manual

GYS PROGYS 250 A TRI User manual

GYS

GYS PROGYS 250 A TRI User manual

GYS GYSPOT EXPERT Series User manual

GYS

GYS GYSPOT EXPERT Series User manual

GYS CUTTER 21 User manual

GYS

GYS CUTTER 21 User manual

GYS Multi PEARL 200-2 User manual

GYS

GYS Multi PEARL 200-2 User manual

GYS CARMIG User manual

GYS

GYS CARMIG User manual

GYS MAGYS 410 User manual

GYS

GYS MAGYS 410 User manual

GYS RENOV'POLYCARBONATE User manual

GYS

GYS RENOV'POLYCARBONATE User manual

GYS M1 GYS AUTO User manual

GYS

GYS M1 GYS AUTO User manual

GYS GYSMI E160 User manual

GYS

GYS GYSMI E160 User manual

GYS GYSPOT ARCPULL 200 User manual

GYS

GYS GYSPOT ARCPULL 200 User manual

GYS WF 4R User manual

GYS

GYS WF 4R User manual

GYS GOLD 190.4 XL User manual

GYS

GYS GOLD 190.4 XL User manual

GYS PROTIG 201 AC/DC User manual

GYS

GYS PROTIG 201 AC/DC User manual

Popular Welding System manuals by other brands

PROCRAFT 512000 operating instructions

PROCRAFT

PROCRAFT 512000 operating instructions

Sel Genesis 4000 PME instruction manual

Sel

Sel Genesis 4000 PME instruction manual

FRO­NIUS PlasmaModule 10 operating instructions

FRO­NIUS

FRO­NIUS PlasmaModule 10 operating instructions

Uni-Mig RAZOR CUT 45 PFC operating manual

Uni-Mig

Uni-Mig RAZOR CUT 45 PFC operating manual

Sel Quasar 150 instruction manual

Sel

Sel Quasar 150 instruction manual

Uni-Mig KUPJR55 operating manual

Uni-Mig

Uni-Mig KUPJR55 operating manual

FRO­NIUS THP 120 - 300 SH Service manual

FRO­NIUS

FRO­NIUS THP 120 - 300 SH Service manual

FRO­NIUS TS 4000 installation instructions

FRO­NIUS

FRO­NIUS TS 4000 installation instructions

FRO­NIUS ActiveCharger 1000 Operating instructions & parts list

FRO­NIUS

FRO­NIUS ActiveCharger 1000 Operating instructions & parts list

TEAM WELDER TIG 180 DC operating instructions

TEAM WELDER

TEAM WELDER TIG 180 DC operating instructions

Uni-Mig 345SWF instruction manual

Uni-Mig

Uni-Mig 345SWF instruction manual

FRO­NIUS MAGIC WAVE 2000 FUZZY operating instructions

FRO­NIUS

FRO­NIUS MAGIC WAVE 2000 FUZZY operating instructions

gala gar SMART MIG 350 MP Technical instruction manual

gala gar

gala gar SMART MIG 350 MP Technical instruction manual

gala gar GALA CUT 350 K G.E Technical instruction manual

gala gar

gala gar GALA CUT 350 K G.E Technical instruction manual

Fytech FYMIG306XL instruction manual

Fytech

Fytech FYMIG306XL instruction manual

Miller Syncrowave 500 owner's manual

Miller

Miller Syncrowave 500 owner's manual

Kemppi MasterTig 235ACDC GM operating manual

Kemppi

Kemppi MasterTig 235ACDC GM operating manual

Viper SYNERGIC MIG165 operating manual

Viper

Viper SYNERGIC MIG165 operating manual

manuals.online logo
manuals.online logoBrands
  • About & Mission
  • Contact us
  • Privacy Policy
  • Terms and Conditions

Copyright 2025 Manuals.Online. All Rights Reserved.