10
Before the use
Please read through the instructions
carefully before using the unit and
carefully note the safety advice.
Always keep this manual accessible
to any users of the drill.
Area of application
This device should only be used by
people who have completed a foot-
care qualification. Before use the
operator should make themselves
familiar with the device by reading
this manual or being instructed by
another. The device must only be
used in closed spaces. It may be
used in hospitals, in a commercial
environment or in homes. The de-
vice is not intended for use in oper-
ating rooms.
The control unit can be set up in a
cabinet, or can be used as a porta-
ble unit (i.g. in a carry case). It is
suitable for the following scopes:
•Footcare: Milling, trimming and
polishing. (Attention: The suction
must be in operation during foot
care).
•Manicure: Grinding, milling and
polishing works.
The devise is determined of
operating rotating instruments,
which will not penetrate the skin
or murcous membrane if used
appropriate, but could evoke
damages accidently.
Caution: In the area of pedicure
you have to work with suction
techniques
Operation
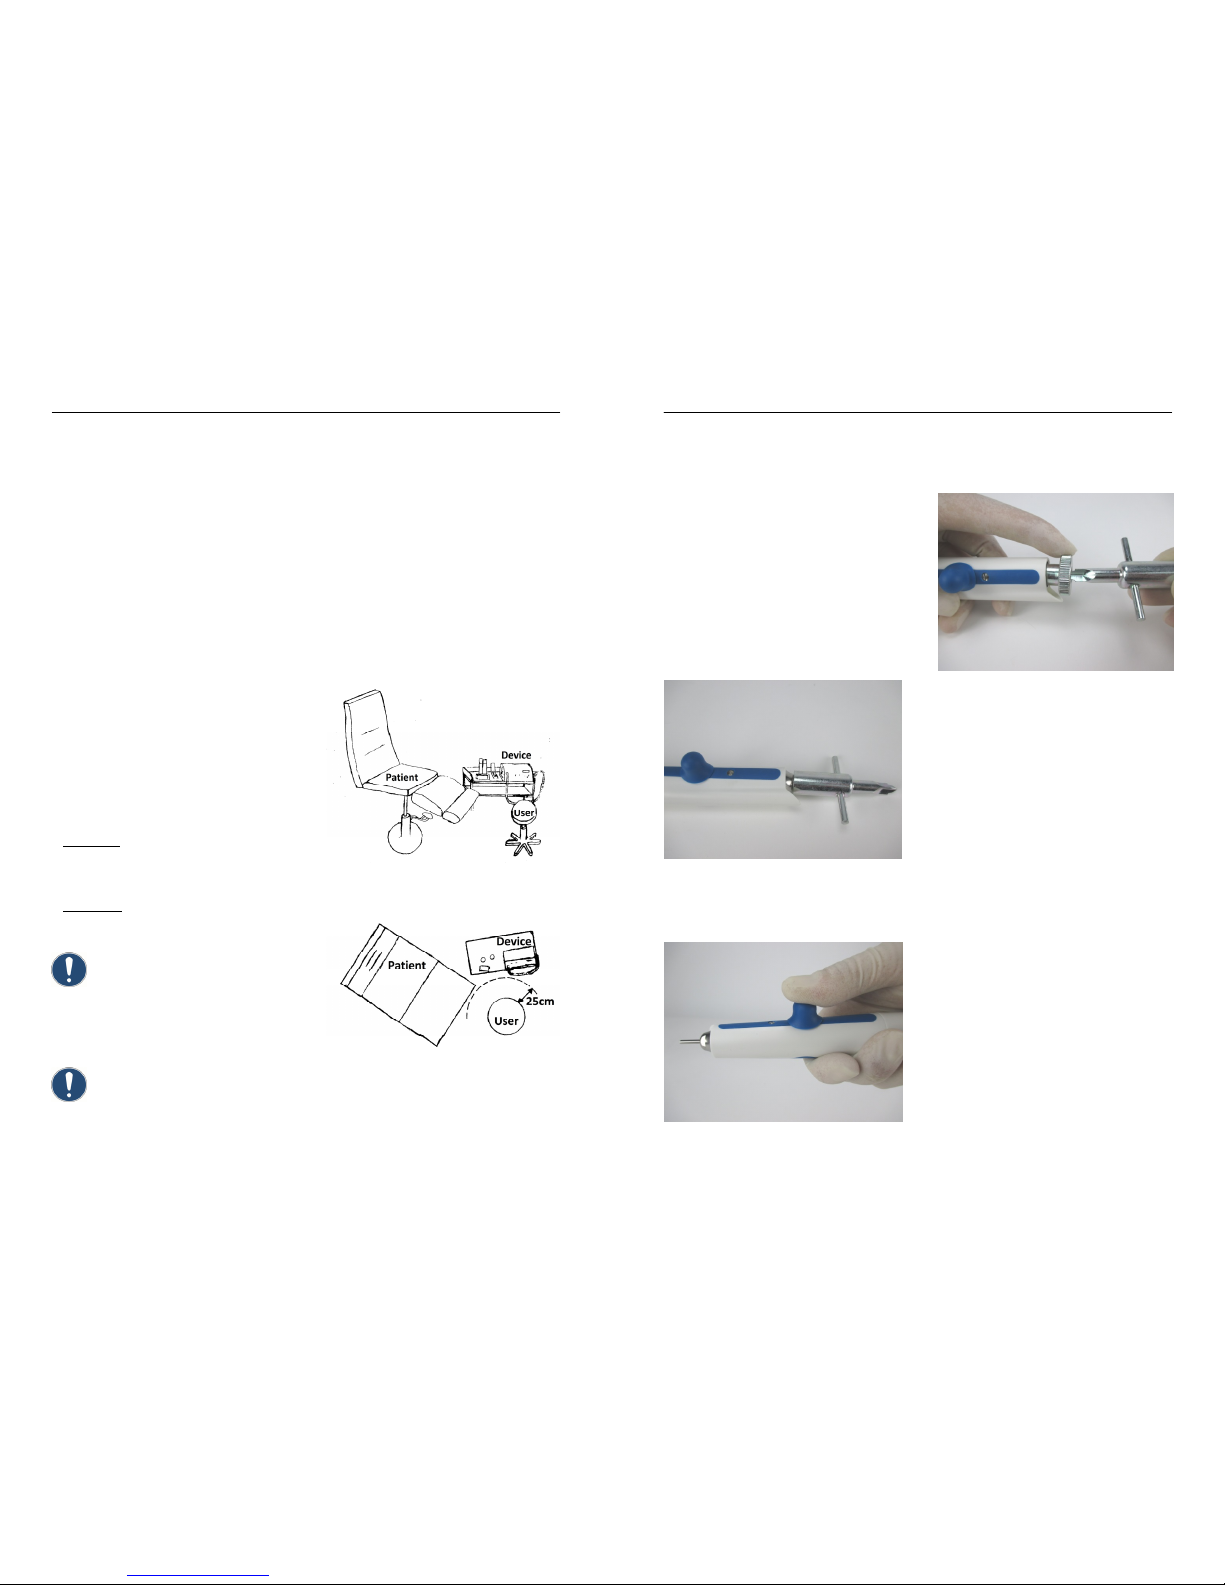
The working area must conform to
the conditions described. Set up the
unit in such a way, that the air slits
are not blocked and the extracted
air can escape well. To guarantee
unhindered air flow there must a
gap of at least 12cm to the right of
the device. Position the device so
that the operating buttons are easy
to reach and the outlet of the hose
is a maximum distance of 60cm
from the patient's foot. The unit
should be 30 - 90cm from the floor.
Image: Example of positioning of foot care unit
in treatment room.
Image: Bird's eye view of work area
If you have a foot switch insert its
plug into the port on the right of the
device which displays this symbol
19
Maintenance & Care
Cleaning the chuck
Because of the additional protection
washer (see right), not much dirt is
usually entering the handpiece. In
the process of time, some dirt might
collect itself within the handpiece,
and might affect its functions.
Therefore the chuck has to be
cleaned monthly.
Dismantle the chuck:
Screw off the top of the handpiece
with the spanner shown in the pic-
ture:
Now clean the inside of the hand-
piece and the top with a dry brush.
For opening the chuck, push the
button forward.
Set the screw spanner (wrench) on
the axle and hold it tight. Now use
the front of the second spanner to
unscrew the chuck.
To assemble the chuck follow the
steps in reverse order. Make sure
that the chuck is opened during the
assembly (the handpiece button
must be in forward position), and is
firmly applied afterwards.
Cleaning the chuck
Soak the chuck in ethyl alcohol or a
special cleaning liquid for tools.
Clean the slits and the hole of the
chuck with a dry scrubber or brush.
Rinse the chuck very well, and
make sure you let it dry well after-
wards.
Cover your index finger with a very
little amount (just a drop) of oil and
rub in between your thumb and
index finger. Now dab off the oil til
your finger is only covered with a
very thin film of oil. Now move the
chuck in between your thumb and
pointer. There should be only a very
thin film of oil left on the chuck.
Please act according to the saying:
Less is more!