Hahn KT-EV User manual

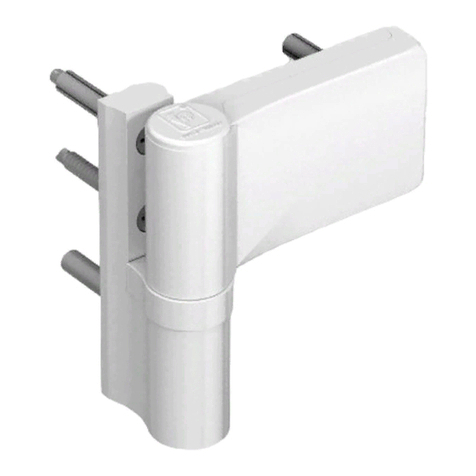
Universalbänder für Kunststofftüren
Hahn
KT-EV / KT-EN
Paumelles universelles pour portes en PVC
Universal hinges for plastic doors
F
GB
■Einbauanleitung
■Notice de montage
■Installation instructions

(B)
(C)
(C)
C = 0*) C = 10 C = 18
(B)
B = 50 B = 60 B = 70*)
B max 73
Einstellen der Bohrlehre • Réglage du gabarit de perçage • Setting the drilling jig
Flügel und Rahmen bohren • Perçage de l'ouvrant et du dormant • Drill boreholes in the door and frame
Einbauanleitung
Notice de montage
Installation instructions
4
Bohrlehre für Direktver-
schraubung
Schrauben der Rahmenbohr-
platte leicht lösen, Bohrplatte
am Aufdeck anschlagen, Flü-
gelbohrplatte auflegen und
Schrauben wieder festziehen.
Gabarit de perçage pour
vissage direct
Désserez légèrement les vis du
gabarit pour dormant, Position-
nez la plaque de perçage en
butée sur le chant de l'ouvrant,
Positionnez la plaque de perçage
pour ouvrant et serrez les vis.
Drilling jig for direct screw
connection
Slightly loosen screws of the frame
drill plate, fasten drill plate to the
upstand, place door drill plate,
and tighten the screws again.
Ø 5 mm
Ø 5 mm
Einstellen Maße „B“ und „C“
nach Einbauzeichnung
Réglage cotes «B» et «C»
d’après le plan de montage
Adjust dimensions “B” and “C”
according to installation drawing
Anschlag DIN rechts /links beachten.
Veillez à la fixation par la droite/ gauche.
Note left and right-hand doors.
*) Werkseitige Voreinstellung
*) Préréglage en usine
*) Factory pre-set

Flügelbandteil und Rahmenbandteil montieren • Montage des éléments de paumelle pour ouvrant et dormant
• Installing the hinge part for door and frame
Lagerbolzen mit Markierung auf Mitte
(Nullstellung) in das Flügelbandteil ein-
schieben.
Introduisez l'axe avec marquage au milieu
(Position zéro) dans l'ouvrant.
Insert bearing pin with marking to centre
(zero position) in the door hinge part.
Bolzen mit Sonder-
schraube fixieren
(max. 4 Nm).
Fixez l'axe avec la vis
spéciale (max. 4 Nm).
Secure pin with special
screw (max. 4 Nm).
4
3
Flügelband verschrauben.
Zwei Schrauben zusätzlich
verwenden – falls
notwendig.
Vissez l'élément de paumelle
ouvrant. Utilisez deux vis
supplémentaires – si néces-
saire.
Screw-on door hinge. Use
two screws – if necessary.
2
KT-EN Variante
Anschlagwinkel am Aufdeck
des Flügels verschrauben.
Variante KT-EN
Fixez l'équerre du chant de
recouvrement.
KT-EN model
Screw-on angle steel at the
upstand of the door.
3
Bandabdeckung in
Aussparung stecken
und aufschieben.
Sicherungsschraube
eindrehen.
Placez le cache-vis en
le faisant coulisser.
Place and slip on hinge
cover in the cut-out.
Screw in lock screw.
3
Kappe aufstecken.
Placez le capuchon.
Insert cap.
Rahmenbandteil aufsetzen
und verschrauben (max. 4 Nm).
Placez et fixez l'élément dormant
(max. 4 Nm).
Install hinge on frame and screw
down (max. 4 Nm).

Dr. Hahn GmbH & Co. KG
Trompeterallee 162 –170 · D-41189 Mönchengladbach · Postfach 40 0109 · D-41181 Mönchengladbach
Phone + 49 (0)2166 /954-3 · Fax + 49 (0)2166 /954-444 · Internet www.dr-hahn.de · E-Mail sales@dr-hahn.com
Einstellanleitung
Notice de réglage
Adjustment instructions
EBA / KT-EV/KT-EN / Artikelnr / D / F / GB 01.09 LW3,5’ Technische Änderungen vorbehalten. Sous réserve de modifications techniques. Right to alter technical details reserved.
– 2,5 mm
+ 2,5 mm
Abdeckkappe abnehmen.
Enlevez le capuchon.
Remove cap.
Sonderschraube leicht
lösen.
Desserrez légèrement la vis
spéciale.
Slightly loosen special screw.
Dichtungsandruck einstel-
len und in Position halten.
Réglez la compression du
joint et maintenez-la dans la
position obtenue.
Adjust sealing pressure and
hold in position.
Sonderschraube
festziehen (max. 4
Nm) und Abdeck-
kappe aufsetzen.
Serrez la vis spéciale
(max. 4 Nm) et placez
le capuchon.
Tighten special screw
(max. 4 Nm) and slip
on cap.
Dichtungsandruck einstellen • Réglage en continu de la compression du joint • Adjusting the sealing pressure
5
3
± 5 mm
Sicherungsschraube
lösen.
Dévissez la vis de
blocage.
Loosen lock screw.
Abdeckstück
abnehmen.
Enlevez le cache-vis.
Remove cover strip.
Stufenlose
Verstellung
Réglage continu
Variable adjustment
Abdeckstück
aufschieben und
Sicherungsschraube
anziehen.
Placez le cache-vis et
serrez la vis de blocage.
Slip on cover strip and
tighten lock screw.
Horizontalverstellung • Réglage horizontal • Horizontal adjustment
6
+ 3 mm Vertikalverstellung
stufenlos + 3 mm
Réglage en hauteur
continu + 3 mm
Vertical adjustment
variable + 3 mm
Höhenverstellung immer nur am
unteren Band vornehmen – obere
Bänder nur nachstellen.
Réglage à effectuer uniquement sur
la paumelle inférieure – seulement
réajuster les paumelles supérieures.
Carry out height adjustment only on
bottom hinge – only readjust upper
hinges.
Höhenverstellung • Réglage en hauteur • Height adjustment
This manual suits for next models
1
Other Hahn Household Hardware manuals
Popular Household Hardware manuals by other brands

Pontec
Pontec PondoSolar Lily Island operating instructions

Marvin
Marvin Sash Limiter installation guide

GMW
GMW ProFin-S Series Product Booklet

Elkron
Elkron DC6002I Installation, programming and functions manual

HAUTAU
HAUTAU PRIMAT Kompakt 300 + FS Maintenance and operating instructions

Smith & Nephew
Smith & Nephew Savanah AA1091A manual