Connection Instructions
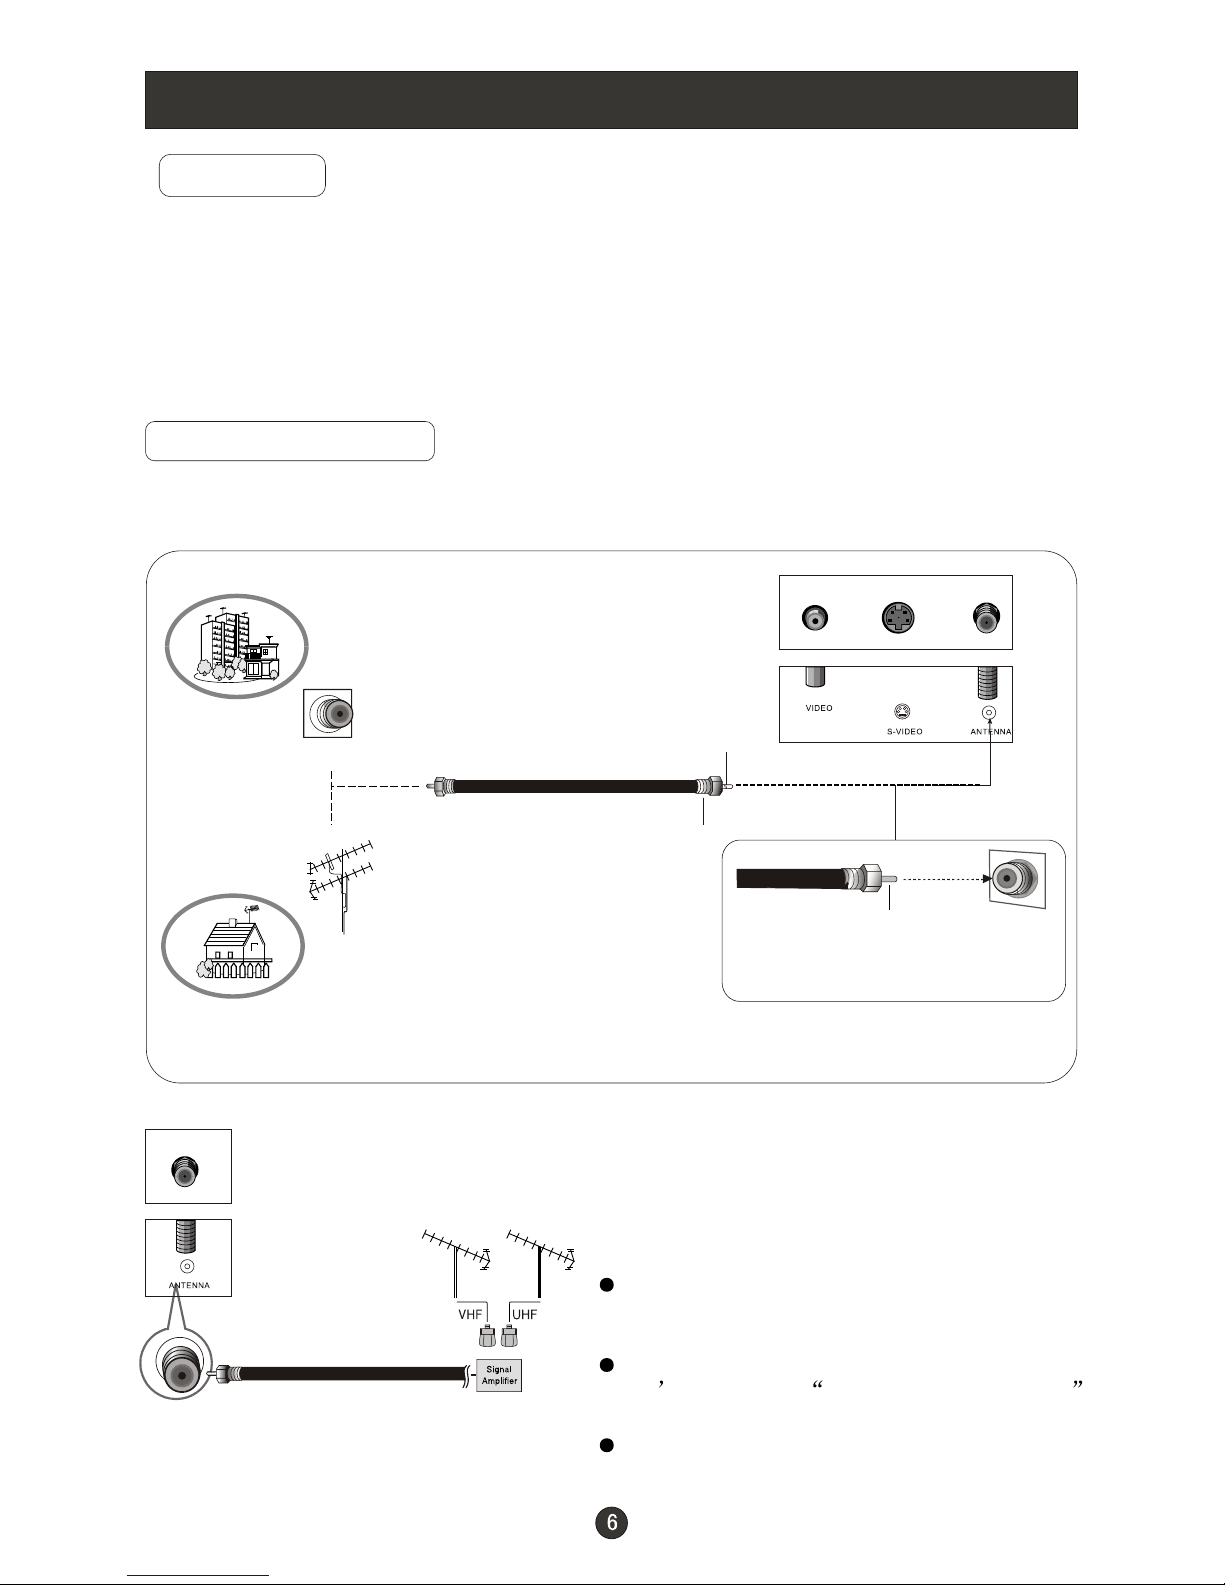
Cable TV Setup
- After subscribing to a cable TV service from a local provider you can watch cable
TV programming. The TV cannot display TV programming unless a TV tuner
device or cableTV converter box is connected to the TV.
- For furtherinformation regarding cable TV service, contact your localcable TV
service provider(s).
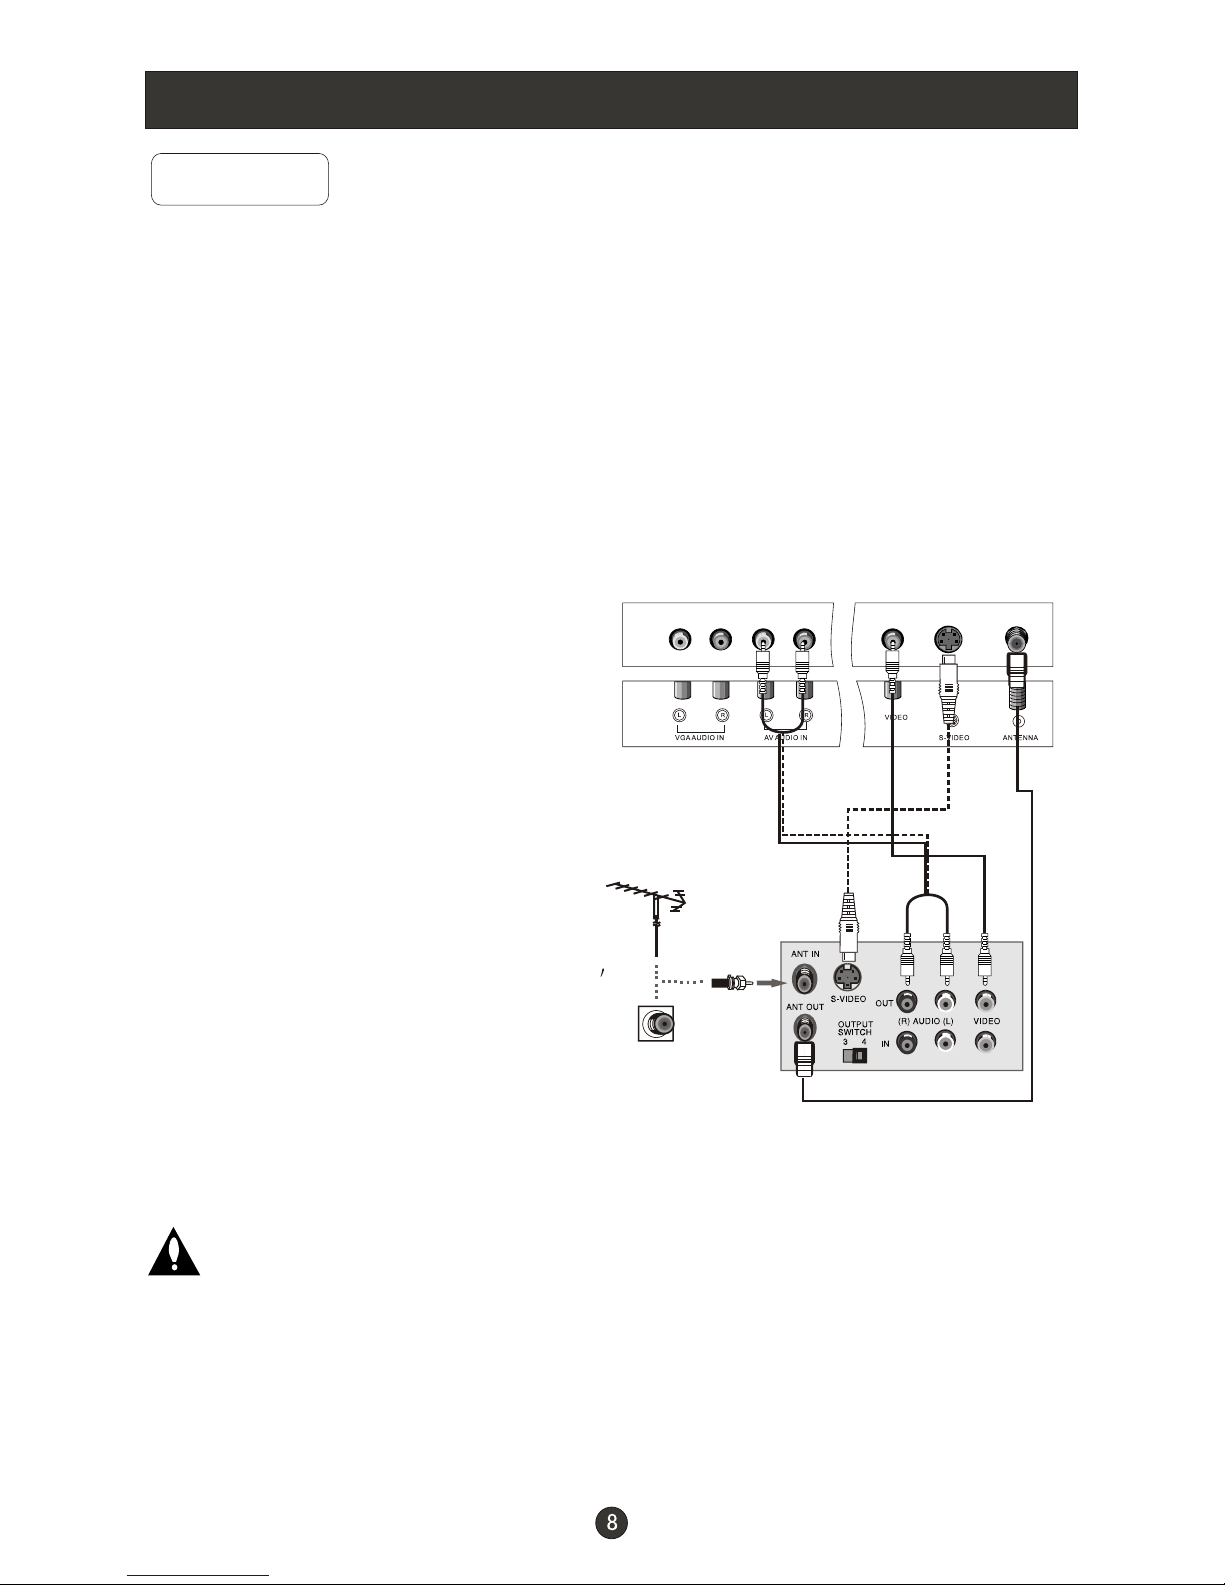
Connection Option 1
1. Select 3or 4 with channel switch on cable
box.
2. Tunethe TV channel to the same selected
output channel on cable box.
3. Select channelsat the cable box or with
the cable box remote control.
Connection Option 2
1. Connect theaudio and video cables from
the Cable Box'soutput jacks to the TV
input jacks, asshown in the figure.When
connecting the TV to aCable Box, match
the jack colors
(Video = yellow, Audio Left = white, and
Audio Right= red).
2. Select theinput source by using the TV/AV
button on theremote control.
3. Select yourdesired channel with the
remote control forcable box.
External A/V Source Setup
How to connect
Connect the audioand video cables from
the external equipment'soutput jacks to the
TV input jacks,as shown in the figure.
When connecting theTV to external equip-
ment, match thejack colors (Video = yellow,
Audio Left =white, and Audio Right = red).
How to use
1. Select theinput source by using the TV/AV
button on theremote control. (If connected
to A/VINPUT 1, select Video input source).
2. Operate thecorresponding external equi-
pment. Refer toexternal equipment ope-
rating guide.