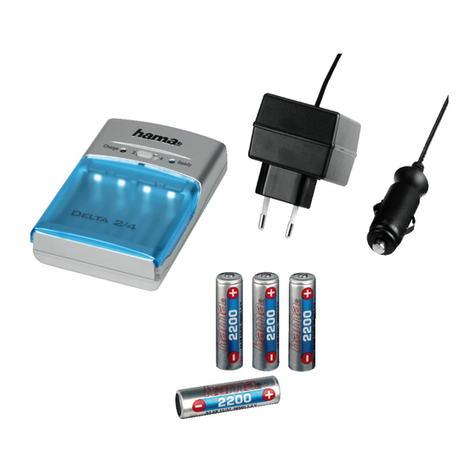
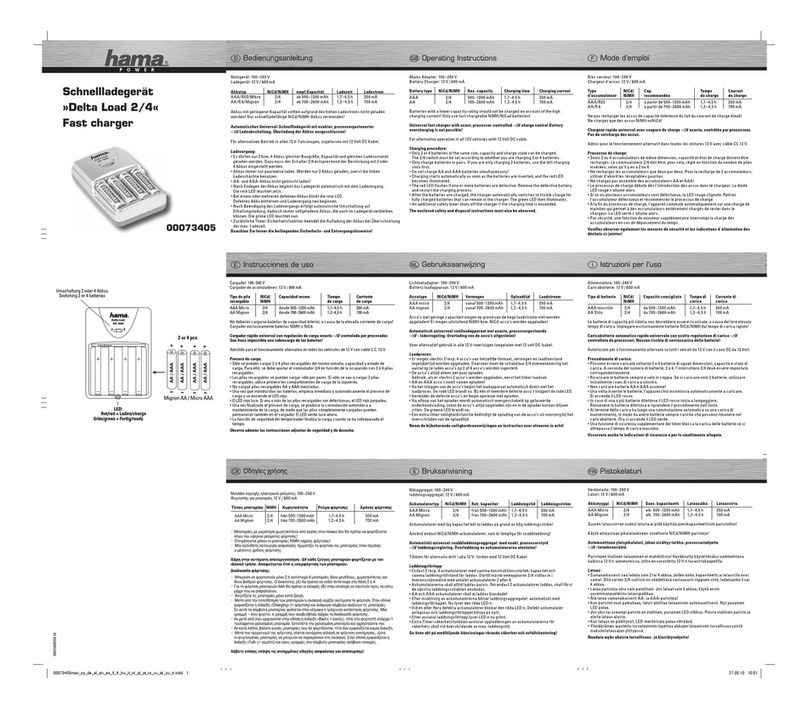
Hama 00052190 User manual

I. Introduzione
Grazie per avere acquistato la stazione di carica Dual
per ivostri WiiMote ecomplimenti per la scelta. Siamo
certi che il nostro prodotto vi agevolerà il gioco durante
iprossimi anni.
Queste brevi istruzioni per l’uso contengono preziose
indicazioni per il comando della stazione. Conservate
le istruzioni in un luogo sicuro per una eventuale
consultazione.
II. Volume di fornitura
-Stazione di carica con cavo di allacciamento alla Wii
-2batterie 2,4 /1100 mAh
-2coperchi per vani batterie con contatti di carica per
WiiMote
III. Installazione
1. Togliere il coperchio del vano batterie erimuovere le
batterie.
2. Introdurre la batteria in dotazione con la polarità
corretta nella stazione di carica.
3. Chiudere nuovamente il WiiMote con il coperchio
del vano batterie in dotazione (la batteria deve
essere caricata prima della messa in funzione).
4. Spegnere la Wii escollegare il cavo
dell’alimentatore dalla Wii.
5. Inserire la spina bianco/nera del cavo in dotazione
nella presa nell‘alimentatore della Wii.
6. Collegare l’altra spina tonda del cavo in dotazione
alla presa della stazione di carica.
7. Collegare la presa Wii dell’alimentatore alla presa
del cavo in dotazione.
8. Mettere il/i WiiMote nella stazione. La carica inizia
non appena ègarantita l’alimentazione elettrica alla
stazione di carica.
9. Il LED di alimentazione si accende non appena la
stazione di carica viene alimentata con la corrente.
10. Durante il processo di carica si accende il LED blu
„Charging“. Quando la batteria ècompletamente
carica, il LED inizia alampeggiare.
11. Quando la batteria ècarica, togliere il WiiMote per
non compromettere la durata della batteria.
IV.Avvertenze
1. Il tempo di carica èdica. 7ore, secondo lo stato di
carica della batteria.
2. La batteria ha una vita limitata eiltempo di gioco si
riduce dopo diversi processi di carica.
La batteria deve essere sostituita se non si può più
caricare.
3. Non cortocircuitare la batteria enon gettarla tra le
amme.
4. Proteggere la batteria dai liquidi edall‘umidità.
5. Evitare di sottoporre la batteria aforti scossoni.
6. Non tentare di aggiustare oriparare l’apparecchio
da soli. Fare eseguire qualsiasi lavoro di riparazione
al personale specializzato competente.
7. Non apportare modiche all’apparecchio per non
perdere idiritti di garanzia.
V. Informazioni per l’assistenza eicontatti
in caso di prodotti difettosi:
Per reclami in merito ai prodotti, rivolgetevi al vostro
rivenditore oalla Consulenza prodotto Hama.
Internet /World Wide Web
Assistenza sui prodotti, nuovi driver oinformazioni sui
prodotti all’indirizzo www.hama.com
Support Hotline –Consulenza prodotto Hama:
Tel. +49 (0) 9091 /502-115
Fax +49 (0)9091/502-272
e-mail: [email protected]
00052190/11.19
Alllistedbrandsare trademarks of thecorrespondingcompanies.Errors and omissions excepted,
and subject to technical changes. Our general terms of delivery and payment are applied.
Hama GmbH &CoKG
86652 Monheim/Germany
www.hama.com
iIstruzioni per l‘uso

Dual-Ladestation,
Version 2
Dual Charging Station
COMPUTER
00052190

2
I. Einführung
Wir freuen uns, dass Sie die Hama Dual Ladestation für
Ihre WiiMotes gewählt haben und gratulieren Ihnen zu
dieser Entscheidung. Wir sind überzeugt, dass Ihnen
unser Produkt in den nächsten Jahren eine Hilfe beim
Spielen sein wird.
Diese Kurzanleitung enthält wertvolle Hinweise zur
Bedienung der Station. Bitte bewahren Sie diese Anlei-
tung zum Nachschlagen an einem sicheren Ort auf.
II. Lieferumfang
-Ladestation mit Anschlusskabel zur Wii
-2Akkus 2,4V /1100 mAh
-
2Batteriefachdeckel mit Ladekontakten für WiiMote
III. Installation
1. Entfernen Sie den Original Batteriefachdeckel und
entnehmen Sie die Batterien/Akkus.
2. Legen Sie den beiliegenden Akku in das Batterie-
fach in der richtigen Polung ein.
3. Schließen Sie die WiiMote mit dem mitgelieferten
Batteriefachdeckel. (Der Akku muss vor Inbetrieb-
nahme geladen werden.)
4. Schalten Sie die Wii aus und entfernen Sie
anschließend das Wii-Netzteil-Kabel von der Wii.
5. Stecken Sie die den weiß/schwarzen Stecker des
mitgelieferten Kabels in die Netzteil Buchse Ihrer
Wii.
6. Verbinden Sie den anderen, runden Stecker des
mitgelieferten Kabels mit der Ladestation-Buchse
7. Nun können Sie den Wii-Stecker des Wii-Netz-
teils mit der Buchse des mitgelieferten Kabels
verbinden.
8. Stellen Sie die WiiMote(s) in die Station.
Das Laden beginnt, sobald die Stromversorgung
zur Ladestation gewährleistet ist.
9. Die LED Power leuchtet auf sobald die Ladestation
mit Strom versorgt ist.
10. Während des Ladevorgangs leuchtet die LED
„Charging” blau. Wenn der Akku komplett
aufgeladen ist, beginnt die LED zu blinken.
11. Wenn der Akku aufgeladen ist, dann entnehmen
Sie die WiiMote, um die Lebensdauer des Akkus
nicht zu belasten.
IV.Hinweise
1. Die Ladezeit kann bis zu 7Stunden betragen, je nach
Status des Akkus.
2. Der Akku hat eine begrenzte Lebenszeit und die
reine Spielzeitverkürzt sich nach vielen Ladevor-
gängen und muss ausgetauscht werden, wenn er
sich nicht mehr laden lässt.
3. Schließen Sie den Akku nicht kurz oder halten Sie
ihn ins Feuer.
4. Bewahren Sie den Akku vor Feuchtigkeit und
Flüssigkeiten.
5. Schützen Sie den Akku vor starken
Erschütterungen.
6. Versuchen Sie nicht, das Gerät selbst zu warten
oder zu reparieren. Überlassen Sie jegliche
Wartungsarbeit dem zuständigen Fachpersonal.
7. Nehmen Sie keine Veränderungen am Gerät vor.
Da
durch verlieren sie jegliche Gewährleistungs-
ansprüche.
V. Support- und Kontaktinformationen
bei defekten Produkten:
Bitte wenden Sie sich bei Produktreklamationen an
Ihren Händler oder an die Hama Produktberatung.
Internet/World Wide Web
Produktunterstützung, neue Treiber oder Produktinfor-
mationen bekommen Sie unter www.hama.com
Support Hotline –Hama Produktberatung:
Tel. +49 (0) 9091 /502-115
Fax +49 (0) 9091 /502-272
e-mail: [email protected]
dBedienungsanleitung

3
I. Introduction
Thank you for choosing the Hama dual charging station
for your WiiMotes and congratulations on your decision.
We are certain that our product will provide you with a
great deal of help when gaming for years to come.
These instructions contain valuable information on
operating the station. Please keep these instructions in
asafe location for future reference.
II. Scope of delivery
-Charging station with connection cable for Wii
-2x2.4V /1100 mAh rechargeable battery 2
-2xBattery compartment cover with charging
contacts for WiiMote
III. Installation
1. Remove the original battery compartment cover
and the batteries.
2. Insert the enclosed rechargeable battery,
observing the correct polarity.
3. Close the WiiMote using the included battery
c
om partment cover.(The battery must be charged
before beginning use.)
4. Switch off the Wii and remove the power supply
cable from the Wii.
5. Insert the white/black connector of the supplied
cable into the power supply socket on the base of
your Wii.
6. Connect the other,round connector on the supplied
cable with the socket on the battery charging station.
7. Now you can connect the Wii connector on the Wii
power supply unit with the socket on the supplied
cable.
8. Place the WiiMote(s) in the charging station.
Charging begins when the battery charging station is
supplied with power.
9. The LED „power“ lights up as soon as the
charging station is supplied with power
10. The LED „Charging” lights blue during charging.
The LED ashes when the battery is completely
charged.
11. When the battery is fully charged, remove the
WiiMote so that the service life of the battery is
not shortened.
IV.Notes
1. Depending on the status of the battery,
the charging time can last up to 7hours.
2. The battery has alimited service life, and playing
time is reduced after many charging cycles.
The battery must be replaced when it can no
longer be recharged.
3. Do not short-circuit the battery or place it in re.
4. Keep the battery away from moisture and liquids.
5. Protect the battery from strong shocks.
6. Do not attempt to service or repair the device
yourself. Leave any service work to qualied
experts.
7. Do not modify the device in any way.Doing so
voids the warranty.
V. Support and contact information
If the product is defective:
Contact your retailer or Hama Product
Consulting if you have any product claims.
Internet/World Wide Web
Product support, new drivers and product
information are available at www.hama.com.
Support hotline –Hama Product Consulting:
Tel. +49 (0) 9091 502 115
Fax +49 (0) 9091 /502-272
E-mail: [email protected]
gOperating Instruction

4
I. Introduction
Nous vous remercions d’avoir choisi le station de
charge dual de WiiMotes de Hama et vous félicitons de
votre choix. Nous sommes convaincus que notre produit
vous sera un auxiliaire de choix pour les années àvenir
et qu’il vous donnera entière satisfaction.
Cette notice d’utilisation contient des remarques im-
portantes concernant l’utilisation de la station. Veuillez
la conserver àportée de main pour toute consultation
ultérieure.
II. Matériel livré
-Station de charge avec cordon de connexion à
une Wii
-2xBatterie 2,4 V/1100 mAh
-2xCouvercle du compartiment de piles avec
contacts de charge pour WiiMote
III. Installation
1. Ouvrez le couvercle du compartiment et retirez les
piles/batteries.
2. Placez la batterie fournie dans le compartiment en
respectant la polarité.
3. Connectez votre WiiMote au couvercle du
compartiment des piles (la batterie doit avoir été
chargée au préalable).
4. Mettez votre Wii hors tension, puis retirez le câble
du bloc secteur de la Wii.
5. Insérez la che mâle blanche/noire du câble fourni
dans la prise du bloc secteur de votre Wii.
6. Raccordez l‘autre che mâle ronde du câble fourni à
la prise de la station de charge.
7. Vous pouvez alors raccorder la che mâle Wii du
bloc secteur Wii àlaprise du câble fourni.
8. Placez votre/vos Wiimote(s) dans la station. Le cycle
de chargement démarre dès que la station de
charge est alimentée en électricité.
9. La DEL „power“ s‘allume dès que la station de
charge est alimentée en courant
10. La DEL „Charging”s’allume en bleu pendant la
procédure de charge. La DEL clignote dès que la
batterie est complètement chargée.
11. Dès que la batterie est complètement chargée,
déconnectez votre WiiMote and’éviter toute
surcharge et une diminution de la durée de vie de
la batterie.
IV.Remarques
1. La charge peut durer jusqu’à 7heures, en fonction
de l’état de la batterie.
2. La batterie aune durée de vie limitée et le temps
de jeu diminue àlasuite de nombreuses recharges;
la batterie doit être remplacée dès qu’il n’est plus
possible de la recharger.
3. Ne court-circuitez pas la batterie et ne la jetez pas
dans un feu.
4. Protégez la batterie de toute humidité et de tous
liquides.
5. Ne secouez pas violemment la batterie.
6. Ne tentez pas de réparer l’appareil vous-même ou
d’effectuer un entretien. Déléguez tous travaux de
réparation àdes techniciens qualiés.
7. N’apportez aucune modication àl’appareil. Des
modications vous feraient perdre vos droits de
garantie.
V. Support technique et contact
En cas d’appareils défectueux :
En cas de réclamation concernant le produit, veuillez
vous adresser àvotre revendeur ou au département
conseil produits de Hama.
Internet /World Wide Web
Notre support technique, les nouveaux pilotes et les
informations produits sont disponibles sous :
www.hama.com
Ligne téléphonique directe d’assistance
–Conseil produits Hama :
Tél. +49 (0) 9091 /502-115
Fax +49 (0) 9091 /502-272
E-mail :p[email protected]
fMode d‘emploi

5
I. Introducción
Celebramos que haya elegido la estación de carga dual
para su WiiMote de Hama ylefelicitamos por su decisi-
ón. Estamos convencidos de que este producto nuestro
le será de gran ayuda para jugar en los próximos años.
Estas instrucciones breves contienen valiosas indica-
ciones relativas al manejo de la estación. Por favor,
guarde estas instrucciones en un lugar seguro para
poder consultarlas cuando sea necesario.
II. Volumen de suministro
-Estación de carga con cable de conexión alaWii
-2pilas recargables 2,4V /1100 mAh
-2tapas de compartimento de pilas con contactos de
carga para WiiMote
III. Instalación
1. Retire la tapa original del compartimento de pilas y
retire las baterías/pilas recargables.
2. Coloque la pila recargable adjunta con la polaridad
correcta en el compartimento de baterías.
3. Cierre la WiiMote con la tapa de compartimento de
baterías suministrada. (Antes de su puesta en
servicio, se debe cargar la pila recargable).
4. Apague la Wii ydesenchufe seguidamente el cable
de la fuente de alimentación de la Wii.
5. Enchufe el conector blanco/negro del cable
suministrado en la entrada de la fuente de
alimentación de su Wii.
6. Enchufe el otro conector redondo del cable
suministrado en la entrada de la estación de carga.
7. Ahora puede conectar el conector Wii de la fuente
de alimentación de la Wii con la entrada del cable
suministrado.
8. Coloque la(s) WiiMote(s) en la estación. La carga
comienza en cuanto queda garantizada la alimentación
de corriente alaestación de carga.
9. El LED Power se ilumina en cuanto llega corriente a
la estación de carga.
10. Durante el proceso de carga, el LED “Charging” luce
en azul. Cuando la pila recargable está completamente
cargada, el LED empieza aparpadear.
11. Cuando se haya cargado por completo la pila
recargable, retire la WiiMote para prolongar la vida
útil de la pila recargable.
IV.Notas
1. El tiempo de carga puede durar hasta 7horas en
función del estado de la pila recargable.
2. La pila recargable tiene una vida útil limitada yel
tiempo neto de juego se reduce después de muchos
procesos de carga ysedebe cambiar cuando deja
de ser posible cargarla.
3. No cortocircuite la pila recargable ni la tire al fuego.
4. Proteja la pila recargable de la humedad ydelos
líquidos.
5. Proteja la pila recargable contra las sacudidas
fuertes.
6. No intente mantener oreparar el aparato por cuenta
propia. Encomiende cualquier trabajo de mantenimiento
al personal especializado competente.
7. No realice cambios en el aparato. Esto conllevaría la
pérdida de todos los derechos de la garantía.
V. Información de contacto ydesoporte en caso de
productos defectuosos:
Si tiene que hacer alguna reclamación sobre nuestros
productos, diríjase asuproveedor oasu asesor de
productos Hama.
Internet/World Wide Web
Encontrará soporte para sus productos, nuevos
controladores oinformación sobre los productos en
www.hama.com.
Línea directa de soporte –Asesoramiento sobre
productos Hama:
Tel. +49 (0) 9091 /502-115
Fax +49 (0) 9091 /502-272
e-mail: [email protected]
eInstrucciones de uso
6
I. Inleiding
Hartelijk dank dat uvoor het Dual laadstation van Hama
voor uw WiiMotes gekozen heeft. Wij feliciteren umet
deze aankoop. Wij zijn ervan overtuigd dat ons product
udekomende jaren veel ondersteuning zal bieden.
In deze korte gebruiksaanwijzing staan belangrijke
instructies over de bediening van het station. Wij advi-
seren udeze gebruiksaanwijzing als naslagwerk goed
te bewaren.
II. Bij de verpakking inbegrepen
-Laadstation met aansluitkabel voor Wii
-2accu´s 2,4V /1100 mAh
-2batterijdeksels met laadcontacten voor WiiMote
III. Installatie
1. Verwijder het originele batterijdeksel en neem de
batterijen/accu´s uit het laadvak.
2. Plaats de meegeleverde accu in het batterijvak met
de polen in de juiste richting.
3. Sluit de WiiMote met het meegeleverde batterijvak.
(De accu moet voor ingebruikname opgeladen
worden.)
4. Schakel de Wii uit en koppel vervolgens de kabel
van de Wii-voedingsadapter los van de Wii.
5. Sluit de wit/zwarte stekker van de inbegrepen kabel
op de poort van de voedingsadapter van uw Wii aan.
6. Sluit de andere, ronde stekker van de inbegrepen
kabel op de poort van het laadstation aan.
7. Nu kunt udeWii-stekker van de Wii-voedingsadapter
op de poort van de inbegrepen kabel aansluiten.
8. Plaats de WiiMote(s) in het station. Het opladen
begint zodra er stroom naar het laadstation
loopt.
9. De power-LED gaat branden zodra het laadstation
van stroom voorzien wordt.
10. Tijdens het opladen brandt de LED “Charging”
blauw.Als de accu helemaal opgeladen is,
begint de LED te knipperen.
11. Haal de accu als hij opgeladen is uit de WiiMote
voor een langere levensduur van de accu.
IV.Aanwijzingen
1. De oplaadtijd kan tot 7uur oplopen, afhankelijk van
de status van de accu.
2. De accu heeft een begrensde levensduur en de
zuivere speeltijd wordt korter als de accu vaak
opgeladen wordt.
Hij moet vervangen worden als hij niet meer
opgeladen kan worden.
3. Voorkom kortsluiting van de accu en houd hem niet
in het vuur.
4. Bescherm de accu tegen vocht en vloeistoffen.
5. Bescherm de accu tegen zware schokken.
6. Probeer niet het toestel zelf te onderhouden of te
repareren. Laat onderhouds- en reparatiewerkzaam-
heden door vakpersoneel uitvoeren.
7. Verander niets aan het toestel. Daardoor vervalt elke
aanspraak op garantie.
V. Support- en contactinformatie
bij defecte producten:
Neem bij klachten over het product contact op met uw
verkoper of met de afdeling Productadvies van Hama.
Internet/World Wide Web
Productondersteuning, nieuwe drivers of product-
informatie zijn verkrijgbaar onder www.hama.com
Support Hotline –Hama Produktberatung:
Tel. +49 (0) 9091 /502-115
Fax +49 (0) 9091 /502-272
E-mail: [email protected]
oGebruiksaanwijzing

7
I. Introdução
Parabéns pela aquisição da estação de carga Dual da
Hama para os seus WiiMotes. Fez uma boa escolha.
Temos acerteza de que, nos próximos anos, onosso
produto ser-lhe-á muito útil para os seus jogos.
Este breve manual contém indicações importantes para
autilização da estação. Guarde-o num local seguro
para futuras consultas.
II. Material fornecido
-Estação de carga com cabo de ligação àWii
-2baterias 2,4 V/1100 mAh
-2tampas de compartimento de pilhas com contactos
de carregamento para oWiiMote
III. Instalação
1. Remova atampa do compartimento de pilhas
original eretire as pilhas/baterias.
2. Insira abateria fornecida no compartimento, tendo
em atenção apolaridade.
3. Feche oWiiMote com atampa do compartimento de
pilhas fornecida. (a bateria tem de ser carregada
antes da colocação em funcionamento.)
4. Desligue aWii eremova, em seguida, ocabo da
fonte de alimentação da Wii.
5. Insira a cha branca/preta do cabo fornecido na
tomada da fonte de alimentação da sua Wii.
6. Ligue aoutra cha redonda do cabo fornecido à
tomada da estação de carga.
7. Agora pode ligar a cha da fonte de alimentação da
Wii àtomada do cabo fornecido.
8. Coloque o(s) WiiMote(s) na estação. Ocarregamento
começa assim que estiver garantida aalimentação
de corrente àestação de carga.
9. OLED Power acende-se assim que aestação de
carga estiver alimentada com energia.
10. Durante oprocesso de carregamento, oLED
„Charging“ ca azul. Assim que abateria estiver
completamente carregada, oLED começa apiscar.
11. Quando abateria estiver carregada, retire oWiiMote
para não prejudicar adurabilidade da mesma.
IV.Indicações
1. Ocarregamento pode durar até 7horas, conforme o
estado da bateria.
2. Abateria tem uma durabilidade limitada eotempo
total de jogo diminui após vários processos de
carregamento etem de ser substituída quando
deixar de ser possível carregá-la.
3. Não provoque curto-circuito nem coloque abateria
no fogo.
4. Proteja abateria da humidade edelíquidos.
5. Proteja abateria de fortes vibrações.
6. Não tente fazer amanutenção ou reparar o
aparelho. Qualquer trabalho de manutenção deve
ser executado por técnicos especializados.
7. Não efectue alterações no aparelho. Dessa forma
perderia os direitos àgarantia.
V. Informações de assistência econtacto
em caso de produtos avariados:
Se pretender apresentar uma reclamação, dirija-se
ao seu comerciante ou àassistência ao produto da
Hama.
Internet/World Wide Web
Pode obter informações sobre aassistência ao produto,
novos controladores ou informações sobre oproduto
em www.hama.com
Linha de apoio –Assistência ao produto da Hama:
Tel. +49 (0) 9091 /502-115
Fax +49 (0) 9091 /502-272
Email: [email protected]
pManual de instruções
Table of contents
Languages:
Other Hama Batteries Charger manuals

Hama
Hama 87061 User manual

Hama
Hama Start User manual

Hama
Hama FC10S User manual

Hama
Hama Dual charging station User manual

Hama
Hama Migno 2/4 User manual

Hama
Hama 46667 User manual

Hama
Hama Delta Solid 2/4 User manual

Hama
Hama MagCharge FC15 User manual

Hama
Hama 00109860 User manual

Hama
Hama 74019 User manual