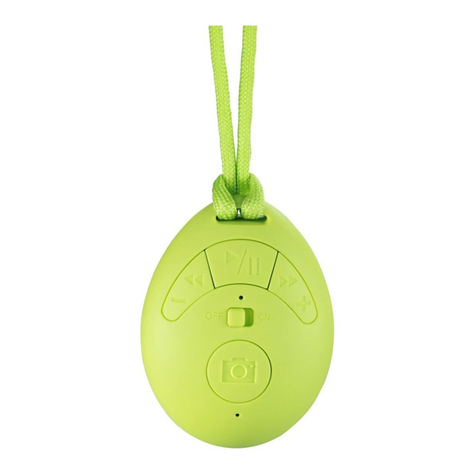
Hama CONES 00173165 User manual

F
D
GB
E
Operating Instructions
Bedienungsanleitung
Mode d‘emploi
Instrucciones de uso
Istruzioni per l‘uso
Gebruiksaanwijzing
Instrukcja obsługi
Használati útmutató
Návod k použití
Návod na použitie
Manual de instruções
Manual de utilizare
SK
PL
P
I
H
NL
CZ
RO
00173165
00173166
CONES
Mobile Bluetooth®Speaker

1
3
4
2
5
Rubber feet

2
Controls and Displays
1. Status LED
2. Microphone
3. AUX-IN input
4. Micro-USB connection (USB)
5. Function button
Thank you for choosing a Hama product.
Take your time and read the following instructions and information
completely. Please keep these instructions in a safe place for future
reference. If you sell the device, please pass these operating instructions
on to the new owner.
1. Explanation of Warning Symbols and Notes
Warning
This symbol is used to indicate safety instructions or to draw your
attention to specic hazards and risks.
Note
This is used to indicate additional information or important notes.
2. Package Contents
•Mobile
Bluetooth
®Speaker Cones
•Micro-USB charging cable
•3.5 mm Y-audio cable
•These operating instructions
3. Safety Notes
•The product is intended for private, non-commercial use only.
•Do not use the product in the immediate vicinity of heaters or other
heat sources or in direct sunlight.
•Protect the product from dirt, moisture and overheating, and only use
it in a dry environment.
•Keep this product, as all electrical products, out of the reach of
children!
•Do not drop the product and do not expose it to any major shocks.
•Do not operate the product outside the power limits given in the
specications.
•Do not use the product in areas where the use of electronic devices
is not permitted.
•Be considerate. Loud volumes can have a detrimental effect on your
surroundings.
•Do not open the device or continue to operate it if it becomes
damaged.
•Since the battery is integrated and cannot be removed, you will need
to dispose of the product as a whole. Do this in compliance with the
legal requirements.
•Keep the packaging material out of the reach of children due to the
risk of suffocation.
•Dispose of packaging material immediately according to locally
applicable regulations.
•Do not modify the product in any way. Doing so voids the warranty.
4. Getting Started and Operation
Note – Stereo/mono
•These operating instructions always refer to the recommended use
with both speakers (stereo).
•If you only want to use one speaker (mono), skip all the
instructions that only refer to use of both speakers (marked with
C). The rest of the instructions also apply to use of a single
speaker.
4.1 Switching on the product
•Press and hold the function button (5) for about 5 seconds to switch
the speaker on. An announcement will play and the status LED (1) will
start to ash twice in blue in quick succession.
•Continue to hold the function button (5) until the ‘Pairing’
announcement indicates that the other speaker can now be
connected.
Note – Master
•The speaker that is connected rst will be the master.
•If you are only using one speaker, it is automatically the master.
CPress and hold the function button (5) on the second speaker for
about 5 seconds to switch on the second speaker. An announcement
will play and the status LED (1) will start to ash in blue.
CContinue to hold the function button (5) until the ‘Pairing’
announcement indicates that the other speaker can now be
connected.
CA voice announcement indicates that the connection was successful.
The status LEDs (1) on both speakers always ash in blue twice in
succession.
Note – Left and right speaker
•After the two speakers are successfully connected, they will issue
voice announcements (“left/right channel”) to inform you of their
ideal positions.
•For optimal sound, the speaker that issues the “left channel”
announcement should be placed to your left. Place the other
speaker to your right.
CThe two speakers can now be connected to a terminal device.
4.2 Switching off the product
•Press and hold the function button (5) for about 3 seconds to switch
the speaker off. A voice announcement is issued and the status LED (1)
briey illuminates in red before switching off.
CIf the two speakers are successfully connected to each other, switching
off one speaker will automatically switch off the other one.
Note – Automatic shutdown
•Note that the speakers will automatically switch off after 10
minutes without action (no audio playback/no
Bluetooth
®
function). A corresponding announcement will play.
4.3 Charging the battery
Warning – Rechargeable battery
•Only use suitable charging devices with USB connections for
charging.
•As a rule, do not use charging devices or USB connections that are
defective and do not try to repair them yourself.
•Avoid storing, charging or using batteries in extreme temperatures.
•When stored for a long period of time, batteries should be charged
regularly (at least every three months).
•Charge the speakers fully before using them for the rst time.
•Connect the included Micro-USB charging cable to the speaker’s
Micro-USB port (4).
•Connect the unused connector on the Micro-USB charging cable to a
suitable USB charger. Please refer to the operating instructions for the
USB charger used.
•The status LEDs (2) light up constantly in red during the charging
process.
•Once the batteries are fully charged, the status LEDs (2) go out.
GOperating Instructions

3
Note – Charging/Battery level
•It takes approx. 5-6 hours to completely charge the product.
•The speaker’s battery can be charged whether the speaker is
on or off.
•If the battery level is less than 10%, an announcement will play.
You will only receive this information if the speaker is on.
•Depending on the terminal device connected (
Bluetooth
®), the
speakers’ battery level will appear on the device.
•The actual battery life varies depending on use of the device, the
settings and the ambient conditions (rechargeable batteries have a
limited service life).
4.4 Audio playback via the included audio cable
(3.5 mm jack)
•Ensure that the speakers are switched off.
•Connect the 3.5 mm Y-audio cable to your terminal device (MP3
player, smartphone, computer, etc.) using the main connector
(somewhat thicker).
•Plug the two other connectors into the AUX-IN inputs (3) on the
speakers.
•Set the volume on your terminal device to a low level.
•Switch on the speakers as described in
4.1 Switching on/off the
product
. The status LEDs (2) will ash steadily in blue.
•Start and control audio playback on the connected terminal device
accordingly.
Note
Please note that you cannot establish the
Bluetooth
®connection
described under 4.5 and 4.6 if an audio cable is connected.
4.5
Bluetooth
®pairing
Note
•Check whether your mobile device (MP3 player, mobile phone,
etc.) is
Bluetooth
®capable.
•If not, you can only use the speakers for playback using the
included audio cable.
•Note that the maximum range for
Bluetooth
®is 10 metres without
obstacles such as walls, people, etc.
•Make sure that your
Bluetooth
®-capable terminal device is on and
Bluetooth
®is activated.
•Make sure that the speakers are located within the
Bluetooth
®range
of max. 10 metres.
•Switch on the speakers as described in
4.1. Switching on the product
.
CThe speakers will search for a connection.
CAlternatively you can press and hold the function buttons (5) on both
speakers at the same time until the status LEDs (1) alternate red and
blue ashes.
•Press and hold the function button (5) on the individual speaker until
the status LED (1) alternates red and blue ashes.
•Open the
Bluetooth
®settings on your terminal device and wait until
Cones appears in the list of
Bluetooth
®devices found.
•Select Cones and wait until the speakers are listed as connected in
the
Bluetooth
®settings on your terminal device. An announcement
conrms that connection was successful.
CThe status LEDs (1) on both speakers will ash once in blue at regular
intervals.
•The status LED (1) on the individual speaker ashes once at regular
intervals.
Note – No connection possible
•If the speakers do not appear in the list of available devices,
quickly press the function button (5) twice in succession.
•A voice announcement plays and the speakers will search for a
connection to the terminal device.
Note –
Bluetooth
®password
Some terminal devices require a password in order to connect to
another
Bluetooth
®device.
•If your terminal device requests a password for connection to the
speakers, enter 0000.
Note
•The speakers always store the last eight terminal devices paired.
•The speakers will automatically connect to the last terminal device
paired when it is switched on the next time.
•The speakers will exit pairing mode if no
Bluetooth
®connection
is established within two minutes. To activate pairing mode again,
see the section Note – No connection possible.
4.6 Automatic
Bluetooth
®connection (after successful
pairing)
•Make sure that your
Bluetooth
®-capable terminal device is on and
Bluetooth
®is activated.
•Make sure that the speakers are located within the
Bluetooth
®range
of max. 10 metres.
•Switch on the speakers as described in section 4.5
Bluetooth
®pairing.
•An announcement conrms that connection was successful.
CThe status LEDs (1) on both speakers ash once in blue at regular
intervals.
•The status LED (1) on the individual speaker ashes once at regular
intervals.
Note – Connection impaired
•After the speaker and terminal device have been paired, a
connection is established automatically. If the
Bluetooth
®
connection is not established automatically, check the following:
•Check the
Bluetooth
®settings of your terminal device to see
whether Cones is connected. If not, repeat the steps listed under
Bluetooth
®pairing.
•Check whether your terminal device and the speaker are less than
10 metres apart. If not, move them closer together.
•Check whether obstacles are impairing the range. If so, move the
devices closer together.
•Check whether the audio cable is connected to the speaker. If
so, disconnect it.

4
4.7 Audio playback (via
Bluetooth
®)
•Start and control audio playback on the connected terminal device.
•Alternatively you can press the function button (5) to start or stop
audio playback.
4.8 Hands-free function
You can use the speakers as a hands-free set for your mobile phone. For
this function, the mobile phone must be connected to the speakers via
Bluetooth
®.
You can only control the hands-free function on the master.
•Press the function button (5) on the master to answer an incoming
call.
•During a call, press the function button (5) on the master once to
end the call.
•If you receive another incoming call during the call, press the function
button (5) on the master once to accept the incoming call and end
the current call.
Note – Call quality
To increase the call quality, make sure that you are near the speaker
with your mobile phone during the call.
5. Care and Maintenance
•Only clean this product with a slightly damp, lint-free cloth and do not
use aggressive cleaning agents.
•Make sure that water does not get into the product.
6. Warranty Disclaimer
Hama GmbH & Co KG assumes no liability and provides no warranty for
damage resulting from improper installation/mounting, improper use of
the product or from failure to observe the operating instructions and/
or safety notes.
7. Service and Support
Please contact Hama Product Consulting if you have any questions about
this product.
Hotline: +49 9091 502-115 (German/English)
Further support information can be found here: www.hama.com
8. Technical Data
Cones
Bluetooth
®stereo speaker
Bluetooth
®technology
Bluetooth
®v4.1
Supported proles A2DP V1.2, AVRCP V1.4
Frequency for
Bluetooth
®transfer 2.402 GHz ~ 2.480 GHz
Bluetooth
®transfer power Max. -6 ~ +4dBm
Range < 10 m
Maximum number of paired
devices 1
Output 2 x 5 W
Charging voltage Max. 5V 300 mA
Sound system Mono / True wireless Stereo
Impedance 4 Ω
Distortion (THD) ≤ 1%
Dimensions 107 x 107 x 60 mm
Weight 497 g
Connections
3.5 mm stereo plug
AUX input, Micro USB charging
function
Battery
Type 3.7 V lithium polymer: 500 mA
Charging time ~ 2.5 h
Operating time
Via
Bluetooth
®: ~ 6 h
Via AUX: ~ 7 h
(depending on volume and audio
content)
9. Recycling Information
Note on environmental protection:
After the implementation of the European Directive 2012/19/
EU and 2006/66/EU in the national legal system, the
following applies: Electric and electronic devices as well as
batteries must not be disposed of with household waste.
Consumers are obliged by law to return electrical and
electronic devices as well as batteries at the end of their service lives to
the public collecting points set up for this purpose or point of sale. Details
to this are dened by the national law of the respective country. This
symbol on the product, the instruction manual or the package indicates
that a product is subject to these regulations. By recycling, reusing the
materials or other forms of utilising old devices/batteries, you are making
an important contribution to protecting our environment.
12. Declaration of Conformity
Hereby, Hama GmbH & Co KG declares that the radio
equipment type [00173165, 00173166] is in compliance
with Directive 2014/53/EU. The full text of the EU declaration
of conformity is available at the following internet address:
www.hama.com /00173165/ Downloads,
www.hama.com /00173166/ Downloads.
Frequency band(s) 180 Hz – 20 kHz
Maximum radio-frequency
power transmitted 5mW EIRP

5
Bedienungselemente und Anzeigen
1. Status-LED
2. Mikrofon
3. AUX-IN-Eingang
4. Micro-USB-Anschluss (USB)
5. Funktionstaste
Vielen Dank, dass Sie sich für ein Hama Produkt entschieden haben!
Nehmen Sie sich Zeit und lesen Sie die folgenden Anweisungen und
Hinweise zunächst ganz durch. Bewahren Sie diese Bedienungsanleitung
anschließend an einem sicheren Ort auf, um bei Bedarf darin
nachschlagen zu können. Sollten Sie das Gerät veräußern, geben Sie
diese Bedienungsanleitung an den neuen Eigentümer weiter.
1. Erklärung von Warnsymbolen und Hinweisen
Warnung
Wird verwendet, um Sicherheitshinweise zu kennzeichnen oder um
Aufmerksamkeit auf besondere Gefahren und Risiken zu lenken.
Hinweis
Wird verwendet, um zusätzlich Informationen oder wichtige Hinweise
zu kennzeichnen.
2. Packungsinhalt
•
Bluetooth
®Stereo-Lautsprecher Cones
•Micro-USB Ladekabel
•3,5mm-Klinke Y-Audiokabel
•diese Bedienungsanleitung
3. Sicherheitshinweise
•Das Produkt ist für den privaten, nicht-gewerblichen
Haushaltsgebrauch vorgesehen.
•Betreiben Sie das Produkt nicht in unmittelbarer Nähe der Heizung,
anderer Hitzequellen oder in direkter Sonneneinstrahlung.
•Schützen Sie das Produkt vor Schmutz, Feuchtigkeit und Überhitzung
und verwenden Sie es nur in trockenen Umgebungen.
•Dieses Produkt gehört, wie alle elektrischen Produkte, nicht in
Kinderhände!
•Lassen Sie das Produkt nicht fallen und setzen Sie es keinen heftigen
Erschütterungen aus.
•Betreiben Sie das Produkt nicht außerhalb seiner in den technischen
Daten angegebenen Leistungsgrenzen.
•Benutzen Sie das Produkt nicht in Bereichen, in denen elektronische
Produkte nicht erlaubt sind.
•Nehmen Sie Rücksicht. Hohe Lautstärken können ihre Umgebung
stören oder beeinträchtigen.
•Öffnen Sie das Produkt nicht und betreiben Sie es bei Beschädigungen
nicht weiter.
•Der Akku ist fest eingebaut und kann nicht entfernt werden, entsorgen
Sie das Produkt als Ganzes gemäß den gesetzlichen Bestimmungen.
•Halten Sie Kinder unbedingt von dem Verpackungsmaterial fern, es
besteht Erstickungsgefahr.
•Entsorgen Sie das Verpackungsmaterial sofort gemäß den örtlich
gültigen Entsorgungsvorschriften.
•Nehmen Sie keine Veränderungen am Produkt vor. Dadurch verlieren
Sie jegliche Gewährleistungsansprüche.
4. Inbetriebnahme und Betrieb
Hinweis – Stereo/ Mono
•Diese Bedienungsanleitung bezieht sich immer auf die empfohlene
Verwendung beider Lautsprecher (Stereo).
•Möchten Sie nur einen Lautsprecher (Mono) verwenden,
überspringen Sie alle Anweisungen, die sich nur auf die
Verwendung beider Lautsprecher beziehen (gekennzeichnet
durch C).Die restlichen Anweisungen gelten entsprechend auch
für die Verwendung eines einzelnen Lautsprechers.
4.1 Einschalten
•Drücken und halten Sie die Funktionstaste (5) ca. 5 Sekunden, um
den Lautsprecher einzuschalten. Es ertönt eine Sprachinformation
und die Status-LED (1) beginnt immer zweimal kurz hintereinander
blau zu blinken.
•Halten Sie die Funktionstaste (5) weiter gedrückt, bis die
Sprachinformation "Pairing" die Verbindungsbereitschaft mit dem
anderen Lautsprecher signalisiert.
Hinweis – Master
•Derjenige Lautsprecher, der zuerst eingeschaltet wird, ist der
Master.
•Bei Verwendung eines einzelnen Lautsprechers ist dieser
automatisch der Master.
CDrücken und halten Sie die Funktionstaste (5) des zweiten
Lautsprechers ca. 5 Sekunden, um diesen ebenfalls einzuschalten.
Es ertönt eine Sprachinformation und die Status-LED (1) beginnt blau
zu blinken.
CHalten Sie die Funktionstaste (5) weiter gedrückt, bis die
Sprachinformation "Pairing" die Verbindungsbereitschaft mit dem
anderen Lautsprecher signalisiert.
CNach einer erfolgreichen Verbindung ertönt eine Sprachinformation.
Die Status-LED (1) beider Lautsprecher blinkt immer zweimal kurz
hintereinander blau auf.
Hinweis – Linker und rechter Lautsprecher
•Nach erfolgreicher Verbindung der beiden Lautsprecher teilen
Ihnen diese über eine Sprachinformation („left/right channel“) Ihre
ideale Position mit.
•Für einen optimierten Klang sollte der Lautsprecher, aus dem „left
channel“ ertönt, zu Ihrer Linken platziert werden. Den anderen
Lautsprecher stellen Sie zu Ihrer Rechten auf.
CDie beiden Lautsprecher können nun mit einem Endgerät verbunden
werden.
4.2 Ausschalten
•Drücken und halten Sie die Funktionstaste (5) ca. 3 Sekunden, um den
Lautsprecher auszuschalten. Es ertönt eine Sprachinformation und die
Status-LED (1) leuchtet kurz rot auf bevor sie erlischt.
CSind beide Lautsprecher erfolgreich miteinander verbunden, wird
durch Ausschalten eines Lautsprechers der andere automatisch auch
ausgeschaltet.
Hinweis – Automatisches Ausschalten
•Beachten Sie, dass sich die Lautsprecher nach 10 Minuten ohne
Aktion (keine Audiowiedergabe/ keine
Bluetooth
®Funktion)
abschalten. Es ertönt eine entsprechende Sprachinformation.
DBedienungsanleitung

6
4.3 Aufladen des Akkus
Warnung – Akku
•Verwenden Sie nur geeignete Ladegeräte mit USB Anschlüssen
zum Auaden.
•Verwenden Sie defekte Ladegeräte oder USB Anschlüsse generell
nicht mehr und versuchen Sie nicht, diese zu reparieren.
•Vermeiden Sie Lagerung, Laden und Benutzung bei extremen
Temperaturen.
•Laden Sie bei längerer Lagerung regelmäßig (mind. vierteljährig)
nach.
•Laden Sie vor dem ersten Gebrauch die Lautsprecher einmal
vollständig auf.
•Schließen Sie das mitgelieferte Micro-USB Ladekabel am Micro-USB
Anschluss (4) des Lautsprechers an.
•Schließen Sie den freien Stecker des Micro-USB Ladekabels an
einem geeigneten USB Ladegerät an. Beachten Sie hierzu die
Bedienungsanleitung des verwendeten USB Ladegeräts.
•Die Status-LEDs (1) leuchten während des Ladevorgangs dauerhaft rot.
•Sind die Akkus vollständig geladen, erlöschen die Status-LEDs (1).
Hinweis – Ladevorgang/ Akkukapazität
•Ein kompletter Ladevorgang dauert ca. 5-6 Stunden.
•Der Akku des Lautsprechers kann sowohl in ein- als auch
ausgeschaltetem Zustand geladen werden.
•Beträgt die Akkukapazität weniger als 10%, ertönt eine
Sprachinformation. Diese Information erhalten Sie nur bei
eingeschaltetem Lautsprecher.
•Abhängig vom verbundenen Endgerät (
Bluetooth
®) wird die
Akkukapazität der Lautsprecher auf diesem angezeigt.
•Die tatsächliche Akkulaufzeit variiert je nach Nutzung des Gerätes,
den Einstellungen und Umgebungsbedingungen (Akkus haben eine
begrenzte Lebensdauer).
4.4 Audiowiedergabe über das beiliegende Audiokabel
(3.5mm-Klinke)
•Stellen Sie sicher, dass die Lautsprecher ausgeschaltet sind.
•Stecken Sie das 3,5mm-Y-Audiokabel mit dem Hauptstecker (etwas
dicker) an Ihr Endgerät (MP3-Player, Smartphone, Computer, etc.) an.
•Stecken Sie die beiden anderen Stecker an die AUX-IN-Eingänge (3)
der Lautsprecher an.
•Stellen Sie die Lautstärke Ihres Endgerätes auf ein niedriges Niveau
ein.
•Schalten Sie die Lautsprecher - wie in
4.1. Einschalten
beschrieben –
ein. Die Status-LEDs (1) blinken gleichmäßig blau auf.
•Starten und steuern Sie die Audiowiedergabe entsprechend auf dem
angeschlossenen Endgerät.
Hinweis
Beachten Sie, dass das Einrichten einer der unter 4.5 und 4.6.
beschriebenen
Bluetooth
®Verbindung bei angestecktem Audiokabel
nicht möglich ist.
4.5
Bluetooth
®Erstverbindung (Pairing)
Hinweis
•Prüfen Sie, ob ihr mobiles Endgerät (MP3-Player, Mobiltelefon,
etc.)
Bluetooth
®fähig ist.
•W enn nicht, können Sie die Lautsprecher nur mittels des
beiliegenden Audiokabels zur Wiedergabe nutzen.
•Beachten Sie, dass die Reichweite von
Bluetooth
®max. 10 Meter
beträgt, ohne Hindernisse wie Wände, Personen etc.
•Stellen Sie sicher, dass Ihr
Bluetooth
®fähiges Endgerät eingeschaltet
ist und dass
Bluetooth
®aktiviert ist.
•Stellen Sie sicher, dass die Lautsprecher sich innerhalb der
Bluetooth
®
Reichweite von max. 10 Metern benden.
•Schalten Sie die Lautsprecher - wie in
4.1. Einschalten
beschrieben
– ein.
CDie Lautsprecher suchen nach einer Verbindung.
CAlternativ drücken und halten Sie die Funktionstaste (5) beider
Lautsprecher gleichzeitig, bis die Status-LEDs (1) abwechselnd blau
und rot blinken.
•Drücken und halten Sie die Funktionstaste (5) des einzelnen
Lautsprechers, bis die Status-LED (1) abwechselnd blau und rot blinkt.
•Öffnen Sie auf Ihrem Endgerät die
Bluetooth
®Einstellungen und
warten Sie, bis in der Liste der gefundenen
Bluetooth
®Geräte Cones
angezeigt wird.
•Wählen Sie Cones aus und warten Sie, bis die Lautsprecher als
verbunden in den
Bluetooth
®Einstellungen Ihres Endgerätes
angezeigt werden. Eine Sprachinformation bestätigt die erfolgreiche
Verbindung.
CDie Status-LED (1) beider Lautsprecher blinkt regelmäßig einmal
blau auf.
•Die Status-LED (1) des einzelnen Lautsprechers blinkt regelmäßig
einmal auf.
Hinweis – keine Verbindung möglich
•Drücken Sie zweimal kurz hintereinander die Funktionstaste (5),
falls die Lautsprecher nicht in der Liste der verfügbaren Geräte
auftauchen.
•Es ertönt eine Sprachinformation und die Lautsprecher suchen die
Verbindung zum Endgerät.
Hinweis –
Bluetooth
®Passwort
Manche Endgeräte benötigen für die Einrichtung der Verbindung mit
einem anderen
Bluetooth
®Gerät ein Passwort.
•Geben Sie für die Verbindung mit den Lautsprechern das Passwort
0000 ein, wenn Sie zur Eingabe von Ihrem Endgerät aufgefordert
werden.
Hinweis
•Die Lautsprecher speichern immer die acht zuletzt gekoppelten
Endgeräte.
•Die Lautsprecher verbinden sich beim nächsten Einschalten
automatisch mit dem zuletzt gekoppelten Endgerät.
•Wenn innerhalb von zwei Minuten keine
Bluetooth
®-Verbindung
hergestellt wird, beenden die Lautsprecher den Pairing-Modus.
Um diesen wieder zu aktivieren, beachten Sie Hinweis-keine
Verbindung möglich.
4.6 Automatische
Bluetooth
®Verbindung (nach
bereits erfolgtem Pairing)
•Stellen Sie sicher, dass Ihr
Bluetooth
®fähiges Endgerät eingeschaltet
ist und dass
Bluetooth
®aktiviert ist.
•Stellen Sie sicher, dass die Lautsprecher sich innerhalb der
Bluetooth
®
Reichweite von max. 10 Metern benden.
•Schalten Sie die Lautsprecher - wie in 4.5
Bluetooth
®Erstverbindung
(Pairing) beschrieben – ein.
•Eine Sprachinformation bestätigt die erfolgreiche Verbindung.
CDie Status-LED (1) beider Lautsprecher blinkt regelmäßig einmal
blau auf.
•Die Status-LED (1) des einzelnen Lautsprechers blinkt regelmäßig
einmal auf.

7
Hinweis – Verbindung beeinträchtigt
Nach einer erfolgreichen Erstverbindung von Lautsprechern und
Endgerät erfolgt die Verbindung automatisch. Sollte sich die
Bluetooth
®Verbindung nicht automatisch wiederherstellen, prüfen
Sie die folgenden Punkte:
•Kontrollieren Sie in den
Bluetooth
®Einstellungen des Endgerätes,
ob Cones verbunden ist. Wenn nicht, wiederholen Sie die unter
Bluetooth
®Erstverbindung genannten Schritte.
•Kontrollieren Sie, ob Endgerät und Lautsprecher weniger als 10
Meter voneinander entfernt sind. Wenn nicht, reduzieren Sie den
Abstand der Geräte.
•Kontrollieren Sie, ob Hindernisse die Reichweite beinträchtigen.
Wenn ja, positionieren Sie die Geräte näher zueinander.
•Kontrollieren Sie, ob das Audiokabel am Lautsprecher gesteckt ist.
Wenn ja, entfernen Sie es.
4.7 Audiowiedergabe (via
Bluetooth
®)
•Starten und steuern Sie die Audiowiedergabe entsprechend auf dem
verbundenen Endgerät.
•Alternativ drücken Sie die Funktionstaste (5), um die Audiowiedergabe
zu starten bzw. zu stoppen.
4.8 Freisprechfunktion
Es besteht die Möglichkeit, die Lautsprecher wie eine
Freisprecheinrichtung für Ihr Mobiltelefon zu verwenden. Das
Mobiltelefon muss für diese Funktion über
Bluetooth
®mit den
Lautsprechern verbunden sein.
Die Freisprechfunktion kann nur über den Master gesteuert werden.
•Drücken Sie einmal die Funktionstaste (5) des Masters, um einen
eingehenden Anruf anzunehmen.
•Drücken Sie während des Gesprächs einmal die Funktionstaste (5) des
Masters, um den Anruf zu beenden.
•Erreicht Sie während eines Gesprächs ein weiterer Anruf, drücken Sie
einmal die Funktionstaste (5) des Masters, um den eingehenden Anruf
anzunehmen und das aktuelle Gespräch zu beenden.
Hinweis – Gesprächsqualität
Achten Sie darauf, dass Sie sich mit Ihrem Mobiltelefon während
eines Anrufs in der Nähe der Lautsprecher benden, um die
Gesprächsqualität zu erhöhen.
5. Wartung und Pflege
•Reinigen Sie dieses Produkt nur mit einem fusselfreien, leicht feuchten
Tuch und verwenden Sie keine aggressiven Reiniger.
•Achten Sie darauf, dass kein Wasser in das Produkt eindringt.
6. Haftungsausschluss
Die Hama GmbH & Co KG übernimmt keinerlei Haftung oder
Gewährleistung für Schäden, die aus unsachgemäßer Installation,
Montage und unsachgemäßem Gebrauch des Produktes oder
einer Nichtbeachtung der Bedienungsanleitung und/oder der
Sicherheitshinweise resultieren.
7. Service und Support
Bitte wenden Sie sich bei Fragen zum Produkt gerne an die Hama-
Produktberatung.
Hotline: +49 9091 502-115 (Deu/Eng)
Weitere Supportinformationen nden sie hier: www.hama.com
8. Technische Daten
Bluetooth
®Stereo-Lautsprecher Cones
Bluetooth
®Technologie
Bluetooth
®v4.1
Unterstützte Prole A2DP V1.2, AVRCP V1.4
Frequenz für die
Bluetooth
®Übertragungen 2.402 GHz ~ 2.480 GHz
Bluetooth
®
Übertragungsleistung Max. -6 ~ +4dBm
Reichweite < 10 m
Max. gekoppelte Geräte 1
Leistung 2 x 5 W
Ladespannung Max. 5V 300 mA
Sound System Mono / True wireless Stereo
Impedanz 4 Ω
Verzerrung THD ≤ 1%
Maße 107 x 107 x 60 mm
Gewicht 497 g
Anschlüsse
3.5 mm Stereo Plug
AUX - Eingang, Micro USB
Ladefunktion
Akku
Typ3.7V Li-Polymer: 500mA
Auadezeit ~ 2.5 h
Laufzeit
Via
Bluetooth®
: ~ 6 h
Via AUX: ~ 7 h
(je nach Lautstärke und Audioinhalt)
9. Entsorgungshinweise
Hinweis zum Umweltschutz:
Ab dem Zeitpunkt der Umsetzung der europäischen
Richtlinien 2012/19/EU und 2006/66/EG in nationales Recht
gilt folgendes: Elektrische und elektronische Geräte sowie
Batterien dürfen nicht mit dem Hausmüll entsorgt werden.
Der Verbraucher ist gesetzlich verpichtet, elektrische und
elektronische Geräte sowie Batterien am Ende ihrer Lebensdauer an den
dafür eingerichteten, öffentlichen Sammelstellen oder an die
Verkaufsstelle zurückzugeben. Einzelheiten dazu regelt das jeweilige
Landesrecht. Das Symbol auf dem Produkt, der Gebrauchsanleitung oder
der Verpackung weist auf diese Bestimmungen hin. Mit der
Wiederverwertung, der stoichen Verwertung oder anderen Formen der
Verwertung von Altgeräten/Batterien leisten Sie einen wichtigen Beitrag
zum Schutz unserer Umwelt.
10. Konformitätserklärung
Hiermit erklärt die Hama GmbH & Co KG, dass der
Funkanlagentyp [00173165, 00173166] der Richtlinie
2014/53/EU entspricht. Der vollständige Text der
EU-Konformitätserklärung ist unter der folgenden Internetadresse
verfügbar:
www.hama.com /00173165/ Downloads
www.hama.com /00173166/ Downloads.
Frequenzband/Frequenzbänder 180 Hz – 20 kHz
Abgestrahlte maximale
Sendeleistung 5mW EIRP

8
Éléments de commande et d'affichage
1. LED d’état
2. Microphone
3. Entrée AUX-IN
4. Port micro USB (USB)
5. Touche de fonction
Nous vous remercions d’avoir choisi un produit Hama.
Veuillez prendre le temps de lire l‘ensemble des remarques et consignes
suivantes. Veuillez conserver ce mode d‘emploi à portée de main an
de pouvoir le consulter en cas de besoin. Transmettez-le au nouveau
propriétaire avec l’appareil le cas échéant.
1. Explication des symboles d‘avertissement et des
remarques
Avertissement
Ce symbole est utilisé pour indiquer des consignes de sécurité ou
pour attirer votre attention sur des dangers et risques particuliers.
Remarque
Ce symbole est utilisé pour indiquer des informations supplémentaires
ou des remarques importantes.
2. Contenu de l‘emballage
•Enceintes stéréo
Bluetooth
®Cones
•Câble de charge micro USB
•Câble audio jack mâle 3,5 mm en Y
•Ce mode d’emploi
3. Consignes de sécurité
•Ce produit est destiné à une installation domestique non commerciale.
•N’utilisez pas le produit à proximité immédiate d‘un chauffage,
d’autres sources de chaleur ou exposé aux rayons directs du soleil.
•Protégez le produit de toute saleté, humidité, surchauffe et utilisez-le
uniquement dans des locaux secs.
•Cet appareil, comme tout appareil électrique, doit être gardé hors de
portée des enfants !
•Protégez le produit des secousses violentes et évitez tout choc ou
toute chute.
•N‘utilisez pas le produit en dehors des limites de puissance indiquées
dans les caractéristiques techniques.
•N‘utilisez pas le produit dans les zones dans lesquelles l‘utilisation
d‘appareils électroniques est interdite.
•Montrez-vous respectueux des personnes dans votre environnement.
Un volume excessif est susceptible de déranger les personnes de votre
environnement ou de leur porter atteinte.
•Ne tentez pas d‘ouvrir le produit en cas de détérioration et cessez
de l’utiliser.
•La batterie est installée de façon permanente et ne peut pas être
retirée ; recyclez le produit en bloc conformément aux directives
légales.
•Tenez les emballages d‘appareils hors de portée des enfants, risque
d‘étouffement.
•Recyclez les matériaux d’emballage conformément aux prescriptions
locales en vigueur.
•N’apportez aucune modication à l’appareil. Des modications vous
feraient perdre vos droits de garantie.
4. Mise en service et fonctionnement
Remarque concernant l’utilisation en stéréo/mono
•Ce mode d’emploi se réfère toujours à l’utilisation conseillée des
deux enceintes (stéréo).
•Veuillez ignorer toutes les consignes portant sur l’utilisation des
deux enceintes (caractérisée par C) si vous souhaitez n’utiliser
qu’une seule enceinte (mono). Les autres consignes sont
applicables à l’utilisation d’une seule enceinte.
4.1 Mise sous tension
•Appuyez sur la touche de fonction (5) pendant env. 5 secondes an
de mettre l’enceinte sous tension. Un message vocal retentit et la LED
d’état (1) clignote brièvement deux fois en bleu.
•Maintenez la touche de fonction (5) enfoncée jusqu’à ce que le
message vocal “Couplage” (Pairing) vous indique que la connexion
peut être établie avec l’autre haut-parleur.
Remarque concernant l’enceinte maître
•L’enceinte mise sous tension en premier lieu est l’enceinte maître.
•En cas d’utilisation d’une seule enceinte, cette dernière est
automatiquement l’enceinte maître.
CMaintenez la touche de fonction (5) de la deuxième enceinte enfoncée
pendant env. 5 secondes an de la mettre également sous tension. Un
message vocal retentit et la LED d’état (1) se met à clignoter en bleu.
CMaintenez la touche de fonction (5) enfoncée jusqu’à ce que le
message vocal “Couplage” (Pairing) vous indique que la connexion
peut être établie avec l’autre haut-parleur.
CUn message vocal retentit dès l’établissement de la connexion. Les
LED d’état (1) des deux enceintes clignotent brièvement en bleu.
Remarque concernant l’enceinte gauche et l’enceinte
droite
•Une fois les deux enceintes connectées, ces dernières vous
indiquent la position idéale à adopter en émettant un message
vocal (« left/right channel »).
•Pour un rendu sonore optimisé, placez l’enceinte sur laquelle
vous entendez « left channel » à gauche. Placez l’autre enceinte
à droite.
CLes deux enceintes peuvent désormais être connectées à votre
appareil de lecture.
4.2 Mise hors tension
•Appuyez sur la touche de fonction (5) pendant env. 3 secondes an
de mettre l’enceinte hors tension. Un message vocal retentit et la LED
d’état (1) s’allume brièvement en rouge avant de s’éteindre.
CLa mise hors tension d’une enceinte, alors que les deux enceintes
sont connectés l’une à l’autre, mettra automatiquement la deuxième
enceinte hors tension.
Remarque concernant la mise hors tension
automatique
•Veuillez noter que les enceintes se mettent automatiquement
hors tension au bout de 10 minutes d'inactivité (aucune lecture /
aucune fonction
Bluetooth
®). Un message vocal retentit à ce
moment.
FMode d‘emploi

9
4.3 Charge de la batterie
Avertissement concernant la batterie
•Utilisez exclusivement un chargeur approprié disposant de ports
USB pour la recharge.
•Cessez d'utiliser tout chargeur ou tout port USB défectueux et ne
tentez pas de réparer ces derniers.
•Évitez d’entreposer, charger ou utiliser les batteries à des
températures extrêmes.
•Rechargez régulièrement le produit (au moins une fois par
trimestre) en cas de longue période d’entreposage.
•Veuillez charger entièrement les enceintes avant la première utilisation.
•Insérez la che micro USB du câble de charge dans la connexion micro
USB (4) des haut-parleurs.
•Insérez la che libre du câble de charge micro USB dans un chargeur
USB adapté. Veuillez, dans ce cas, également consulter le mode
d’emploi du chargeur USB utilisé.
•Les LED d’état (1) s’allument en rouge en permanence pendant la
charge.
•Les LED d’état s’éteignent (1) une fois les batteries entièrement
rechargées.
Remarque concernant le cycle de charge / la capacité
des batteries
•Un cycle de charge complet dure environ 5-6 heures.
•Il est possible de recharger la batterie d’une enceinte sous ou
hors tension.
•Un message vocal vous informe d’une capacité de la batterie
inférieure à 10 %. Vous n’entendrez ce message que si l’enceinte
est sous tension.
•En fonction de l’appareil (
Bluetooth
®) connecté, la capacité des
batteries des enceintes est achée sur celui-ci.
•La durée de fonctionnement réelle des batteries varie en fonction
de l’utilisation de l’appareil, des réglages et des conditions
environnementales (les batteries ont une durée de vie limitée).
4.4 Lecture audio via le câble audio fourni (câble jack
mâle 3,5 mm)
•Vériez que les enceintes soient bien hors tension.
•Insérez la che principale (un peu plus épaisse) du câble audio en Y
dans votre appareil (lecteur MP3, smartphone, ordinateur, etc.).
•Branchez les deux autres ches aux entrées AUX-IN (3) des enceintes.
•Réglez le volume de votre appareil à un niveau bas.
•Mettez les enceintes sous tension - comme décrit au paragraphe
4.1. Mise sous tension
. Les LED d’état (1) clignotent en bleu.
•Démarrez et pilotez la lecture audio sur l'appareil connecté.
Remarque
Notez qu'il n’est pas possible de congurer une des connexions
Bluetooth
®décrites aux paragraphes 4.5 et 4.6 lorsque le câble
audio est branché.
4.5 Première connexion
Bluetooth
®(couplage)
Remarque
•Veuillez vérier que votre appareil portable (lecteur MP3,
téléphone portable, etc.) est bien compatible avec
Bluetooth
®.
•Si tel n'est pas le cas, vous pourrez utiliser les enceintes
uniquement à l'aide du câble audio fourni.
•Veuillez noter que la portée maximale de la connexion
Bluetooth
®
est de 10 mètres sans obstacles tels que cloisons, personnes, etc.
•Assurez-vous que votre appareil
Bluetooth
®est bien sous tension et
que sa fonction
Bluetooth
®est bien activée.
•Assurez-vous que les enceintes sont placées dans un rayon n’excédant
pas la portée
Bluetooth
®maximale de 10 mètres.
•Mettez les enceintes sous tension - comme décrit au paragraphe
4.1. Mise sous tension.
CLes enceintes recherchent alors la connexion.
CAlternativement, appuyez simultanément sur les touches de fonction
(5) des deux enceintes et maintenez ces touches enfoncées jusqu’à ce
que les LED d’état (1) clignotent alternativement en bleu et rouge.
•Maintenez la touche de fonction (5) d’une enceinte enfoncée jusqu’à
ce que la LED d’état (1) clignote alternativement en bleu et rouge.
•Ouvrez les réglages
Bluetooth
®sur votre appareil de lecture, puis
patientez jusqu'à ce que l'appareil Cones apparaisse dans la liste des
appareils
Bluetooth
®détectés.
•Sélectionnez l'appareil Cones, puis patientez jusqu'à ce que les
enceintes apparaissent en tant que connectées dans les réglages
Bluetooth
®de votre appareil. Un message vocal conrme
l’établissement de la connexion.
CLes LED d’état (1) des deux enceintes clignotent brièvement en bleu.
•La LED d’état (1) d’une enceinte clignote brièvement.
Remarque concernant le message
« aucune connexion possible »
•Appuyez deux fois de suite sur la touche de fonction (5) si
les enceintes n’apparaissent pas dans la liste des appareils
disponibles.
•Un message vocal retentit et les enceintes cherchent à se
connecter à votre appareil de lecture.
Remarque concernant le mot de passe
Bluetooth
®
Certains appareils requièrent un mot de passe pour l'établissement de
la connexion avec un autre appareil
Bluetooth
®.
•Saisissez 0000 lors de la connexion avec les enceintes dans le cas
où votre appareil exige la saisie d'un mot de passe.
Remarque
•Les enceintes conservent les huit derniers appareils couplés en
mémoire.
•À la prochaine réactivation, les enceintes se connecteront
automatiquement à l’appareil couplé en dernier lieu.
•Les enceintes quitteront le mode de couplage si aucune connexion
Bluetooth
®n’est établie dans un délai de deux minutes. Pour
réactiver le mode de couplage, veuillez noter la remarque
concernant le message « aucune connexion possible ».
4.6 Connexion
Bluetooth
®automatique (après un
couplage conforme)
•Assurez-vous que votre appareil
Bluetooth
®est bien sous tension et
que sa fonction
Bluetooth
®est bien activée.
•Assurez-vous que les enceintes sont placées dans un rayon n’excédant
pas la portée
Bluetooth
®maximale de 10 mètres.
•Mettez les enceintes sous tension - comme décrit au paragraphe 4.5
Première connexion
Bluetooth
®(couplage).
•Un message vocal conrme l’établissement de la connexion.
CLes LED d’état (1) des deux enceintes clignotent brièvement en bleu.
•La LED d’état (1) d’une enceinte clignote brièvement.

10
Remarque concernant une mauvaise qualité de
connexion
Après une première connexion conforme entre les enceintes et votre
appareil, les connexions suivantes sont établies automatiquement.
Vériez les points suivants dans le cas où la connexion
Bluetooth
®ne
s’établit pas automatiquement :
•Vériez, dans les paramètres
Bluetooth
®de votre appareil, que le
produit Cones est bien connecté. Si tel n’est pas le cas, réitérez
les étapes décrites dans le paragraphe Première connexion
Bluetooth
®.
•Vériez que la distance entre votre appareil portable et les
enceintes ne dépasse pas 10 mètres. Le cas échéant, rapprochez
les appareils l’un de l’autre.
•Vériez la présence d’obstacles susceptibles de réduire la portée.
En présence d’obstacles, rapprochez les appareils l’un de l’autre.
•Vériez que le câble audio est bien raccordé à l’enceinte. Si tel est
le cas, débranchez-le.
4.7 Lecture audio (via
Bluetooth
®)
•Démarrez et pilotez la lecture audio sur l'appareil connecté.
•Alternativement, appuyez sur la touche de fonction (5) an de
démarrer ou arrêter la lecture audio.
4.8 Fonction mains-libres
Vous pouvez utiliser les enceintes comme kit mains-libres pour votre
téléphone mobile. Pour permettre cette fonction, votre téléphone mobile
doit être connecté aux enceintes via
Bluetooth
®.
La fonction mains-libres ne peut être pilotée que sur l’enceinte maître.
•Appuyez une fois sur la touche de fonction (5) de l’enceinte maître an
de répondre à un appel entrant.
•Pendant une conversation, appuyez une fois sur la touche de fonction
(5) de l’enceinte maître an de terminer un appel.
•En cas d’appel entrant pendant un appel en cours, appuyez une fois
sur la touche de fonction (5) de l’enceinte maître an de répondre à
l’appel entrant et terminer l’appel en cours.
Remarque concernant la qualité de la communication
Pendant un appel, veillez à rester avec votre téléphone portable à
proximité des enceintes an d'optimiser la qualité de la conversation.
5. Soins et entretien
•Nettoyez la balance uniquement à l’aide d’un chiffon non breux
légèrement humide ; évitez tout détergent agressif.
•Veillez à ce qu’aucun liquide ne pénètre dans le produit.
6. Exclusion de garantie
La société Hama GmbH & Co KG décline toute responsabilité en cas de
dommages provoqués par une installation, un montage ou une utilisation
non conformes du produit ou encore provoqués par un non respect des
consignes du mode d‘emploi et/ou des consignes de sécurité.
7. Service et assistance
En cas de question concernant le produit, veuillez vous adresser au
service de conseil produits de Hama.
Ligne téléphonique directe : +49 9091 502-115 (allemand/anglais)
Vous trouverez ici de plus amples informations concernant l‘assistance :
www.hama.com
8. Caractéristiques techniques
Enceintes stéréo
Bluetooth
®Cones
Technologie
Bluetooth
®
Bluetooth
®v4.1
Prols pris en charge A2DP V1.2, AVRCP V1.4
Fréquence pour les
transmissions
Bluetooth
®2.402 GHz ~ 2.480 GHz
Puissance de transmission
Bluetooth
®-6 ~ +4 dBm maxi
Portée < 10 m
Nombre maximal d’appareils
pouvant être couplés 1
Puissance 2 x 5 W
Tension de charge 5V 300 mA maxi
Système sonoreMono / Stéréo True wireless
Impédance 4 Ω
Distorsion THD ≤ 1%
Dimensions 107 x 107 x 60 mm
Poids 497 g
Branchements
Prise jack stéréo 3,5 mm
Entrée AUX, Micro USB fonction
de charge
Batterie
Type Li-polymère 3,7 V : 500 mA
Temps de recharge ~ 2.5 h
Autonomie
Via
Bluetooth
®: ~ 6 h
Via AUX : ~ 7 h
(en fonction du volume et du contenu
audio)
9. Consignes de recyclage
Remarques concernant la protection de l’environnement:
Conformément à la directive européenne 2012/19/EU et
2006/66/CE, et an d‘atteindre un certain nombre d‘objectifs
en matière de protection de l‘environnement, les règles
suivantes doivent être appliquées: Les appareils électriques
et électroniques ainsi que les batteries ne doivent pas être
éliminés avec les déchets ménagers. Le pictogramme “picto” présent sur
le produit, son manuel d‘utilisation ou son emballage indique que le
produit est soumis à cette réglementation. Le consommateur doit
retourner le produit/la batterie usager aux points de collecte prévus à cet
effet. Il peut aussi le remettre à un revendeur. En permettant enn le
recyclage des produits ainsi que les batteries, le consommateur
contribuera à la protection de notre environnement. C‘est un acte
écologique.
10. Déclaration de conformité
Le soussigné, Hama GmbH & Co KG, déclare que
l‘équipement radioélectrique du type [00173165, 00173166]
est conforme à la directive 2014/53/UE. Le texte complet de
la déclaration UE de conformité est disponible à l‘adresse internet
suivante:
www.hama.com /00173165/ Downloads
www.hama.com /00173166/ Downloads.
Bandes de fréquences 180 Hz – 20 kHz
Puissance de radiofréquence
maximale 5mW EIRP

11
Elementos de manejo e indicadores
1. LED de estado
2. Micrófono
3. Entrada AUX-IN
4. Puerto microUSB (USB)
5. Tecla de función
Le agradecemos que se haya decidido por un producto de Hama.
Tómese tiempo y léase primero las siguientes instrucciones e indicaciones.
Después, guarde estas instrucciones de manejo en un lugar seguro para
poder consultarlas cuando sea necesario. Si vende el aparato, entregue
estas instrucciones de manejo al nuevo propietario.
1. Explicación de los símbolos de aviso y de las
indicaciones
Aviso
Se utiliza para caracterizar las indicaciones de seguridad o para
llamar la atención sobre peligros y riesgos especiales.
Nota
Se utiliza para caracterizar informaciones adicionales o indicaciones
importantes.
2. Instrucciones de seguridad
•Altavoz estéreo
Bluetooth
®Cones
•Cable de carga microUSB
•Jack estéreo 3,5mm de cable de audio Y
•Estas instrucciones de manejo
3. Instrucciones de seguridad
•El producto es para el uso doméstico privado, no comercial.
•No opere el producto en las inmediaciones de la calefacción, de otras
fuentes de calor o bajo la radiación directa del sol.
•Proteja el producto de la suciedad, la humedad y el
sobrecalentamiento y utilícelo sólo en recintos secos.
•Este aparato, como todos los aparatos eléctricos, no debe estar en
manos de los niños.
•No deje caer el producto ni lo someta a sacudidas fuertes.
•No opere el producto fuera de los límites de potencia indicados en
los datos técnicos.
•No utilice el producto en áreas donde no se permitan aparatos
electrónicos.
•Tenga consideración con los demás. Los volúmenes altos pueden
molestar o afectar a su entorno.
•No abra el producto y no lo siga operando de presentar deterioros.
•La pila recargable está montada de forma ja y no se puede retirar,
deseche el producto como una unidad y en conformidad con los
reglamentos locales.
•Mantenga el material de embalaje fuera del alcance de los niños,
existe peligro de asxia.
•Deseche el material de embalaje en conformidad con las disposiciones
locales sobre el desecho vigentes.
•No realice cambios en el aparato. Esto conllevaría la pérdida de todos
los derechos de la garantía.
4. Puesta en marcha y funcionamiento
Nota – Estéreo / Mono
•Estas instrucciones de manejo se reeren siempre al uso
recomendado de ambos altavoces (estéreo).
•Si desea utilizar sólo un altavoz (Mono), ignore todas las
indicaciones que se reeren al uso de ambos altavoces
(caracterizadas con C). Las demás indicaciones tienen la validez
correspondiente también para el uso de un solo altavoz.
4.1 Encender
•Pulse y mantenga pulsada la tecla de función (5) durante aprox. 5
segundos para encender el altavoz. Se escucha una información verbal
y el LED de estado (1) empieza a parpadear brevemente dos veces de
forma consecutiva en azul.
•Siga manteniendo pulsada la tecla de función (5) hasta que la
información por voz "Pairing" (Vinculación) señalice la disponibilidad
de la conexión con el otro altavoz.
Nota – Maestro
•El altavoz que se enciende en primer lugar es el maestro.
•Cuando se utiliza un solo altavoz, éste es automáticamente el
maestro.
CPulse y mantenga pulsada la tecla de función (5) del segundo altavoz
durante aprox. 5 segundos para encenderlo también. Se escucha
una información verbal y el LED de estado (1) empieza a parpadear
en azul.
CSiga manteniendo pulsada la tecla de función (5) hasta que la
información por voz "Pairing" (Vinculación) señalice la disponibilidad
de la conexión con el otro altavoz.
CSi la conexión se realiza con éxito, se escucha una información verbal.
Los LEDs de estado (1) de ambos altavoces parpadean brevemente dos
veces de forma consecutiva en azul.
Nota – Altavoces izquierdo y derecho
•Cuando se ha establecido con éxito la conexión entre los dos
altavoces, éstos le indican mediante una información verbal («left/
right channel») cuál es la posición ideal.
•Para que el sonido sea óptimo, el altavoz del que sale la
información verbal «left channel» lo debe colocar a su izquierda. El
otro altavoz lo debe colocar a su derecha.
CAhora se pueden conectar los dos altavoces con un terminal.
4.2 Apagar
•Pulse y mantenga pulsada la tecla de función (5) durante aprox. 3
segundos para apagar el altavoz. Se escucha una información verbal y
el LED de estado (1) se ilumina brevemente en rojo antes de apagarse.
CSi los dos altavoces están correctamente conectados entre ellos, con
el apagado de un altavoz se apaga automáticamente el otro altavoz
también.
Nota – Apagado automático
•Tenga en cuenta que los altavoces se apagan automáticamente
pasados 10 minutos sin acción (sin reproducción de audio/sin
funcionamiento
Bluetooth
®). Se escucha la información verbal
correspondiente.
EInstrucciones de uso

12
4.3 Carga de la batería
Aviso – Batería
•Utilice sólo cargadores adecuados con puertos USB para la carga.
•No siga utilizando cargadores o puertos USB defectuosos y no
intente repararlos.
•Evite el almacenamiento, la carga y el uso en condiciones de
temperatura extrema.
•En caso de almacenamiento prolongado, cargue regularmente
(mín. trimestralmente).
•Antes de utilizar por primera vez los altavoces, cárguelos por completo.
•Conecte el cable de carga microUSB suministrado al puerto microUSB
(4) del altavoz.
•Conecte el conector libre del cable de carga microUSB a un cargador
USB adecuado. Para ello, tenga en cuenta las instrucciones de manejo
del cargador USB utilizado.
•Los LEDs de estado (1) lucen en rojo de manera continua durante el
proceso de carga.
•Cuando las baterías están completamente cargadas, se apagan los
LEDs de estado (1).
Nota – Proceso de carga / Capacidad de la batería
•Un proceso de carga completo dura aprox. 5-6 horas.
•La batería del altavoz puede cargarse estando éste tanto
encendido como apagado.
•Cuando la capacidad de la pila recargable descienda por debajo
del 10% escuchará una información verbal. Solo recibirá esta
información en caso de estar encendido el altavoz.
•Dependiendo del terminal conectado (
Bluetooth
®), se indica o no
la capacidad de la batería del altavoz en el terminal.
•La vida útil real de la batería varía en función de la utilización del
dispositivo, los ajustes y las condiciones ambientales (las baterías
tienen una vida útil limitada).
4.4 Reproducción de audio mediante el cable de audio
adjunto (jack de 3,5 mm)
•Asegúrese de que los altavoces están apagados.
•Enchufe el cable de audio Y de 3,5mm con el conector principal
(algo más grueso) en su terminal (reproductor MP3, smartphone,
ordenador, etc.).
•Enchufe los otros dos conectores en las entradas AUX-IN (3) de los
altavoces.
•Baje el volumen de su terminal.
•Encienda los altavoces como se indica en
4.1. Encender
.Los LEDs de
estado (1) parpadean regularmente en azul.
•Inicie y controle la reproducción de audio según corresponda en el
terminal conectado.
Nota
Tenga en cuenta que la conguración de una conexión
Bluetooth
®
tal y como se describe en los apartados 4.5 y 4.6 no es posible si se
ha conectado un cable de audio.
4.5 Conexión inicial
Bluetooth
®(sincronización)
Nota
•Compruebe que su terminal móvil (reproductor de MP3, teléfono
móvil, etc.) sea compatible con
Bluetooth
®.
•De no serlo, solo podrá utilizar los altavoces con el cable de audio
adjunto para la reproducción.
•Tenga en cuenta que el alcance de la tecnología
Bluetooth
®es de
máx. 10 metros, en ausencia de obstáculos, como pueden ser las
paredes, personas, etc.
•Asegúrese de que su terminal compatible con
Bluetooth
®está
encendido y de que se ha activado
Bluetooth
®.
•Asegúrese de que los altavoces se encuentran dentro del alcance
Bluetooth
®de máx. 10 metros.
•Encienda los altavoces como se indica en
4.1. Encender
.
CLos altavoces buscan una conexión.
CAlternativamente, pulse y mantenga pulsada la tecla de función (5)
de ambos altavoces al mismo tiempo hasta que los LEDs de estado (1)
parpadeen alternando azul y rojo.
•Pulse y mantenga pulsada la tecla de función (5) del altavoz hasta que
el LED de estado (1) parpadee alternando azul y rojo.
•En el terminal, abra la conguración
Bluetooth
®y espere hasta que se
muestre Cones en la lista de los dispositivos
Bluetooth
®encontrados.
•Seleccione Cones y espere hasta que el altavoz se muestre como
conectado en la conguración
Bluetooth
®de su terminal. Una
información verbal conrma que la conexión se ha establecido
correctamente.
CLos LEDs de estado (1) de ambos altavoces parpadean una vez
regularmente en azul.
•El LED de estado (1) del altavoz parpadea una vez regularmente.
Nota – No es posible establecer la conexión
•Pulse brevemente la tecla de función (5) dos veces consecutivas
en el caso de que los altavoces no se encuentren en la lista de
dispositivos encontrados.
•Se escucha una información verbal y los altavoces buscan la
conexión con el terminal.
Nota – Contraseña
Bluetooth
®
Algunos terminales requieren una contraseña para la conguración
de la conexión con otro dispositivo
Bluetooth
®.
•Introduzca la contraseña 0000 para la conexión con los altavoces
si el terminal lo requiriese.
Nota
•Los altavoces siempre almacenan los últimos ocho terminales
sincronizados.
•Con el siguiente encendido, los altavoces se conectan
automáticamente con el último terminal sincronizado.
•Si en el espacio de dos minutos no se establece ninguna conexión
Bluetooth
®, los altavoces nalizan el modo de sincronización. Para
activarlo de nuevo, observe la Nota – No es posible establecer
la conexión.
4.6 Conexión
Bluetooth
®automática (una vez
realizada la sincronización)
•Asegúrese de que su terminal compatible con
Bluetooth
®está
encendido y de que se ha activado
Bluetooth
®.
•Asegúrese de que los altavoces se encuentran dentro del alcance
Bluetooth
®de máx. 10 metros.
•Encienda los altavoces tal y como se describe en 4.5 Conexión inicial
Bluetooth
®(sincronización).
•Una información verbal conrma que la conexión se ha establecido
correctamente.
CLos LEDs de estado (1) de ambos altavoces parpadean una vez
regularmente.
•El LED de estado (1) del altavoz parpadea una vez regularmente.

13
Nota – Fallo en la conexión
La conexión se establece de forma automática tras el establecimiento
correcto de la conexión inicial entre los altavoces y el terminal.
De no establecerse la conexión
Bluetooth
®de forma automática,
compruebe los siguientes puntos:
•Compruebe, en la conguración
Bluetooth
®del terminal, si
Cones aparece como conectado. De lo contrario, repita los pasos
descritos en el apartado Conexión inicial
Bluetooth
®.
•Compruebe que el terminal y el altavoz se encuentren a una
distancia inferior a 10 metros el uno del otro. De lo contrario,
reduzca la separación entre los dispositivos.
•Verique la presencia de obstáculos que puedan afectar al
alcance. De haberlos, reduzca la separación entre los dispositivos.
•Compruebe si el cable de audio está conectado al altavoz. De
ser así, retírelo.
4.7 Reproducción de audio (vía
Bluetooth
®)
•Inicie y controle la reproducción de audio en el terminal conectado
como corresponda.
•Alternativamente, pulse la tecla de función (5) para iniciar o parar la
reproducción de audio.
4.8 Función de manos libres
Es posible utilizar los altavoces como dispositivo manos libres para
su teléfono móvil. Para ello es necesario que el teléfono móvil esté
conectado los altavoces mediante
Bluetooth
®.
La función de manos libres sólo se puede controlar con el maestro.
•Pulse una vez la tecla de función (5) del maestro para aceptar una
llamada entrante.
•Durante la conversación, pulse una vez la tecla de función (5) del
maestro para nalizar la llamada.
•Si durante una conversación llega otra llamada, pulse una vez la tecla
de función (5) del maestro para aceptar la llamada entrante y nalizar
la llamada actual.
Nota – Calidad de audio
Durante las llamadas, manténgase, junto con el teléfono móvil, cerca
de los altavoces, para aumentar la calidad de audio.
5. Mantenimiento y cuidado
•Limpie este producto sólo con un paño ligeramente humedecido que
no deje pelusas y no utilice detergentes agresivos.
•Asegúrese de que no entre agua en el producto.
6. Exclusión de responsabilidad
Hama GmbH & Co KG no se responsabiliza ni concede garantía por los
daños que surjan por una instalación, montaje o manejo incorrectos del
producto o por la no observación de las instrucciones de manejo y/o de
las instrucciones de seguridad.
7. Servicio y soporte
Si tiene que hacer alguna consulta sobre el producto, diríjase al
asesoramiento de productos Hama.
Línea directa: +49 9091 502-115 (Alemán/Inglés)
Encontrar más información de soporte aquí: www.hama.com
8. Datos técnicos
Altavoz estéreo
Bluetooth
®Cones
Tecnología
Bluetooth
®
Bluetooth
®v4.1
Perles soportados A2DP V1.2, AVRCP V1.4
Frecuencia para 2.402 GHz ~ 2.480 GHz
transmisiones
Bluetooth
®Máx. -6 ~ +4dBm
Potencia de transmisión
Bluetooth
®< 10 m
Alcance 1
Nº. máx. dispositivos
acoplables 2 x 5 W
Potencia Máx. 5V 300 mA
Tensión de carga Mono / True wireless Stereo
Sistema de audio 4 Ω
Impedancia ≤ 1%
Distorsión THD 107 x 107 x 60 mm
Dimensiones 497 g
Peso
Jack estéreo 3,5 mm
Entrada AUX, Micro USB para función
de carga
Batería
Tipo 3,7 V Polímero de litio 500mA
Tiempo de carga ~ 2,5 h
Tiempo de funcionamiento
Vía
Bluetooth
®: ~ 6 h
Vía AUX: ~ 7 h
(dependiendo del volumen y el
contenido de audio)
9. Instrucciones para desecho y reciclaje
Nota sobre la protección medioambiental:
Después de la puesta en marcha de la directiva Europea
2012/19/EU y 2006/66/EU en el sistema legislativo nacional,
se aplicara lo siguiente: Los aparatos eléctricos y
electrónicos, así como las baterías, no se deben evacuar en
la basura doméstica. El usuario está legalmente obligado a
llevar los aparatos eléctricos y electrónicos, así como pilas y pilas
recargables, al nal de su vida útil a los puntos de recogida comunales o
a devolverlos al lugar donde los adquirió. Los detalles quedaran denidos
por la ley de cada país. El símbolo en el producto, en las instrucciones de
uso o en el embalaje hace referencia a ello. Gracias al reciclaje, al
reciclaje del material o a otras formas de reciclaje de aparatos/pilas
usados, contribuye Usted de forma importante a la protección de nuestro
medio ambiente.
10. Declaración de conformidad
Por la presente, Hama GmbH & Co KG, declara que el tipo de
equipo radioeléctrico [00173165, 00173166] es conforme
con la Directiva 2014/53/UE. El texto completo de la
declaración UE de conformidad está disponible en la dirección Internet
siguiente:
www.hama.com /00173165/ Downloads
www.hama.com /00173166/ Downloads.
Banda o bandas de frecuencia 180 Hz – 20 kHz
Potencia máxima de radiofrecuencia 5mW EIRP

14
Elementi di comando e indicazioni
1. LED di stato
2. Microfono
3. Ingresso AUX-IN
4. Attacco micro USB (USB)
5. Tasto funzione
Grazie per avere acquistato un prodotto Hama!
Prima della messa in esercizio, leggete attentamente le seguenti istruzioni
e avvertenze, quindi conservatele in un luogo sicuro per una eventuale
consultazione. In caso di cessione dell‘apparecchio, consegnate anche le
presenti istruzioni al nuovo proprietario.
1. Spiegazione dei simboli di avvertimento e delle
indicazioni
Attenzione
Viene utilizzato per contrassegnare le indicazioni di sicurezza oppure
per rivolgere l‘attenzione verso particolari rischi e pericoli.
Avvertenza
Viene utilizzato per contrassegnare informazioni supplementari o
indicazioni importanti.
2. Contenuto della confezione
•Altoparlante stereo
Bluetooth
®Cones
•Cavo di carica micro USB
•Jack 3,5 mm cavo audio Y
•Queste istruzioni per l’uso
3. Indicazioni di sicurezza
•Il prodotto è concepito per l’uso domestico privato, non commerciale.
•Evitare di mettere in esercizio il prodotto in prossimità di
riscaldamento, altre fonti di calore o la luce diretta del sole.
•Proteggere il prodotto da sporcizia, umidità e surriscaldamento e
utilizzarlo solo in ambienti asciutti.
•Tenere questo apparecchio, come tutte le apparecchiature elettriche,
fuori dalla portata dei bambini!
•Non fare cadere il prodotto e non sottoporlo a forti scossoni!
•Non mettere in esercizio il prodotto al di fuori dei suoi limiti di
rendimento indicati nei dati tecnici.
•Non utilizzare il prodotto in zone in cui non sono ammesse le
apparecchiature elettroniche.
•Usare cautela. Il volume alto può disturbare o compromettere
l‘ambiente circostante.
•Non aprire il prodotto e non utilizzarlo più se danneggiato.
•L‘accumulatore è sso e non può essere rimosso, smaltirlo
conformemente alle normative locali vigenti.
•Tenere l’imballo fuori dalla portata dei bambini, pericolo di
soffocamento!
•Smaltire immediatamente il materiale d‘imballaggio attenendosi alle
prescrizioni locali vigenti.
•Non apportare modiche all’apparecchio per evitare di perdere i diritti
di garanzia.
4. Messa in esercizio e funzionamento
Nota - Stereo/Mono
•Queste istruzioni per l’uso di riferiscono sempre all’utilizzo
consigliato di entrambi gli altoparlanti (stereo).
•Se si desidera utilizzare solo un altoparlante (mono), saltare tutte
le istruzioni che si riferiscono all’uso di entrambi gli altoparlanti
(contrassegnati da C). Le istruzioni restanti valgono per l’utilizzo
di un singolo altoparlante.
4.1 Accensione
•Tenere premuto il tasto funzione (5) per ca. 5 secondi per accendere /
spegnere l’altoparlante. Viene emesso un messaggio vocale e il LED di
stato (1) blu inizia a lampeggiare due volte in rapida successione.
•Mantenere premuto il tasto funzione (F5) no a quando il segnale
vocale “Paring” indica la disponibilità al collegamento da parte
dell’altro altoparlante.
Nota - Master
•L’altoparlante che viene accesso prima diventa il master.
•Se si utilizza un solo altoparlante questo diventa automaticamente
il master.
CPremere per ca. 5 secondi il tasto funzione (5) del secondo
altoparlante per accenderlo. Viene emesso un messaggio vocale e il
LED di stato (1) blu inizia a lampeggiare.
CMantenere premuto il tasto funzione (F5) no a quando il segnale
vocale “Paring” indica la disponibilità al collegamento da parte
dell’altro altoparlante.
CDopo il corretto collegamento, viene emesso un segnale vocale. I LED
di stato (1) di entrambi gli altoparlanti blu lampeggiano sempre due
volte in rapida successione.
Nota - Altoparlante sinistro e destro
•Dopo il corretto collegamento di entrambi gli altoparlanti
assegnare loro la posizione ideale (“left/right channel”).
•Per una riproduzione acustica ideale, l’altoparlante del “left
channel” deve essere posizionato a sinistra. L’altro altoparlante
deve essere messo a destra.
CAdesso entrambi gli altoparlanti possono essere collegati ad un
terminale.
4.2 Spegnimento
•Tenere premuto il tasto funzione (5) per ca. 3 secondi per spegnere
l’altoparlante. Viene emesso un messaggio vocale e il LED di stato (1)
rosso si accende velocemente e poi si spegne.
CSe entrambi gli altoparlanti sono stati collegati correttamente tra di
loro, lo spegnimento di uno attiva anche lo spegnimento automatico
dell’altro.
Nota – Spegnimento automatico
•Prestare attenzione che l’altoparlante si spegne dopo 10 minuti
se non si effettua alcuna azione (nessuna riproduzione audio /
nessuna funzione
Bluetooth
®). Viene emesso un messaggio
vocale.
IIstruzioni per l‘uso

15
4.3 Carica della batteria
Avvertenza – Batteria
•Per la carica utilizzare esclusivamente caricabatterie idonei con
attacchi USB.
•Non utilizzare più caricabatterie o attacchi USB difettosi e non
cercare di ripararli.
•Evitare la conservazione, la carica e l’utilizzo a temperature
estreme.
•In caso di lungo inutilizzo, ricaricare regolarmente (almeno una
volta ogni tre mesi).
•Prima del primo utilizzo, caricare completamente l’altoparlante.
•Collegare il cavo di carica micro USB in dotazione all‘attacco micro
USB (4) dell‘altoparlante.
•Collegare la spina libera del cavo di carica micro USB a un
caricabatterie USB idoneo. Consultare le istruzioni per l’uso del
caricabatterie USB utilizzato.
•Durante il processo di carica, si accende il LED di stato (1) rosso.
•Quando la batteria è completamente carica, il LED di stato (1) si
spegnerà.
Nota – Processo di carica/Autonomia batteria
•Un processo di carica completo dura ca. 5-6 ore.
•La batteria dell’altoparlante si può caricare quando questo è
acceso o spento.
•Se l’autonomia della batteria è inferiore al 10%, viene emesso
un messaggio vocale. Questa informazione viene ricevuta solo se
l’altoparlante è acceso.
•A seconda del terminale collegato (
Bluetooth
®) viene visualizzata
l’autonomia della batteria dell’altoparlante.
•L’autonomia effettiva della batteria varia a seconda dell’utilizzo del
dispositivo, delle impostazioni e delle condizioni ambientali (le batterie
hanno una vita limitata).
4.4 Riproduzione audio mediante cavo audio in
dotazione (jack 3,5 mm)
•Accertarsi che l’altoparlante sia spento.
•Inserire il cavo audio Y da 3,5 mm con la spina principale (più grossa)
nel terminale (MP3-Player, smartphone, computer, ecc.).
•Inserire le altre due spine negli ingressi AUX-IN (3) dell’altoparlante.
•Regolare il volume del terminale su un livello basso.
•Accendere l’altoparlante come descritto in
4.1. Descrizione accensione
- On Il LED di stato (1) blu lampeggia ad intervalli regolari.
•Avviare e controllare la riproduzione audio sul terminale collegato.
Nota
Con il cavo audio collegato non è possibile creare una connessione
Bluetooth
®come descritta ai punti 4.5 e 4.6.
4.5 Prima connessione
Bluetooth
®(pairing)
Nota
•Vericare che il terminale mobile (lettore MP3, telefono cellulare
ecc.) sia compatibile
Bluetooth
®.
•In caso contrario, l’altoparlante può essere utilizzato per la
riproduzione soltanto mediante il cavo audio in dotazione.
•Ricordare che la portata massima del
Bluetooth
®è 10 metri
senza ostacoli, come per esempio possono essere le pareti e o
le persone.
•Accertarsi che il terminale compatibile
Bluetooth
®sia acceso e che il
Bluetooth
®sia attivato.
•Accertarsi che l’altoparlante si trovi entro la portata massima del
Bluetooth
®e cioè 10 metri.
•Accendere l’altoparlante come descritto in
4.1. Descrizione accensione
- On
CL’altoparlante cerca una connessione.
CIn alternativa premere continuamente il tasto funzione (5) di entrambi
gli altoparlanti no a che il LED di stato (1) inizia a lampeggiare in
successione blu e rosso.
•Premere continuamente il tasto funzione (5) di entrambi gli
altoparlanti no a che il LED di stato (1) inizia a lampeggiare in
successione blu e rosso.
•Aprire le impostazioni
Bluetooth
®sul terminale e attendere nché
nell'elenco degli apparecchi
Bluetooth
®trovati non venga visualizzato
Cones.
•Selezionare Cones e attendere nché l’altoparlante non viene
visualizzata come collegata nelle impostazioni
Bluetooth
®del
terminale. Un messaggio vocale conferma che la connessione è
avvenuta.
CI LED di stato (1) di entrambi gli altoparlanti blu lampeggiano
regolarmente.
•Il LED di stato (1) del singolo altoparlante lampeggia una volta.
Nota – Nessun collegamento possibile
•Premere brevemente due volte in successione il tasto funzione (5)
se l’altoparlante non è nell’elenco dei dispositivi disponibili.
•Viene emesso un messaggio vocale e l’altoparlante cerca il
collegamento con il terminale
Nota – Password
Bluetooth
®
Per stabilire la connessione con un altro apparecchio
Bluetooth
®
alcuni terminali richiedono una password.
•Per la connessione con gli altoparlanti immettere la password
0000, se viene richiesta dal proprio terminale.
Nota
•L’altoparlante memorizza sempre gli ultimi otto terminali
accoppiati.
•All’accensione successiva, l’altoparlante si collega
automaticamente all’ultimo terminale accoppiato.
•Se entro due minuti non avviene nessun collegamento
Bluetooth
®,l’altoparlante interrompe la modalità pairing. Per
riattivare questa modalità, fare attenzione alla nota nessun
collegamento possibile.
4.6 Collegamento automatico
Bluetooth
®(dopo aver
effettuato il pairing)
•Accertarsi che il terminale compatibile
Bluetooth
®sia acceso e che il
Bluetooth
®sia attivato.
•Accertarsi che l’altoparlante si trovi entro la portata massima del
Bluetooth
®e cioè 10 metri.
•Accendere l’altoparlante con indicato in 4.5 Prima connessione
Bluetooth
®(pairing).
•Un messaggio vocale conferma che la connessione è avvenuta.
CI LED di stato (1) di entrambi gli altoparlanti blu lampeggiano
regolarmente.
•Il LED di stato (1) del singolo altoparlante lampeggia una volta.

16
Nota – Connessione ostacolata
Dopo aver effettuato il primo collegamento tra l’altoparlante
e il terminale, la connessione avviene automaticamente. Se la
connessione
Bluetooth
®non dovesse ripristinarsi automaticamente,
vericare i seguenti punti:
•Nelle impostazioni
Bluetooth
®del terminale, controllare se Cones
è connesso. In caso contrario, ripetere i passaggi elencati al
paragrafo Prima connessione
Bluetooth
®.
•Controllare se il terminale e l’altoparlante distano meno di 10
metri. Diversamente ridurre la distanza degli apparecchi.
•Controllare se la portata è compromessa da ostacoli e in caso
affermativo posizionare gli apparecchi più vicini.
•Controllare se il cavo audio è inserito nell’altoparlante. Se sì,
scollegarlo.
4.7 Riproduzione audio (via
Bluetooth
®)
•Avviare la riproduzione audio sul terminale collegato.
•In alternativa premere il tasto funzione (5) per avviare o fermare la
riproduzione audio.
4.8 Funzione viva voce
L’altoparlante può essere utilizzato come viva voce per il proprio telefono
cellulare. Per questa funzione il telefono cellulare deve essere collegato
via
Bluetooth
®all'altoparlante.
La funzione viva voce può essere controllata tramite il master.
•Premere una volta il tasto funzione (5) del master per rispondere a una
chiamata in arrivo.
•Durante la conversazione, premere una volta il tasto funzione (5) del
master per concludere la chiamata.
•Se durante la conversazione arriva una seconda chiamata, premere
una volta il tasto funzione (5) del master per rispondere e concludere
invece la chiamata in corso.
Nota – Qualità della conversazione
Al ne di aumentare la qualità della conversazione, durante la
conversazione è necessario portarsi nelle vicinanze dell’altoparlante.
5. Cura e manutenzione
•Pulire il prodotto unicamente con un panno che non lascia pelucchi e
appena inumidito e non ricorrere a detergenti aggressivi.
•Fare attenzione a non fare penetrare acqua nel prodotto.
6. Esclusione di garanzia
Hama GmbH & Co KG non si assume alcuna responsabilità per i danni
derivati dal montaggio o l‘utilizzo scorretto del prodotto, nonché dalla
mancata osservanza delle istruzioni per l‘uso e/o delle indicazioni di
sicurezza.
7. Assistenza e supporto
In caso di domande sul prodotto, rivolgersi alla Consulenza prodotto Hama.
Hotline: +49 9091 502-115 (ted./ing.)
Ulteriori informazioni sul supporto sono disponibili qui: www.hama.com
8. Dati tecnici
Altoparlante stereo
Bluetooth
®Cones
Tecnologia Bluetooth
®
Bluetooth
®v4.1
Proli supportati A2DP V1.2, AVRCP V1.4
Frequenza per le 2.402 GHz ~ 2.480 GHz
trasmissioni Bluetooth
®Max. -6 ~ +4dBm
Potenza di trasmissione
Bluetooth
®< 10 m
Portata 1
N. max. dispositivi accoppiati 2 x 5 W
Potenza Max. 5V 300 mA
Tensione di carica Mono / True wireless Stereo
Sound System 4 Ω
Impedenza ≤ 1%
Distorsione THD 107 x 107 x 60 mm
Dimensioni 497 g
Peso
Jack stereo 3,5 mm
Ingresso AUX, Micro USB funzione
di carica
Batteria
Tipo 3.7V polimeri di litio 500mA
Tempo di carica ~ 2.5 h
Autonomia
Via
Bluetooth
®: ~ 6 h
Via AUX: ~ 7 h
(a seconda del volume e del contenuto
audio)
9. Indicazioni di smaltimento
Informazioni per protezione ambientale:
Dopo l’implementazione della Direttiva Europea 2012/19/EU
e 2006/66/EU nel sistema legale nazionale, ci sono le
seguenti applicazioni: Le apparecchiature elettriche ed
elettroniche e le batterie non devono essere smaltite con i
riuti domestici. I consumatori sono obbligati dalla legge a
restituire I dispositivi elettrici ed elettronici e le batterie alla ne della loro
vita utile ai punti di raccolta pubblici preposti per questo scopo o nei
punti vendita. Dettagli di quanto riportato sono deniti dalle leggi
nazionali di ogni stato. Questo simbolo sul prodotto, sul manuale
d’istruzioni o sull’imballo indicano che questo prodotto è soggetto a
queste regole. Riciclando, ri-utilizzando i materiali o utilizzando sotto
altra forma i vecchi prodotti/le batterie, darete un importante contributo
alla protezione dell’ambiente.
10. Dichiarazione di conformità
Il fabbricante, Hama GmbH & Co KG, dichiara che il tipo di
apparecchiatura radio [00173165, 00173166] è conforme
alla direttiva 2014/53/UE. Il testo completo della
dichiarazione di conformità UE è disponibile al seguente indirizzo
Internet:
www.hama.com /00173165/ Downloads
www.hama.com /00173166/ Downloads.
Bande di frequenza 180 Hz – 20 kHz
Massima potenza a radiofrequenza
trasmessa 5mW EIRP

17
Bedieningselementen en weergaven
1. Status-LED
2. Microfoon
3. AUX-IN-ingang
4. Micro-USB-aansluitpunt (USB)
5. Functietoets
Hartelijk dank dat u voor een product van Hama heeft gekozen.
Neem de tijd om de volgende aanwijzingen en instructies volledig door
te lezen. Berg deze gebruiksaanwijzing vervolgens op een goede plek
op zodat u hem als naslagwerk kunt gebruiken. Op zodat u hem als
naslagwerk kunt gebruiken. Mocht u het toestel verkopen, geeft u dan
ook deze gebruiksaanwijzing aan de nieuwe eigenaar.
1. Verklaring van waarschuwingssymbolen en
instructies
Waarschuwing
Wordt gebruikt voor veiligheidsinstructies of om de aandacht te
trekken op bijzondere gevaren en risico‘s.
Aanwijzing
Wordt gebruikt voor extra informatie of belangrijke informatie.
2. Inhoud van de verpakking
•
Bluetooth
®stereo-luidsprekers Cones
•Micro-USB-oplaadkabel
•Y-audiokabel stereostekker 3,5 mm
•deze bedieningsinstructies
3. Veiligheidsinstructies
•Het product is bedoeld voor niet-commercieel privegebruik in huiselijke
kring.
•Gebruik het product niet in de onmiddellijke nabijheid van een
verwarming of andere warmtebronnen en stel het niet bloot aan
directe zonnestralen.
•Bescherm het product tegen vuil, vocht en oververhitting en gebruik
het alleen in droge omgevingen.
•Elektrische apparaten dienen buiten het bereik van kinderen gehouden
te worden!
•Laat het product niet vallen en stel het niet bloot aan zware schokken
of stoten.
•Gebruik het product niet buiten de in de technische gegevens
vermelde vermogensgrenzen.
•Gebruik het product niet binnen omgevingen, waarin elektronische
apparatuur niet is toegestaan.
•Houd rekening met anderen. Grote geluidsvolumen kunnen uw
omgeving storen of benadelen.
•Open het product niet en gebruik het niet meer als het beschadigd is.
•De accu is vast ingebouwd en kan niet worden verwijderd, voer het
product derhalve als één geheel af overeenkomstig de wettelijke
voorschriften.
•Het verpakkingsmateriaal mag absoluut niet in handen van kinderen
komen; verstikkingsgevaar.
•Het verpakkingsmateriaal direct en overeenkomstig de lokaal geldende
afvoervoorschriften afvoeren.
•Verander niets aan het toestel. Daardoor vervalt elke aanspraak op
garantie.
4. Ingebruikneming en werking
Aanwijzing – stereo/ mono
•Deze bedieningsinstructies hebben altijd betrekking op het
aanbevolen gebruik van de beide luidsprekers (stereo).
•Wilt u slechts één luidspreker (mono) gebruiken, dan slaat u alle
aanwijzingen, die alleen betrekking hebben op de gebruikmaking
van de beide luidsprekers (gemarkeerd door C), over. De overige
aanwijzingen gelden ook voor de gebruikmaking van één enkele
luidspreker.
4.1 Inschakelen
•Houd de functietoets (5) ca. 5 seconden ingedrukt teneinde de
luidspreker in te schakelen. Er weerklinkt een gesproken informatie
en de status-LED (1) begint altijd met tweemaal kort opeenvolgend
blauw knipperen.
•Houdt u de functietoets (5) zolang ingedrukt totdat de gesproken
informatie "Pairing" de gereedmelding voor de verbinding met de
andere luidspreker signaleert.
Aanwijzing – Master
•De luidspreker die als eerste wordt ingeschakeld is de zgn. Master.
•Bij gebruikmaking van één luidspreker is deze automatisch de
„Master“.
CHoud de functietoets (5) van de tweede luidspreker ca. 5 seconden
ingedrukt teneinde ook deze in te schakelen. Er weerklinkt een
gesproken informatie en de status-LED (1) begint blauw te knipperen.
CHoudt u de functietoets (5) zolang ingedrukt totdat de gesproken
informatie "Pairing" de gereedmelding voor de verbinding met de
andere luidspreker signaleert.
CNa een succesvolle verbinding weerklinkt een gesproken informatie.
De status-LED (1) van beide luidsprekers begint altijd met tweemaal
kort opeenvolgend blauw knipperen.
Aanwijzing – luidsprekers links en rechts
•Na een succesvolle verbinding van de beide luidsprekers delen
zij via een gesproken informatie („left/right channel“) hun ideale
positie/stand mee.
•Ten behoeve van het meest ideale geluid dient de luidspreker,
waaruit het „left channel“ weerklinkt, links van u te worden
geplaatst. De andere luidspreker plaatst u aan uw rechter zijde.
CDe beide luidsprekers kunnen nu met een eindtoestel worden
verbonden.
4.2 Uitschakelen
•Houd de functietoets (5) ca. 3 seconden ingedrukt teneinde de
luidspreker uit te schakelen. Er weerklinkt een gesproken informatie en
de status-LED (1) brandt kort rood voordat zij uitgaat.
CIndien beide luidsprekers succesvol met elkaar zijn verbonden, wordt
door het uitschakelen van één luidspreker de andere automatisch
tevens uitgeschakeld.
Aanwijzing – automatisch uitschakelen
•Houd er rekening mee dat de luidsprekers zich na een periode
van 10 minuten zonder actief te zijn (geen audioweergave/ geen
Bluetooth
®-functie) uitschakelen. Er weerklinkt een desbetreffende
gesproken informatie.
NGebruiksaanwijzing

18
4.3 Opladen van de accu
Waarschuwing – accu
•Gebruik alleen geschikte laadapparatuur met USB-aansluitingen
voor het opladen.
•Gebruik defecte laadapparatuur of USB-aansluitpunten niet meer
en probeer ze niet te repareren.
•Opbergen, opladen en gebruik bij extreme temperaturen
vermijden.
•Indien de accu’s gedurende langere tijd worden opgeborgen,
dienen ze ten minste elke 3 maanden te worden opgeladen.
•Laad vóór het eerste gebruik de luidsprekers eenmaal volledig op.
•Sluit de meegeleverde Micro-USB-oplaadkabel op de Micro-USB-
aansluiting (4) van de luidspreker aan.
•Sluit de vrije stekker van de Micro-USB-oplaadkabel op een geschikt
USB-laadtoestel aan. Neem in dat geval de bedieningsinstructies van
het gebruikte USB-laadtoestel in acht.
•De status-LED‘s (1) branden tijdens het opladen continu rood.
•Zodra de accu‘s volledig zijn opgeladen, gaan de status-LED‘s (1) uit.
Aanwijzing – oplaadprocedure/accucapaciteit
•Het volledig opladen duurt ca. 5-6 uur.
•De accu van de luidspreker kan zowel in in- als uitgeschakelde
toestand worden opgeladen.
•Zodra de accucapaciteit minder dan 10% bedraagt, klinkt er een
gesproken informatie. Deze informatie ontvangt u alleen bij een
ingeschakelde luidspreker.
•Afhankelijk van het verbonden eindtoestel (
Bluetooth
®) wordt de
accucapaciteit van de luidsprekers daarop weergegeven.
•De daadwerkelijke gebruikstijd van de accu varieert afhankelijk van het
gebruik van het toestel, de instellingen en omgevingsomstandigheden
(accu‘s hebben een beperkte technische levensduur).
4.4 Audioweergave via de inbegrepen audiokabel
(stereostekker 3,5 mm)
•Controleer of de luidsprekers zijn uitgeschakeld.
•Sluit de Y-audiokabel 3,5 mm met de hoofdstekker (iets dikker) op uw
eindtoestel (MP3-speler, smartphone, computer, enz.) aan.
•Sluit de beide andere stekkers op de AUX-IN-ingangen (3) van de
luidsprekers aan.
•Stel het volume van uw eindtoestel op een laag niveau in.
•Schakel de luidsprekers in - zoals in
4.1. Inschakelen is beschreven
. De
status-LED‘s (1) knipperen nu gelijkmatig blauw.
•start en regel de audioweergave op het desbetreffende aangesloten
eindtoestel.
Aanwijzing
Let erop dat het tot stand brengen van een onder 4.5 en 4.6
beschreven
Bluetooth
®-verbinding bij een aangesloten audiokabel
niet mogelijk is.
4.5 De eerste maal een
Bluetooth
®-verbinding tot
stand brengen (pairing)
Aanwijzing
•Controleer of uw mobiele eindtoestel (MP3-speler, mobiele
telefoon, enz.) over een
Bluetooth
®-functie beschikt.
•Is dit niet het geval, dan kunt u de luidsprekers alleen via de
meegeleverde audiokabel voor de weergave gebruiken.
•Houd er rekening mee dat het bereik van
Bluetooth
®max. 10
meter bedraagt, zonder obstakels zoals muren, personen, enz.
•Controleer of uw eindtoestel met
Bluetooth
®-functie is ingeschakeld
en of deze functie is geactiveerd.
•Controleer of de luidsprekers zich binnen het
Bluetooth
®-bereik van
max. 10 meter bevinden.
•Schakel de luidsprekers in - zoals in
4.1. Inschakelen
is beschreven.
CDe luidsprekers zoeken naar een verbinding.
CAlternatief houdt u de functietoets (5) van beide luidsprekers
tegelijkertijd ingedrukt tot de status-LED‘s (1) afwisselend blauw en
rood knipperen.
•Houd de functietoets (5) van de afzonderlijke luidspreker ingedrukt tot
de status-LED (1) afwisselend blauw en rood knippert.
•Open op uw eindtoestel de
Bluetooth
®-instellingen en wacht tot
in de lijst van de gevonden
Bluetooth
®-apparatuur Cones wordt
weergegeven.
•Selecteer Cones en wacht tot de luidsprekers als zijnde „verbonden“ in
den
Bluetooth
®-instellingen van uw eindtoestel worden weergegeven.
Een gesproken informatie bevestigt de succesvolle verbinding.
CDe status-LED (1) van de beide luidsprekers knippert regelmatig
eenmaal blauw.
•De status-LED (1) van de afzonderlijke luidspreker knippert regelmatig
eenmaal.
Aanwijzing – geen verbinding mogelijk
•Druk tweemaal kort na elkaar de functietoets (5) in het geval
dat de luidsprekers niet in de lijst van beschikbare apparatuur
verschijnen.
•Er weerklinkt een gesproken informatie en de luidsprekers zoeken
naar de verbinding met het eindtoestel.
Aanwijzing –
Bluetooth
®-password
Sommige eindtoestellen hebben voor het tot stand brengen van de
verbinding met een ander
Bluetooth
®-toestel een password nodig.
•Voer voor de verbinding met de luidsprekers het password 0000
in, indien uw toestel de invoer van een password verlangt.
Aanwijzing
•De luidsprekers slaan altijd de laatste acht gekoppelde
eindtoestellen op.
•De luidsprekers verbinden zich bij het eerstvolgende inschakelen
automatisch met het als laatste gekoppelde eindtoestel.
•Indien er binnen twee minuten geen
Bluetooth
®-verbinding
tot stand wordt gebracht, beëindigen de luidsprekers de
pairing-modus. Hoe deze modus weer te activeren, leest u in de
aanwijzing „geen verbinding mogelijk“.
4.6 Automatische
Bluetooth
®-verbinding (na een reeds
uitgevoerde pairing/koppeling)
•Controleer of uw eindtoestel met
Bluetooth
®-functie is ingeschakeld
en of deze functie is geactiveerd.
•Controleer of de luidsprekers zich binnen het
Bluetooth
®-bereik van
max. 10 meter bevinden.
•Schakel de luidsprekers - zoals in 4.5
Bluetooth
®eerste maal
verbinden (pairing) is beschreven – in.
•Een gesproken informatie bevestigt de succesvolle verbinding.
CDe status-LED (1) van de beide luidsprekers knippert regelmatig
eenmaal blauw.
•De status-LED (1) van de afzonderlijke luidspreker knippert regelmatig
eenmaal.

19
Aanwijzing – verbinding stagneert
Nadat de eerste verbinding tussen de luidsprekers en uw toestel
succesvol tot stand is gebracht wordt de verbinding normaliter steeds
weer automatisch uitgevoerd. Indien de
Bluetooth
®-verbinding
echter niet wederom automatisch tot stand wordt gebracht, dienen
de hieronder vermelde punten te worden gecontroleerd:
•Controleer in de
Bluetooth
®-instellingen van het eindtoestel of
Cones is verbonden. Is dit niet het geval, dan herhaalt u de onder
"De eerste maal een
Bluetooth
®-verbinding tot stand brengen
(koppelen)“ vermelde stappen.
•Controleer of het toestel en de luidsprekers zich op minder dan
10 meter afstand van elkaar bevinden. Is dit niet het geval, dan
reduceert u de afstand tussen de toestellen.
•Controleer of hindernissen het bereik negatief beïnvloeden. Indien
dit het geval is, plaatst u de toestellen dichter bij elkaar.
•Controleer of de audiokabel op de luidspreker is aangesloten.
Indien dit het geval is, dient u de kabel te verwijderen.
4.7 Audioweergave (via
Bluetooth
®)
•Start en regel de audioweergave op het desbetreffende verbonden
eindtoestel.
•Alternatief drukt u op de functietoets (5) teneinde de audioweergave
te starten resp. te stoppen.
4.8 Handsfree-functie
De mogelijkheid is aanwezig om de luidsprekers als een handsfree-
voorziening voor uw mobiele telefoon te gebruiken. De mobiele telefoon
dient voor deze functie via
Bluetooth
®met de luidsprekers te zijn
verbonden.
De handsfree-functie kan alleen via de zgn. Master worden geregeld.
•Druk eenmaal op de functietoets (5) van de zgn. Master teneinde een
binnenkomend gesprek aan te nemen.
•Druk tijdens het gesprek eenmaal op de functietoets (5) teneinde het
gesprek te beëindigen.
•Indien er tijdens een gesprek nog een ander gesprek binnenkomt, dan
drukt u eenmaal op de functietoets (5) van de zgn. Master teneinde
het nieuwe binnenkomende gesprek aan te nemen en het actuele
gesprek te beëindigen.
Aanwijzing – gesprekskwaliteit
Let erop dat u met uw mobiele telefoon tijdens een telefoongesprek
in de buurt van de luidsprekers blijft teneinde de gesprekskwaliteit
te waarborgen.
5. Onderhoud en verzorging
•Reinig dit product uitsluitend met een pluisvrije, licht vochtige doek en
maak geen gebruik van agressieve reinigingsmiddelen.
•Let erop dat er geen water in het product binnendringt.
6. Uitsluiting van garantie en aansprakelijkheid
Hama GmbH & Co KG aanvaardt geen enkele aansprakelijkheid of
garantieclaims voor schade of gevolgschade, welke door ondeskundige
installatie, montage en ondeskundig gebruik van het product ontstaan of
het resultaat zijn van het niet in acht nemen van de bedieningsinstructies
en/of veiligheidsinstructies.
7. Service en support
Neem bij vragen over het product contact op met de afdeling
Productadvies van HAMA.
Hotline: +49 9091 502-115 (Duits/Engels)
Meer support-informatie vindt u hier: www.hama.com
8. Technische specificaties
Bluetooth
®stereo-luidsprekers Cones
Bluetooth
®technologie
Bluetooth
®v4.1
Ondersteunde proelen A2DP V1.2, AVRCP V1.4
Frequentie voor de
Bluetooth
®-overdracht 2.402 GHz ~ 2.480 GHz
Bluetooth
®zendvermogen Max. -6 ~ +4dBm
Bereik < 10 m
Max. gekoppelde toestellen 1
Vermogen 2 x 5 W
Oplaadspanning Max. 5V 300 mA
Soundsysteem Mono / True wireless Stereo
Impedantie 4 Ω
Vervorming THD ≤ 1%
Afmetingen 107 x 107 x 60 mm
Gewicht 497 g
Aansluitpunten
Stereostekker 3,5 mm
AUX - ingang, Micro USB
oplaadfunctie
Accu
Type 3.7V Li-Polymer: 500mA
Oplaadtijd ~ 2.5 h
Gebruikstijd
Via
Bluetooth
®: ~ 6 h
Via AUX: ~ 7 h
(afhankelijk van het volume en de
audio-inhoud)
9. Aanwijzingen over de afvalverwerking
Notitie aangaande de bescherming van het milieu:
Ten gevolge van de invoering van de Europese Richtlijn
2012/19/EU en 2006/66/EU in het nationaal juridisch system,
is het volgende van toepassing: Elektrische en elektronische
apparatuur, zoals batterijen mag niet met het huisvuil
weggegooid worden. Consumenten zijn wettelijk verplicht
om electrische en elctronische apparaten zoals batterijen op het einde
van gebruik in te dienen bij openbare verzamelplaatsen speciaal opgezet
voor dit doeleinde of bij een verkooppunt. Verdere specicaties
aangaande dit onderwerp zijn omschreven door de nationale wet van het
betreffende land. Dit symbool op het product, de gebruiksaanwijzing of
de verpakking duidt erop dat het product onderworpen is aan deze
richtlijnen. Door te recycleren, hergebruiken van materialen of andere
vormen van hergebruiken van oude toestellen/batterijen, levert u een
grote bijdrage aan de bescherming van het mileu.
10. Conformiteitsverklaring
Hierbij verklaar ik, Hama GmbH & Co KG, dat het type
radioapparatuur [00173165, 00173166] conform is met
Richtlijn 2014/53/EU. De volledige tekst van de
EU-conformiteitsverklaring kan worden geraadpleegd op het volgende
internetadres:
www.hama.com /00173165/ Downloads
www.hama.com /00173166/ Downloads.
Frequentieband(en) 180 Hz – 20 kHz
Maximaal radiofrequent vermogen 5mW EIRP
This manual suits for next models
1
Table of contents
Languages:
Other Hama Speakers manuals

Hama
Hama 00173160 User manual

Hama
Hama Soldier-S User manual

Hama
Hama Soundcup-L User manual

Hama
Hama Rocket User manual

Hama
Hama SIRIUM1000ABT User manual

Hama
Hama 00054843 User manual

Hama
Hama 11063 User manual

Hama
Hama Gentleman-S User manual

Hama
Hama 124517 User manual

Hama
Hama Traveler 00076037 User manual