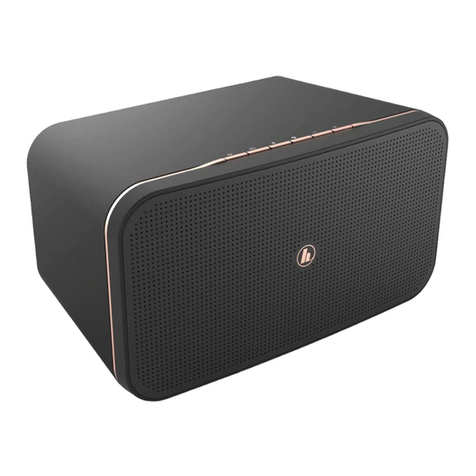
Hama SIRIUM2000AMBT User manual

F
D
GB
E
Quick Guide
Kurzanleitung
Notice d’utilisation
Instrucciones breves
Краткое руководство
Istruzioni brevi
Beknopte bedieningsinstructies
Σύντομες οδηγίες
Krótka instrukcja obsługi
Rövid útmutató
Stručný návod
Stručný návod
Instruções resumidas
Kısa kullanımkılavuzu
Instrucțiuni scurte
Snabbguide
Lyhyt ohje
Kort vejledning
Kortveiledning
RUS
PL
P
I
H
TR
FIN
NL
CZ
RO
DK
GR
SK
S
N
"SIRIUM2000AMBT/SIRIUM2100AMBT"
Smart Speaker/Smart-Speaker
00054881
00054886
(SIRIUM2000AMBT)
00054882
00054887
(SIRIUM2100AMBT)
QUICK GUIDE
KURZANLEITUNG

23456
A
B
C
2
1
3
1
4 5 6
OPT IN IN OUT
AUX USB
Playback
SET UP
DC IN
18V 1.6A
1
7
2

5
6
7
8
1
3
911
12 14
15 17
18
2
10
13
16
4
D
BASS –
VOL +
VOL –
BASS +
EQ 1EQ2
Line-INBluetooth
Optical

Further information and features areavailable on/
WeitereInformationen und Features nden Sie hier
www.hama.com -> 00054881
www.hama.com -> 00054886
Streaming
Streaming
WiStream (DLNA compatible)
WiStream (DLNA-kompatibel)
ü
UPNP
ü
Alexa Voice Service
Alexa Voice Service
Voice Control
Sprachsteuerung
ü
Number of Microphones
Anzahl der Mikrofone 3
Microphone Array
Mikrofon-Array Far-Field
Connectivity
Konnektivität
WiFi (Standard); (Encryption, WPS)
WiFi (Standard); (Verschlüsselung, WPS)
Dual Band 2.4GHz (b/g/n) &
5GHz (a/c) MiMo 1x1 WiFi
Bluetooth (Standard) 4.1 LowEnergy (BLE)
USB Playback &Update
Digital Optical IN
ü
AUX-IN
ü
Line-Out
ü
Speaker
Lautsprecher
2x Mid-Woofer 3" (7.62cm)
2x Tweeter 20mm
Amplier Class
Amplier-Klasse Class D(TAS5754)
Standards &Decoders
Standards &Decoder
Max. Audio Resolution (Hi-Res)
Max. Tonauösung (Hi-Res) 192 kHz /24bit
Supported Hi-Res Audio Codecs
Unterstützte Hi-Res Audio Codecs FLAC, ALAC
Online Update Forced /Manual Update
Other Details and Specication
AndereDetails und Spezikationen
Remote
Fernbedienung Hama SRC-1805 Layout B
Batteries
Batterien 2x AAA
Wall Mount Possibility
Möglichkeit zur Wandaufhängung
ü
Dimensions (W xHxD)
Größe (B xHxT) 27 cm x14.5 cm x16.5 cm
Weight
Gewicht 2.2 kg
Equalizer /DSP
Equalizer /DSP
Proles
Prole 2(Standard&My Equalizer)
00054881/00054886 SIRIUM2000AMBT
Technical Data/Technische Daten

Further information and features areavailable on/
WeitereInformationen und Features nden Sie hier
www.hama.com -> 00054882
www.hama.com -> 00054887
00054882/00054887 SIRIUM2100AMBT
Technical Data/Technische Daten
Streaming
Streaming
WiStream (DLNA compatible)
WiStream (DLNA-kompatibel)
ü
UPNP
ü
Alexa Voice Service
Alexa Voice Service
Voice Control
Sprachsteuerung
ü
Number of Microphones
Anzahl der Mikrofone 3
Microphone Array
Mikrofon-Array Far-Field
Connectivity
Konnektivität
WiFi (Standard); (Encryption, WPS)
WiFi (Standard); (Verschlüsselung, WPS)
Dual Band 2.4GHz (b/g/n) &
5GHz (a/c) MiMo 1x1 WiFi
Bluetooth (Standard) 4.1 LowEnergy (BLE)
USB Playback &Update
Digital Optical IN
ü
AUX-IN
ü
Line-Out
ü
Speaker
Lautsprecher
2x Mid-Woofer 4" (10.16cm)
2x Tweeter 20mm
1x Sub-Woofer 4" (10.16cm)
Amplier Class
Amplier-Klasse Class D(TAS5754)
Standards &Decoders
Standards &Decoder
Max. Audio Resolution (Hi-Res)
Max. Tonauösung (Hi-Res) 192 kHz /24bit
Supported Hi-Res Audio Codecs
Unterstützte Hi-Res Audio Codecs FLAC, ALAC
Online Update Forced /Manual Update
Other Details and Specication
AndereDetails und Spezikationen
Remote
Fernbedienung Hama SRC-1805 Layout B
Batteries
Batterien 2x AAA
Wall Mount Possibility
Möglichkeit zur Wandaufhängung
ü
Dimensions (W xHxD)
Größe (B xHxT) 36.5 cm x21.5 cm x17.5 cm
Weight
Gewicht 5.0 kg
Equalizer /DSP
Equalizer /DSP
Proles
Prole 2(Standard&My Equalizer)

Behaviour of the LED indicator
Indicator LED Behaviour Description
System indicator Flashes orange
The system is starting and searching for a
network connection. Wait until the LEDs light up
solid and the network connection has been established.
Network
indicator
Lights up soild green The WLAN connection has been established.
LED 1-3slowly ashes red,
LED 5slowly ashes green
WIFI is disconnected. Initial setup can be carried out via
the Hama Smart Audio App.
LED 1-3quickly ashes red,
LED 5quickly ashes green
WIFI is disconnected.
WPS mode is active.
Amazon Alexa
voice assistant
Alternating quick
ashes of blue and cyan
Alexa is processing and responding to avoice
command. No further voice commands can be given.
Lights up solid red Mute mode is active. All microphones aremuted. Alexa
does not respond to the activation word.
Flashes red Thereisnoconnection with the Amazon server.Alexa is
unable to accept voice commands.
Audio source
indicator
Pulses blue The loudspeaker is in Bluetooth mode. Thereisno
connection with amobile device.
Flashes blue The loudspeaker is in Bluetooth pairing mode. The rst
connection can be established with amobile device.
Lights up solid blue The loudspeaker is in Bluetooth mode. Aconnection has
been successfully established with amobile device.
Lights up solid purple The loudspeaker is in optical mode. Aterminal device
can be connected via the digital input.
Lights up solid orange The loudspeaker is in USB mode. An external storage
medium can be connected.
Lights up solid cyan
The loudspeaker is in AUX mode. Aterminal device can
be connected via the analogue input. Audio les can be
played back via AUX In.
Volume indicator
Lights up white for 3s
Volume 20%
Lights up white for 3s
Volume 40%
Lights up white for 3s
Volume 60%
Lights up white for 3s
Volume 80%
Lights up white for 3s
Volume 100%
(If the volume is
muted in this mode,
the LED ashes in the
relevant colour)

Verhalten der LED-Anzeige
Indikator LED Verhalten Beschreibung
System Indikator blinkt gelb
Das System startet und sucht nach einer
Netzwerkverbindung. Warten Sie, bis die LEDs durchgehend
leuchten und die Netzwerkverbindung hergestellt wurde.
Netzwerk
Indikator pulsiert weiß
Der Lautsprecher bendet sich im Setup Mode. Die
Ersteinrichtung kann über die Hama Smart Audio App
durchgeführt werden.
Sprachassistent
Amazon Alexa
blinkt abwechselnd
schnell blau und cyan
Alexa verarbeitet und reagiert auf einen Sprachbefehl. Es
können keine weiteren Sprachbefehle erteilt werden.
leuchtet dauerhaft rot Der Mute Modus ist aktiviert. Alle Mikrophone sind stumm
geschaltet. Alexa reagiert nicht auf das Aktivierungswort.
blinkt rot Es besteht keine Verbindung zum Amazon Server.Alexa
nimmt keine Sprachbefehle entgegen.
Indikator
Audioquelle
pulsiert blau Der Lautsprecher bendet sich im Bluetooth Modus. Es
besteht keine Verbindung zu einem mobilen Endgerät.
blinkt blau
Der Lautsprecher bendet sich im Bluetooth Pairing Modus.
Die erstmalige Verbindung zu einem mobilen Endgerät kann
hergestellt werden.
leuchtet dauerhaft blau
Der Lautsprecher bendet sich im Bluetooth Modus. Eine
Verbindung zu einem mobilen Endgerät wurde erfolgreich
hergestellt.
leuchtet dauerhaft lila Der Lautsprecher bendet sich im Optischen Modus. Musik
kann abgespielt werden.
leuchtet dauerhaft
orange
Der Lautsprecher bendet sich im USB-Modus. Musik kann
abgespielt werden.
leuchtet dauerhaft grün Der Lautsprecher bendet sich im AUX-Modus. Musik kann
abgespielt werden.
Lautstärke
Indikator
leuchtet weiß für 10s
Lautstärke 20%
leuchtet weiß für 10s
Lautstärke 40%
leuchtet weiß für 10s
Lautstärke 60%
leuchtet weiß für 10s
Lautstärke 80%
leuchtet weiß für 10s
Lautstärke 100%
Verhalten der LED-Anzeige
Indikator LED Verhalten Beschreibung
System Indikator blinkt orange
Das System startet und sucht nach einer
Netzwerkverbindung. Warten Sie, bis die LEDs durchgehend
leuchten und die Netzwerkverbindung hergestellt wurde.
Netzwerk
Indikator
leuchtet dauerhaft
grün Die WLAN Verbindung wurde erfolgreich hergestellt.
LED 1-3blinkt langsam rot,
LED 5blinkt langsam grün
Es besteht keine Verbindung zum Netzwerk. Die
Ersteinrichtung kann über die Hama Smart Audio App
durchgeführt werden.
LED 1-3blinkt schnell rot,
LED 5blinkt schnell grün
Es besteht keine Verbindung zum Netzwerk.
Der WPS Modus ist aktiv.
Sprachassistent
Amazon Alexa
blinkt abwechselnd
schnell blau und cyan
Alexa verarbeitet und reagiert auf einen Sprachbefehl. Es
können keine weiteren Sprachbefehle erteilt werden.
leuchtet dauerhaft rot Der Mute Modus ist aktiviert. Alle Mikrophone sind stumm
geschaltet. Alexa reagiert nicht auf das Aktivierungswort.
blinkt rot Es besteht keine Verbindung zum Amazon Server.Alexa
nimmt keine Sprachbefehle entgegen.
Indikator
Audioquelle
pulsiert blau Der Lautsprecher bendet sich im Bluetooth Modus. Es
besteht keine Verbindung zu einem mobilen Endgerät.
blinkt blau
Der Lautsprecher bendet sich im Bluetooth Pairing Modus.
Die erstmalige Verbindung zu einem mobilen Endgerät kann
hergestellt werden.
leuchtet dauerhaft blau
Der Lautsprecher bendet sich im Bluetooth Modus. Eine
Verbindung zu einem mobilen Endgerät wurde erfolgreich
hergestellt.
leuchtet dauerhaft lila
Der Lautsprecher bendet sich im Optischen Modus. Ein
Endgerät kann über den digitalen Eingang angeschlossen
werden
leuchtet dauerhaft
orange
Der Lautsprecher bendet sich im USB-Modus. Ein externes
Speichermedium kann angeschlossen werden.
leuchtet dauerhaft cyan
Der Lautsprecher bendet sich im AUX-Modus. Ein Endgerät
kann über den analagen Eingang angeschlossen werden.
Audiodateien können über AUX In wiedergegeben werden.
Lautstärke
Indikator
leuchtet weiß für 3s
Lautstärke 20%
leuchtet weiß für 3s
Lautstärke 40%
leuchtet weiß für 3s
Lautstärke 60%
leuchtet weiß für 3s
Lautstärke 80%
leuchtet weiß für 3s
Lautstärke 100%
(wirddie Lautstärke in
diesem Modus stumm
geschaltet, blinkt die
LED in der jeweiligen
Farbe)

2
GQuick Guide
Controls and Displays
A. Loudspeaker control panel
1. [POWER] BUTTON
2. [SOURCE] BUTTON
3. [MICROPHONE MUTE] BUTTON
4. [ACTION] BUTTON
5. [VOLUME] -BUTTON
6. [VOLUME] +BUTTON
B. Front
1. Status LED 1-5
2. Status LED update
C. Back
1. Thread for wall bracket
2. [SETUP] button
3. Optical-in socket
4. AUX-in socket
5. AUX-out socket
6. USB (playback &update)
7. Mains power supply
D. Remote control
1. Power
2. Mute loudspeaker
3. Action
4. Mute microphone
5. Bass +
6. Bass –
7. Vol+
8. Vol–
9. EQ1 (standard)
10. No function
11. EQ2 (MyEQ)
12. Optical-IN
13. Bluetooth
14. Line-IN
15. Previous
16. Play /Pause
17. Next
18. Pairing
!
Important note -Quick Guide:
•This is aquick guide to provide you withthe
most importantbasic information, such as safety
warnings andhow to getstarted usingthe
product.
•Forthe sake of protecting the environmentand
saving valuable resources, Hama dispenseswitha
printedinstruction manual and providesthisonly
in the form of aPDF le availablefor download.
•Thecomplete instruction manual is available
at:
www.hama.com->00054881 -> Downloads
www.hama.com->00054882 -> Downloads
www.hama.com->00054886 -> Downloads
www.hama.com->00054887 -> Downloads
•Save the instructionmanual to your computer’s
hard drivefor future reference, or print it out if
necessary.
1.Explanation of Warning Symbols and Notes
Risk of electric shock
This symbol indicates product parts energized with a
dangerous voltage of sucient magnitude to constitute
arisk of electric shock.
Warning
This symbol is used to indicate safety instructions or to
draw your attention to specichazards and risks.
Note
This symbol is used to indicate additional information or
important notes.
2.Package Contents
•“SIRIUM2000AMBT/SIRIUM2100AMBT" Hama Smart
speaker
•Power supply unit
•SRC-1805-Layout Bremote control
•2xAAA batteries
•Quick reference guide

3
3.Safety Notes
•The product is intended for indoor use only.
•The product is intended for private, non-commercial use
only.
•Protect the product from dirt, moistureand overheating
and use it in dry rooms only.
•As with all electrical devices, this device should be kept
out of the reach of children.
•Do not drop the product and do not expose it to any
major shocks.
•Do not operate the product outside the power limits
given in the specications.
•Keep the packaging material out of the reach of children
due to the risk of suffocation.
•Dispose of packaging material immediately according to
locally applicable regulations.
•Do not modify the device in any way.Doing so voids the
warranty.
Risk of electric shock
•Do not open the device or continue to operate it if it
becomes damaged.
•Do not use the product if the AC adapter,adapter
cable or power cable is damaged.
•Do not attempt to service or repair the device yourself.
Leave any service work to qualied experts.
Warning –Batteries:
•When inserting batteries, note the correct polarity (+
and -markings) and insert the batteries accordingly.
Failuretodosocould result in the batteries leaking or
exploding.
•Do not allow children to change batteries without
supervision.
•Do not mix old and new batteries or batteries of a
different type or make.
•Remove the batteries from products that arenot being
used for an extended period
•Do not short-circuit batteries.
•Do not charge batteries.
•Do not throw batteries in a re.
•Keep batteries out of the reach of children.
•Immediately remove and dispose of dead batteries
from the product.
4.Getting started
Preparing the remote control for use
Open the cover on the battery compartment. This can
be found on the back of the remote control and can be
opened by sliding in the direction indicated. The extent
of delivery includes two AAA batteries which must be
inserted into the battery compartment for the remote
control to work. When inserting the batteries, ensurethat
they areinserted with the correct polarity.The relevant
polarity (+ /-)ismarked inside the battery compartment.
Warning
•Connect the product only to asocket that has been
approved for the device. The socket must be installed
close to the product and must be easily accessible.
•Disconnect the product from the power supply using
the on/off switch –ifthis is not available, unplug the
power cordfromthe socket.
•When using amult-socket power strip, make surethat
the sum power draw of all the connected devices does
not exceed its maximum throughput rating.
•If you will not be using the product for along period
of time, disconnect it from mains power.
Turning on the product
•Connect the mains lead on the loudspeaker to aproperly
installed socket.
•The loudspeaker switches on automatically.
Note –Turningonfor the rst time
•When rst switched on, the loudspeaker is in "Device
setup" mode and the status LEDs (1-5) pulse.
•If setup mode is not active, brieypress the [SETUP]
button (2) on the back of the device to activate WPS
mode (ashes rapidly). Alternatively,press and hold
the [SETUP] button (2) for around 7seconds to open
an AccessPoint (ashes slowly).
•At the next switch-on, allofthe status LEDs (1-5) ash
orange until the connections made so far have been
restored. Depending on the Internet signal strength,
this may take up to 20 seconds.
Switching on /off /standby
•Press [POWER] (1) to switch on the loudspeaker.
Alternatively,press [POWER] (1) on the remote control.
•Press [POWER] (1) again on the device or the remote
control to switch the loudspeaker off.(Standby)
4
Note
•To switch the loudspeaker off completely,disconnect it
from the power supply.
Volume adjustment /mute
•Press [VOLUME -/+] to reduce /increase the volume.
•Press [ ](2) on the remote control to mute the
loudspeaker.
•Press [ ](2) again to reset the volume to the level
beforeitwas muted.
5.Setting up the loudspeaker
Note
•To be able to use the product’sfull range of functions,
you must additionally download the Amazon Alexa
app and create an Amazon account. Forthis purpose,
follow the instructions in the Amazon Alexa app.
Further information can be found at www.amazon.
co.uk
5.1Downloading the Hama Smart Audio app
Note
The following operating systems aresupported:
•iOS 8orhigher
•Android 4.4.2 or higher
•Open the iTunes App StoreorGoogle Play Storeonyour
smartphone.
•Use the search term "Hama Smart Audio".
•Download the app in the usual way and install it on your
smartphone. To do this, follow the instructions on your
smartphone.
5.2First-time setup of the device with the Hama
Smart Audio app (ALEXA function)
Note –WLAN (wireless network)
•Ensurethat the router is switched on, is functioning
correctly and that thereisaconnection to the internet.
•Activate the WLAN function of your router.
•Followyour router´s operating instructions as regards
the correct functioning of the WLAN connection.
•Ensurethat the loudspeaker is in WLAN pairing mode.
The status LEDs (1-5) ash.
•Ensurethat the Hama Smart Audio App is installed
on your smartphone and that all updates have been
installed.
•Open the Hama Smart Audio app and touch
[CONFIGURE].
•Then touch [Add MoreSpeakers].
•Open your smartphone's WLAN settings by touching
[OPEN Settings].
•In your smartphone's WLAN settings, search for
the Hama SIRIUM2000AMBT/SIRIUM2100AMBT
loudspeaker.
Note
•The loudspeaker generates its own WLAN network
bearing the name SIRIUMSetup and the rst six digits
of the MACaddress. (e.g. SIRIUMSetup_E69EBB) This
WLAN does not requireapassword.
•Connect your smartphone with the loudspeaker.
•Now return to the Hama Smart Audio App on your
smartphone.
•Select the required WLAN name (SSID) with which you
wish to connect the loudspeaker.
•Now also enter your network key if necessary and
conrm with [Save].
•Conrm the selected settings by touching [CONFIRM].
•The loudspeaker now connects to the network. After
successful conguration, "Loudspeaker congured
successfully" appears on the smartphone.
•The LEDs go out after afew seconds.
Note
•With iOS, the App may need to be closed and
restarted. Then follow the two steps below.
•The sound bar that has been set up should now appear
in the main menu. Press on the loudspeaker icon.
•Tap[Sources]atthe bottom edge of the screen to
establish aconnection with your Amazon account.
•Then touch the [Amazon Alexa]button.
•Touch [Sign in with Amazon] to open the web browser to
enter your access details.
Note
•If the Amazon Shopping App has already been installed
and set up on your smartphone, the following steps
areskipped.
•Using your smartphone's keypad, enter the access
details for your Amazon account and conrm your
entries with Login.
•Alternatively,tap [Create new Amazon account]
to create anew Amazon account.
•Following successful login, you will return to the Hama
Smart Audio app.
•Now choose the language to which Alexa is to respond
in future.

5
•Open the Amazon Alexa App and if necessary re-enter
your access details. Youshould then nd the loudspeaker
in your active devices.
•Then adjust your personalised settings (time zone,
device name, etc.) in the Amazon Alexa app. Further
information on this can be found at www.amazon.com
-> Help and Customer Service.
Note
•If the Amazon Market App has already been installed
and set up on your smartphone, some smartphones
will take the user data directly from the App.
•To set up anew Amazon account, log out and repeat
the steps described in this section.
Note Alexa Push to talk/ Function Key
•Brieypress the [Action] button (4)onthe loudspeaker
to activate Alexa during audio modeorhigher volume.
Alternatively,press the [Action] button (3) on the
remote control.
•Press the [Microphone Mute] button (3) to switch the
microphone off.Ifthe microphones aredeactivated,
the status LEDs (1-5) light up solid red. Alternatively,
press the [Microphone Mute] button (4) on the remote
control.
•The loudspeaker will now no longer respond to the
activation worduntil the microphones arereactivated.
•Press the [Microphone Mute] button (3) again to
reactivate the microphone. Alternatively,press the
[Microphone Mute] button (4) on the remote control.
The status LEDs (1-5) go out.
6.Bluetooth pairing
Youcan pair your terminal device with the speaker via
Bluetooth and use the speaker as aplayback device for
audio signals. Playback is controlled directly via the device
or the remote control. The volume can also be controlled
directly on the speaker.
Note –
Bluetooth
®
•Check whether your mobile device (smartphone,
tablet, etc.) is
Bluetooth
®-capable.
•Note that the maximum range for
Bluetooth
®is
10 metreswithout obstacles such as walls, people,etc.
•The
Bluetooth
®connection may be disrupted by other
Bluetooth
®devices/connections in the vicinity.
•It is only possible to connect the speaker to one
terminal device.
•Note that compatibility depends on the supported
Bluetooth
®proles as well as the
Bluetooth
®versions
being used. (See Technical specications, operating
instructions of the terminal device in use)
•Ensurethat your Bluetooth-enabled device is switched
on and that Bluetooth is activated.
•Activate Bluetooth mode by repeatedly pressing the
[SOURCE] button (2) on the loudspeaker.
•Alternatively,press [Bluetooth] (13) on the remote
control.
•The Bluetooth status LED (4) starts to pulse blue.
•Press and hold the [SOURCE] button (2) for around
2seconds to activate pairing mode. The Bluetooth status
LED (4) starts to ash blue and asignal tone sounds.
•Open the Bluetooth settings on your terminal device and
wait until Hama SIRIUM2000AMBT/SIRIUM2100AMBT
appears in the list of Bluetooth devices found.
•If necessary,start searching for Bluetooth devices on
your terminal device.
•Select the Hama SIRIUM2000AMBT/SIRIUM2100AMBT
speaker in the list of available devices and wait until the
speaker is shown as connected in the Bluetooth settings
on your terminal device.
•The Bluetooth status LED (4) is now constantly lit blue.
•Start and control the audio playback accordingly via the
device or remote control.
Note –Bluetooth®password
•Some terminal devices requireapasswordinorder to
connect to another
Bluetooth
®device.
•If your terminal device requests apasswordfor
connection to the speaker,enter 0000.

6
7.Connection via Optical-IN
The loudspeaker's digital audio input allows you to
connect your device (e.g. TV) and play its audio signal via
the loudspeaker.
Note
•Switch the loudspeaker off beforeconnecting adevice
to it.
•Beforeconnection, remove the safety caps from both
ends of the optical signal cable.
•Do not bend or crush the cable.
•Forplayback via the optical audio connection, connect
an optical signal cable to the optical audio input on the
loudspeaker and to the optical audio output on your
device, and then select Optical mode.
•Press and hold [POWER] (1) for approximately 3seconds
to switch on the loudspeaker.
•Activate Optical mode by repeatedly pressing the
[SOURCE] button (2) on the loudspeaker.
•The Optical status LED (4) lights up purple when Optical
mode is active.
•Alternatively,press [Optical IN] (12) on the remote
control.
8.Connection via Auxiliary In /Auxiliary Out
Youcan connect mobile devices (such as smartphones,
tablet PCs, MP3 players, etc.) and older analogue
sources (CD/DVD player,etc.) to the loudspeaker via the
analogue audio input and play their audio signal via the
loudspeaker.Here, you have the option to connect via a
3.5 mm audio cable (jack cable).
Further loudspeakers can be connected via the analogue
audio output (5), via which the audio signal is also played.
Note
•Switch the loudspeaker off beforeconnecting adevice
to it.
•Do not bend or crush the cable.
•Forplayback via the AUX-In socket, connect your device
via the AUX-In socket (4) using a3.5 mm audio cable
(jack cable) to the loudspeaker and select AUX mode.
•Forplayback via the AUX-Out socket, connect further
loudspeakers /anamplier,for example, via the AUX-
Out socket (5) using a3.5 mm audio cable (jack cable)
to the loudspeaker and select AUX mode.
•Press [POWER] (1) to switch on the loudspeaker.
•Activate AUX mode by repeatedly pressing the [SOURCE]
button (2) on the loudspeaker.
•The status LED (4) lights up cyan when AUX mode has
been selected.
•Start and control audio playback accordingly via the
connected device.
•Alternatively,press [LINE IN] (14) on the remote control.
9.Factory reset
To reset the loudspeaker to the factory default settings
(delivery condition), proceed as follows:
•Press and hold the [SETUP] (2) and [Action] (4) buttons
for around 6seconds to reset the loudspeaker to the
factory default settings.
•Once the loudspeaker has been reset, it restarts.
Note
•Resetting to the factory default settings can solve
some problems and malfunctions.
•However,all settings made previously,such as
equaliser presets, favourites and network proles,
arepermanently deleted.
10.Care and Maintenance
•Only clean this product with aslightly damp, lint-free
cloth and do not use aggressive cleaning agents.
•If you do not use the product for along time, turn off
the device and disconnect it from the power supply.
Storeitinaclean, dry place out of direct sunlight.
11.Warranty Disclaimer
Hama GmbH &Co. KG assumes no liability and provides
no warranty for damage resulting from improper
installation/mounting, improper use of the product or from
failuretoobserve the operating instructions and/or safety
notes.
12.Service and Support
Please contact Hama Product Consulting if you have any
questions about this product.
Hotline: +49 9091 502-115 (German/English)
Further support information can be found here:
www.hama.com
The complete instruction manual is available at:
www.hama.com->00054881->Downloads
www.hama.com->00054882->Downloads
www.hama.com->00054886->Downloads
www.hama.com->00054887->Downloads

7
13.Declaration of Conformity
Hereby,Hama GmbH &CoKGdeclares that the
radio equipment type [00054881, 00054882,
00054886, 00054887] is in compliance with
Directive 2014/53/EU.The full text of the EU declaration of
conformity is available at the following internet address:
www.hama.com->00054881, 00054882, 00054886,
00054887->Downloads.
Frequency band(s)
Bluetooth:2.402 GHz -2.480 GHz
WiFi: 2.402GHz –2.480GHz
WiFi: 2.412GHz –2.483GHz
WiFi: 5.150GHz –5.350GHz
WiFi: 5.470GHz –5.725GHz
Maximum radio-frequency
power transmitted
Bluetooth:4dBm (EIRP)
WiFi: 2.4 GHz /19.5 dBm (EIRP)
WiFi: 5GHz /16.5dBm (EIRP)
Restrictions or Requirements in
Belgium, Bulgaria, Czech Republic, Denmark, Germany,
Estonia, Ireland, Greece, Spain, France, Croatia, Italy,
Cyprus, Latvia, Lithuania, Luxembourg, Hungary,Malta,
the Netherlands, Austria, Poland, Portugal, Romania,
Slovenia, Slovakia, Finland, Sweden, United Kingdom
Note
If channels 36–64 (frequency 5.150–5.350 GHz) are
used in a5-GHz WLAN, the product may only be used in
closed rooms.

8
DSchnellstartanleitung
Bedienungselemente und Anzeigen
A. Bedienfeld Lautsprecher
1. [POWER]-Taste
2. [SOURCE]-Taste
3. [MIKROPHON-Mute]-Taste
4. [AKTION]-Taste
5. [VOLUME] -Taste
6. [VOLUME] +Taste
B. Frontseite
1. Status-LED 1-5
2. Status LED Update
C. Rückseite
1. Gewinde für Wandhalterung
2. [SETUP]-Taste
3. Optical-In Buchse
4. AUX-In Buchse
5. AUX-Out Buchse
6. USB (Playback &Update)
7. Netzzuleitung
D. Fernbedienung
1. Power
2. Lautsprecher Mute
3. Aktion
4. Mikrophon Mute
5. Bass +
6. Bass –
7. Vol+
8. Vol–
9. EQ1 (Standard)
10. ohne Funktion
11. EQ2 (MyEQ)
12. Optical IN
13. Bluetooth
14. Line-IN
15. Previous
16. Play /Pause
17. Next
18. Pairing
!
Wichtiger Hinweis -Kurzanleitung:
•Dies ist eine Kurzanleitung, dieSie mit
denwichtigsten Basis-Informationen wie
Sicherheitshinweisenund der Inbetriebnahme
IhresProduktes versorgt.
•Aus Gründen des Umweltschutzes und der
Einsparungwertvoller Rohstoffe verzichtet die
Firma Hama aufeinegedruckte Langanleitung
undbietetdiese ausschließlich als PDF-Download
an.
•Die vollständige Langanleitung ist unterder
folgenden Internetadresse verfügbar:
www.hama.com->00054881 -> Downloads
www.hama.com->00054882 -> Downloads
www.hama.com->00054886 -> Downloads
www.hama.com->00054887 -> Downloads
•SpeichernSie dieLanganleitung zum
Nachschlagen auf Ihrem Computerund drucken
Sie diese nachMöglichkeitaus.
1.Erklärung von Warnsymbolen und Hinweisen
Gefahr eines elektrischen Schlages
Dieses Symbol weist auf eine Berührungsgefahr mit nicht
isolierten Teilen des Produktes hin, die möglicherweise
eine gefährliche Spannung von solcher Höhe führen,
dass die Gefahr eines elektrischen Schlags besteht.
Warnung
Wirdverwendet, um Sicherheitshinweise zu
kennzeichnen oder um Aufmerksamkeit auf besondere
Gefahren und Risiken zu lenken.
Hinweis
Wirdverwendet, um zusätzlich Informationen oder
wichtige Hinweise zu kennzeichnen.
2.Packungsinhalt
•Hama Smart Speaker „SIRIUM2000AMBT/
SIRIUM2100AMBT“
•Netzteil
•Fernbedienung SRC-1805-Layout B
•2x Batterien AAA
•Schnellstartanleitung

9
3.Sicherheitshinweise
•Das Produkt ist nur für den Gebrauch innerhalb von
Gebäuden vorgesehen.
•Das Produkt ist für den privaten, nicht-gewerblichen
Haushaltsgebrauch vorgesehen.
•Schützen Siedas Produkt vorSchmutz, Feuchtigkeitund
Überhitzung undverwenden Sieesnur in trockenen Räumen.
Dieses Produkt gehört, wie alle elektrischen Produkte,
nicht in Kinderhände!
•Lassen Sie das Produkt nicht fallen und setzen Sie es
keinen heftigen Erschütterungen aus.
•Betreiben Sie das Produkt nicht außerhalbseiner in den
technischen Daten angegebenen Leistungsgrenzen.
•Halten Sie Kinder unbedingt von dem
Verpackungsmaterial fern, es besteht Erstickungsgefahr.
•Entsorgen Sie das Verpackungsmaterial sofort gemäß
den örtlich gültigen Entsorgungsvorschriften.
•Nehmen Sie keine Veränderungen am Gerät vor.Dadurch
verlieren sie jegliche Gewährleistungsansprüche.
Gefahr eines elektrischen Schlages
•Öffnen Sie das Produkt nicht und betreiben Sie es bei
Beschädigungen nicht weiter.
•Verwenden Sie das Produkt nicht, wenn der
AC-Adapter,das Adapterkabel oder die Netzleitung
beschädigt sind.
•Versuchen Sie nicht, das Produkt selbst zu warten oder
zu reparieren. Überlassen Sie jegliche Wartungs-arbeit
dem zuständigen Fachpersonal.
Warnung -Batterien
•Beachten Sie unbedingt diekorrekte Polarität
(Beschriftung+und -) derBatterien undlegen Sie diese
entsprechend ein. Bei Nichtbeachtung besteht die Gefahr
desAuslaufensodereiner Explosion derBatterien.
•Gestatten SieKindern nicht ohne Aufsichtdas Wechseln
vonBatterien.
•MischenSie alte undneue Batterien nicht,sowie
Batterienunterschiedlichen Typs oder Herstellers.
•Entfernen SieBatterienaus Produkten, dielängereZeit
nichtbenutztwerden.
•Schließen Siedie Batterien nicht kurz.
•LadenSie Batterien nicht.
•Werfen Sie Batterien nicht insFeuer.
•Bewahren Sie Batterien außerhalbder Reichweitevon
Kindern auf.
•Entfernenund entsorgen Sie verbrauchte Batterien
unverzüglich ausdem Produkt.
4.Inbetriebnahme
Fernbedienung in Betrieb nehmen
Öffnen Sie die Abdeckung des Batteriefachs. Diese
bendet sich auf der Rückseite der Fernbedienung und
kann durch schieben in die gekennzeichnete Richtung
geöffnet werden. Zum Lieferumfang gehören zwei
AAA-Batterien, welche Sie für die Inbetriebnahme in das
Batteriefach einlegen müssen. Achten Sie beim Einlegen
darauf,dass die Batterien mit der richtigen Polarität
eingelegt werden. Die vorgegebene Polarität (+ /-)ist im
Batteriefach gekennzeichnet.
Warnung
•BetreibenSie dasProdukt nur an einerdafür
zugelassenen Steckdose. DieSteckdose muss in der Nähe
desProduktesangebracht und leichtzugänglich sein.
•Trennen Sie das Produktmittelsdes Ein-/Ausschalters vom
Netz –wenndieser nicht vorhandenist,ziehenSie die
Netzleitungaus der Steckdose.
•Achten Siebei Mehrfachsteckdosen darauf,dass
dieangeschlossenen Verbraucher diezulässige
Gesamtleistungsaufnahme nichtüberschreiten.
•Trennen Sie das Produkt vomNetz, wenn Sie es längere
Zeit nichtbenutzen.
Einschalten
•Verbinden Sie das Netzkabel des Lautsprechers mit einer
ordnungsgemäß installierten Steckdose.
•Der Lautsprecher schaltet sich automatisch ein.
Hinweis –beim ersten Einschalten
•Beim ersten Einschalten bendet sich der Lautsprecher
im Modus „Ersteinrichtung des Gerätes“ und die
Status-LEDs (1-5) pulsieren.
•Sollte der Einrichtungsmodus nicht aktiv sein, drücken
Sie kurz die [SETUP]-Taste (2) auf der Rückseite
des Gerätes, um den WPS Modus zu aktivieren
(blinkt schnell). Alternativ drücken und halten Sie
die [SETUP]-Taste (2) für ca. 7Sekunden, um einen
AccessPoint zu öffnen (blinkt langsam).
•Bei erneutem Einschalten blinken alle Status LEDs (1-
5) orange, bis bisher getätigte Verbindungen wieder
aufgebaut sind. Dies kann je nach vorhandener
Signalstärke des Internets bis zu 20 Sekunden dauern.
Einschalten/Ausschalten/Standby
•Drücken Sie [POWER] (1), um den Lautsprecher
einzuschalten. Alternativ drücken Sie [POWER] (1) auf
der Fernbedienung.
•Drücken Sie erneut [POWER] (1) auf dem Gerät oder der
Fernbedienung, um den Lautsprecher auszuschalten.
(Standby)

10
Hinweis
•Um den Lautsprecher vollständig auszuschalten,
trennen Sie ihn von der Stromversorgung.
Lautstärke anpassen/Mute
•Drücken Sie [VOLUME -/+], um die Lautstärke zu
reduzieren/erhöhen.
•Drücken Sie [ ](2) auf der Fernbedienung, um den
Lautsprecher stumm zu schalten.
•Drücken Sie erneut [ ](2), um die Lautstärke auf den
Wert vor der Stummschaltung zurückzusetzen.
5.Einrichten des Lautsprechers
Hinweis
•Um den vollen Funktionsumfang des Produktes nutzen
zu können, muss zusätzlich die Amazon Alexa App
heruntergeladen sowie ein Amazon Konto erstellt
werden. Folgen Sie hierfür den Anweisungen in der
Amazon Alexa App. WeitereInformationen hierzu
nden Sie unter www.amazon.de.
5.1Herunterladen der Hama Smart Audio App
Hinweis
Es werden folgende Betriebssysteme unterstützt:
•iOS 8oder höher
•Android 4.4.2 oder höher
•Öffnen Sie den iTunes AppStoreoder Google Play Store
auf Ihrem Smartphone.
•Nutzen SIe den Suchbegriff "Hama Smart Audio".
•Laden Sie die App wie gewohnt herunter und installieren
Sie diese auf Ihrem Smartphone. Folgen Sie hierfür den
Anweisungen Ihres Smartphones.
5.2Ersteinrichtung des Gerätes mit der Hama Smart
Audio App (ALEXA-Funktion)
Hinweis WLAN (kabelloses Netzwerk)
•Stellen Sie sicher,dass der Router eingeschaltet ist und
eine Verbindung zum Internet /Netzwerk besteht.
•Aktivieren Sie, falls noch nicht geschehen, die WLAN-
Verbindung Ihres Routers.
•Sollten Fragen zur Konguration des Routers auftreten,
nutzen Sie bitte die Bedienungsanleitung des Routers
zur Fehlersuche /Problemlösung.
•Stellen Sie sicher,dass sich der Lautsprecher im
WLANPairing-Modus bendet. Die Status-LEDs (1-5)
blinken.
•Stellen Sie sicher,dass die Hama Smart Audio App
auf Ihrem Smartphone installiert ist und alle Updates
installiert wurden.
•Öffnen Sie die Hama Smart Audio App und berühren Sie
[CONFIGURE].
•Berühren Sie anschließend [Add MoreSpeakers].
•Öffnen Sie die WLAN-Einstellungen Ihres Smartphones
durch Berühren von [OPEN Settings].
•Suchen Sie in den WLAN Einstellungen Ihres
Smartphones nach dem Lautsprecher Hama
SIRIUM2000AMBT/SIRIUM2100AMBT.
Hinweis
•Der Lautsprecher erzeugt ein eigenes WLAN-Netz,
welches die Bezeichnung SIRIUMSetup und die
ersten sechs Stellen der MAC-Adresse trägt (z.B.
SIRIUMSetup_E69EBB). Dieses WLAN benötigt kein
Passwort.
•Verbinden Sie Ihr Smartphone mit dem Lautsprecher.
•Kehren Sie nun zur Hama Smart Audio App auf Ihrem
Smartphone zurück.
•Wählen Sie den gewünschten WLAN Namen (SSID) aus,
mit dem Sie den Lautsprecher verbinden möchten.
•Geben Sie nun gegenbenenfalls Ihren Netzwerkschlüssel
ein und bestätigen Sie mit [Save].
•Bestätigen Sie die gewählten Einstellungen durch
Berühren von [CONFIRM].
•Der Lautsprecher verbindet sich nun mit dem Netzwerk.
Nach erfolgreicher Verbindung wird„Lautsprecher
erfolgreich konguriert“ auf dem Smartphone angezeigt.
•DIe LEDs erlöschen nach einigen Sekunden.
Hinweis
•Bei iOSkannesvorkommen,dassdie Appnun
geschlossenwirdund neu gestartet werden muss.
Befolgen Sie anschließenddie folgendenzweiSchritte.
•Die eingerichtete Soundbar solltejetztimHauptmenü
angzeigtwerden.Drücken Sieauf dasIcon des
Lautsprechers.
•BerührenSie [Quellen]amunteren Bildschirmrand,um
eineVerbindung zu Ihrem AmazonKonto herzustellen.
•Berühren Sie anschließend dieSchaltäche[Amazon
Alexa].
•Berühren Sie [MELDEN SIE SICH MIT AMAZON AN], um
den Webbrowser für die Eingabe Ihrer Zugangsdaten zu
öffnen.

11
Hinweis
•Wurde dieAmazonShopping App bereits aufIhrem
Smartphone installiertund eingerichtet, werden die
folgenden Schritteübersprungen.
•Geben Siemit der Tastatur Ihres Smartphones die
Zugangsdaten Ihres Amazon Kontos einund bestätigen
Sie dieEingabe mitAnmelden.
•Alternativ können Sie durch Berühren von[Neues
Amazon Kontoerstellen]ein neues Amazon Konto
erstellen.
•Nach erfolgreicher Anmeldung gelangen Sie wieder
zurück zur Hama Smart Audio App.
•Wählen Sie nun die Sprache aus, auf welche Alexa
zukünftig reagieren soll.
•Öffnen Sie die Amazon Alexa App und geben Sie
ggf.erneut IhreZugangsdaten ein. Sie sollten den
Lautsprecher im Anschluss bei Ihren aktiven Geräten
nden.
•Nehmen Sie anschließend Ihrepersönlichen
Einstellungen (Zeitzone, Gerätename, etc.) in der Amazon
Alexa App vor.WeitereInformationen hierzu nden Sie
unter www.amazon.de -> Hilfe und Kundenservice.
Hinweis
•Wurde die Amazon Market App bereits auf Ihrem
Smartphone installiert und eingerichtet, übernehmen
einige Smartphones die Benutzerdaten direkt aus der
App.
•Um ein neues Amazon-Konto einzurichten, melden
Sie sich ab und wiederholen Sie die in diesem Kapitel
beschriebenen Schritte.
Hinweis Alexa Push to talk/ Function Key
•Drücken Sie kurz die [Aktion]-Taste (4) auf dem
Lautsprecher,umAlexa während des Audiobetriebs
bzw.hoher Lautstärke zu aktivieren. Alternativ
drücken Sie die [Aktion]-Taste (3) auf der
Fernbedienung.
•Drücken Sie die [Mikrophon Mute]-Taste (3), um
die Mikrofone auszuschalten. Sind die Mikrofone
deaktiviert, leuchten die Status-LEDs(1-5) dauerhaft
rot. Alternativ drücken Sie die [Mikrophone Mute]-
Taste (4) auf der Fernbedienung
•Der Lautprecher reagiert nun nicht mehr auf das
Aktivierungswort, bis die Mikrofone wieder aktiviert
werden.
•Drücken Sie erneut die [Mikrophone Mute]-Taste (3),
um die Mikrophone wieder zu aktivieren. Alternativ
drücken Sie die [Mikrophone Mute]-Taste (4) auf der
Fernbedienung. Die Status LEDs (1-5) erlöschen.
6.Bluetooth Erstverbindung (Pairing)
Via Bluetooth können Sie IhreEndgeräte mit dem
Lautsprecher verbinden und diesen als Wiedergabegerät
für Audiosignale nutzen. Die Steuerung der Wiedergabe
erfolgt dabei direkt über das Endgerät oder die
Fernbedienung. Die Lautstärke lässt sich auch am
Lautsprecher direkt regeln.
Hinweis –Bluetooth®
•Prüfen Sie, ob Ihr mobiles Endgerät (Smartphone,
Tablet-PC, etc.) Bluetooth-fähig ist.
•Beachten Sie, dass die Reichweite von
Bluetooth
®
max. 10 Meter beträgt, ohne Hindernisse wie Wände,
Personen, etc.
•Es kann vorkommen, dass die Verbindung durch
weitere
Bluetooth
®-Geräte/ Verbindungen in der
Umgebung gestört wird.
•Der Lautsprecher kann immer nur mit einem Endgerät
gekoppelt werden.
•Beachten Sie, dass die Kompatibilität von den
unterstützten
Bluetooth
®Prolen sowie der
verwendeten
Bluetooth
®Versionen abhängig ist.
(siehe: Technische Daten, Bedienungsanleitung des
verwendeten Endgeräts)
•Stellen Sie sicher,dass Ihr Bluetooth fähiges Endgerät
eingeschaltet ist und dass Bluetooth aktiviert ist.
•Aktivieren Sie durch wiederholtes Drücken der [SOURCE]-
Taste (2) auf dem Lautsprecher den Bluetooth Modus.
•Alternativ drücken Sie [Bluetooth] (13) auf der
Fernbedienung.
•Die Status-LED Bluetooth (4) beginnt blau zu pulsieren.
•Drücken und halten Sie die [SOURCE]-Taste (2) für ca.
2Sekunden, um den Pairing Modus zu aktivieren. Die
Status LED Bluetooth (4) beginnt blau zu blinken und ein
Signalton ertönt.
•Öffnen Sie die Bluetooth Einstellungen auf Ihrem
Endgerät und warten Sie, bis in der Liste der
gefundenen Bluetooth Geräte Hama SIRIUM2000AMBT/
SIRIUM2100AMBT angezeigt wird.
•Starten Sie ggf.die Suche nach Bluetooth Geräten auf
Ihrem Endgerät.
•Wählen Sie den Lautsprecher Hama SIRIUM2000AMBT/
SIRIUM2100AMBT in der Liste der verfügbaren Geräte
aus und warten Sie, bis der Lautsprecher als verbunden
in den Bluetooth Einstellungen Ihres Endgerätes
angezeigt wird.
•Die Status-LED Bluetooth (4) leuchtet nun dauerhaft
blau.
•Starten und steuern Sie die Audiowiedergabe
entsprechend über das Endgerät bzw.die
Fernbedienung.

12
Hinweis –Bluetooth®Passwort
Manche Endgeräte benötigen für die Einrichtung der
Verbindung mit einem anderen
Bluetooth
®Gerät ein
Passwort.
•Geben Sie für die Verbindung mit dem Lautsprecher
das Passwort 0000 ein, wenn Sie zur Eingabe von
Ihrem Endgerät aufgefordert werden.
7.Verbindung über Optical IN
Über den digitalen Audioeingang des Lautsprechers
können Sie Ihr Endgerät (z.B. TV Gerät) anschließen und
dessen Audiosignal über den Lautsprecher wiedergeben.
Hinweis
•Schalten Sie den Lautsprecher aus, bevor Sie ein
Endgerät daran anschließen.
•Entfernen Sie vor dem Anschließen die Schutzkappen
von beiden Enden des optischen Signalkabels.
•Knicken und quetschen Sie das Kabel nicht.
•Für eine Wiedergabe über den optischen Audioanschluss
schließen Sie ein optisches Signalkabel am optischen
Audioeingang des Lautsprechers und am optischen
Audioausgang Ihres Endgerätes an und wählen den
Optical Modus.
•Drücken und halten Sie [POWER] (1) für ca. 3Sekunden,
um den Lautsprecher einzuschalten.
•Aktivieren Sie durch wiederholtes Drücken der [SOURCE]-
Taste (2) auf dem Lautsprecher den Optical Modus.
•Die Status LED Optical (4) leuchtet lila, wenn der Optical
Modus aktiviert ist.
•Alternativ drücken Sie [Optical IN] (12) auf der
Fernbedienung.
8.Verbindung über Auxiliary In/Auxiliary Out
Über den analogen Audioeingang können Sie mobile
Endgeräte (z.B. Smartphone, Tablet PC; MP3-
Player,etc.) und ältereanaloge Quellen (CD-/DVD-
Player etc.) an den Lautsprecher anschließen und deren
Audiosignal über den Lautsprecher wiedergeben. Hier
haben Sie die Anschlussmöglichkeit über ein 3,5mm
Audiokabel (Klinkenkabel).
Über den analogen Audioausgang (5) können weitere
Lautsprecher angeschlossen werden, über die das
Audiosignal ebenfalls wiedergegeben wird.
Hinweis
•Schalten Sie den Lautsprecher aus, bevor Sie ein
Endgerät daran anschließen.
•Knicken und quetschen Sie das Kabel nicht.
•Für eine Wiedergabe über den AUX-In Anschluss
verbinden Sie Ihr Endgerät über die AUX-In Buchse (4)
mittels eines 3,5mm Audiokabels (Klinkenkabel) mit dem
Lautsprecher und wählen den AUX-Modus.
•Für eine Wiedergabe über den AUX-Out Anschluss
verbinden Sie z.B. weitereLautsprecher/einen Verstärker
über die AUX-Out Buchse (5) mittels eines 3,5mm
Audiokabels (Klinkenkabel) mit dem Lautsprecher und
wählen den AUX-Modus.
•Drücken Sie [POWER] (1), um den Lautsprecher
einzuschalten.
•Aktivieren Sie durch wiederholtes Drücken der [SOURCE]-
Taste (2) auf dem Lautsprecher den AUX-Modus.
•Die Status-LED (4) leuchtet cyan, wenn der AUX Modus
gewählt wurde.
•Starten und steuern Sie die Audiowiedergabe
entsprechend über das angeschlossene Endgerät.
•Alternativ drücken Sie [LINE IN] (14) auf der
Fernbedienung.
9.Werkseinstellung
Um den Lautsprecher auf die Werkseinstellung
(Auslieferungszustand) zurückzusetzen, gehen Sie bitte wie
folgt vor:
•Drücken und halten Sie die Tasten [SETUP] (2) und
[Aktion] (4) für ca. 6Sekunden, um den Lautsprecher auf
Werkseinstellungen zurückzusetzen.
•Nach erfolgreichem Zurücksetzen wirdder Lautsprecher
neu gestartet.
Hinweis
•Probleme und Fehlfunktionen können möglicherweise
durch Rücksetzung auf die Werkseinstellungen
behoben werden.
•Es werden jedoch alle Voreinstellungen wie Equalizer,
Favoriten und die Netzwerkprole unwiderruich
gelöscht.
10.Wartung und Pflege
•Reinigen Sie dieses Produkt nur mit einem fusselfreien,
leicht feuchten Tuch und verwenden Sie keine
aggressiven Reiniger.
•Sollten Sie das Produkt längereZeit nicht nutzen,
schalten Sie das Gerät aus und trennen es von der
Stromversorgung. Lagern Sie es an einem sauberen,
trockenen Ort ohne direkte Sonneneinstrahlung.
11.Haftungsausschluss
Die Hama GmbH &Co. KG übernimmt keinerlei Haftung
oder Gewährleistung für Schäden, die aus unsachgemäßer
Installation, Montage und unsachgemäßem Gebrauch
des Produktes oder einer Nichtbeachtung der
Bedienungsanleitung und/oder der Sicherheitshinweise
resultieren.

13
12.Service und Support
Bitte wenden Sie sich bei Fragen zum Produkt
gerne an die Hama-Produktberatung.
Hotline: +49 9091 502-115 (Deu/Eng)
WeitereSupportinformationen nden Sie hier:
www.hama.com
Die vollständige Langanleitung ist unter
der folgenden Internetadresse verfügbar:
www.hama.com->00054881->Downloads
www.hama.com->00054882->Downloads
www.hama.com->00054886->Downloads
www.hama.com->00054887->Downloads
13.Konformitätserklärung
Hiermit erklärt die Hama GmbH &CoKG, dass der
Funkanlagentyp [00054881, 00054882,
00054886, 00054887] der Richtlinie 2014/53/EU
entspricht. Der vollständige Text der EU-
Konformitätserklärung ist unter der folgenden
Internetadresse verfügbar:
www.hama.com->00054881, 00054882, 00054886,
00054887-> Downloads.
Frequenzband/
Frequenzbänder
Bluetooth:2.402 GHz -2.480 GHz
WiFi: 2.402GHz –2.480GHz
WiFi: 2.412GHz –2.483GHz
WiFi: 5.150GHz –5.350GHz
WiFi: 5.470GHz –5.725GHz
Abgestrahlte maximale
Sendeleistung
Bluetooth:4dBm (EIRP)
WiFi: 2.4 GHz /19.5 dBm (EIRP)
WiFi: 5GHz /16.5dBm (EIRP)
Beschränkungen oder Anforderungen in
Belgien, Bulgarien, Tschechische Republik, Dänemark,
Deutschland, Estland, Irland, Griechenland, Spanien,
Frankreich, Kroatien, Italien, Zypern, Lettland, Litauen,
Luxemburg, Ungarn, Malta, Niederlande, Österreich,
Polen, Portugal, Rumänien, Slowenien, Slowakei, Finnland,
Schweden, Vereinigtes Königreich
Hinweis
Wenn Kanal 36-64 (Kanäle der Frequenz
5150 MHz -5350 MHz) verwendet wird, darf das Gerät
nur in geschlossenen Räumen verwendet werden.

14
FNotice d’utilisation
Éléments de commande et d'affichage
A. Panneau de commande de l’enceinte
1. TOUCHE [MISE SOUS TENSION]
2. TOUCHE [SOURCE]
3. TOUCHE [COUPURE DU SON MICROPHONE]
4. TOUCHE [ACTION]
5. TOUCHE -[VOLUME]
6. TOUCHE +[VOLUME]
B. Avant
1. LED d’état 1à5
2. LED d’état de mise àjour
C. Arrière
1. Filetage pour support mural
2. Touche [CONFIGURATION]
3. Prise femelle Optical-In (entrée optique)
4. Prise femelle AUX-In (entrée auxiliaire)
5. Prise femelle AUX-Out (sortie auxiliaire)
6. USB (lectureetmise àjour)
7. Alimentation électrique
D. Télécommande
1. Mise sous tension
2. Coupureduson l’enceinte
3. Action
4. Coupureduson du microphone
5. Basses +
6. Basses -
7. Vol+
8. Vol-
9. EQ1 (standard)
10. Sans fonction
11. EQ2 (MyEQ)
12. Optical IN (entrée optique)
13. Bluetooth
14. Line-IN (entrée de ligne)
15. Précédent
16. Lecture/pause
17. Suivant
!
Remarque importante - Notice
d’utilisation:
•Ceci estunmoded’emploi abrégé:il vous fournit
des informations de base essentielles, parex.
des consignes de sécurité et desinformations
concernant la mise en service de votreproduit.
•Pour des raisonsécologiques et and’économiser
de précieuses matières premières, l’entreprise
Hama renonce àimprimer la versionlongue du
mode d’emploi et propose ce dernieruniquement
en téléchargement au format PDF.
•La version intégrale du mode d’emploi est
disponible àl‘adresseInternet suivante :
www.hama.com->00054881 -> Downloads
www.hama.com->00054882 -> Downloads
www.hama.com->00054886 -> Downloads
www.hama.com->00054887 -> Downloads
•Enregistrez cetteversion longue survotre
ordinateur pour la consulter ultérieurement et
imprimez-la,danslamesuredupossible.
1.Explication des symboles d‘avertissement et des
remarques
Risque d’électrocution
Ce symbole indique un risque de contact avec des
parties non isolées du produit susceptibles de conduire
un courant électrique capable de provoquer un risque
d‘électrocution.
Avertissement
Ce symbole est utilisé pour indiquer des consignes de
sécurité ou pour attirer votreattention sur des dangers et
risques particuliers.
Remarque
Ce symbole est utilisé pour indiquer des informations
supplémentaires ou des remarques importantes.
2.Contenu de l‘emballage
•Enceinte intelligente Hama "SIRIUM2000AMBT/
SIRIUM2100AMBT"
•Bloc secteur
•Télécommande SRC-1805-Layout B
•2piles AAA
•Guide démarrage rapide
Other manuals for SIRIUM2000AMBT
1
This manual suits for next models
5
Table of contents
Languages:
Other Hama Speakers manuals

Hama
Hama R9173116 User manual

Hama
Hama Gentleman-S User manual

Hama
Hama I 470 User manual

Hama
Hama BTL-200 User manual

Hama
Hama Sonic Mobil 150 User manual

Hama
Hama I 340 User manual

Hama
Hama KitSound X-Dock User manual

Hama
Hama SIRIUM1400ABT User manual

Hama
Hama Soldier-L User manual

Hama
Hama 00124515-1800173117-19 User manual

Hama
Hama AL-100 User manual

Hama
Hama SOUNDCUP-D User manual

Hama
Hama B-15 User manual

Hama
Hama 00188200 Installation instructions

Hama
Hama SIRIUM1400ABT User manual

Hama
Hama 00054843 User manual

Hama
Hama E 400 User manual

Hama
Hama SIRIUM1000ABT User manual

Hama
Hama Pluto User manual

Hama
Hama Rockman S User manual