manuals.online logo
Brands
  1. Home
  2. •
  3. Brands
  4. •
  5. Hanna Instruments
  6. •
  7. Measuring Instrument
  8. •
  9. Hanna Instruments Total Chlorine HI 711 User manual

Hanna Instruments Total Chlorine HI 711 User manual

Other Hanna Instruments Measuring Instrument manuals
Hanna Instruments Alkalinity HI775 User manual

Hanna Instruments

Hanna Instruments Alkalinity HI775 User manual

Hanna Instruments HI749 User manual

Hanna Instruments

Hanna Instruments HI749 User manual

Hanna Instruments Checker HI 723 User manual

Hanna Instruments

Hanna Instruments Checker HI 723 User manual

Hanna Instruments HI96726 User manual

Hanna Instruments

Hanna Instruments HI96726 User manual

Hanna Instruments HI96729 User manual

Hanna Instruments

Hanna Instruments HI96729 User manual

Hanna Instruments HI 83740 User manual

Hanna Instruments

Hanna Instruments HI 83740 User manual

Hanna Instruments HI 991002 User manual

Hanna Instruments

Hanna Instruments HI 991002 User manual

Hanna Instruments HI 93726 User manual

Hanna Instruments

Hanna Instruments HI 93726 User manual

Hanna Instruments HI 86301 User manual

Hanna Instruments

Hanna Instruments HI 86301 User manual

Hanna Instruments HI 96761C User manual

Hanna Instruments

Hanna Instruments HI 96761C User manual

Hanna Instruments HI83300 User manual

Hanna Instruments

Hanna Instruments HI83300 User manual

Hanna Instruments HI96786 User manual

Hanna Instruments

Hanna Instruments HI96786 User manual

Hanna Instruments HI772 User manual

Hanna Instruments

Hanna Instruments HI772 User manual

Hanna Instruments HI 93737 User manual

Hanna Instruments

Hanna Instruments HI 93737 User manual

Hanna Instruments HI97714 User manual

Hanna Instruments

Hanna Instruments HI97714 User manual

Hanna Instruments HI 9835 User manual

Hanna Instruments

Hanna Instruments HI 9835 User manual

Hanna Instruments HI 84102 User manual

Hanna Instruments

Hanna Instruments HI 84102 User manual

Hanna Instruments HI 9126 User manual

Hanna Instruments

Hanna Instruments HI 9126 User manual

Hanna Instruments HI 93752 User manual

Hanna Instruments

Hanna Instruments HI 93752 User manual

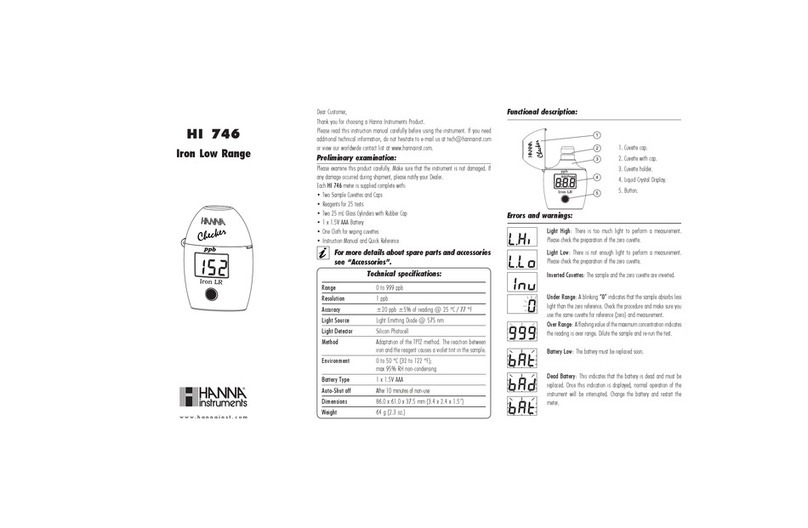
Hanna Instruments HI 746 User manual

Hanna Instruments

Hanna Instruments HI 746 User manual
Hanna Instruments HUALIX HI 715 User manual

Hanna Instruments

Hanna Instruments HUALIX HI 715 User manual

Hanna Instruments HI 9210N User manual

Hanna Instruments

Hanna Instruments HI 9210N User manual

Hanna Instruments EC 214 User manual

Hanna Instruments

Hanna Instruments EC 214 User manual

Hanna Instruments HI 96771C User manual

Hanna Instruments

Hanna Instruments HI 96771C User manual

Popular Measuring Instrument manuals by other brands

Powerfix Profi 278296 Operation and safety notes

Powerfix Profi

Powerfix Profi 278296 Operation and safety notes

Test Equipment Depot GVT-427B user manual

Test Equipment Depot

Test Equipment Depot GVT-427B user manual

Fieldpiece ACH Operator's manual

Fieldpiece

Fieldpiece ACH Operator's manual

FLYSURFER VIRON3 user manual

FLYSURFER

FLYSURFER VIRON3 user manual

GMW TG uni 1 operating manual

GMW

GMW TG uni 1 operating manual

Downeaster Wind & Weather Medallion Series instruction manual

Downeaster

Downeaster Wind & Weather Medallion Series instruction manual

Nokeval KMR260 quick guide

Nokeval

Nokeval KMR260 quick guide

HOKUYO AUTOMATIC UBG-05LN instruction manual

HOKUYO AUTOMATIC

HOKUYO AUTOMATIC UBG-05LN instruction manual

Fluke 96000 Series Operator's manual

Fluke

Fluke 96000 Series Operator's manual

Test Products International SP565 user manual

Test Products International

Test Products International SP565 user manual

General Sleep Zmachine Insight+ DT-200 Service manual

General Sleep

General Sleep Zmachine Insight+ DT-200 Service manual

Sensa Core Lacto Spark user manual

Sensa Core

Sensa Core Lacto Spark user manual
VOLTCRAFT UTS-1980 operating instructions

VOLTCRAFT

VOLTCRAFT UTS-1980 operating instructions

EBCHQ 94915 Operation manual

EBCHQ

EBCHQ 94915 Operation manual

Balluff BIP LD2-T017-01-EP-S4 Series user guide

Balluff

Balluff BIP LD2-T017-01-EP-S4 Series user guide

Pulsar IMP Lite Series instruction manual

Pulsar

Pulsar IMP Lite Series instruction manual

ETCR 6800 user manual

ETCR

ETCR 6800 user manual

IRIMO 984-6D-1 owner's manual

IRIMO

IRIMO 984-6D-1 owner's manual

manuals.online logo
manuals.online logoBrands
  • About & Mission
  • Contact us
  • Privacy Policy
  • Terms and Conditions

Copyright 2025 Manuals.Online. All Rights Reserved.

Total Chlorine Preliminary examination:
Please examine this product carefully. Make sure that the instrument is not damaged. If
any damage occurred during shipment, please notify your Dealer.
Each HI 711 meter is supplied complete with:
• Two Sample Cuvettes and Caps
• Six powder reagents for Total Chlorine
• 1 x 1.5V AAA Battery
• Instruction Manual
HI 711
Technical specifications:
Range 0.00 to 3.50 ppm
Resolution 0.01 ppm
Accuracy ±0.03 ppm ±3% of reading @ 25 °C / 77 °F
Light Source Light Emitting Diode @ 525 nm
Light Detector Silicon Photocell
Method Adaptation of USEPA method 330.5. The reaction
between the chlorine and DPD reagent causes a pink
tint in the sample.
Environment 0 to 50 °C (32 to 122 °F);
max 95% RH non-condensing
Battery Type 1 x 1.5V AAA
Auto-Shut off After 2 minutes of non-use
Dimensions 81.5 x 61 x 37.5 mm (3.2 x 2.4 x 1.5”)
Weight 64 g (2.25 oz.)
Functional description:
Errors and warnings:
Light High: There is too much light to perform a measurement.
Please check the preparation of the zero cuvette.
Light Low: There is not enough light to perform a measurement.
Please check the preparation of the zero cuvette.
Inverted Cuvettes: The sample and the zero cuvette are inverted.
Under Range: A blinking “0.00” indicates that the sample absorbs
less light than the zero reference. Check the procedure and make sure
you use the same cuvette for reference (zero) and measurement.
Over Range: A flashing value of the maximum concentration indicates
the reading is over range. Dilute the sample and re-run the test.
Battery Low: The battery must be replaced soon.
Dead Battery: This indicates that the battery is dead and must be
replaced. Once this indication is displayed, normal operation of the
instrument will be interrupted. Change the battery and restart the
meter.
1. Dust cover.
2. Cuvette with cap.
3. Cuvette holder.
4. Liquid Crystal Display.
5. Button.
For more details about spare parts and accessories
see “Accessories”.
www.hannainst.com
Dear Customer,
Thank you for choosing a Hanna Instruments Product.
Please read this instruction manual carefully before using the instrument. If you need
additional technical information, do not hesitate to e-mail us at [email protected]
or view our worldwide contact list at www.hannainst.com.
•Turn the meter on by pressing the button.
All segments will be displayed. When the
display shows “Add”, “C.1” with “Press”
blinking, the meter is ready.
•Fill the cuvette with 10 mL of unreacted
sample and replace the cap. Place the cuvette
into the meter and close the meter’s cap.
•Press the button. When the display shows
“Add”, “C.2” with “Press” blinking the
meter is zeroed.
•Remove the cuvette from the meter and
unscrew the cap. Add the content of one
packet of HI 711-25 reagent. Replace the
cap and shake gently for 20 seconds. Place
the cuvette back into the meter.
•Press and hold the button until the timer is
displayed on the LCD (the display will show
the countdown prior to the measurement)
or, alternatively, wait for 2 minutes and
30 seconds and press the button.
•The instrument directly displays the
concentration of total chlorine in ppm. The
meter automatically turns off after 2 minutes.
10 mL
REAGENT SETS
HI 711-25 Reagents for 25 Total Chlorine tests
OTHER ACCESSORIES
HI 711-11 Total Chlorine Certified Standard Kit
HI 731318 Cloth for wiping cuvettes (4 pcs.)
HI 731321 Glass cuvettes (4 pcs.)
HI 731225 Cuvette black cap for checker HC (4 pcs.)
HI 731353 Cuvette seal cap for checker HC (4 pcs.)
HI 740028 1.5V AAA batteries (4 pcs.)
HI 93703-50 Cuvette cleaning solution (230 mL)
Recommendations for Users
Before using these products, make sure that they are entirely suitable for your specific application and for
the environment in which they are used.
Operation of these instruments may cause unacceptable interferences to other electronic equipments, thus
requiring the operator to take all necessary steps to correct interferences.
Any variation introduced by the user to the supplied equipment may degrade the instrument’s EMC
performance.
To avoid damages or burns, do not put the instrument in microwave oven. For the safety of you and the
instrument do not use or store the instrument in hazardous environments.
For additional information, contact your
dealer or the nearest
Hanna Customer Service Center.
To find a Hanna Office in your area,
visit our web site:
www.hannainst.com
Hanna Instruments reserves the right to modify the design, construction or
appearance of its products without advance notice.
Battery management
IST711 03/13
Measurement procedure: Accessories:Tips for an accurate measurement
•It is important that the sample does not contain any debris.
•Whenever the cuvette is placed into the measurement cell, it must be dry
outside, and completely free of fingerprints, oil and dirt. Wipe it thoroughly with
HI 731318 or a lint-free cloth prior to insertion.
•Shaking the cuvette can generate bubbles, causing higher readings. To obtain
accurate measurements, remove bubbles by swirling or by gently tapping the
cuvette.
•Do not let the reacted sample stand for too long after reagent is added, as
accuracy will be affected.
•After the reading it is important to immediately discard the sample, otherwise
the glass might become permanently stained.
To save the battery, the instrument shuts down after 2 minutes of non-use.
One fresh battery lasts for a minimum of 5000 measurements. When the battery is dead the
instrument will display “bAd” then ”bAt” for 1 second and then turns off.
To restart the instrument, the battery must be replaced with a new one.
To replace the instrument’s battery:
•Turn the instrument off by holding the button until the meter shuts off.
•Turn the instrument upside down and remove the battery cover with a screwdriver.
•Remove the battery from its location and replace it with a new one, inserting the
negative end first.
•Insert the battery cover and replace the screw with a screwdriver.