Hanwha Techwin Video Wall Controller Series User manual

Video Wall Controller Series
Manual
Table of Contents
1. Warranty and RMA .......................................................................................................................... 5
2. Safety Precautions ........................................................................................................................... 6
3. Product Introduction ....................................................................................................................... 8
4. Know Your Appliance..................................................................................................................... 10
5. Getting Started .............................................................................................................................. 12
6. Setup.............................................................................................................................................. 14
7. Support .......................................................................................................................................... 21
7.1 Frequently Asked Questions ................................................................................................... 22
Revision History
Version
Date
Notes
2.0
31/03/2020
3.0
25/11/2020

Video Wall Controller Series Manual
Preface
Throughout the remainder of this document the product titles Eight1080, Six4K and Nano4K will be identified as the
“appliance”. Please see product quick start guide for installation and basic setup guidance.
Copyright
BlueBox Video Limited claims copyright on this documentation. This publication, including all images, drawings and
software, is protected under international copyright laws, with all rights reserved. No part of this manual may be
reproduced, copied, translated or transmitted in any form or by any means without the prior written consent from BlueBox
Video Limited.
Disclaimer
Whilst every effort is made to ensure that the information contained in this manual is correct, BlueBox Video Limited make
no representations or warranties with respect to the contents thereof, and do not accept liability for any errors or omissions.
BlueBox Video Limited reserves the right to change specification without prior notice, it does not represent commitment
from BlueBox Video Limited and cannot assume responsibility for the use made of the information supplied.
The information in this publication is provided “as is” without warranty of any kind. The entire risk arising out of the use of
this information remains with the recipient.
BlueBox Video shall not be liable for direct, indirect, special, punitive, incidental, consequential or other damages
(including without limitation, damages for loss of business profits, business interruption or loss of business information)
arising out of the use of any product, nor for any infringements upon the rights of third parties, which may result from such
use.
Acknowledgement
All registered trademarks used within this documentation are acknowledged by BlueBox Video Limited.

Video Wall Controller Series Manual
Declaration of Conformity
This section provides the FCC compliance statement for Class A devices and describes how to keep the system CE
compliant.
For EMC compliance, good quality shielded cables or adapters should be used for connection from the appliance to the
display device.
FCC
This appliance complies with part 15 of the FCC Rules.
Operation is subject to the following two conditions:
1. This device may not cause harmful interference
2. This device must accept any interference received, including interference that may cause undesired operation.
This equipment has been tested and verified to comply with the limits for a Class A digital device, pursuant to Part 15 of
FCC Rules. These limits are designed to provide reasonable protection against harmful interference when the equipment is
operated in a commercial environment. This equipment generates, uses, and can radiate radio frequency energy and, if
not installed and used in accordance with the instructions, may cause harmful interference to radio communications.
Operation of this equipment in a residential area (domestic environment) is likely to cause harmful interference, in which
case the user will be required to correct the interference (take adequate measures) at their own expense.
CE
The product(s) described in this manual comply with all applicable European Union (CE) directives if it has a CE marking.
Maintaining CE compliance also requires correct cable and cabling techniques.
Directives applied to this product are:
●Low Voltage Directive –2014/35/EU
●EMC Directive –2014/30/EU
●RoHS –Restriction of Hazardous Substances Directive –2011/65/EU
●Waste Electrical and Electronic Equipment Directive –2012/19/EU
WEEE Disposal
At the end of life all appliances products should be disposed of as per local laws and regulations dictate. Please contact your
local distributor to arrange disposal if in doubt. Our WEEE registration number is WEE/AX3802YC.

Video Wall Controller Series Manual
1. Warranty and RMA
Warranty Period
Products will be free from defects in material and workmanship for 3 years, beginning on the date of purchase invoice.
Return Merchandise Authorization (RMA)
Customers must collect and detail all the information about the problems encountered and note anything abnormal or,
print out any on-screen messages, and describe the problems to our repair team via email.
Customers may be required to return faulty products with or without accessories (manuals, cable, etc.). If the accessories
were suspected as part of the problems, please note clearly which components are included. Otherwise, the RMA process
is not responsible for the devices/parts.
Customers are responsible for the safe packaging of defective products, making sure it is durable enough to be resistant
against further damage and deterioration during transportation. In case of damages occurred during transportation, the
repair is treated as “Out of Warranty.” We always recommend shipping the product using the original packaging (As it
arrived to you).
If the returned item's fault is diagnosed to be from user error or mistreatment, repairs will be treated as “Out of
Warranty”.
Any products returned after the RMA process to other locations besides the customers’ site will bear an extra charge and
will be billed to the customer.
Repair Service Charges for Out-of-Warranty Products
The RMA process will charge for out-of-warranty products in two categories, one is basic diagnostic fee and another is
component (product) fee.
System Level
Component fee: The RMA process will only charge for main components such as CPUs, GPUS, Memory, Hard Drives etc.
Items will be replaced if the original component cannot be repaired. Ex: motherboard, power supply, etc.
Board Level
Component fee: The RMA process will charge for main components, such as ICs etc.
Passive components will be repaired free of charge, example: resistors, capacitors.
If RMA goods cannot be repaired, items and components will be returned to the customer without charge.

Video Wall Controller Series Manual
2. Safety Precautions
WARNING: Read these instructions carefully! Follow all warnings and instructions specified within this document and/or on
the equipment. All cautions should be noted.
CAUTION: The unit will be powered on upon connecting a valid power supply source. Please make sure to properly shut-
down the device’s operating system prior to removing power.
1. Keep this User Manual for later reference.
2. WARNING: Eight1080, Nano4K and Six4K MUST be EARTHED. The appliance uses a three-wire earthed power system,
the input power connector which is equipped with a third pin, is to earth the unit and prevent electric shock. Do not
defeat the purpose of this pin. You must use a 3 pin IEC C13 power cable. If your outlet does not support this kind of
plug, contact your service person to replace your obsolete outlet and install the appliance safely.
3. Disconnect this equipment from any AC outlet before cleaning. Use a soft damp cloth. Do not use liquid or spray
detergents for cleaning. Ensure dry before turning on.
4. Keep this equipment away from liquids. Never pour any liquid into an opening. This may cause fire or electrical shock.
5. For plug-in equipment, the power outlet socket must be located near the equipment and must be easily accessible.
6. Put this equipment on a stable surface during installation. Dropping it or letting it fall may cause damage.
7. The openings on the enclosure are for air convection to protect the equipment from overheating. DO NOT COVER
OPENINGS.
8. Ensure voltage of the power source is correct before connecting the equipment to the power outlet.
9. Place the power cord in a way so that people will not step on it. Do not place anything on top of the power cord. Use
a power cord that has been approved for use with the product and that it matches the voltage and current marked on
the product’s electrical range label. The voltage and current rating of the cord must be greater than the voltage and
current rating marked on the product.
10. All cautions and warnings on the equipment should be noted.
11. If the equipment is not used for a long time, disconnect it from the power source to avoid damage by transient
overvoltage.
12. WARNING: Never open the equipment. For safety reasons, the equipment should be opened only by qualified service
personnel. NOTE: Opening the equipment case will void the warranty.
13. If one of the following situations arises, get the equipment checked by service personnel:
a. The power cord or plug is damaged.
b. Liquid has penetrated into the equipment.
c. The equipment has been exposed to moisture.
d. The equipment does not work correctly, or you cannot get it to work according to the user manual.
e. The equipment has been dropped and damaged.
f. The equipment has obvious signs of breakage i.e. Rattling sounds
14. Do not place heavy objects on the equipment.

Video Wall Controller Series Manual
15. The appliance should be installed by qualified personnel only (persons having the appropriate technical training and
experience necessary for product installation).
16. Nano4K: The equipment should be installed in a FIXED (Wall/Monitor Mount) or DESKTOP configuration
17. Eight1080 and Six4K: The unit can be installed in a FIXED (Rack Mount) or DESKTOP configuration. The Unit MUST
always be installed HORIZONTALLY,
18. Eight1080 and Six4K: The unit is always recommended to be installed in a rack cabinet, with a supporting rack shelf
below is possible. The unit should be secured to the cabinet using the 2 mounting tabs.
19. Ensure the unit is installed securely to avoid the unit being dropped or falling from height accidentally. Dropping it or
letting it fall may cause damage.
20. When installing the equipment, please make sure that cables are installed so that accidents cannot occur. Cables
connected to the equipment must not be subject to any mechanical strain.
CAUTION: DANGER OF EXPLOSION IF BATTERY IS INCORRECTLY REPLACED. REPLACE ONLY WITH THE SAME OR
EQUIVALENT TYPE RECOMMENDED BY THE MANUFACTURER. DISCARD USED BATTERIES ACCORDING TO THE
MANUFACTURER’S INSTRUCTIONS.
Hardware
What’s included in the box:
●Appliance
Extras Included with Nano4K:
●19V DC Power Supply with country-specific plug attachment
●VESA Mounting Bracket and Screws
Optional Extras (Depending on Specific Model):
●Mouse/Keyboard
●Optical Cables
●Active DP to HDMI Adapters
●VGA to HDMI Adapter
●HDMI to DisplayPort Adapter
●Dual VESA Bracket
●VESA Wall Mounting Bracket
●DC Power Extension Cable
Required for Eight1080 and Six4K:
●A common IEC C13 cable is required to power the appliance, this is not provided and the customer will be
required to purchase one of the appropriate length and region for installation.
This cable must be a 3 wire earthed cable and must be connected to an earthed outlet socket.
Note: When unpacking, inspect the shipment box and appliance to identify any possible damages due to shipping. Make
sure all items have been delivered and that no items are missing. Contact your representative should you find any damages
or defects.
Note: The product serial number is on the product label, this number helps the support team identify your device. The
serial number can also be obtained through the web portal or on an appliance built-in display, if supported by your device.

Video Wall Controller Series Manual
3. Product Introduction
Overview
The appliance platform provides a high definition, compact video wall with recording options for command and control
surveillance environments. Equipped with up to 8 1080p/4k outputs, simplifying traditional video wall systems by reducing
footprint to a powerful, single condensed 2U appliance. Combined CPU and GPU technologies present users with a generic
hardware platform for choice of application. The appliance allows video to be received over the network or locally from
disk. Users can action the latest graphics technologies to provide an unrestricted video layout design under a familiar
Windows platform.
An appliance is optionally supplied with the latest Windows 10 operating system installed and configured. Interfaces
including DirectX and OpenGL allow user applications to leverage hardware acceleration technology found within the
appliances latest generation GPU processor. See appliance model data sheet for further details
The appliance is a custom industrial hardware platform sourced from long life embedded components. The customised
unit provides a resistant enclosure for physical durability, cooling and system reliability.

Video Wall Controller Series Manual
Hardware Specifications
Appliance
Eight1080
Six4K
Nano4K
Platform
Modular Embedded
Motherboard
Modular Embedded
Motherboard
Embedded SBC
Processor
7th Gen Intel
7th Gen Intel
7th Gen Intel
Graphics
Intel
NVidia
Intel
Memory
2 x 4GB Dual DDR4,
upgrade options available
(Up to 32GB, 2133MHz,
1.2V)
2 x 4GB Dual DDR4,
upgrade options available
(Up to 32GB, 2133MHz,
1.2V)
1 x 4GB Dual DDR4,
upgrade options available
(Up to 32GB, 2133MHz,
1.2V)
I/O Interface
-Front
1 x Power Switch with LED
(Blue)
2 x USB 3.0
1 x Power Switch with LED
(Blue)
2 x USB 3.0
1 x Power Switch
1 x Power LED
4 x USB 3.0
2 x USB 2.0
I/O Interface
-Rear
2 x USB 2.0
2 x Gigabit RJ45
8 x DisplayPort 1.2 outputs
1 x AC power inlet
2 x USB 2.0
2 x Gigabit RJ45
8 x DisplayPort 1.2 outputs
1 x AC power inlet
1 x HDMI 2.0
1 x Gigabit RJ45
1 x DC power inlet
Storage
Up to 2 x SATA 2.5”
HDD/SDD for RAID
Configuration
Up to 2 x SATA 2.5”
HDD/SDD for RAID
Configuration
1 x 64GB mSATA SDD
Dimensions
444mm (W) x 221mm (D) x
88mm (H)
444mm (W) x 221mm (D) x
88mm (H)
129mm (W) x 129mm (D) x
40mm (H)
Form Factor
2U Rack Mount
2U Rack Mount
VESA Mount
Wall Mount
Weight
2.5Kg
2.5Kg
1.3Kg
Power Supply
1 x Internal Power supply
Input: 90VAC-240VAC
50/60Hz
180W Typical
250W Max
1 x Internal Power supply
Input: 90VAC-240VAC
50/60Hz
180W Typical
250W Max
1 x External power supply
Input: 110VAC-234VAC
50/60Hz
Output: 12V/5A
25W Typical
60W Max
Environment
Operating temperature:
0°C to 40°C
Storage temperature: -
40°C to 80°C
Humidity: 10 to 95% (non-
condensing)
Operating temperature:
0°C to 40°C
Storage temperature: -
40°C to 80°C
Humidity: 10 to 95% (non-
condensing)
Operating temperature:
0°C to 40°C
Storage temperature: -40°C
to 80°C
Humidity: 10 to 95% (non-
condensing)
Compliance
CE approval
FCC Class A
CE approval
FCC Class A
CE approval
FCC Class A

Video Wall Controller Series Manual
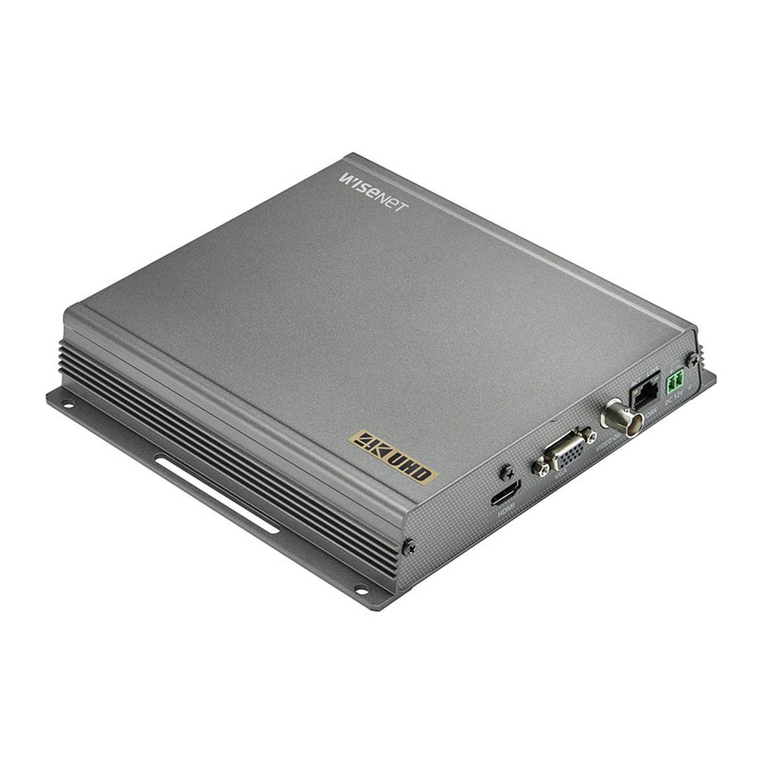
4. Know Your Appliance
Eight1080 and Six4K
Front Panel
Power Button
Power switch to power on/off the system.
Display
Appliance display shows import appliance metrics for easy inspection.
USB 3.0 Ports
Used to connect USB 3.0/2.0 devices.
Rear Panel
AC Power Socket [90V~240V AC Input]
Plug an AC power cord here before turning on the system.
USB 2.0 Ports
Used to connect USB 2.0 devices.
GbE LAN Ports
Used to connect the system to a local area network.
DisplayPort 1.2 Ports
Used to connect DisplayPort interface to monitors.

Video Wall Controller Series Manual
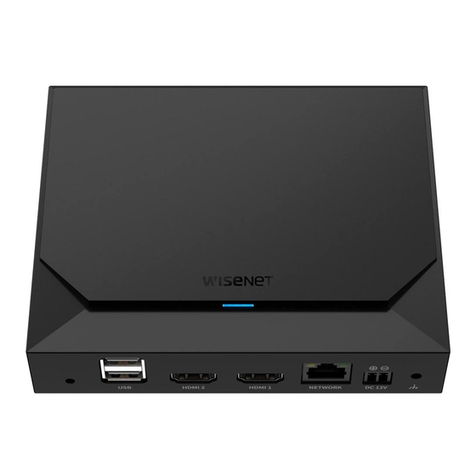
Know Your Appliance
Nano4K
Front Panel
Power Button and Power LED
Power switch to power on/off the system and LED to show system powered.
USB 3.0 Ports
Used to connect USB 3.0/2.0 devices.
USB 2.0 Ports
Used to connect USB 2.0 devices.
Rear Panel
DC Power Input
Plug the 19V external power supply cord here before turning on the system.
GbE LAN Port
Used to connect the system to a local area network.
HDMI Port
Used to connect HDMI interface to the display device.
VGA Port
Used to connect VGA interface to the display device.

Video Wall Controller Series Manual
5. Getting Started
Port Guide
Physical Installation
The Eight1080 and Six4K are all 2U rack mountable systems.
The appliance can either be desktop mounted or installed in a standard 19” rack enclosure.
Use the enclosure mounting tabs to secure the unit within the rack. Supporting rails or a supporting shelf are always
recommended to ensure a more stable installation.
The Nano4K can be placed on a flat surface, such as a desktop, mounted on a monitor via the available VESA bracket
or wall mounted via the optional bracket.
IMPORTANT:
When installing the appliance, position the unit to allow for cable clearance at the front and rear of the unit.
Make sure that there is ample clearance around the appliance to provide sufficient air flow.
Power
IMPORTANT: A common IEC C13 cable is required to power the appliance, this is not provided and the customer will be
required to purchase one of the appropriate length and region for installation. This cable must be a 3 wire Earthed
cable and must be connected to an Earthed outlet socket.
When illuminated, the power switch LED indicates the unit is connected to a mains supply and unit is running.
All ports which deliver power are designed to the port type specification this include USB 2.0, USB 3.0 and DisplayPort 1.2.
Cables
Do not expose cables to any liquids; doing so may cause a short circuit which could damage the equipment. Do not place
heavy objects on top of any cables as this can cause damage and possibly lead to exposed live wires.
Adapters

Video Wall Controller Series Manual
It is recommended that if DisplayPort to HDMI adapters are required, only Active types are used. It is strongly advised
against the use of passive adapters.
Operation of the unit cannot be guaranteed with the use of passive adapters.
Below is a list of adapter options that have been tested and recommended. These can be ordered separately.
1. Pluggable MDP-HDMI
2. Benfei Active Adapters
3. Optical Cables - HDMI and DisplayPort up to 100m
Working Environment
The system should be located in a well ventilated area free from dust, moisture and extreme temperatures. All ventilation
holes on the casing must be kept clear of any obstruction at all times. NOTE: Failure to do so will result in the system over-
heating and potentially damaging your equipment and will invalidate the warranty.
Liquids (hot/cold drinks etc) should not be placed near the equipment as spillage could cause serious damage.
Warning
Should you notice smoke or unusual smells being emitted from your system, turn off and unplug the system from the mains
supply. The system should then be passed to a qualified technician for inspection. Continued operation could result in
personal injury and damage to property.
Cable Lengths
Workable cable lengths depend on the quality of the cables used as part of your installation.
Cable Type
Resolution
Maximum Length
DisplayPort (output)
Up to 1080p60
15m - 20m
DisplayPort (output)
Up to 4k60
10m
HDMI (output)
Up to 1080p60
10m
HDMI (output)
Up to 4k30
5m
VGA (output)
Up to 1080p60
5m
USB
N/A
3m
* Using DisplayPort to HDMI adapters will reduce maximum cable lengths.
Intermittent or Loss of Input Signal
If you lose your monitor signal or if the signal is intermittent it could mean there is a problem with the quality of cable or
the length of the cable between the unit and monitor.
Please see the recommended cable length table above.
●Check that all cables are fitted correctly.
●Try shorter cables.
●Try turning monitor power off and on
●Try unplugging and replugging cable
Maintenance
The unit requires minimal maintenance for reliable 24/7 operation however care should be taken to keep all ventilation
holes clear to allow an unrestricted flow of air through the unit. It is recommended to periodically power down unit and

Video Wall Controller Series Manual
disconnect from wall outlet, and remove any built up dust from the side ventilation holes and fan grills using a soft dry
cloth.
Note:
Failure to keep ventilation holes clear could result in damage to unit and invalidate the warranty.
Transportation and Storage
Care should be taken at all times when handling the unit. If transporting unit, it is always recommended to move unit in its
original packaging to avoid accidental damage. For maximum protection, repack the unit as it was originally packed at our
factory.
The unit should be stored in an environment between -40°C to +85°C.
6. Setup
When installing the equipment, please make sure that cables are installed so that accidents cannot occur.
Cables connected to the equipment must not be subject to any mechanical strain.
Step 1: Connect Network
Eight1080 and Six4K:
Connect Ethernet cable to LAN1 (Top LAN Port) on the appliance and connect to the video source network switch.
LAN1 is the primary network port, LAN1 should be used for video streaming interfaces.
LAN2 is the secondary network port.
Nano4K:
Connect Ethernet cable to LAN Port on appliance and connect to video source network switch.
Step 2: Connect Monitors/Display Devices
Eight1080 and Six4K:
Connect required graphics outputs, starting from left to right looking at the rear of the unit to the monitor(s).
Looking at the rear panel the Outputs run from left to right, 1 to N. Connect graphics outputs using DisplayPort
cables or active DP to HDMI adapters for HDMI cables.
Nano4K:
Connect HDMI and/or VGA outputs on the rear panel to monitor(s).
If you encounter any issues with displays try the following:
●Power Cycle Monitor
●Try Disconnecting and Reconnecting cable
●Restart System
●Try Shorter Cable
IMPORTANT: When connecting appliances to monitors via DisplayPort (Not using DP to HDMI adapters), to avoid any issues
with displays, it is highly recommended to disable any "Power-Saving" features your monitors have via the monitor settings
menu.
Step 3: Connect Power and Boot Appliance
Eight1080, Nine1080 and Six4K:

Video Wall Controller Series Manual
Connect C13 power cable to AC input connector on appliance and mains socket.Power on the unit by pressing the
power button, LED will illuminate to show the appliance is powered.
Nano4K:
Connect external power supply to mains socket and DC input connector on appliance. Power on the unit by
pressing the power button, LED will illuminate to show the appliance is powered.
Step 4: Main Screen
Your appliance will boot directly to the Windows Desktop using the following Administrator credentials:
Username: video
Password: p@ssw0rd
You will NOT be prompted for a login username and password, automatic login is configured. To change this, use the
Windows ‘Run’ command and type “netplwiz”. Uncheck the box labelled ‘users must enter a username and password to use
this computer’.
Note: It is advised that the default Windows password is changed, this must be done on the appliance itself, use CTRL-ALT-
DELETE and select ‘Change a Password’. We advise that the username remains as ‘video’.
IMPORTANT: When you change the user account Password, ensure that you update the details found in “netplwiz” for the
automatic login feature to continue.
The operating platform Language and Keyboard layout is set to English(US) by default. To change this, use the Windows ‘Run’
command and type “Region”. Follow the instructions presented.
The device uses DHCP by default, if your network supports DHCP, the appliance will now be discoverable on the network.
The appliance Hostname will be “Videowall-’XXXXX’”
You can now login to the Appliance Web Portal (AWP) to configure the appliance remotely.
Step 5: AWP Configuration
The appliance has a built in web portal which allows the unit to be monitored and configured remotely without the need for
a keyboard and mouse being attached locally.
The AWP allows the following functions:
●Monitor Device Metrics
●Manage Display Settings - Arrangement Display Layout, Set Number of Displays and Set Display Resolutions
●Manage Appliance Network Settings
●Add Video Network Sources i.e. NVR/VMS server credential settings
●Update appliance Firmware
●Restart and Shutdown Appliance
The appliance will show the AWP IP Address on the units front panel display.
Format example: http://192.168.0.99:9001
Using a client PC on the same network, enter the IP address into a web browser.
The browser will load the AWP login page when login is enabled. If disabled, user login can be enabled on the
‘Settings->Global Settings’ page.
Default AWP logon credentials.
Username: video
Password: p@ssw0rd
The ‘Users’ link in the top right hand side of the AWP allows changes to the default username and password.

Video Wall Controller Series Manual
Settings Page:
The following settings are currently available:
Display Setting:
Allows user to configure display settings
Network Settings:
Allows user to configure network port settings including static and DHCP settings
Global Settings:
General hardware and software settings
Upload Firmware:
Allows a new software release to be uploaded and installed
User Manual Download:
View this manual in the browser
RTSP Encoder Download:
Client application for screen and chosen programs to be captured, encoded and transported as accessible
authenticated RTSP video sources
Restart:
Restarts Appliance
Shutdown:
Shuts down Appliance

Video Wall Controller Series Manual
Display Settings:
The remote display settings page allows the user to arrange the display layout on the video wall appliance.
The “Display Arrangement” drop-down contains the current available arrangements based on the connected and
discovered outputs in addition to what resolutions the displays attached support.
Once the desired layout/mode has been selected the display grid arrangement will update to show the current monitor
arrangement.
Pressing “Identify” will display the output ID(s) on the monitor(s). Use the grid to drag displays to the desired desktop
position without physically unplugging and plugging video cables.

Video Wall Controller Series Manual
Once layout is correct use the “Apply” button to update the settings on the video wall appliance.
If any displays are not detected it is recommended to press the “Redetect” button.
Select the “Lock Displays” option to allow monitors to be turned off and on without Windows re-arranging the Desktop.
Network Settings:
The network settings page presents the user with remote access to configure active network ports on the appliance.
By default the appliance ships with all ports set to DHCP.
The page will auto display all active network ports on the appliance and display the current settings for each.
Pressing the “Edit” button for each of the ports will open a dialogue window which allows the user to change the current
settings. This includes both IP and DNS settings which can be DHCP or Static.

Video Wall Controller Series Manual
Click “Apply Changes” to set the configuration.
NOTE: when changing network settings on the appliance, you may be required to reload or refresh the AWP browser page.
Adding Inputs:
Inputs are sourced from supported video servers, ONVIF compatible devices or through manually adding inputs.
Inputs are added on the ‘Inputs’ page.
The page will display any input server credentials which have been previously added. In most cases, only a single set of
credentials are required, this depends on the input integration type.
Input Servers:
The ‘Add New Input Server’ page permits the appliance software access to input sources from NVRs, ONVIF supported
devices or VMS Servers on the network. If full integration is supported by the Input Server, the appliance will appear as a
display device within the associated VMS Client for direct control of the appliance using the VMS UI in addition to AWP
control via the ‘Layout’ page.
Press the “Add New Input Server” to open a “Add New Input Server” dialog window:

Video Wall Controller Series Manual
‘TARGET SERVER’ lists supported input servers. Select an integration type from the drop down list. Use the link at the
bottom of the pop up windows to view the setup instructions and connection diagram for the selected integration.
Click “Add Server” to apply and accept these settings.
Manually Add Inputs:
The ‘Input’ page allows the user to manually add the following input types:
●Network video streams
●Local video sources
●Applications with command line arguments
●VNC viewers
●Web pages

Video Wall Controller Series Manual
Video Capture Cards:
Supported audio video capture cards are automatically enumerated by the appliance at startup and presented to the user
in the ‘Layout’ page under the heading ‘Capture’.
For further details, information and guides, see ‘Getting Started’ found in the AWP ‘Help’ page.
7. Support
For technical support, please contact via one of the below options:
BlueBox Video Ltd,
Pontefract Road,
Unit 5 Courtyard 31,
Normanton,
WF6 1JU,
United Kingdom.
Tel: +44 7307 052693
Email: support@bluebox.video
www.bluebox.video
This manual suits for next models
5
Table of contents
Other Hanwha Techwin Media Converter manuals
Popular Media Converter manuals by other brands
Pixel Magic Systems
Pixel Magic Systems plasma Enhancer PE1000 PRO Brochure & specs
Esoteric
Esoteric OP-DAC1 owner's manual

SRS Lighting
SRS Lighting DST5-RDM instruction manual
TRENDnet
TRENDnet TFC-210MST - Media Converter - External Specifications
Atlona
Atlona AT-HD510VGA user manual
Vitec Multimedia
Vitec Multimedia MGW Ace Decoder OG user manual
