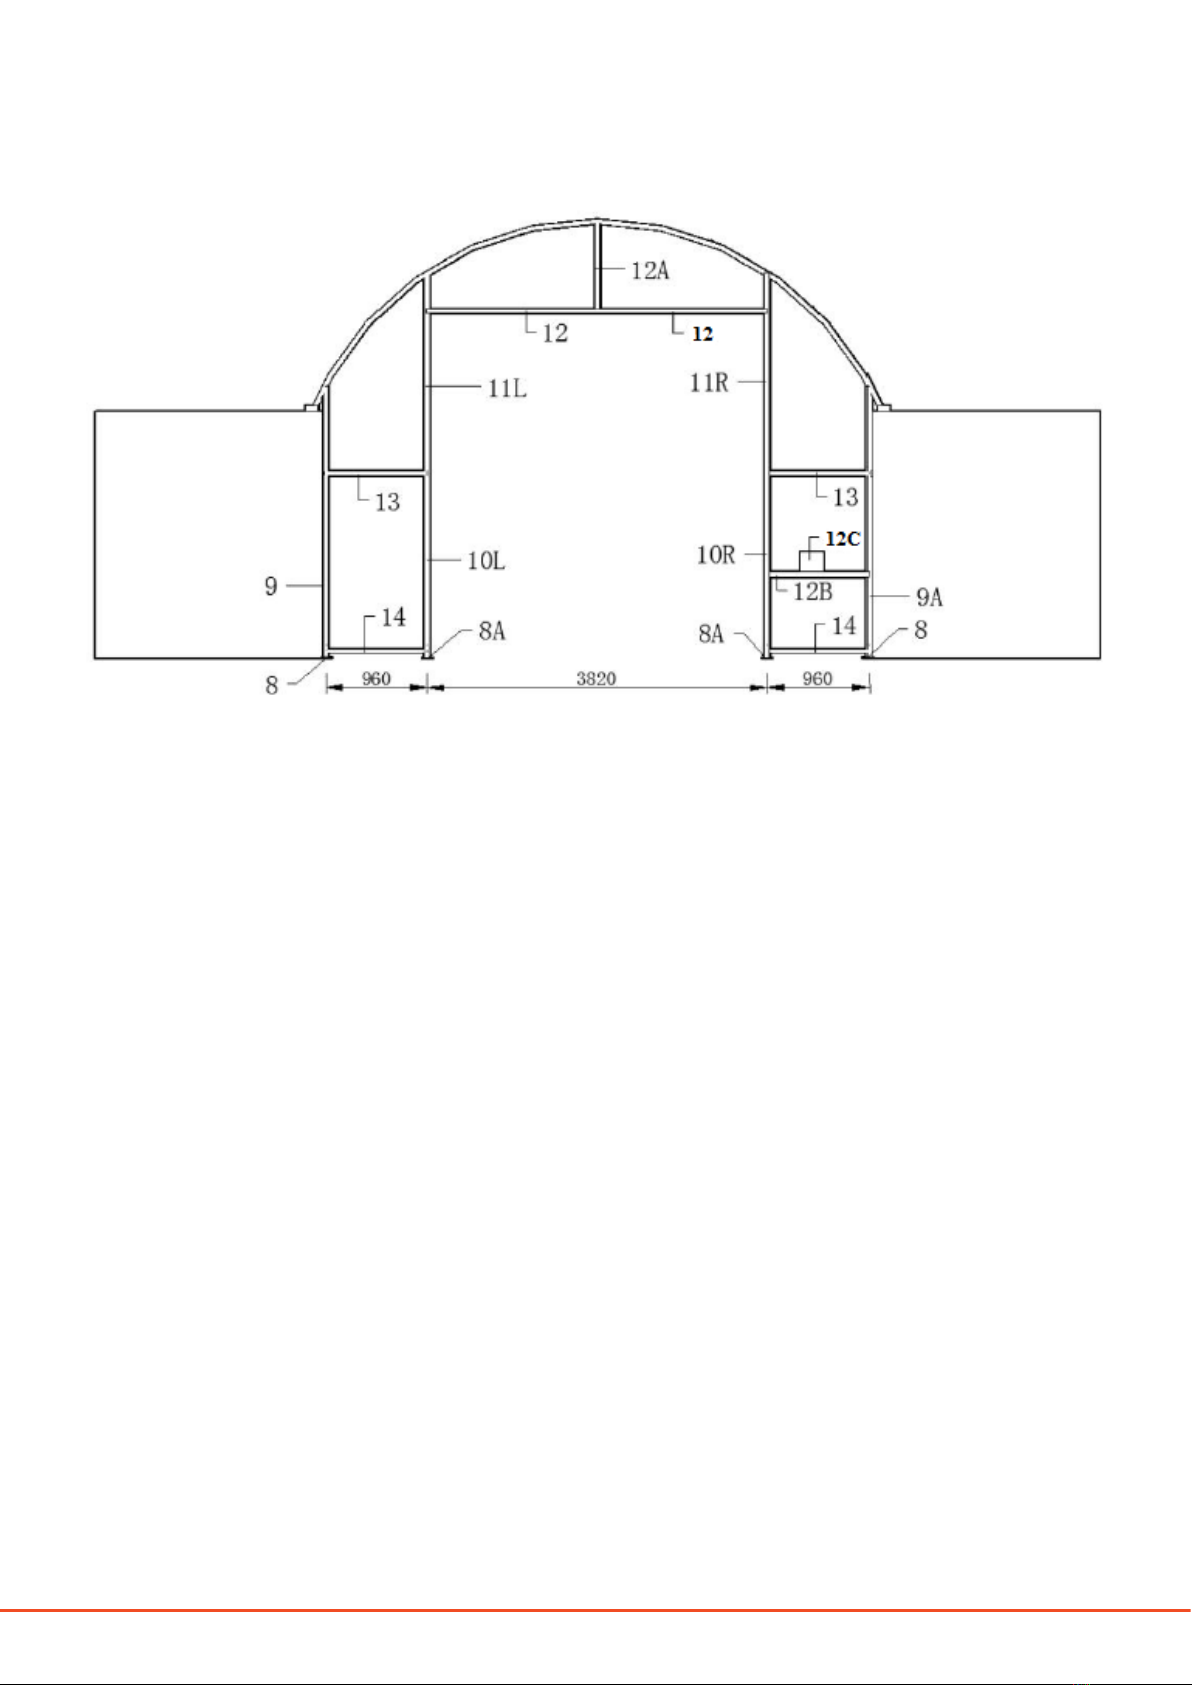
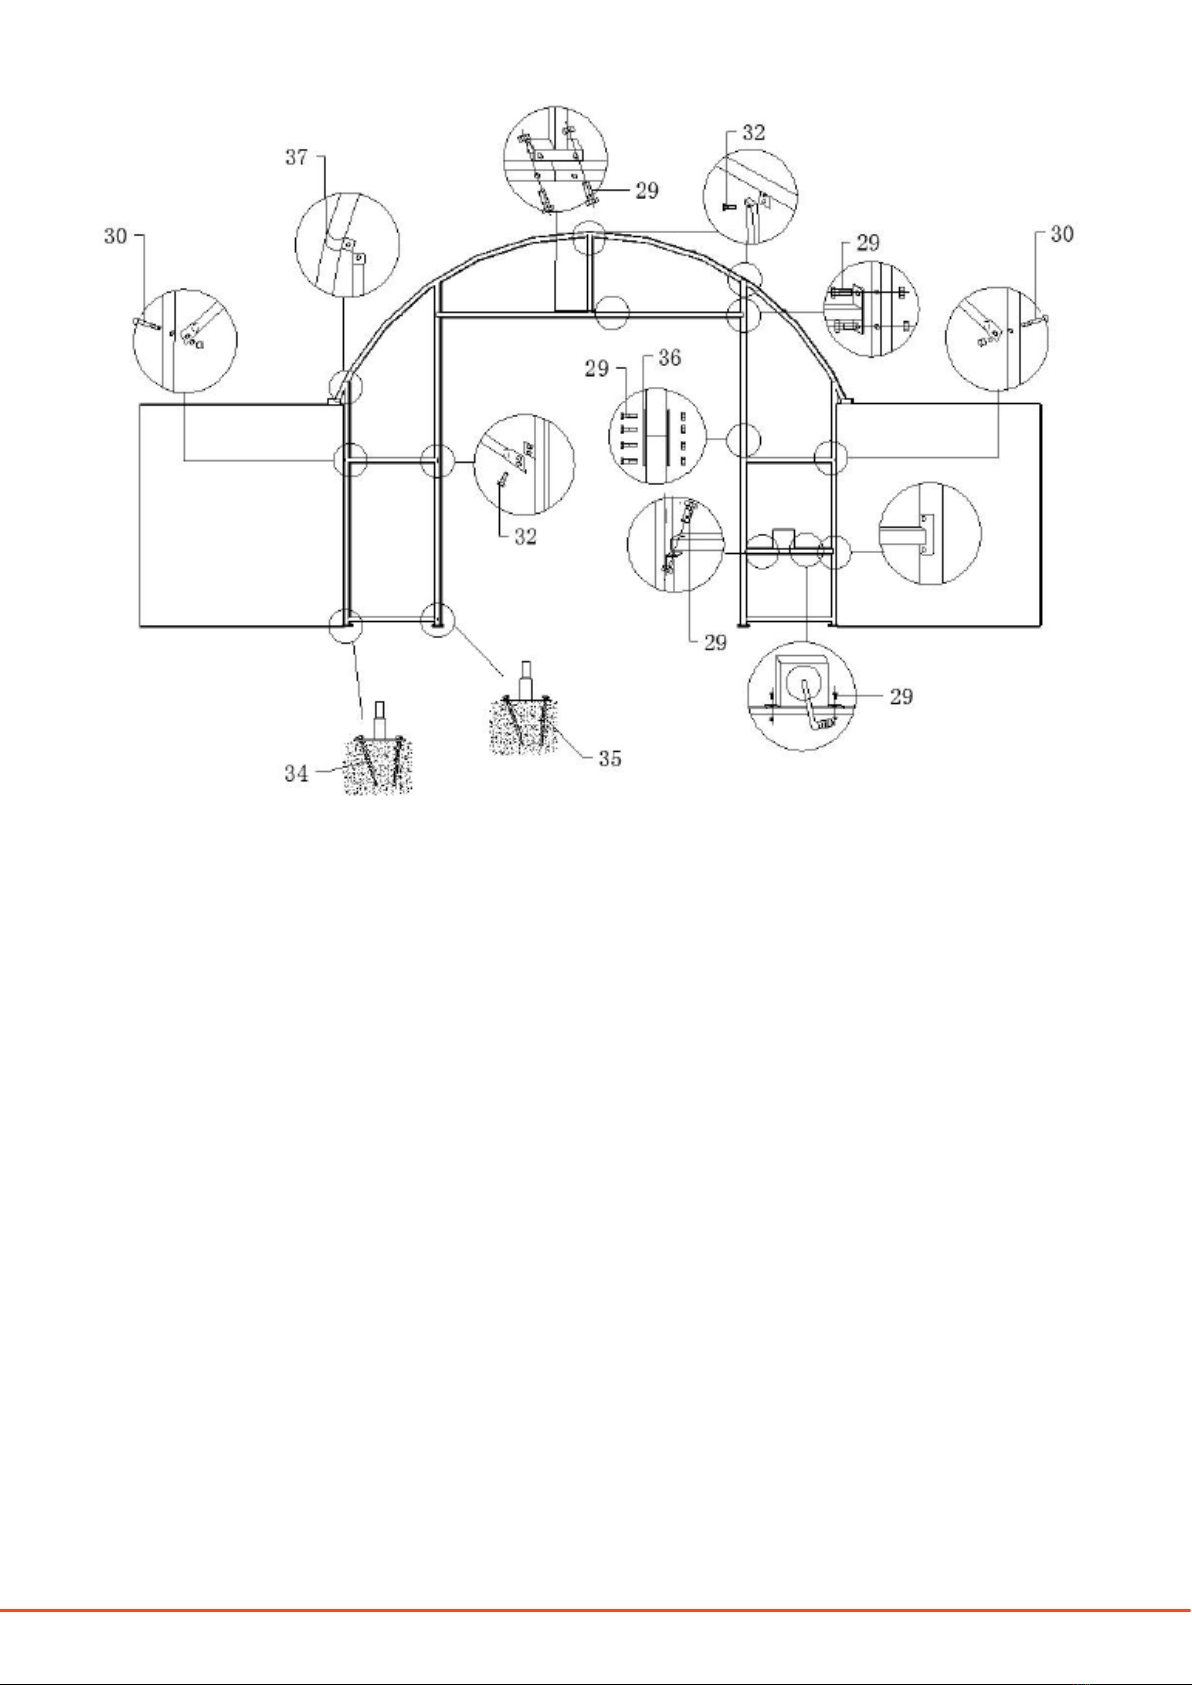
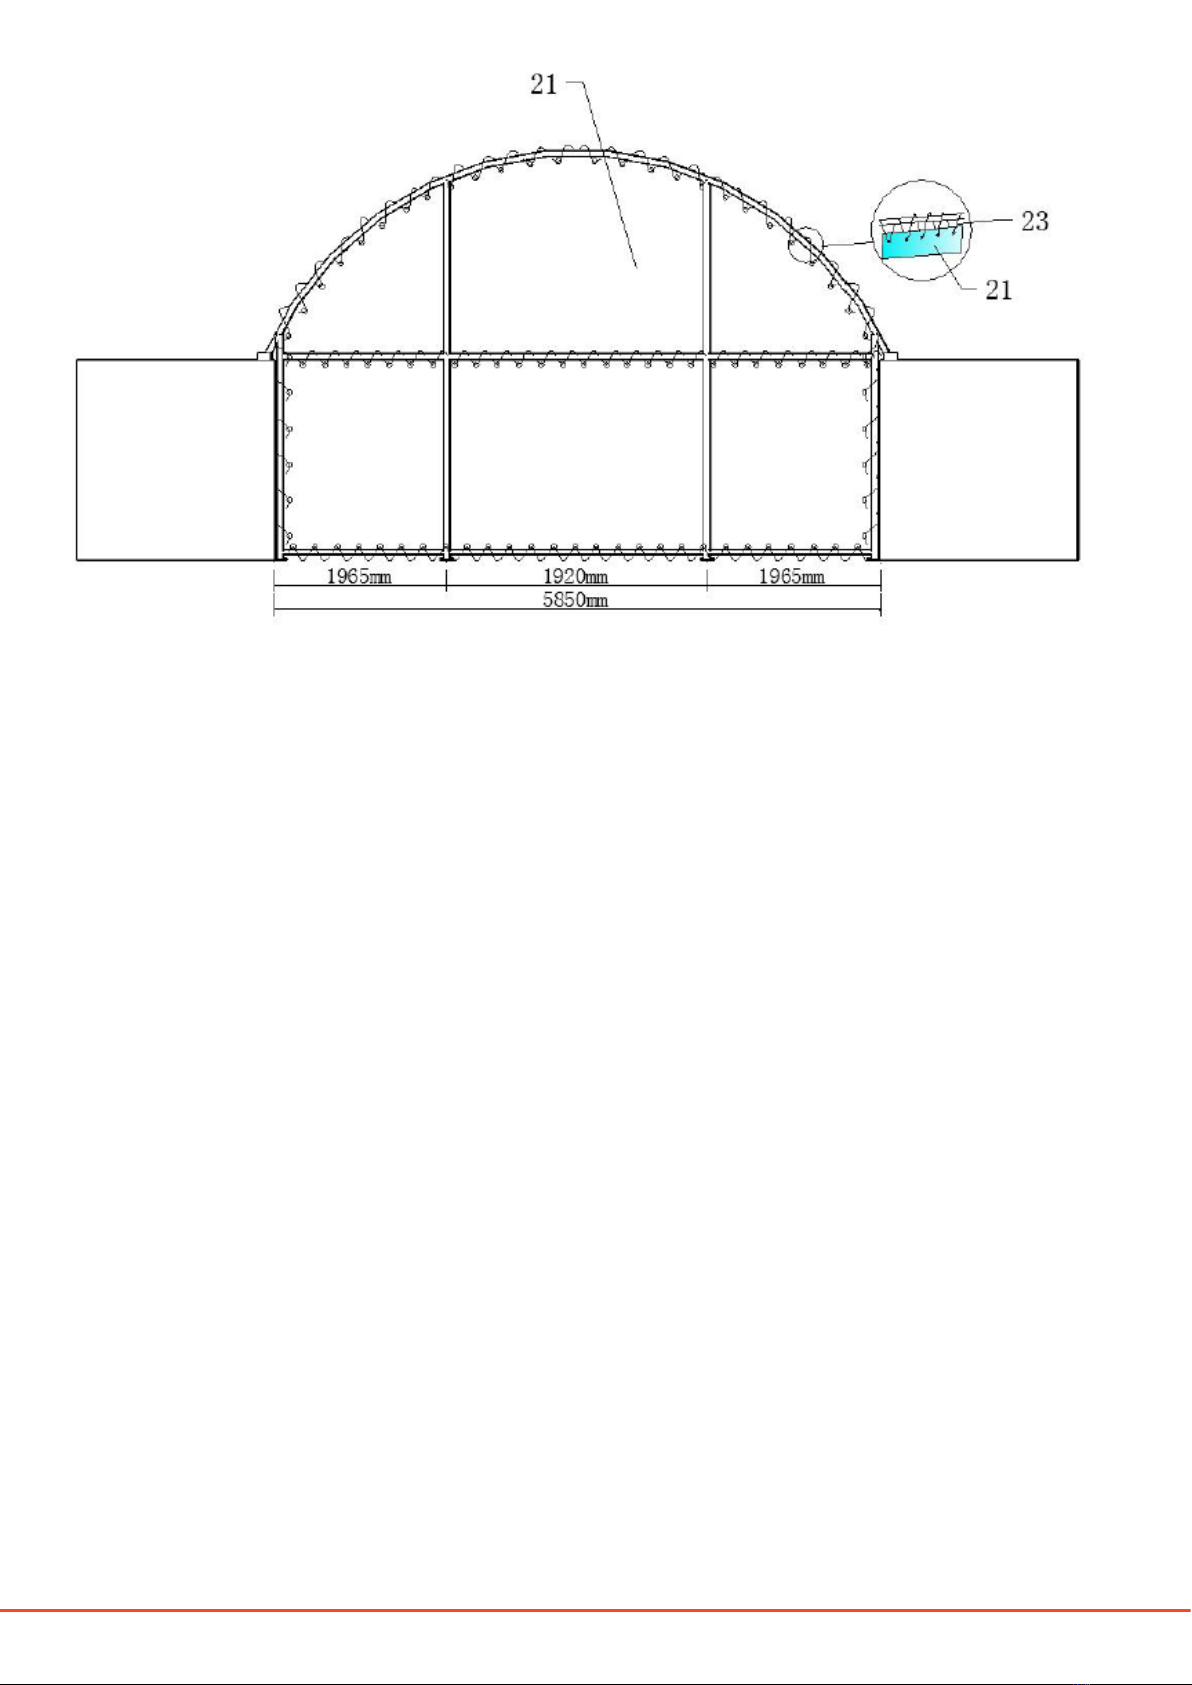
Hardlife Utility C2020 User manual


Other manuals for C2020
1
This manual suits for next models
1
Table of contents
Other Hardlife Utility Shelter manuals

Hardlife Utility
Hardlife Utility C2020 User manual

Hardlife Utility
Hardlife Utility C2620 User manual

Hardlife Utility
Hardlife Utility C2020H User manual

Hardlife Utility
Hardlife Utility C2620 User manual

Hardlife Utility
Hardlife Utility 204016DP User manual

Hardlife Utility
Hardlife Utility C4040 User manual
Popular Shelter manuals by other brands

Texsport
Texsport Item 01085 instructions

Storage Canopy
Storage Canopy EWC6040DTR Assembly instructions

Storage Canopy
Storage Canopy 26x40x10 Container Shelter Single truss Assembly manual

TMG
TMG TMG-ST3040-1.0 product manual

ShelterLogic
ShelterLogic Shed-in-a-Box 70401 Assembly instructions

AMERICANA OUTDOORS
AMERICANA OUTDOORS COLONIAL Assembly instructions


TMG
TMG TMG-DT3063-PRO product manual

felton industries
felton industries FELDBSH Aassembly Instructions

Shelters4Less
Shelters4Less SR1553 Assembly instructions

Storage Canopy
Storage Canopy C3340S Assembly manual

Kozyard
Kozyard 12'x20' Alexander hardtop gazebo with double... Assembly manual

ShelterLogic
ShelterLogic ShelterCoat 12'W x 8'H Peak manual