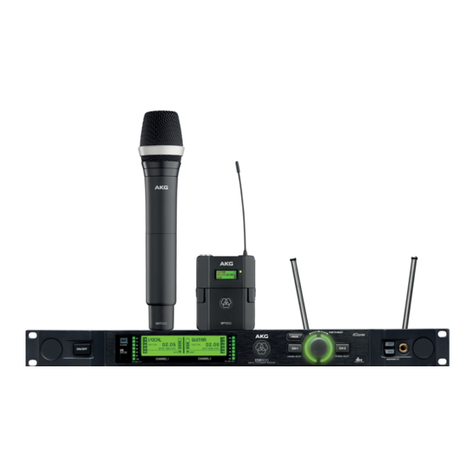
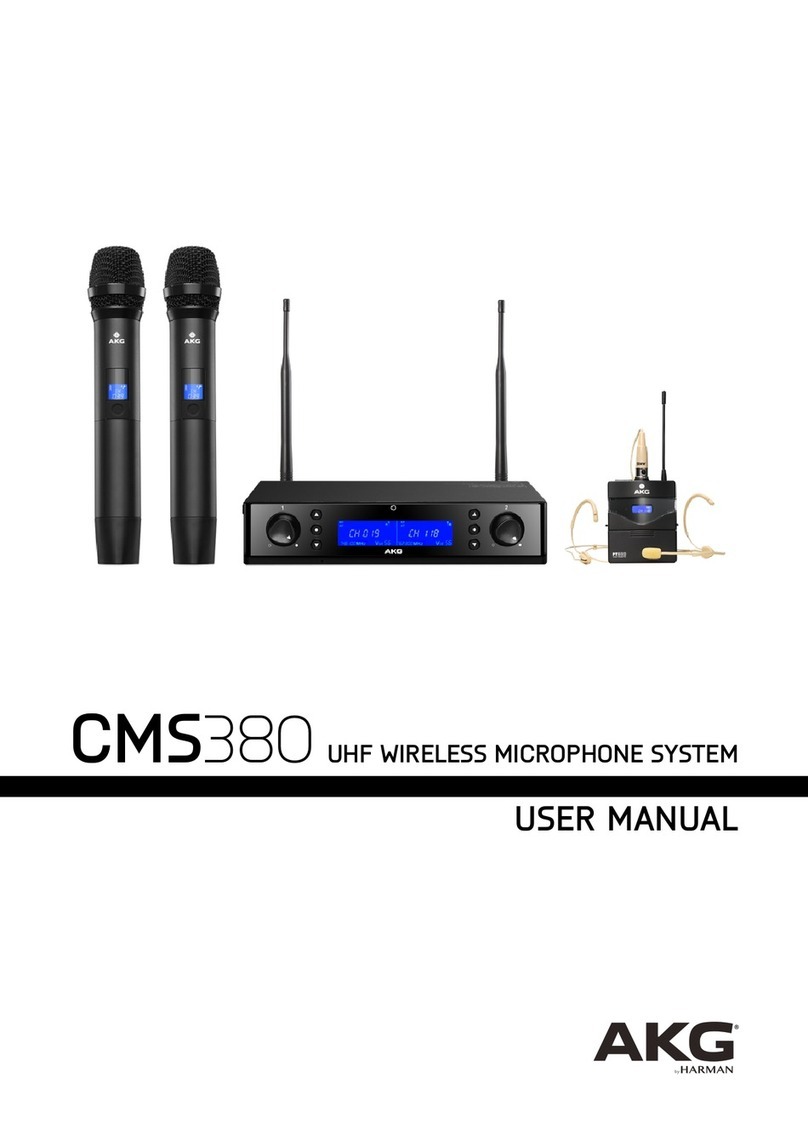
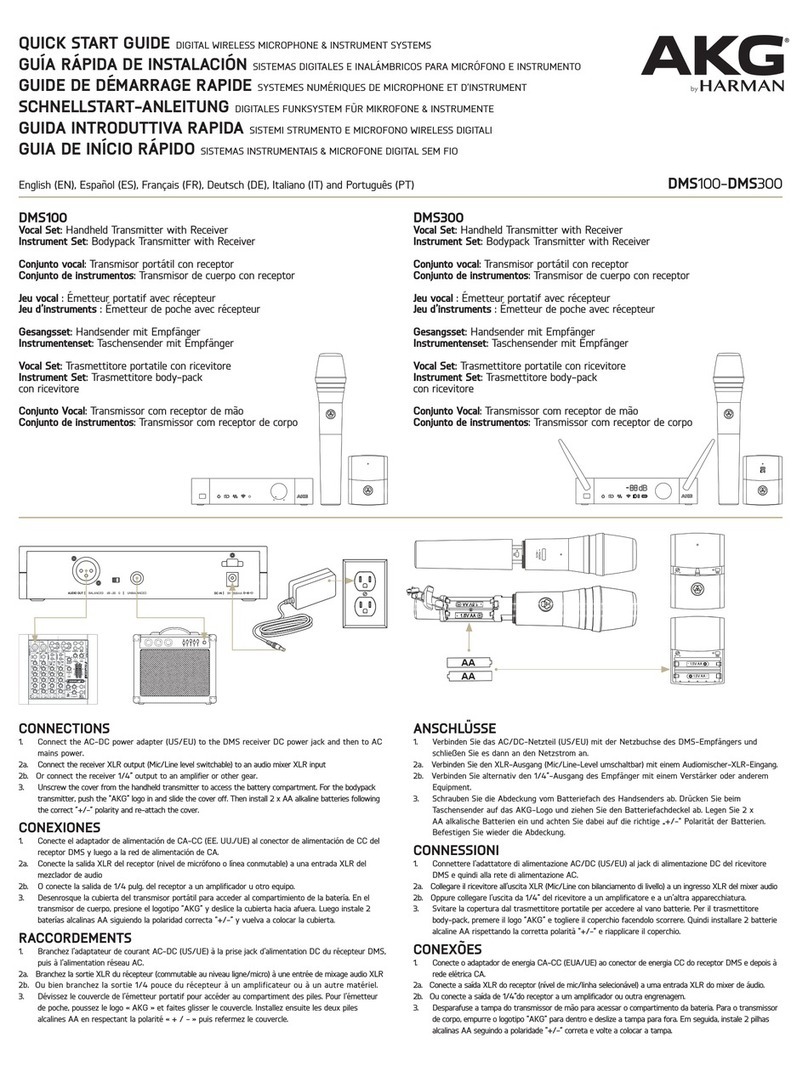
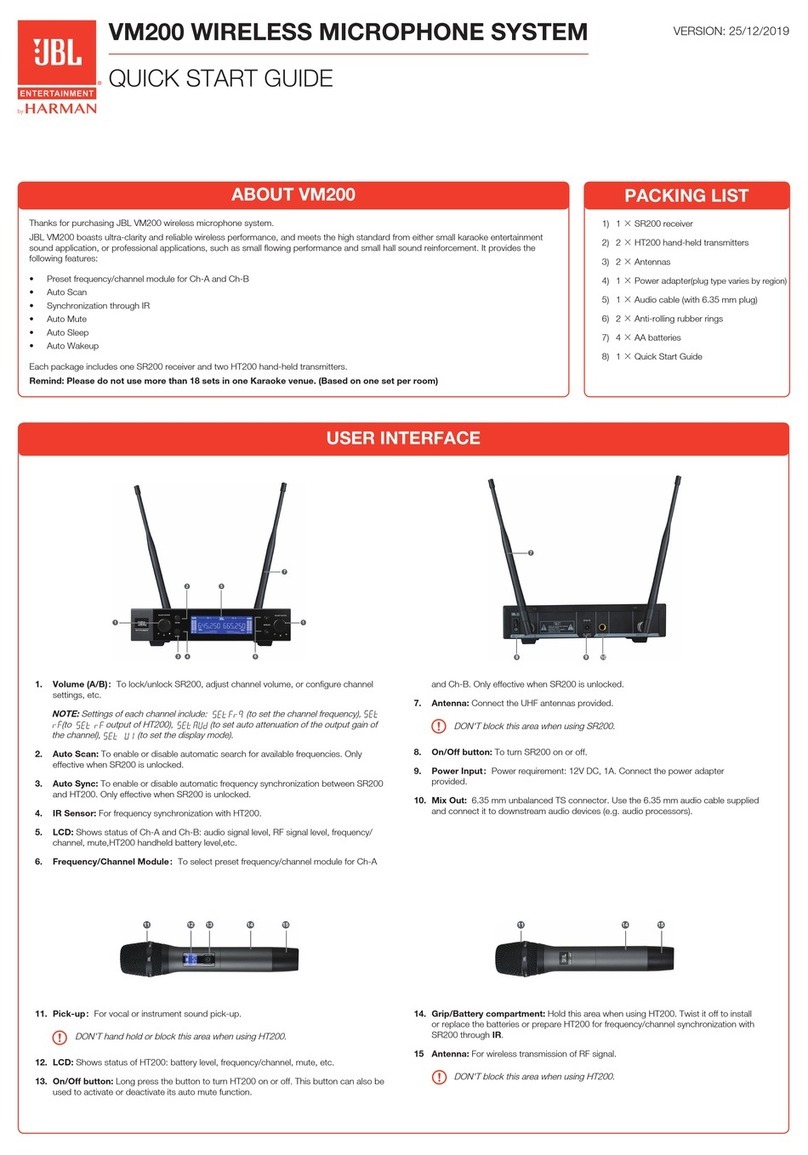
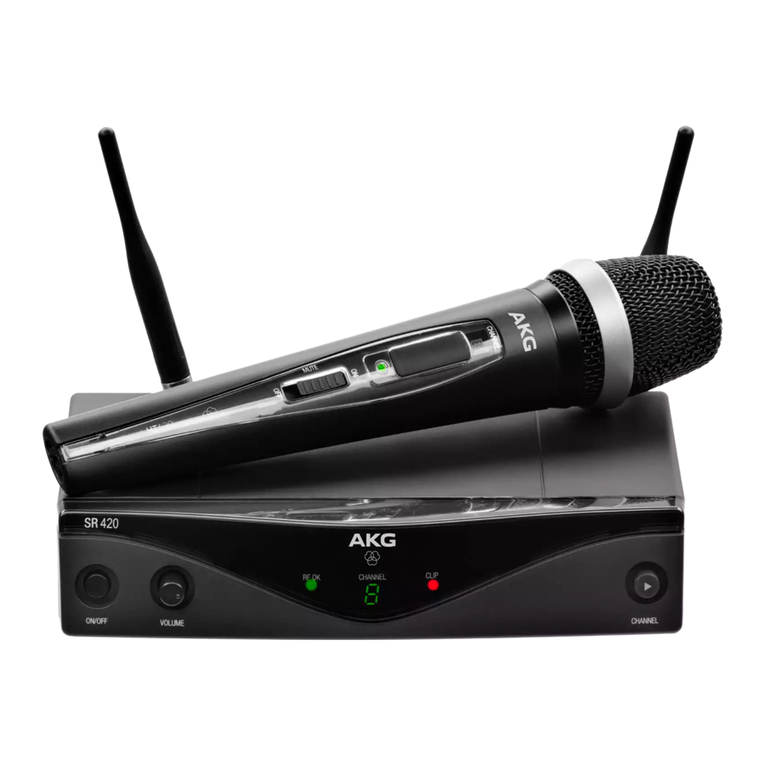
Harman AKG WMS420 User manual

WMSU2O
ULTRA HIGH FREQUENCY
Plug and play solution
ïransmitter with charging contacts
6 to I hours with one single AA-size battery
Dry battery or rechargeable battery
Detachable receiver antennas
Llp to I channels in one band
Low battery warning
PT/+20
Bodypack transmitter
5R1+20
Stationary receiver
c555 L
Head-worn microphone
,J
J1
Y.
3
3
I
3
JJ
T
HEAD-WORN SET w¡th MicroMlC C5551
WMS420 Quick Start GUIDE, multilingual
(JCWSR400 joimax@ Funkmikrofonset für Sprachsteuerung)

V\íMSL2O Quick Start Guide
' r' Controls: 5R420 - HT420 - PT42O
SR42O
10
11 12
PT42O 13
HT42O
14
3: RF 0K leuchtet, wenn der Empfänger ein Signal ausreichender Stärke empfängt; bei keinem oder
zu schwachem Signal leuchtet RF 0K nicht
RF 0K llghts up if the receiver is receiving a sufficiently strong signal; RF 0K will not light up if a
signal is not being received or the signal is too weak
RF 0K est allumé lorsque le récepteur reçoit un signal de puissance suffisante ; en cas d'absence
de signal 0u de signal trop faible, RF 0K ne s'allume pas
RF 0K: questo LED si illumina se viene ricevuto un segnale di intensità adeguata, mentre non si
illumina se non viene ricevuto alcun segnale oppure se I'intensità del segnale è insufficiente
RF 0K se enciende cuando el receptor recibe una señal lo bastante fuerte; si no hay señal o ésta
es muy débil, el RF 0K no se enciende
A luz RF 0K acende quando 0 receptor recebe um sinal com intensidade suficiente; se não for
recebido nenhum sinal ou se este for fraco, a luz RF 0K não acende
B: Kontroll-LED für Betriebsbereitschaft und Batteriekapazität
LED indicating readiness for operation and battery capacity
DEL de contrôle pour l'élat opérationnel et le niveau de charge des piles
LED di controllo dello stato di carica e della capacità della baüeria
LED de control para la disponibilidad de servicio y la capacidad de la batería
LED de controlo da operacionalidade e da capacidade das pilhas
CONTENT Paqe
Controls 1
Setting Up 2
Operation 2
T¡ps &Tricks 3
Volume Configuration 4
4
4o
B
B
o
7
o6
45
3
2
5: CLIP leuchtet wenn derAudiopegel zu hoch ist 6: CHANNEL zum Einstellen von bis zu I verschiedenen Kanälen
CLIP lights up if the audio level is too high CHANNEL for seleciing up to B different channels
CLIP est allumé lorsque le niveau audio est trop élevé CHANNEL pour le réglage de B canaux au maximum
CLIP: questo LED si illumlna se il livello audio è troppo elevato CHANNEL manopola che consente di impostare fino ad B canali diversi
CLIP se enciende cuando los niveles de audio son demasiado elevados CHANNEL para la sintonización de hasta B canales distintos
A luz CLIP acende se o nível de áudio for demasiado alto Botão CHANNEL para definir até B canais diferentes
4: Display zeigt den eingestellten Kanal an
Display shows which channel has been selected
L'écran afiiche le canal réglé
ll canale impostato viene visualizzato sul display
La pantalla indica el canal ajustado
0 visor mostra o canal definido
7: GAIN Schieberegler zum Einstellen der Eingangsempfindlichkeit
GAIN slide control for setting input sensitivity
Curseur GAIN pour le réglage de la sensibilité d'entrée
Cursore GAIN per la regolazione della sensibilità dl ingresso
GAIN Fader para ajustar la sensibilidad de entrada
Botão deslizante GAIN para definir a sens¡bllidade de entrada
9: Ein/Aus Schieberegler mit MUTE-FunKion
0n/Off slide control with MUTE function
Curseur Marche/Arrêt avec fonction MUTE
Cursore 0N/0FF con Tunzione MUTE
Conectar/Desconectar el fader con función MUTE
Botão deslizante Ligar/Desligar com funçäo MUTE (silêncio)
1 2: Batteriefachdeckel
Battery compartment cover
Couvercle du compartiment des piles
Scomparto batterie
Tapa de la batería
Tampa do compartimento das pilhas
'I 0: Miní-XLR-Eingangsbuchse
Mini-XLR input jack
Fiche d'entrée mini XLR
Mini-presa di ingresso XLR
Clavija de entrada mini-XLR
Tomada de entrada XLR mini
1 3: GAIN Potentiometer zum Anpassen des Eingangspegels
GAIN potentiometer for adjusting the input level
Potentiomètre GAIN pour l'adaptation du niveau d'entrée
Potenziometro GAIN per la regolazione del livello di ingresso
GAIN Potenciómetro para ajustar los niveles de entrada
Potenciómetro GAIN para adaptar 0 nível de entrada
'l: Ein/Aus Taste
0n/0ff button
Touche Marche/Arrêt
Tasto 0N/0FF
Tecla Con/Des
Botão Ligar/Desligar
2: Lautstärkeregler
Volume control
Réglage du volume sonore
Manopola di regolazione volume
Regulador de volumen
Regulador de volume
1 1 : Glirtelspange
Belt clip
Agrafe de ceinture
Clip per cintura
Hebilla de cinturón
Gancho para cinto
1 4: Ladekontakte
Charging contacts
Pôles de charge
Contatti di carica
Contactos de carga
Contatos de carga
14
ovHARMAN
0111415041325_A
@AKG"
@C€OÊ?ÃRoHSOK
Printed in China (PR.C.)
Dona l

0
r-å-
:)
Ül
ç
;:
*J
e,
LN
m"
-_-,i
i:Tt
ñ
.]!J
fiJ
t-f1
Antennen anschließen
Connect antennas
Connecter antennes
Collegare le antenne
Conectar antenas
Conectar as antenâs
Empfänger an das Netz anschließen und Batterien in den Sender einlegen.
Connect receiver to the mains and insert batteries in the transmitter.
Raccorder le récepteur au réseau et placer ìes piles dans l'émetteur.
Collegare il ricevitore alla rete e inserire le batterie nel trasmettitore.
Conectar el receptor a la red y cOlocar las baterías en el emisor.
Ligue o receptor à corrente e coloque pilhas no transmissor.
SQUELCH Regler auf Minimum stellen.
Set SoUELCH control to minimum.
Placer le bouton SOUELCH sur le m¡nimum.
Regolare la manopola S0UELCH sul livello minimo.
Colocar el regulador SQELCH al mínimo.
Coloque o regulador S0UELCH no mínimo.
max.3 m
Empfänger an symmetrischen 0DER asymmetrischen Eingang anschließen!
Connect receiver t0 a balanced 0R unbalanced input!
Brancher le récepteur à l'entrée symétrique 0U à I'entrée asymétrique !
Collegare il ricevitore all'ingresso simmetrico 0PPURE assimmetrico!
Conectar el receptor a la entrada simétrica 0 asimétrical
Ligue o receptor a uma entrada simétrica 0U assimétrica!
0
lnstrument oder Mikrofon an den Mini-XLR-Stecker des Taschensenders anschließen.
Connect instrument or microphone t0 the min|-XLR jack of the pocket transmitter.
Brancher l'instrument ou le microphone à la fiche mini XLR de l'émetteur de poche.
Collegare lo strumento o il microfono al mini-connettore XLR del trasmettitore portatile.
Conectar el instrumenfo o micrófono en la clavija mini-XLR del transmisor portálil.
Ligue 0 instrumento ou o microfone à tomada XLR mini do transmissor portátil.
I
,g
*J
ru
a
â
c)
3
cxì
!:
i¡::;
'H
flJ
[4ì 3
ìl
lml
\Wþ
J
FI
\ffi
3
W
.g
&-¡
ßu
fl¡
{"t
Mindestabstand zwischen Sender und Empfänger beachten.
0bserve minimum distance between transmitter ând receiver.
Respecter la distance minimale entre l'émetteur et le récepteur.
Osservare la distanza minima richiesta tra trasmettitore e ricevitore.
Respetar la d¡stancia mínima enire el emisor y el receptor.
0bserve a distância mínima entre o transmissor e 0 receptor
Empfänger und Sender einschalten.
Switch on receiver and transmitter.
Mettre sous tension le récepteur et l'émetteur
Accendere il ricevitore e il trasmettitore.
Conectar el emisor y el receptor.
Ligue o receptor e o transmissor.
Empfänger und Sender auf den gleichen Kanal stellen.
Tune receiver and transmitter to the same channel.
Régler le récepteur et l'émetteur sur le même canal.
lmpostare il ricevitore e il trasmettitore sullo stesso cana
Ajustar el emisor y el receptor en el mismo canal.
Coloque o fansmissor e o receptor no mesmo canal.
ffi
Grün: Batterie ist ok und der Sender betriebsbereit; Rot: Batterie bald austauschen; Kein Aufleuchten: Batterie austauschen
Green: Battery is 0K and transmitter is operational; Red: Replace battery soon; Does not light up: Replace battery now
Vert : La pile est en ordre et l'émetteur est prêt à l'emploi ; Rouge : Remplacer bientôt la pile ; Éteint : Remplacer la pile
ll LED si illumina di verde: Buon livello di carica dellâ batteria e trasmettitore pronto per l'uso; ll LED si illumina di rosso: Carica
ridotta; ll led non si illumina: Sostituire la batteria
Verde: La batería está bien y el emisor está listo; Rojo: Cambiar la batería pronto; Ningún destello: Cambiar la batería
Verde: A pilha está ok e o transm¡ssor está operacional; Vermelho: A pilha deve ser substituída brevemente; Sem luz: Substitua a pilha

-f'lps & Tl"icks
Bei Mikrofonen mit einer nierenförmigen Richtcharakteristik erfolgt die größte
Dämpfung des Schalls bel 1 80". Deshalb werden dieso Mikrofone bevorzugt
eingeselzt, wo sich eine Störschallquelle oder ein Lautsprecher unmlttelbar
gegenüber dem Sprecher befindet, Ein Besprechungsabstand unter 5 cm verleiht
lhrer Stimme einen voluminÖsen und bassbetonten Klang.
In the case of micr0phones wilh a cardloid polar pattern, m0st sound attenuation
oçcurs at 1 B0'. These microphones should therefore preferably be used where there
is an interference noise source or a loudspeaker directly opposite the speaker.
Holding the microphone less than 5 cm from your mouth wlll give your voice a
voluminous and punchy quality.
Sur les micr0phones à directivité cardioiTe, la plus grande atténuation du son
intervient à 180". C'est pour cette raison que I'utilisation de ces microphones est
privilégiée lorsqu'une source d'interférences sonores ou un haut-parleur se trouve
juste en face de I'orateur, Une distance d'ulilisation inférieure à 5 cm donne à votre
voix un son bas et caverneux.
Nei microfoni con direttività cardiolde, la massima attenuazione del suono viene
prodotta a 1 80". Questi tipi di microfoni vengono quindi preferibilmente implegati nel
caso in cui una fonte di disturbo sonoro oppure un altoparlante siano posti
direttamente di fronte a colui che parla. Una distanza microfonica inferiore a 5 cm
conferisce alla voce un suon0 voluminoso, dai bassi accentuati.
En micrófonos con pafón polar cardioide se consigue un mayor amortiguamiento de
las ondas a 1800. Por eso es preferible utilizar estos micrófonos, en los que una
fuente de perturbación del sonido se encuentrajusto en frenle del locutor, Sl habla a
menos de 5 cm, su voz adquirirá un tono voluminoso de bajos acentuados.
Nos microfones com padrão direccional cardióide, a atenuação do som é maior a
1 B0'. Por este motivo, estes microfones são preferencialmente utilizados quando
uma fonte de ruído ou um altifalante se encontra mesmo à frente do utilizador. Ao
falar a men0s de 5 cm do microfone, a voz fica com um lom volumoso e grave.
Tips & Tricks
Lassen Sie nie mehr als 2 Personen in ein Mikrofon singen. Der Ëlnfallswinkel sollte
nie größer als 35' seinl
Never let more than 2 people sing into one microphone. The angle of incidence
should never be more than 35"!
Ne laissez jamais plus de 2 personnes chanter sur le même microphone. L'angle
d'incidence ne d0itjamais excéder 35' !
Non lasciare mai cantare più dl 2 persone per microfono. L'angolo di incidenza non
deve mai essere superiore a 35"!
No deje que canten nunca más de dos personas en el micrÓfono. El ángulo de
incidencia nunca debe ser supeli0r a los 350!
Não permita que mais d0 que 2 pessoas cantem num mlsrofone. 0 ângulo de
incidência nã0 deve nunca ser superlor a 35o!
Elngangsempfindlichkeit am Taschensender PT420, mit dem im Batteriefaohdeckel
integrierten Schraubenzieher, und am Handsender HT420, mit dem Schieberegler
unter deÍ Gummiabdeckung, einstellen:
Wenn CLIP häufig leuchtet, GAIN am HT420 auf "10W" und das Potentlometer am
PT420 kleiner stellen.
Wenn RF 0K erllscht, wird kein Signal empfangen, Abstand zwischen Sender und
Empfànger verl{einern bzw. SQUELCH Regler solango gegen den Uhrzeigerslnn
drehen, bis RF 0K wieder leuchtet.
Adjust the input sensitivity on the PT420 pOcket transmitter using the screwdr¡ver
included in the battery compartment cover; 0n the HT420 manual transmitter, use the
slide control under the rubber cover:
lf CLIP lights up frequently, set the GAIN on the HT420 to "10W" and reduce the
potentlometer setting on the PT420.
lf RF 0K goes out, it means that no signal is being received. Reduce distance
between transmitter and receiver or turn S0UELCH c0ntrol knob counter-clockwise
until RF 0K lights up again.
Régler la sensibilité d'eniróe sur l'émetteur de poche PT420 avec le tournevis intégré
au couvercle du compartiment des piles et avec le curseur situé sous le cache en
caoutchouc pour l'émetteur portable HT420 :
Lorsque CLIP est souvent allumé, réduire GAIN sur le HT420 sur la position ( LOW )
et baisser le potentiomètre sur le PT420,
Lorsque RF 0K s'éteint, aucun signal n'est reçu. Réduire la d¡stance entre l'émetteur
et le récepteur ou tourner le bouton SQUELCH en sens inverse des aiguilles d'une
montre jusqu'à ce que RF 0K s'allume à nouveau.
Regolare la sensibilità di ingresso del trasmettitore portatile PT420 utilizzando il
cacciavite integrato nello scomparto batterie e la sensibilità di ingresso del
trasmettitore a manO HT420 utilizzando il culsore presente solto la protezione in
g0mma:
se il LED OL|P sl illumina di frequente, impostare il cursore GAIN del trasmettitore
HT420 sul livello "10W" e il potenziometro del trasmettitore PT420 su un livello
inferlore.
Quando ll LED RF 0K si spegne, non viene rleevuto alcun segnale. Ridurre la distanza
fra lrasmettitoro e riçevit0re oppure ruOtare il regolatore SoUELCH in senso anllorario
fino a quando non si accende nuovamente RF 0K.
En el transmisor portátil PT420, ajuste la sensibilldad de entrada con el deslornillador
integrado en la tapa de la batela, y en el emisor de mano HT420, con el fader de
debajo del revestim¡ento de goma.
Si el CLIP se enciende frecuentemente, reduzca el GAIN del HT420 a "10W" y el
potenciómetro del PT420.
Si se apaga el RF 0K, no recibirá ninguna señal. Reducir la distancia entre el emisor y
el receptor o girar el regulador SQUELCH en sentido contrario a las agujas del reloj
hasta que RF 0K vuelva a lluminarse.
Defina a sensibilidade de entrada no transmlssor portátil PT420, utilizando a chave
de parafusos integrada n0 compartimento das pilhas, e no botão deslizante do
HT420, utlllzando o botão deslizante por baixo da cobertura de borracha,
Se a luz CLIP acender frequentemente, coloque o botão GAIN do HT420 em "10W" e
reduza o potenciómetro do PT420,
Se a luz RF 0K apagar é porque não está a ser recebido nenhum sinal. Reduzir
distância entre emissor e receptor 0u rodar regulador SQUELCH no sentido contrário
ao dos ponteiros do relógio até acender novamente a luz RF 0K.
Tips & Tricks
3
'Ml
,.f,H1
Page 3

Volume Configuration - Audio-Mixer
Passen Sie den Audiopegel mit dem Volume-Button an lhr angeschlossenes Gerät
an. Für optimale Ergebnisse empfehlen wir einen möglichst hohen Eingangspegel
um einen optimalen Signal-Rauschabstand zu erhalten. Beachten Sie jedoch, dass
die Pegelanzeige auch bei lautem Besprechen des Mikrofons nie ln den roten
Bereich gerät, da es sonst zu unangenehm klingenden Verzerrungen kommen
kann. Erhöhen Sie den Eingangspegel vorsichtig bls die Pegelanzeige gerade nicht
rot aufleuchtet.
Adjust the audlo level using the Volume control on the instrument you have
connected. For best results we recommend uslng the hlghest possible input level
in order t0 obtain the þest posslble signalto-noise ratio. Howeve¡ even when
some0ne is speaking loudly into the microphone you should lake care to ensure
lhatthe level indicalor never moves int0 the red zone; failure 1o do so can result in
unpleasant distortion. Carefully increase the lnput level until the level indicator is
just below the red zone.
Adaptez le nlveau audio avec le þ0ut0n do volume à votre appareil racc0rdé. Pour
les meilleurs résultats, nous recommandons un niveau d'entrée le plus élevé
possible pour obtenir un rapp0rt signal/bruit optlmal. Veiller toutefois à ce que
l'indicateur de niveau ne passe pas dans la zone rouge en parlant fort devant le
microphone afin de ne pas risquer de distorsions désagréables. Augmenter
lentement le niveau d'entrée jusqu'à ce que l'indicateur de nlveau ne passe pas
au rouge.
Regolare il livello audio mediante il tasto di regolazione volume in funzione del tipo
di apparecchio collegato, Per risultati ottimall, si consiglia un livello d'ingresso il
più alto possibile per garantire un rapporto segnale/rumore ottimale. Accertarsi
comunque che l'indicatore di livello non si trovi mai nell'area rossa, anche quando
sl parla nel microfono a voce alta, ln quanto in caso contrario potrebbero
verificarsi spiacevoli distorsioni sonore, Aumentare gradualmente il livello
d'ingresso finché l'indicatore di livello non risulta più illuminato di rosso,
Regule los niveles de audio con el botón de volumen en su equipo conectado. Para
unos resultados óptimos, le recomendamos unos niveles de entrada lo más altos
posible para conseguir la mejor relación señal/ruido. Sin embargo, tenga en
cuenta que el nivel de audio nunca llega a la zona roja incluso aunque se hable
alto en el micrófono, ya que de lo contrario puede provocar distorsiones que
suenen desagradables. Aumente los niveles de entrada con cuidado hasta que los
niveles de audlo dejen de encenderse de color rojo.
Adapte 0 nivel de áudio com 0 þotão de volume do aparelho ligado. Para melhores
resultados, recomendamos que regule o nlvel de entrada para 0 mais alto
possível, de modo a obter uma relação slnal-rufdo ideal, No entanto, nâ0 permlta
que 0 lndlcador de nfvel atinJa a zona vermelha, mesmo quando fala em voz alta
ao microfone, uma vez que pode oconer uma distorçâo desagradável do som.
Aumente 0 nfvel de entrada lentamente até que 0 indicador de nfvel deixe de
acender a vermelho,
0nly for frequencies designed for use in the USA,
(Receiver complies to Part I 5, transmitter lo Part 74):
Weitere lnformationen finden Sie in der Bedienungsanleitung als PDF Download unter
www,akg.com,
Further ¡nformation can be found in the operating instructions as a PDF download from
www,akg.com,
Pour toutes informations complémentaires, consulter la Notlce d'utilisation à télécharger au
format PDF sur le site www.akg.com.
Ulteriori informazioni sono disponibili nelle istruzioni per I'uso, scaricabili in formato PDF dal
sito www.akg.com,
0btendrá más información en el manual de func¡onamiento que puede descargar en formato
PDF en www,akg.com.
Para mais informaçoes transfira o manual de instruções em PDF a partir do site www.akg,com.
Nur für Frequenzbänder für den Gebrauch in ECI
Dieses Produkt entspricht den in der Konformitätserklärung angegebenen Normen. Sie
anfordern,
Only for frequency bands designed for use in the EC:
This product conforms to the standards listed in the Declaration of Conformity. To order a
free copy of the Declaration of Conformity, visit www,akg,com or contact sales@akg,com,
Conçu uniquement pour les bandes à fréquence, pour une utilisation dans la CEt
Ce produit est conforme aux normes citées dans la Déclaration de Conformité, dont vous
pouvez prendre connaissance en consultant le sile www.akg,com ou en adressant un e-mail
à saìes@akg,com,
Solo per bande di frequenza designate per l'uso nella CE:
Questo prodotto corrisponde alle norme elencate nella dichiarazione di conformità, che è
disponibile al sito www.akg,c0m 0ppure all'indirizzo email sales@akg,com,
Sólo para bandas de frecuencia diseñadas para uso en la CE:
Este aparato conesponde a las normas citadas en la declaración de conformidad, Esta
última está disponible en el sitio www,akg.com 0 puede ser solicitada al correo electrónico
Apenas para bandas de frequência concebidas para uso na CE:
Este produto corresponde às normas citadas na declaração de c0nformidade, que pode
pedir na nossa página da web www,akg.com, ou enviando-nos um email para
www.akg.com
For other products and distributors wofdwide visit www.akg,com
Specifications subject to change without notice. Technische Anderungen vorbehalten. Ces caractéristiques sont susceptibles de modifications. Ci riserviamo il diritto di
effettuare modifiche tecniche, Nos reservamos el derecho de introducir modificaciones técnicas. Especificações sujeitas a mudanças sem aviso prévio.
FGt Statemcnt:
This equipment has been tested and found to comply with the limits for a Class B digital
device, pursuant to Parts 74 and 1 5 of the FCC Rules. These limits are designed to provide
reasonable protection against harmful interference in a residential installation. This
equipment generales, uses, and can radiate radio frequency energy and, if not installed and
used in accordance with the instructions, may cause harmful intederence to radio
communications. However, there is no guarantee that interference will not occur in a
particular installation. lf this equipment does cause harmful interference to radio or
television reception, which can be determined by turning the equipment off and on, the user
is encouraged to try to corroct the interference by one or more of the following measures:
- Reorient or relocate Ìhe receiving antenna.
- lncrease the separation between the equipment and the receiver,
- Connect the equipment into an outlel on a circuit different from that to which the receiver
is connected.
- Consult the dealer or an experienced radioÆV technician for help.
Shielded cables and l/0 cords must be used for this equipment to comply with the relevant
FCC regulations.
Changes or modifications not expressly approved in writing by AKG Acoustics may void the
user's authority to operate this equipment.
This device complies with Pan 15 ofthe FCC Rules.Operation is subjecttothe following
two conditions: (1) this device may not cause harmful interference, and (2) this device must
accept any interference received, including inlerference that may cause undesired
operation,
@AKG
V,/M5420 ¡vHARMAN
Sicherheit - Safety - SÉcurité - Sicurezza - Seguridad - Segurança
G) nchtunst
. Schütten Sie keine Flüssigkeiten auf das Gerät.
. Stellen Sie keine mit Flüssigkeìt gefüllten Gefäße auf das Gerät oder das Netzteil.
. Das Gerät daÍ nur in trockenen Räumen eingesetzt werden.
. Das Gerät darf nur von autorisiertem Fachpersonal geöffnet, gewadet und reparieft werden, lm lnneren des Gehäuses befinden sich keinerlei Teile, die vom Laien
gewaftet, repariert oder ausgetauscht werden können.
. Prüfen Sie vor lnbetriebnahme des Geräts, ob die auf dem mitgelieferten Steckernetzteil angegebene Betriebsspannung der Netzspannung am Einsatzort entspricht.
o Betreiben Sie das Gerät ausschließlich mit dem mitgelieferten Steckernetzteil mil einer Ausgangsspannung von 12 V DC, Andere Stromarten und Spannungen
könnten das Gerät ernsthaft beschädigenl
. Brechen Sie den Betrieb der Anlage sofort ab, wenn ein fester Gegenstand oder Flüssigkeit in das Geräteinnere gelangen sollte, Ziehen Sie in diesem Fall sofort das
Steckernetzteil aus der Steckdose und lassen Sie das Gerät von unserem Kundendienst überprüÍen.
. Ziehen Sie das Steckernetzteil bei längerer Nichtvenruendung aus der Steckdose, Bitte beachten Sie, dass bei angestecktem Steckernetzteil das Gerät nicht
vollständig vom Netz getrennt wird, wenn Sie es ausschalten.
. Stellen Sie das Gerät nicht in der Nähe von Wärmequellen wie z,B, Radiatoren, Heizungsrohren, Verstärkern, usw. auf und setzen Sie es nicht direkter
Sonneneinstrahlung, starker Staub- und FeuchÏigkeitsentwicklung, Regen, Vibrationen oder Schlägen aus.
. Verlegen Sie zur Vermeidung von Störungen bzw, Einstreuungen sämtliche Leitungen, speziell die der Mikrofoneingänge, getrennt von Starkstromleitungen und
Netzleitungen. Bei Verlegung in Schächten oder Kabelkanälen achten Sie darauf, die Überlragungsleitungen in einem separaten Kanal unterzubringen.
o Reinigen Sie das Gerät nur mit einem feuchten, aber nicht nassen Tuch, Ziehen Sie unbedingt das Steckernetzteil vorher aus der Steckdose! Venruenden Sie
keinesfalls scharfe oder scheuernde Reinigungsmittel sowie keine, die Alkohol oder Lösungsmittel enthalten, da diese den Lack sowie Kunststoffteile beschädigen
können.
. Ven¡venden Sie das Gerät nur für die in dieser Bedienungsanleitung beschriebenen Anwendungen. Für Schäden infolge unsachgemäßer Handhabung oder
missbräuchlicher Venruendung kann AKG keine Haftung übernehmen,
GÐ ^r,"n.on,
. Do not spill any liquids 0n the equipment
o Do not place any containers containing liquid on the device or the power pack,
. The equipment must only be used in dry r00ms.
. The equipment must only be opened, serviced, and repaired by authorised personnel. The equipment contains no user-serviceable parts.
. Before connecting the equipment to power, check that the AC mains voltage stated on the supplied AC adapter is identical t0 the AC mains voltage available where
you will use the equipment.
. 0nly operate the equipment with the supplied AC adapter with a 1 2-VDC output, Using adapters with a different output voltage or current type may cause serious
damage to the unit.
o lf anV solid object or liquid should get into the equipment, shut down the system immediately, Disconnect the AC adapter from the pOwer outlet at once and have lhe
equipment checked by 0ur customer service department,
. lf the equipment ìs not going to be used for a long time, discOnnect the AC adapter from the power Outlet. Please note that if you turn the equipment off whìle
leaving the AC adapter plugged in, it is not fully isolated from the power supply,
' Do not place the equipment near heat sources such as radiators, heating ducts, amplifiers, etc. and do not expose it to direct sunlight, excessive dust, moisture,
rain, mechanical vibrations, 0r shock.
. To avoid hum or interference, route all audlo lines, particularly those connected to the microphone inputs, away from power lines of any type. lf you use cable ducts,
be sure to use separate ducls for the audio lines,
. Clean the equipment with a moistened (not wet) clolh only. Be sure to disconnecl the AC adapter from the power outlet before cleaning the equipment. Never use
caustic or scouring cleaners or cleaning products containing alcohol or solvents since these may damage the enamel and plastic parts.
.0nlyusetheequipmentfortheapplicationsdescribedinthismanual.AKGcannotacceptanyliabilityfordamagesresultingfromimproperhandlingormisuse,
@) Avertissement !
. Ne pas renverser de liquide sur l'appareil,
. Ne placez pas de récipient rempli de liquide sur l'appareìl ou le bloc secteur,
. L'appareil ne doit être utilisé que dans des locaux secs.
. Cet appareil ne peut être ouvert, entretenu et réparé que par le personnel technique autorisé. 0n ne trouve à l'intérieur du boîtier aucun élément pouvant être
entretenu, réparé ou remplacé par un profane,
¡ Avant de mettre I'appareil en service, vérifiez si la tension de service indiquée sur le bloc d'alimentation livré correspond à la tension secteur sur le lieu d'utilisation,
. N'utilisez l'appareil qu'avec Ie bloc d'alimentation livré et avec une tension de sortie de 1 2 V DC. Toute autre nature de courant 0u de tension risque de provoquer
de sérieux dégâts sur I'appareil !
r lnterrompez immédiatement le fonctionnement de l'appareil si un objet quelconque ou du liquide devait pénétrer à I'intérieur de l'appareil, Dans une telle situation,
débranchez le bloc d'alimentation de la prise etfaites procéderà une inspection de I'appareil par notre service après-vente.
. Débranchez I'adaptateur secteur de la prise en cas d'inutilisation prolongée de l'appareil. Notez que, lorsque le bloc d'alimentation est branché sur la prise secteur,
l'appareil n'est pas entièrement coupé du secteur lorsque vous le mettez hors tension.
. Ne placez pas I'appareil à proximité d'une source de chaleur (p. ex, radiateurs, tuyaux de chauffage, amplificateurs, etc.), ni à un endroit où il risque d'être exposé
au rayonnement solaire direct, à une atmosphère poussiéreuse, à l'humidité, à la pluie, aux vibrations 0u aux secousses.
. Pour éviter les parasites et les interférences, installez tous les câbles, en particulier ceux des entrées micro, séparément des câbles de puissance et des câbles
d'alimentation secteur. En cas de pose dans des canaux 0u conduites pour câbles, les câbles de transmission devront toulours être posés dans une conduite
séparée,
o Pour nettoyer I'appareil, utilisez un chiffon légèrement humide, jamais un chiffon mouìllé, Débranchez impérativement le bloc d'alimentation auparavant de la prise
secteur. N'utilisez jamais de produits de nettoyage conosifs ou abrasifs, ni de produits contenant de l'alcool ou un solvant susceptible d'endommager la laque et les
éléments en plastique,
d'une manipulation inappropriée ou d'une utilisation non conforrne.
O 2013 HARMAN lnternatìonal Industries, lncorporated. Alì rights reserued. AKG is a trademark of AKG Acoustics GmbH, registered in the United States
and/or other countries,
www.akg.com o1/14/so4Bo2B_A

@AKG"
\^/MS42O
(D
@
@
uvHARMAN
Attenzionel
. Non fare entrare liquidi nell'apparecchio.
. Non collocare recipienti pieni di liquidi sull'apparecchio o sull'alimentatore.
r L'apparecchio deve essere impiegato solo in ambienll asciutti.
r L'apeftura, la manutenzione e la riparazione dell'apparecchio possono essere eseguite esclusivamenle da un tecnico autorizzato, All'interno dell'apparecchio non
sono presenti componenti la cui manutenzione, riparazione o sostituzione può essere eseguita da personale n0n qualificato.
. Prima di mettere in funzione I'apparecchio controllare se la tensione d'esercizio indicata sull'alimentatore a spina in dotazione conisponde alla tensione di rete del
luogo d'impiego.
¡ Utilizzare l'apparecchio esclusivamente con l'alimentatore a spina in dotazione con una tensione di uscita di 1 2 v CC, Altri tipi di corrente e allre tensioni potrebbero
danneggiare gravemente l'apparecchio!
a spina dalla presa e fare controllare I'apparecchio dal nostro servizio assistenza clìenti,
. Se I'apparecchio non viene usato per un periodo di tempo prolungalo, scollegare I'alimentatore a spina dalla presa. Tenere presente che se I'alimentatore a spina
rimane inserito l'apparecchio non è completamente scollegato dalla rete, anche se Ò spento,
polvere e umidità eccessive, a pioggia, vibrazioni o colpi.
. Pel evitare disturbi o inte¡ferenze, posare tutte le linee, in particolare quelle degli ingressi microfonici, separatamente da linee di potenza e linee di rete, ln caso dl
posa in pozzi o canaìi per cavi avere cura di sistemare le linee di trasmissione in un canale separato.
. Pulire I'apparecchio solo con un panno umido, ma non bagnato. Scollegare prima I'alimentatore a spina dalla presal Non utilizzare in nessun caso detergenti acidi o
abrasivi o detergenti contenenti alcool o solventi, in quanto potrebbero danneggiare la vernice e i componenli in plastica.
. Usare I'apparecchio solo per gli impieghi descritti in queste istruzioni per I'uso, AKG non si assume alcuna responsabilità per danni causati da manipolazionì non
conformi o impieghi inappropriati.
¡Atención!
. No derrame ningún líquido sobre el aparato,
. No coloque ningún recipiente con fluidos sobre el aparato o la fuente de alimentaciÓn,
. El aparato debe utilizarse sólo en lugares secos.
. Sólo el personal especializado aulorizado puede abrir, mantener y reparar el aparato, En el interior de la caja n0 se encuentra ninguna pieza que pueda ser
mantenida, reparada o recambiada por inexpertos.
. Antes de poner en funcionamiento el equipo, verifique que la tensión de red indicada en el adaptador de red se corresponda con la tensión de red en el lugar de
USO,
o Ulilice eÌ equipo sólo con el adaptador de red suministrado con una tensión de salida de 1 2 V CC, ¡Todos los demás tipos de coniente y tensiones pueden dañar
seriamente el aparato!
. lnterrumpa inmediatamente el funcionamiento del equipo si llegara a penetrar en el aparato algún objeto sólido o un líquido. En este caso, saque inmediatamente
del enchufe de red del adaptador de red y haga examinar el equìpo por nuestro servicio de atención al cliente,
. Saque el adaptador de red en caso de no utilizarlo por mucho tiempo. Tenga en cuenta que, al desconectar el equipo, éste no se desconecta completamente de la
red si el adaptador de red está conectado.
. No coloque el aparato cerca de fuentes de calor, como radiadores, tubos de calefacción, amplificadores, etc., y n0 lo exponga dlrectamente a la luz solar, a polvo o
humedad intensos, a lluvia, vibraciones o golpes.
. Para evitar perturbaciones o interferencias, haga el tendido de todos los cables, y sobre todo los de las enfadas de micrófono, separado de las líneas de alta
tensión y de las lÍneas de alimentación. Si hace el tendido en cajas o canales de cables, preste atención a colocar las líneas de transmisión en un canal separado.
. Limpie el aparato con un paño húmedo, pero no mojado. Antes de proceder a la limpieza, desenchufe el adaptador de red. En ningún caso debe utilizar productos
de limpieza corrosivos o abrasivos o aquellos que contengan alcohol o disolventes, ya que pueden dañar el barniz y las piezas de plástico.
. Utilice el aparato únicamente para los fines descritos en estas instrucciones de uso, AKG no se responsabiliza en caso de daños causados por un uso inadecuado o
indebido.
Atenção!
. Não dename lÍquidos sobre o aparelho,
. Não coloque recipientes com líquidos sobre o aparelho ou sobre a fonte de alimentaçã0,
. 0 aparelho deve ser utilizado apenas em locais secos.
. A abertura, manutenção e reparação do aparelho só podem ser efectuadas por pessoal qualificado e autorizado. No interior da caixa não existem quaisquer peqas
cuja manutençã0, reparação ou substituição possa ser feita por leigos.
. Antes de colocar o aparelho em funcionamento, verifique se a tensão de serviço indicada no adaptador de corrente fornecido corresponde à lensão de rede n0 local
de utilizaçã0.
. Utilize o aparelho exclusivamente com o adaptador de conente fornecido, com uma tensão de saída de I 2 V CC, Outros tipos de corrente e tensÕes podem causar
danos graves no aparelho!
o Interrompa imediatamente o funcionamento do sistema em caso de queda de objectos sólidos ou de líquidos para o interior do aparelho. Neste caso, desligue
imediatamente 0 adaptadOr de conente da tomada e mande verificar o aparelho pelO n0ss0 serviço de assistência ao cliente.
. Ouando não utìlizar o aparelho durante um longo período de tempo, desligue o adaptador de corrente da tomada. Tenha em atenção que quando desliga o aparelho,
o mesmo nã0 é totalmente desligado da rede se o adaptador de conente estiver ligado.
. Näo coloque o aparelho perto de fontes de calor como, por exemplo, radiadores, tubos de aquecimento, amplificadores, etc,, nem o exponha à luz solar directa, a
acumulação excessiva de poeira e de humidade, à chuva, a vibraçöes ou a choques.
. Para evitar avarias 0u interferências, disponha t0d0s 0s cabos, em especial os cabos das entradas do microfone, separados de cabos de conente intensa e de
cabos de rede, Se os cabos forem colocados em calhas 0u canais, certifique-se de que coloca as linhas de transmissäo num canaì separado.
. Limpe o aparelho apenas com um pano húmido, mas sem estar molhado, Primeiro desligue o adaptador de corrente da tOmada! Não utilize utensÍlios de limpeza
afiados ou abrasivos nem detergentes que contenham álcool ou solventes, uma vez que podem danificar 0 revestimento e as peças de plástico.
. Ulilize o aparelho exclusivamente para as aplicaçöes descritas neste manual de insfuçoes. A AKG não se responsabiliza por dados resultantes de manuseamento
inconecto ou utilização indevida.
@ 2013 HARMAN lnternational lndustrios, lncorporated. All rights reserved. AKG is a trademark of AKG Acoustics GmbH, registered in the United Stqtes
and/or other countries,
www.akg.com o1/14/5O4sO28J

Geräl
HT42O
PT42O
sR420
Erstverwendung des Teiles
AKG-Code
341 1 X 00xx0
3412 H 00xx0
3410 H 00xx0
C€ O
C€
Leiler FEKB
FEPE
FEKB
Datum
2014 01 08
2014 01 08
2014 01 08
Name
PBI
PTI
WBU
lnd
Benennuns: Manuat Supplement
SR42O, HT42O, PT42O
AMit,Nr
PROCOM
AKG Acoustics GmbH
A-1230 Wien, Laxenburger Straße 254
Anderuno
Firs'l ¡ssue Datum
2014 01 08
5041 326
AKG - Code:
Liste besteht aus : 1 Blatt
Blatt : 1
Name
WBU
Zur Verwendung in:
For use ¡n:
Pour l'usage en:
Per l'uso ¡n:
Para el uso en:
Para o uso êm:
Voor het gebru¡k in: Til natkunar i : Kasutamiseks ¡ärgm¡stes r¡ikides:
Må anvendes i: Käyttöön seuraavissa: Nadale sió do uóytku w nastópujócycg krajach:
Får användas i: lp¡orporro¡noruoç ornç: Tinka naudoti: Pentru a fi folosit în:
Biex ¡¡ntuza frl-:
lzmantoèanai:
B ynorpe6a e s
Na pouzívanie v: Za uporabo v:
A következó országokban használhaló:
Za kor¡õten¡e u:
Na pouzívání:
Band D
Band M (PT420)
Band M 0-r42o)
Band 82
Band 81
Band U2
Band Ui
Band A
HT¿fiX},PT42I)
863_lOO
826.300
826.300
Tt4.1tO
748-100
6'¡4,100
606-100
530-025
Stert
864-S00
831-00û
831.000
7r,900
751.900
629,900
613_700
559-000
Stop
10
50
2Ð
lo
'10
lo
10
10
rñW
x
X
X
X
x
x
x
ÂT
RÃTTEd counfüea
x
x
x
x
X
X
x
SE
x
x
x
x
x
x
E€¡
X
x
x
X
x
x
x
CH
X
x
x
x
x
CY
X
x
x
X
X
e,¿
X
X
x
x
x
x
tlE
x
X
x
X
x
DK
x
x
x
EE
x
X
x
x
x
X
ES
X
x
x
x
x
FI
x
x
X
x
x
FR
x
x
X
x
GB
x
X
X
x
x
GR
x
x
x
X
x
x
HR
X
x
x
x
x
X
X
t{[J
x
x
x
X
x
E
X
x
x
x
x
x
x
$s
x
x
X
X
fT
x
X
x
X
X
u
X
x
x
x
LT
x
x
x
x
x
x
x
LU
X
x
x
X
x
LV TT
x
x
x
NO
x
x
X
x
x
x
HL
x
x
X
X
x
x
FL
X
X
x
X
X
PT
X
X
X
RO
x
x
x
X
x
X
SE
X
X
x
X
X
x
sü
X
x
x
x
SK
H¡emit erklärt AKG Acoustics GmbH, da$ die Produkte HT420, PT420 und SR420die wesentlichen Anfordetungen und sonstigen e¡nsch¡ãg¡gen Bestimmungen der
Richdinie 1999/5/EG erfùllen. Sie kônnen die Konformilãlserklãrung aut hltp://M-akg.com oder per E-mail ân [email protected] aniordern.
AKG Aæustiæ GmbH herewith dælares that the HT420, PT420 and SR420 are ¡n comp¡iance with the essential requ¡rements and other relevant prov¡sions oi
Di.êcìive 1999/5/EC. To order a lree copy of the Declarat¡on of Corformity, vis¡t http://@.akg.æm or contact sales@akg-com.
Par la présente AKG Acoustics GmbH déclare que l'appareils ¡fT420, PT420 et SR420 sont conforme aux d¡gênces essentielles et aux autres disposit¡ons
pertinentes de la d¡rective 1999/5/CE. Vous pouvez p€ndre connaisilce de la Déclaration de Conformité en consultant le site http://M.akg.com ou en adressnt
Con la presente AKG Acoustics GmbH dichiara che il prodotto Hf420, PT420 e SR420 soño conlomi ai requisiti essenziali ed alle altre disposi¿ioni peltinenti stabilite
dalla direttiva f 999/5/CE- La dichiaræ¡one di confomità è dìsponibile al sito htlp//M.akg.com oppure all'ind¡r¡zo emajl [email protected].
Por medìo de lâ prcsentê AKG Acoustics GmbH declara que el HT420, PT420 y el SF420 cumplen con los requisitos esenciales y cualesquiera ot6 disposiciones
aplicables o ex¡g¡bles de ia Directiva l99g/5/CE. La dælaración de conforñidad está disponible en el sitio htlp://w.akg.coñ o puede ær solicitada al correo
electrónico [email protected].
Hiemee verklaart AKG Acoust¡cs GmbH dat de producten HT420, PT420 en SR420 voldoen âan de wezenlijke eisen en oveñge doeleinden van de ichtl¡jn
1999i5/EG. U kunt de conformiteitwerklaring lezen op httpJ/w.akg.com of aanvrâgen door een e-mail te sìuren aan [email protected].
AKG Acoustìcs GmbH erklærer hemed, at produkt HT420, PT420 09 SR420 er i overensstêmmelse med de væsent¡ige krav og øvrige reìevante bestemmelser i
direktiv 1999/5/ÊF. En gratìs kopi al overensstemmelseserklæringen kan bestilles ved at besøge http://M.akg.com eller koñtakte [email protected].
AKG Acoustics GmbH avaldab, et tooled ¡1T420, Pf4ã) jâ SFì420 vastavad dìrektiivi 1999/5/EÛ põhilislele nõuetelê ning teilele æjakohaslele sãtelele. Te võite
valâvusavaldusega tuvudaveebilehel http//M.akg.com võ¡lasta selle saata e-postiteê[email protected].
AKG Acoustics GmbH vakuuttaa, että flT420, PT420ja SR420 tãl,ttävâl sítâ koskêvat oleellisel vaatimuksetja muut direktiivin 1999/5/EY ehdot.
Vaatìmustenmukaisuuwakuutuksen ì¡ma¡sen kopion voitilata sivustosa ht!p://M.akg.com tâi osoilleesta [email protected].
Ms rc frûpóv rì tdrpEio AKG Acoustics GmbH õqÀóver ófl rq rpoiówo ¡1T420, PT420 Kû! SR420 rÀnpoúv rç PqoKÉç oro[óoE¡ç Kor Ào¡rÉç oxrrKÉç õrdrd<Êrç r4ç
oõqy¡oç 1999/5/EK. T¡l ónÀ@orì rEp¡ ouplroppr¡oÊoç Èrop¿íTÊ w ¡q ÞpÊiÌÊ do http://M.akg.coñ { vo rrì (níto€TE mó To email [email protected].
AKG Acoustics GmbH lisir því hér með y,fir aö HT420, PT420 og SR420 lândasl aðalkröfur og önnur ákvæð¡ 19996 Þglu Evópusbandsins.
Hægl er aö pantafrít eintak af staöalyfirlisingunni á vefsíöunn¡ l¡ttp//M.akg.com eöa ñeð Því aò hafa samband viö [email protected].
Firma AKG Acoustìcs GmbH apliecina, ka produkls HT420, PT420 un SR420 pëc war¡gàkajãm præ¡bãm un cit¡em attiecÌgajiem priekérakstiem atbils l999/5/EG
direlfNas praslbãm. Attieclgo apstìprinoSo dokumenlu Jùs varat p¡eprasn inlerneta mãjâs lapã httpf/M.akg.com vai e-pastu: [email protected]
AKG Acousti$ GmbH tuo paðju pripa¿Ìsta, jog HT420,1,142O r sB42O alitiñka wârbiausius Direktyvos 1999/5/EC reikalavimus beì kiìas ios reiksmingas s4ygas.
Norèdami uzsisakyti produkto Atit¡kimo Deklaracija(Dælaration of Conformity), aplankykìle intemeto tinklapi hftp/v\M.ak9.com aóa susisiekite el. paStu
AKG Acoustjæ GmbH hawn lidd¡kjaE li l-prodotti H1420, PT420 k SR420 huma konfomi matr rekwiz¡ti essenzja¡i u ghandhom il- prowed¡menti relevanti tad-Direttiva
1999/5/EC. B¡ex tordna kopja tad-Dikjarujoni ta' Konformìta' b'xejn, zur ¡sìt elettroniku http//M.akg.com jew ikkuntattja lill- s¡[email protected].
AKG Acoustics GmbH erk¡ærer med dette at produkter: HT420, PT420 og SR420 ovêrholder alle vesent¡ige kEv og tilhørende bestemmelsêr i henhold til EU-
rêtningslinje 1999/5i EU. En kopi av samvarserklæringen er ä ñnne på htlp//M.akg.com, eller kan bestilles per epost til [email protected].
Spotka AKG Acoustics GmbH oswiadcza niniejszym,2e produkty ¡11420, P1420 ore SR420 spelniajq najwazniej*e wymogi i stosujqsiç do innych odnosnych
pzepisw dyrektyvly 1999/5 ¡VE. Deld@je zgodnoéci otzymacie Pañstwo, wysyl4ac zapytanie pzez strone internetow4 httpJ/M.akg.com lub na adres e-maìl:
sa¡es@akg,æm.
A AKG Acousti6 GmbH declara que os prcdùtos HT420, PT420 e SR420 esteo conioñes com os rêquisitos essenciais e outræ disposiçöes da Directìva
1999/5/CE. Pode pedir a declaração de confomidade na nossa página da web http:/,4dw.akg.com, ou enviando-nos um email para [email protected].
AKG Acouslics GmbH t ñìo vyhlæuje, ¿e v robky HT420, Pf420 a SR420 splñujrl podstatné poziadavky a ostatné reìevanté usþnovenia smernice 1999/5/ES.
Mô:ete po2iadat'zdarma o prehláseñie o srllâde na httpJ/M.akg.com alebo emaiìon na adrese [email protected].
S tem potrdilom podjetje AKG Aæustiæ cmbH zagotavlja, da proi4od HT420, Pf420 in SR420 ustreza bistven¡m zahtevam in sicerË.jim zadevnim doloðbam
smernice 1999/5/EG. lzjarc o konfomnoli lahko zæled¡te ludi na spletni Srani [email protected] ali preverite preko nælova elel(ronske poðte [email protected].
AKG Acoustics GmbH tímto prohlaÈuje, Ze v robky HT420, PT420 a SR420 splñují podstatné po:adavky a ostatni relevantní ustanovení smèrñ¡ce 1999/5/Ê5. Mùieìe
AKG Acoustics GmbH ezennel kijelentì, hogy a HT420, PT420 és SR420 temék æ 1999/9EG szabályrendelet lényeges követelményeinêk és egyéb ¡devágó
rendelkezéseinek mggfelel. A megegyezésì nyilatkozatot a következõ cíñên igényelheti: iÌttpJ/lw.akg.com vagy e-ñajlen: [email protected].
Prin aceæta AKG Acoustiæ GmbH declarã cã produsul HT420, PT420 çi SR420 îndep¡¡nesc cerìnlele esenljale çi celelafte dispoz¡!i corespunzãtoare ale dkectiveì
1999/5/CE. Dvs. pute!- cere dældatia de confom¡tate sub httpl/ww.akg.com sau píñtr-un e-ma¡l cätre [email protected],
C Hacroeqoro AKG Acoudics GmbH Aefrapøpa, ce npoayfrrre lfT420, PT420 ø SR420 or¡oBapsr Ha cÈulecrBeHøre v3vcKBa{øe v Àpyrure pa3nopqÂ6r
orHacrq, ce,qo yre3aHøe 1999/5/ÉG. Büe Moxe Aa nonygfre 6orBerøBeHara Aesapaq# no htpJ/M.ak9.com mu ¡o e¡efipoHHa noqa noA
AKG Acousti6 GmbH ovim izjavljuje da su proizvod; HT420, PT420 i SR420 u sukladnosìi s bitnim zahtjevima i ostalim pdmjenjivim odredbama Direktive 1999/5/EZ.
Besplatan primjerak lzjave o sukladnos,ti mo:eìe dobili na httpy/w.akg.com ili zatraZiti putem e-ñaila sâ[email protected]
This product complies with national regulations of countries within and outs¡de the
EC. For details please contact your dealer.
Warn¡ng: Using this equipment is subject to permission as required by ìaw. Some
countries may not require such permissìon.
Please contact your local telecommunications authority for further information.
Before operating the equipment read the user manual carefully.
Spec¡ficat¡ons subject to change without notice.
Technische Anderungen vorbehalten.
Sous réserve de modifications techniques.
Ci riserviamo il diritto di apportare modifìche tecniche senza preawiso.
Nos reservamos el derecho de introducir modificaciones técnicas sin previo aviso.

VúM5420 Frequency Chart AKG'
ov HARMA.N
Band K
Band D
Band M
Band 82
Band 81
Band U2
Band U1
Band A
Hï420lPT420
925,100
cH1
863,100
cH1
826,300
774,100
748,100
614,100
606,100
530,025
cH1
925,700
cH2
863,500
cH,z
826,700
774,500
748,500
614,500
606,600
532,700
cH2
929,175
CH3
864,900
cH3
828,450
775,500
749,500
616,900
608,100
540,000
cH3
929,075
cH4
863,100
CHA
829,050
777,200
751,200
618,900
610,700
541,900
cH4
930,300
cH5
863,675
cHb
829,900
777,900
751,900
620,500
611,450
546,775
cH5
931,850
cH6
864,525
cHc
831,000
625,900
612,450
557,500
cH6
CH7
864,900
cHd
629,100
613,700
557,900
cH7
CHB
629,900
559,000
cH8
5042803 - A

lUlrcnolllhc
THE ORIGINAL
c555 L
BEDIENUNGSANLEITUNG,,..
Bitlo vor hboìíebnahme dos G€dtes l6enl
USER INSTRUCTIONS ....,.,,,
Pleâ6e roadlho manual beforo uslngìhe equlpmenll
M0DE 0',8MP101 ...........,...
Veullle¿ lfo celle notlcoavantd'ullllser ls syslèmol
ISTRUZIONI PER L'US0......,
Pilma dl ullll¡zare I'apparecchlo, leggers ll manualel
MODO DE EMPLEO
islruase lû€rol manual anles de ulllìzarel equipo!
rNsTRUcÕES DE us0... . .
Fav0r lela este"manual anles de usal o equipamenlol
.s. 2
.p.12
p.22
.p. 32
.p. 42
.s. 52

i
Seite Überprirfen Sle bitte, ob das Gerät, an das Sie das
Mikrofon anÊchließen möchten, den gültigen Si-
cherheitsbestimmungen entspricht und mil einer
Sicherheitserdung versehen ist.
Kontrollieren Sie bitte, ob die Verpackung allê
oben angeführten Teile enthält. Falls etwas fehlt,
wenden Sie sich bitte an lhren AKG-Händler.
. Batteriespeisegerät B 29 L
. Weiteres Zubehör siehe www.akg,com oder
aktuel I e M icroM i c- Brosch ü re.
1.1 Sicherheits'
hinweis
1 Sicherheitshinweis/Beschreibung
1.1 Sicherheitshinweis
1.2 Lieferumfang.....
1.3 Optionales Zubehör
1 .4 Kurzbeschreibung.
1.5 Abtropfring
2 Anschluss
2.1 Einleitung
2.2 Mikrofon anschließen
3 Anwendung
3.1 Mikrofonarm links oder rechts montieren
3.2 Mikrofon aufsetzen
3.3 Mikrofon positionieren
3.4 Mikrofonarm verstellen
3.5 Abtropfring austauschen.
4 Reinigung.
4.1 Mikrofongehåuse
4.2 Windschutz....
5 Fehlerbehebung
6 Technische Daten . .
1 Ersatz-
Abtropfring
1 xW 4441 xC555L
*
)
.J
A
1.2
Lieferumfang
1.3 Optionales
Zubehör
1.4Kurz-
beschreibung
Abb. 1: Mikrofon
c555L
Siehe Abb. 1.
2555 L
1 Mikrofon mlt nierenförmiger Richtcharakteristik für
hohe Rückkopplungssicherheit. Frequenzgang für
Sprachübertragung ausgelegt.
AKG C 555 LJ

:À
-l
lE-,'.i
2 Elastische Lagerung zur wirkungsvollen Unter-
drûckung mechanischer Störgeräusche
3 Verstellbarer, abnehmbarer Schwanenhals (725 mm)
zur exakten Positionierung des Mikrofons.
4 Beïestigungsclip für Schwanenhals: ermög-
licht links- oder rechtsseitiges Tragen des Mi-
krofons.
5 Zugentlastung für Mikrofonkabel
o Für Speisung mittels Batteriespeisegerät B 29 L,
Phantomspeiseadapter MPA V L oder Sender
PT 40, PT 4OO.
. 1,5 m langes Anschlusskabel mit 3-poligem
Mini-XLR-Stecker.
Ein spezieller Abtropfring
an der Mikrofonkapsel
erschwert das Eindrin-
gen von Schweiß und
Schminke in den Kapsel-
bereich. Dies verhinderl,
dass die Einsprech-
schlitze des Mikrofons
durch Schweiß oder Schminke verstopft werden,
was zu dumpfem Klang und geringerer Empfind-
lichkeit des Mikrofons führen würde.
Entfernen Sie daher den Abtropfring niemals vom
Mikrofon!
AKG C 555 L
Das C 555 L ist ein Kondensatormikrofon und be-
nötigt daher eine Stromversorgung. 2.1 Einleitung
Wenn Sie andere als die von AKG empfohlenen
Speisegeräte verwenden, kann das Mikrofon
beschädigt werden und erlischt die Garantie.
Stecken Sie den Mini-XLR-Stecker am Mikro-
fonkabel bis zum Anschlag in eine der beiden
Mini-XLR-Buchsen am B 29 L, die Mini-XLR-
Kupplung am Anschlusskabel des MPA V L
bzw. die Eingangsbuchse des Taschensenders
an,
Der Stecker verriegelt sich automatisch.
o Zum Abziehen des Kabels drücken Sie auf den
Entriegelungsknopf am Mini XLR-Stecker und
ziehen Sie den Stecker aus der Buchse heraus.
I Um das Kabel nicht zu beschädigen, ziehen
Sie niemals am Kabel selbstl
2. B 29 L: Verbinden Sie das B 29 L mit dem ge-
wünschten Eingang.
MPA V L: Stecken Sie den MPA V L an einen
symmetrischen XLR-Mikrofoneingang mit
Phantomspeisung an und schalten Sie die
Phantomspeisung ein.
AKG C 555 L
¡frtictrtsl
2.2 Mikrofon
anschließen
Kabel abziehen:
1.5 Abtropfring
Abb. 1a: Abtropf-
ring am Mikrofon
¡futctrtisl
5
4

3"1 Mikrofonarm
links oder reehts
montieren
Abb.2: Mikrofon-
arm abziehen
Siehe Abb. 2.
lm Lieferzustand ist der Mikrofonarm rechts am
Nackenbügel befestigt. Die Schnappverbindung
erlaubt lhnen, den Mikrofonarm auch links am Na-
ckenbügel zu montieren:
1. Ziehen Sie die Mikrofonarm-Halterung (2) mit
dem Mikrofonarm (3) in Pfeilrichtung vom Ohr-
bügel (1) ab.
2. Ziehen Sie die Abdeckung (4) vom anderen
Ohrbügel ab.
3. Ziehen Sie das Kabel aus dem Kabelhalter (5).
4. Schieben Sie die Mikrofonarm-Halterung (2)
und die Abdeckung (4) bis zum Anschlag in
den Drahtbogen unterhalb des jeweils anderen
Ohrbügels ('1)ein.
(Die Abdeckung (4) stabilisiert den Ohrbugel
und verhindert, dass sich Haare im Drahtbo-
gen vedangen.)
5. Drücken Sie das Kabel wieder in den Kabelhal-
ter (5) hinein.
AKG C 555 L
Setzen Sie den Na-
ckenbügel wie in
Abb.3bisSgezeigt
auf.
2. Falls das Mikrofon zu locker sitzt, können Sie
den Nackenbügel und die Ohrbügel nach innen
biegen:
c Halten Sie den Nackenbügel bzw. Ohrbügel
fest an den in Abb. 6 bezeichneten Stellen und
biegen Sie vorsichtig etwas nach innen.
" Probieren Sie, ob das Mikrofon besser sitzt.
Falls nicht, verbiegen Sie den Draht vorsichtig
etwas weiter.
AKG C 555 L
3ËT
f
)
/
3.2 Mikrofon
aufsetzen
Abb. 3 bis 5:
Nackenbugel auf-
setzen und enger
stellen
Abb.6: Nackenbii-
gel und Ohrbügel
zurechtbiegen
Siehe Abb. 6
67
I4
4,53b
a
1,2
a
3a
5
ii
. Þ."
.^#n\ ru
) J''
\/

Hinweis:
3.3 Mikrofon
positionieren
Abb. 7: Schwanen-
hals einstellen.
Siehe Abb. 7
3,4 Mikrofonarm
verstellen
Abb. B: Mikrofon-
arm verstellen
Nackenbügel und Ohrbügel bestehen aus Fe-
derstahldraht. Wenn Sie den Draht zu stark
biegen, kann es sehr schwierig sein, den Draht
in die gewünschte Form zurtickzubiegen.
Stellen Sie den Schwanenhals so ein, dass das
Mikrofon seitlich vor dem Mundwinkel sitzt.
Siehe Abb. 8. 1. Zìehen Sie den
Schwanenhals
aus der Halterung
heraus.
2. Klemmen Sie den
Schwanenhals (1) an
der
Stelle
o Versuchen Sie nie, den Schwanenhals in der
Halterung zu verschieben. Sie würden da-
durch den Schwanenhals und/oder die Hal-
terung beschädigen.
Sollte derAbtropfring beschädigt werden, kön-
nen Sie ihn wie oben gezeigt gegen den mitge-
lieferten zweiten austauschen
Reinigen Sie das Gehäuse des Mikrofons mit
einem mit Wasser befeuchteten Tuch.
aDen Schaumstoff-Windschutz reinigen Sie am
besten mit einer milden Waschmittellösung,
Der Windschutz ist sofort nach dem Trocknen
wieder einsatzbereit.
¡ftncntisl
3.5 Abtropfring
austauschen
Abb. 9: Abtropf-
ring austauschen
Siehe Abb. 9
4"1 Mikrsfon-
gehäuse
4.2 Windsehutz
(1)
(2)
ng (2) ein
IAKG C 555 LAKG C 555 L
4
\-. \
3
2
\ç
1
øo

I
.l
Arbeitsweise: Kondensatorwandler mit Permanentladung
Richtcharakteristik: N¡ere
Elektrische lmpedanz bei 1 000 Hz: < 200 Ohm
Empfohlene Lastimpedartz: > 2000 Ohm
Grenzschalldruck 1ür 1%o / 3% Klirrfaktor: 1 26 dB / 1 30 dB
Speisespannung: Batteriespeisegerät B 29 L, phantomspe¡-
seadapter MPA V L, AKG WMS Taschen-
sender
Stromaufnahme: ca.2 mA
Kabelìänoe/Steckerart: 1,5 m / Mini-XLR
Oberfläche: mattschwarz
Abmessungen (nur Mikrofon): Länge: 195 mm, max. Durchm.: 1G4 mm
Nettogewicht (Mikrofon ohne Kabel): 26 g
Bruttogewicht: 260 g
Dieses Produkt entspr¡cht den in der Konformitätserklärung angeführten Nor-
men. Sie können die Konformitätserklärung auf http://wwwakg.com oder per E-
Frequenzgang
AKG C 555 L
Polardiagramm
AKG C 555 L11
Siehe auch Bedienungsanleitung des Senders und Empfängersl
1. Gain-Reglerzurück-
drehen.
2. 10-dB-Vorabschwä-
chung zwischen Mi-
krofonkabel und Ein-
gang stecken.
1. Gain-Regler am
Mischpult zu weit
aufgedreht.
2. Mischpulteingang zu
empf¡ndlich.
Verzerrungen:
1. Mischpult und/oder
Verstärker einschal-
ten.
2. Kanal-Faderoder
Summenpegelregler
am Mischpult oder
Lautstärkeregler des
Verstärkers auf ge-
wúnschten Pegel eìn-
stellen.
3. Mikrofon an Misch-
pult oder Verstärker
anschlìeßen.
4. Kâbelstecker noch-
mals anstecken.
5. Kabel überprüfen und
falls nötig ersetzen.
6. Phantomspeisung
einschalten.
Phantomspeisegerät:
ans Netz anschließen
bzw. Batterie(n) einle-
gen.
Kabel überprüfen und
falls nötig ersetzen.
1. Mìschpult und/oder
Verstärker ausge-
schaltet,
2. Kanal-Faderoder
Summenpegelregler
am Mischpult oder
Lautstärkeregler des
Verstärkers steht auf
Null,
3. Mikrofon nicht an
Mischpult oder
Verstärker ange-
schlossen.
4. Kabelsteckernicht
richtig angestecki.
5. Kabel defekt.
6. KeineSpeisespan-
nung.
Kein Ton:
AbhilfeMögl¡che UrsacheFehler
rrI
.<'-A
æ/M
ffi
."\VT;;
-r.
¡8:tr .---
10

'l Precaution/Description
'1 .1 Precaution . ... :,
'1.2 Packing List. . .. . . .,
1 .3 Optional Accessories
1.4 Brief Description . . .
1.5 MoistureShield. . . .
2lnterfacing
2.1 lntroduction..,..... :. : :.
2.2 Connecting the Microphone
3 Using Your Microphone . . . .
3.1 Mounting the Microphone Arm on the Left or Right
3.2 Putting the Micorphone On. . .
3.3 Aligningthe Microphone. . . . . .
3.4 Adjusting the Microphone Arm . . .
3.5 Replacing the Moisture Shield .
4 Cleaning.
4.1 Micorphone SurJace
4.2 Windscreen.......
5 Troubleshooting
6 Specifications
1 moisture
shield
1 xW 4441xC555L
*
\
Please make sure that the piece of equipment
your microphone will be connected to fulfills the
safety regulations in force in your country and is
fitted with a ground lead.
Check that the packaging contains all of the com-
ponents listed above. Should anything be miss-
ing, please contact yourAKG dealer.
. B 29 L battery power supply
. For more accessories visit wwwakg.com or re-
fer to the latest MicroMic brochure.
A
l,l Precaut¡on
1.2 Packing List
L3 Optional
Accessories
1,4 Brief
Description
Fig. 1; C 555 L
microphone.
Refer to fig. 1
AKG C 555 L
1 Cardioid microphone for high gain before feed-
back. Frequency response tailored to vocal
use and flute miking.
2 Shock mount reduces handling and cable noise,
AKG C 555 LI,J

:ü
Refer to fig. 1
on page 1 3.
1.5 Mo¡sture
Shield
. For 9 to 52 V universal phantom power.
. 10-ft. (3-m) plug-in connecting cable with
phantom power adapter with integrated S-pin
XLR connector and switchable bass rolloff (6)
(-4 dB at 100 Hz).
3 Adjustable, detachable 5-inch (125-mm)
gooseneck for precise microphone position-
ing.
4 Removable microphone arm holder for placing
the microphone to the left or right of your
mouth.
5 Microphone cable strain relief.
A special moisture shield
on the microphone cap-
sule makes it difficult for
moisture and makeup to
penetrate into the micro-
phone. This barrier pre-
vents the microphone
sound entries from being
clogged by perspiration or makeup which would
make the sound dull and reduce the sensitivity of
the microphone. Therefore, never remove the
moisture shield from the microphonel
AKG C 555 L
The C 555 L is a condenser microphone and 2.1 lntroduction
therefore needs a power supply.
¡[mnortant!
Using any power supply other than those reo-
ommended by AKG may damage your micro-
phone and will vold the warranty.
1. Plug the mini XLR connector on the micro-
phone cable all the way into one of the two mini
XLR sockets on the B 29 L, the mini XLR socket
on the connecting cable of the MPA V L, or the
input jack on your bodypack transmitter.
The connector will lock automatically.
r To disconnect the cable, press the unlocking
button on the mini XLR connector (1) and pull
the connector (1 ) out of the socket.
2.2 Gonnecting
the Microphone
Disconnecting
the cable:
. To avóld
the cabledamaglng
¡ts6lfl füe cablc, never pull at ¡l¡mnortantl
14
2. B29Lt Connect the B 29 L to the desired input,
MPA V Ll Connect the MPA V L to a balanced
XLR microphone input with phantom power
and switch the phantom power on.
AKG C 555 L15

3.1 Mounting
the Microphone
Arm on the Left
or Right
As delivered, the microphone arm is fitted on the
right side of the behind-the-neck headband. To
mount the microphone arm on the left side of the
headband:
3
i
IJr
3.1 Putting the
Microphone on
Figs. 3 to 5l Putting
on and tightening
the headband.
Fig. 6: Bending the
headband and
temple pieces
to fit.
Refer to fig. 6.
17
Fig. 2: Removing
the microphone
arm.
Pull the microphone arm holder (2) w¡th the mi-
crophone arm (3) from the temple piece (1) in
the direction of the arrow.
Remove the cover (4) from the other temple
piece.
Remove the cable from the cable holder (5).
lnsert the microphone arm holder (2) and the
cover (4) all the way into the respective wire
loop below the opposite temple piece (1).
ffhe cover (4) stabilizes the temple piece and
prevents your hair from getting caught in the
wire loop.)
Press the cable back into the cable holder (5).
Put the behind-the-
neck headband on
as shown in figs. 3
through 5.
2. Should the microphone fit loosely, you may
bend the behindthe-neck headband and the
temple pieces inward:
. Hold the headband or temple piece firmly at
the points marked in fig. 6 and bend inward
with extreme care.
r Check whether the microphone fits better. lf it
does not, bend the wire some more, again with
extfeme care.
AKG C 555 L
Refer to fig. 2. 1.
2.
ó.
4.
Ã
16 AKG C 555 L
4
4,53b
ta
-
3a1,2
5
I
ìì
TF

Note:
3.3 Aligning the
Microphone
Fig. 7: Adjusting
the gooseneck.
Refer to fig. 7
. Both the headband and temple pieces are
made of spring steel wire. lf you bend the wire
too hard it may be extremely difficult to bend
the wire back to the desired shape.
. Adjust the gooseneckso as to point the micro-
phone at the corner of your mouth.
Never try to shift the gooseneck inside the
holder, This would damage the gooseneck
and/or holder.
lf the moisture shield gets damaged, replace it
with the supplied extra moisture shield as
shown above.
To clean the microphone sur-face, use a soft
cloth moislened with water.
Clean the foam windscreen in mild soap suds.
You can use the windscreen again as soon as it
has dried.
AKG C 555 L
a¡[lmeonantr
3"4 Ad¡ust¡ng the
Microphone Arm
Fig. B: Adjusting
the microphone
arm,
'18
a
3.5 Replacing
the Moisture
Shield
Fig. 9: Replacing
the moisture
shield.
Refer to fig. 9
4.1 Mierophone
Surfaoe
4,2 Windsereen
19
Refertofig.S. 1. Unsnap the goose-
neck (1) from the
holder (2).
2. Snap the gooseneck
(1) back into the
holder (2) at the
desired position.
AKG C 555 L
4
3
\-Ð
2
\ç
1
ø

Also read the transmitter and receiver manuals!
1. Turngaìncontrol
down CCW.
2. ConnectalO-dB
preattenuation pad
between m¡crophone
cable and input.
1. Gain control on the
mixer set too high.
2. Mixer input sensitivity
too high.
Distortion:
1. Switch powerto
mixer or amplifier on.
2. Setchannelormas-
ter fader on mixer or
volume control on
amplifier to desired
level.
3. Connect microphone
to mixer or amplifier.
4. Check cable connec-
tors for secure seat.
5. Checkcableandre-
place if damaged.
6. Switch phantom
power on.
Phantom power sup-
ply: connect to power
outlet or insert bat-
tery
(batteries).
Check cable and re-
place if necessary.
1. Powertomixer
and/or amplifier is off.
2. Channel ormaster
fader on mixer, or vol-
ume control on am-
plifier is at zero,
3. Microphone is noi
connected to mixer
or amplifier.
4. Cableconnectorsare
seated loosely.
5. Cable is defective.
6. No supply voltage.
No sound:
Remedy
Possible CauseProblem Tvoe: pre-polarized condenser microphone
Polar cardioid
Frequency range: 80 Hz to 20,000 Hz
Sensitivity: 35 mV/Pa (-46 dBV re 1 V/Pa)
Electrical lmpedance at 1000 Hz: < 200 ohms
Recommended load impedance: > 2000 ohms
Max. SPLfor 1% / 3%THD: 126d8/130d8
Equivalent noise level: 22 dB(A) to IEC 60268-4
Supply voltage: B 29 L battery supply, MPAV L phantom
power adapte¡ or AKG WMS bodypack
transm¡tter
Current consumption: approx. 2 mA
Cable length/Connector: 1.5 m (5 ft.) / 3-pin mini XLR
Finish: matte black
Size (microphone only): length: 195 mm (7.7 ìn.);
max. dia.: 134 mm (5.3 ìn.)
Net weight (microphone l/cable): 26 g (0.9 oz.)
Shipping weight 260 g (9.2 oz.)
This product conforms to the standards listed in the Declarat¡on of Conformity.
To order a free copy of the Declaration of Conformity, visit http://www.akg.com
or contact .com.
Frequency Response Polar Diagram
AKG C 555 L
AKG C 555 L21
20
Other manuals for AKG WMS420
2
Table of contents
Languages:
Other Harman Microphone System manuals

Harman
Harman AKG DMS 700 V2 User manual

Harman
Harman JBL VM200 User manual

Harman
Harman AKG KM200 User manual

Harman
Harman AKG DHT800 User manual

Harman
Harman AKG DMS100 User manual

Harman
Harman DMS 70 QUATTRO User manual

Harman
Harman AKG DMM12 User manual

Harman
Harman JBL VM300 User manual

Harman
Harman AKG WMS4500 User manual

Harman
Harman AKG CMS380 User manual