manuals.online logo
Brands
  1. Home
  2. •
  3. Brands
  4. •
  5. Hayward
  6. •
  7. Swimming Pool Filter
  8. •
  9. Hayward GM P/18 User manual

Hayward GM P/18 User manual

(GM) Grande Meurtrière (PM) Petite Meurtrière
1 SKX9411
2 SKX9752
5 SKX20000
6C SKX16001BE
6L SKX16001VE
7C SKX15014B
7L SKX15014V
8 SKX15018/19 (
PREMIUM)
SKDX219 (DESIGN)
SKOX410 (OMEGA)
9 SKX10112 (PM)
9 SKX15016 (GM)
10 SKX9753 (PM)
10 SKX15015 (GM)
11 SKX3101 (PM)
11 SKX3102 (GM)
12 SKX8078
13 SKX16000C
14 SKX6598
15 SKX20001N
16B SKXVS
17 SKX9907
SKIMMER
Permissible flow: 6 to 10 m3/h
The skimmer must be installed on the side of the pool facing the
predominant wind, and at the same end as the diving pit. It should
be sealed as high as possible in order to obtain an ideal water line.
To prevent leakage problems due to settlement of the infill, which
could rip the pipe out of position, use rigid pipes that extend down
as far as the foundation raft. You are recommended to infill with fine
sand and, applying successive layers. Wet each layer abundantly,
so as to ensure that it settles properly.
LINER MASONRY STRUCTURE
lGlue the site protection onto the front panel of the skimmer.
lSeal the skimmer into the masonry, taking the necessary steps so
that you can subsequently apply rendering around the front panel.
lGlue the seal onto the front panel of the skimmer.
lGlue the seal onto the skimmer’s flange.
lInstall the liner, and then secure the flange into position.
lMake a cut-out in the liner, and then install the cover plate.
lUse one 2’’ screw-in connection sleeve and Ø50 female socket,
ensuring that there is a waterproof seal.
lConnect the vertical rigid PVC hype by gluing it into the Ø50
female socket of the skimmer/rigid pipe connection sleeve.
lIn order to use the socket connection Ø63: cut an outlet, plug the
2’’ outlet, and glue a Ø63 PVC rigid pipe directly into position.
lTo install an overflow outlet: drill the Ø32 at the top of the skimmer,
and connect to the drainage point.
LINER PANELLING STRUCTURE
lUse the template for cutting the panel. Fit the track from within the
basin. Fit the foam seal in position, and then screw the track onto
the panel.
lGlue the main body of the skimmer to the track, using liquid ABS,
and then tighten with a wrench in order to ensure a firm bonding
and proper waterproof seal. Apply another bead of ABS to the
interior and exterior of the point of assembly of the two parts.
lProceed with the water connection in the same way as for the
skimmer liner.
MASONRY STRUCTURE WITHOUT LINER
lSeal the skimmer into the masonry, leaving the front part recessed
sufficiently so that you can subsequently apply rendering or tiling.
lProceed with the water connection in the same way as for the
skimmer liner.
lReplace damaged, broken, cracked, missing, or not securely
attached suction outlet components immediately. Use only genuine
replacement parts.
lStop filtration system when you change parts.
lThe manufacturer can not be considered as responsible for a
direct or indirect damage resulting from an use or an incorrect
installation of the product.
lIndicative information, not contractual photos and schema.
SKIMMER
Débit admissible : 6 à 10 m3/h
Le skimmer doit être installé face aux vents dominants et du côté de
la fosse à plonger. Il sera scellé le plus haut possible pour obtenir
une ligne d’eau idéale, en tenant compte du niveau de la plage.
Pour éviter des problèmes de fuite dus au tassement du remblai
qui pourraient arracher la tuyauterie, utiliser des tuyaux rigides qui
descendront jusqu’au radier .Il est conseillé de remblayer avec du
sable fin par couches successives et de mouiller abondamment
entre chaque couche pour un bon tassement.
STRUCTURE MAÇONNÉE LINER
lColler la protection de chantier sur la face avant du skimmer.
lSceller le skimmer dans la maçonnerie en prévoyant de finir
l’enduit à fleur de la face avant.
lColler le joint sur la face avant du skimmer.
lColler le joint sur la bride du skimmer.
lFixer la bride, après la pose du liner.
lPoser l’enjoliveur après la découpe du liner.
lUtiliser un manchon de raccordement 2’’ à visser et femelle Ø50 à
coller en réalisant l’étanchéité.
lRaccorder le tuyau rigide PVC vertical par collage dans la sortie
50 à coller du manchon de liaison skimmer/tuyau rigide.
lPour utiliser le Ø63 à coller : percer cette sortie, bouchonner la
sortie 2’’, et coller directement un tube rigide PVC Ø63
lPour installer une sortie trop plein : percer le Ø32 en haut du
skimmer et raccorder jusqu’à l’évacuation.
STRUCTURE PANNEAUX LINER
lUtiliser le gabarit pour le perçage du panneau Poser la meurtrière
par l’intérieur du bassin. La visser sur le panneau après la pose du
joint mousse.
lColler le corps principal du skimmer à la meurtrière avec
l’ABS liquide, serrer avec les pinces afin de faire le collage et
l’étanchéité. Refaire un cordon d’ABS à l’intérieur et à l’extérieur
de l’assemblage des deux parties (Aucune bulle ou trou ne doit
apparaître dans ce collage).
lRaccordement hydraulique identique au skimmer liner.
STRUCTURE MAÇONNÉE SANS LINER
lSceller le skimmer dans la maçonnerie, la partie avant en retrait
pour la réalisation de l’enduit fini ou du carrelage.
lRaccordement hydraulique Identique au skimmer liner.
lIl est impératif de changer dans les délais les plus brefs tout
élément ou ensemble d’éléments détériorés. N’utiliser que des
pièces d’origine.
lIl est conseillé d’arrêter la filtration pendant les opérations de
maintenance du système de filtration.
lLe fabricant ne pourra être tenu pour responsable d’un dommage
direct ou indirect provenant d’une utilisation ou installation
incorrecte du produit.
lInformations indicatives, représentations, photos et schémas non
contractuels.
SKIMMER
SKNOTICE - REV C - 10SKIMMER
Zulässiger Durchsatzleistung : 6 bis 10 m3/h
Der Skimmer muß gegen ber den vorherrschenden Winden und auf
der Seite der Tauchgrube installiert werden. Ihn so hoch wie möglich
verankern, um eine ideale Wasserlinie zu erhalten.
Um Leckageprobleme aufgrund der Bodensenkung zu vermeiden,
die Rohrleitung abreißen könnten, starre Rohre verwenden, die bis
zur Sohle herabführen. Es wird eine Aufschüttung mit feinem Sand
in aufeinanderfolgenden Schichten empfohlen. Zwischen jeder
Schicht gut befeuchten, um eine einwandfreie Senkung zu erhalten.
MAUERSTRUKTUR LINER
lDen Baustellenschutz an die Vorderseite des Skimmers kleben.
lDen Skimmer im Mauerwerk verankern, dabei den Verputz bündig
an der Vorderseite abschließen.
lDie Dichtung an die Vorderseite des Skimmers kleben.
lDie Dichtung an den Flansch des Skimmers kleben.
lDen Flansch nach Verlegen des Liners befestigen.
lDie Zierblende nach Ausschneiden des Liners anbringen.
lEinen Anschlußschraubstutzen 2’’ und Innengewinde Ø50 zum
Verkleben verwenden, um die Dichtheit herzustellen.
lDas starre, vertikale PVC-Rohr durch Verkleben im Ausgang Ø50
des Verbindungsstutzens Skimmer/starres Rohr anschließen.
lZur Verwendung des zu verklebenden Ø63: diesen Ausgang
durchbohren, den Ausgang 2’’ verstopfen und direkt ein starres
PVC-Rohr Ø63 ankleben.
lZur Installation eines überlaufausgangs : das Ø32 oben am
Skimmer durchbohren und bis zur Kanalisation anschließen.
PLATTENSTRUKTUR LINER
lDie Schablone für die Bohrung der Platte verwenden. Die
Scharte von innen in das Becken setzen. Sie nach Anbringen des
Schaumstoffs an der Platte festschrauben.
lDen Hauptkörper des Skimmers mit flüssigem ABS an die Scharte
kleben, mit den Klammern festhalten, um die Verklebung und die
Dichtheit herzustellen. Innerhalb und außerhalb des Montage der
beiden Teile eine ABS-Wulst einfügen.
lHydraulischer Anschluß wie beim Skimmer Liner.
MAUERSTRUKTUR OHNE LINER
lDen Skimmer im Mauerwerk verankern, mit nach hinten versetztem
Vorderteil, um den Fertigverputz oder die Fliesenverlegung
vorzunehmen.
lHydraulischer Anschluß wie beim Skimmer Liner.
lErsetzen Sie beschädigt, gebrochen, geknackt, Vermissen oder
nicht sicher angebrachte Sauganschlußbestandteile sofort.
Benutzen Sie nur echte Ersatzteile.
lStoppen Sie Filtration systeme, wenn Sie Teile ändern.
lDer Erzeuger wird keinen Verantwortlichen für eines direkten
oder indirekten Schadens gehalten sein können, der aus einer
Benutzung oder einer inkorrekten Einrichtung des Produktes
verbindet.
lZum Info, nicht vertragliche Fotos und Schemas.
SKIMMER
Caudal admisible : 6 a 10 m3/h
El skimmer debe ser instalado frente a los vientos dominantes y del
lado más hondo de la piscina. Deberá sellar ser lo más alto posible
para conseguir una linea de agua ideal.
Para evitar problemas de fuga debidos al apisonamiento del relleno
que podrían arrancar la tubería, utilizar tubos rígidos que bajaran
hasta el fondo de la piscina. Se aconseja rellenar con arena fina por
capas sucesivas. Remojar cada capa para asegurarnos un buen
apisonamiento
ESTRUCTURA CONSTRUIDA EN LINER
lPegar la protección para empotrar en obra en la parte delantera
del skimmer
lSellar el skimmer en la construcción previniendo e embaldosado
o revestimiento
lPegar la junta en la parte delantera del skimmer
lPegar la junta en la brida del skimmer
lFijar la brida, después de poner el liner
lPoner el embellecedor después de recortar el liner
lUtilizar un manguito de conexión 2’’ a enroscar y hembra Ø50 a
encolar realizando la hermeticidad
lEmpalmar un tubo de PVC vertical encolado en la salida Ø50 a
encolar del manguito de unión.
lPara utilizar el Ø63 a encolar: agujerear esta salida, taponar la
salida 2’’, y pegar directamente un tubo de PVC Ø63
lPara instalar una salida de evacuación de agua sobrante.
Agujerear el Ø32 encima del skimmer y empalmar hasta la
evacuación.
ESTRUCTURA EN PANEL LINER
lUtilizar la plantilla para taladrar el panel. Poner la boca por el
interior de la piscina. Enroscarla al panel después de poner la
espuma....
lPegar el cuerpo del skimmer a la boca con el ABS Líquido, apretar
con las pinzas con el fin de encolarlo y hacer la hermeticidad.
Volver a poner un cordón de ABS en el interior y exterior de la
unión de las dos partes
lEmpalme hidráulico idéntico al skimmer liner
ESTRUCTURA CONSTRUIDA SIN LINER
lSellar el skimmer en la construcción, la parte delantera retraída
para realizar el revestimiento o embaldosado
lEmpalme hidráulico idéntico al skimmer liner
lCambie inmediatamente los componentes de la salida de
aspiración dañados, rotos, rajados, que falta o no asegurado
correctamente. Use solamente repuestos genuinos.
lPare el sistema de la filtración cuando usted cambia piezas.
lEl fabricante no puede ser considerado como responsable de un
daño directo o indirecto que es resultado de un empleo o una
instalación incorrecta del producto.
lInformación indicativa, no esquemas contractual.
NOTICE D’UTILISATION
USER’S GUIDE
GUÍA DEL USUARIO
ANWENDER HANDBUCH
HAYWARD POOL EUROPE - P.I.P.A. - Allée des Chênes - 01150 Saint Vulbas - France

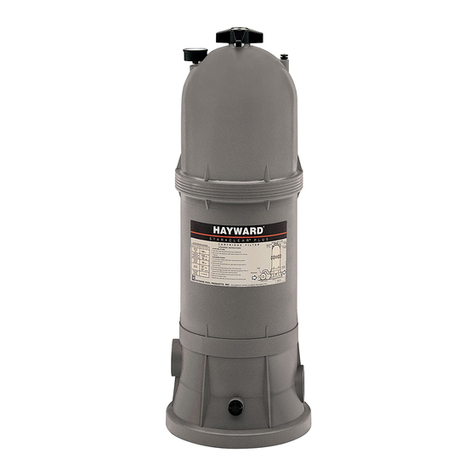
Other Hayward Swimming Pool Filter manuals

Hayward Aqua Plus® User manual

Hayward

Hayward Aqua Plus® User manual

Hayward SandMaster SM1700T Series User manual

Hayward

Hayward SandMaster SM1700T Series User manual

Hayward SwimClear User manual

Hayward

Hayward SwimClear User manual

Hayward EcoStar User manual

Hayward

Hayward EcoStar User manual

Hayward EZ-CHEM User manual

Hayward

Hayward EZ-CHEM User manual

Hayward Perflex User manual

Hayward

Hayward Perflex User manual

Hayward Aqua Rite® Pro Owner's manual

Hayward

Hayward Aqua Rite® Pro Owner's manual

Hayward XStream User manual

Hayward

Hayward XStream User manual

Hayward Perflex EC40C90 Series User manual

Hayward

Hayward Perflex EC40C90 Series User manual

Hayward Perflex EC50C90 Series User manual

Hayward

Hayward Perflex EC50C90 Series User manual

Hayward Ntech Evac-sharkvac User manual

Hayward

Hayward Ntech Evac-sharkvac User manual

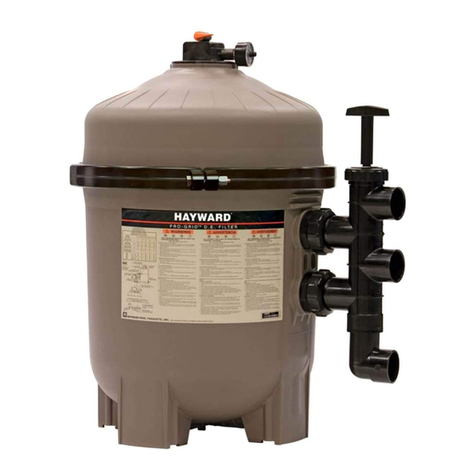
Hayward Pro-Grid User manual

Hayward

Hayward Pro-Grid User manual

Hayward ColorLogic Bubbler User manual

Hayward

Hayward ColorLogic Bubbler User manual

Hayward Perflex EC50 User manual

Hayward

Hayward Perflex EC50 User manual

Hayward Pro Series Top-Mount User manual

Hayward

Hayward Pro Series Top-Mount User manual

Hayward SwimClear User manual

Hayward

Hayward SwimClear User manual

Hayward Saline C HCSC60EU User manual

Hayward

Hayward Saline C HCSC60EU User manual

Hayward S-210T User manual

Hayward

Hayward S-210T User manual

Hayward Perflex Series User manual

Hayward

Hayward Perflex Series User manual

Hayward ECONOMY Series User manual

Hayward

Hayward ECONOMY Series User manual

Hayward AQUARITE FLO User manual

Hayward

Hayward AQUARITE FLO User manual

Hayward Star-Clear™ User manual

Hayward

Hayward Star-Clear™ User manual

Hayward S166T PRO Series User manual

Hayward

Hayward S166T PRO Series User manual

Hayward Swimclear C100SE User manual

Hayward

Hayward Swimclear C100SE User manual

Popular Swimming Pool Filter manuals by other brands

Davey Monarch EcoSalt BMSC Series Installation & operating instructions

Davey

Davey Monarch EcoSalt BMSC Series Installation & operating instructions

Axiall Accu-Tab 2300 Installation and operating instructions

Axiall

Axiall Accu-Tab 2300 Installation and operating instructions

King Technology SPARCO CYCLER instruction manual

King Technology

King Technology SPARCO CYCLER instruction manual

Vertex Omega 150 manual

Vertex

Vertex Omega 150 manual

Pentair BERMUDA GUNITE SKIMMER Design installation and user guide

Pentair

Pentair BERMUDA GUNITE SKIMMER Design installation and user guide

Lectranator Systems Soft Touch Pool Pilot ST840C Installation and operation manual

Lectranator Systems

Lectranator Systems Soft Touch Pool Pilot ST840C Installation and operation manual

Zodiac TITAN SERIES TP500 user guide

Zodiac

Zodiac TITAN SERIES TP500 user guide

AquaDriver SkimClean manual

AquaDriver

AquaDriver SkimClean manual

MRC MR Series quick start guide

MRC

MRC MR Series quick start guide

Zodiac TRi PRO Module Instructions for installation and use

Zodiac

Zodiac TRi PRO Module Instructions for installation and use

STA-RITE System 3 owner's manual

STA-RITE

STA-RITE System 3 owner's manual

JNS Aquaria ConeS RC Series quick start guide

JNS Aquaria

JNS Aquaria ConeS RC Series quick start guide

BWT EES Installation and operating instructions

BWT

BWT EES Installation and operating instructions

BWT P-GFI 400 Installation and operating instructions

BWT

BWT P-GFI 400 Installation and operating instructions

HydroTools 8940H operating instructions

HydroTools

HydroTools 8940H operating instructions

BSV BS POOL PRO250V2 user manual

BSV

BSV BS POOL PRO250V2 user manual

JetMAX Automatic Commercial Swimming Pool Cleaner Operator's manual

JetMAX

JetMAX Automatic Commercial Swimming Pool Cleaner Operator's manual

CAD Lights Aquariums PLS-50 ELITE manual

CAD Lights Aquariums

CAD Lights Aquariums PLS-50 ELITE manual

manuals.online logo
manuals.online logoBrands
  • About & Mission
  • Contact us
  • Privacy Policy
  • Terms and Conditions

Copyright 2025 Manuals.Online. All Rights Reserved.