HBK B&K 2245 User manual

B&K 2245
with Work Noise Partner
User Guide
for Version 1.5
BN 2377–16
Copyright © Hottinger Brüel & Kjær A/S. All rights reserved.

2

3
TABLE OF CONTENTS
TABLE OF CONTENTS 3
OVERVIEW 6
Licences 7
About the instrument 8
About the mobile app 8
About the PC application 9
System requirements 9
Data storage 10
Service and support 11
Additional documentation 12
THE INSTRUMENT 13
Hardware interface 13
Instrument GUI 15
Web server display 19
Charge the battery 20
Fix an unresponsive instrument 21
Drying the instrument 21
DOWNLOAD THE APPS 23
Download the mobile app 23
Download the PC application 23
CONNECT DEVICES 25
Local connections 25
Remote connections 26
Connect the mobile app to the instrument 29
CONFIGURE YOUR INSTRUMENT 31
Access instrument settings on the instrument 31
Access instrument settings on the mobile app 31
Input settings 31
Measurement control 33
Broadband parameters 35
Spectrum parameters 41

4
Audio recording 45
Display settings 46
Regional settings 48
Power management 49
Data management 49
Network settings 51
Voltage output 54
Lock the settings 54
CALIBRATION CHECK 55
How to perform a calibration check 55
Calibration history 57
Calibration settings 57
CREATE A PROJECT USING THE MOBILE APP 58
About settings for the standards 58
How to edit a project 59
How to delete a project 59
Create tasks 59
Create exposure groups 60
Create jobs 61
Add past measurements 61
MEASUREMENTS 62
Data explorer 63
Make a measurement using the mobile app 63
ANNOTATIONS 65
How to make annotations 65
View annotations in the mobile app 66
Edit annotations 66
Delete annotations 66
POST-PROCESS USING THE PC APP 67
PC application GUI 67
Import a project 72
Create a project using the PC application 74
Import measurements 76
Table of contents

6
OVERVIEW
Your instrument works with applications:
lNoise Partner for general-purpose, basic sound level measurements
lEnviro Noise Partner for measuring and analysing sound levels in the world around us
lWork Noise Partner for determining sound exposure levels in the workplace
lProduct Noise Partner for testing noise emission levels of products
There is a mobile version and a PC version of each application.
Work Noise Partner performs noise exposure calculations according to standards. The mobile app connects to the
instrument to act as a remote control and enables you to create a project, fill it with tasks and exposure groups which
are used to define jobs, and to add measurements and annotations. The PC application connects to the instrument and
allows you to import projects and measurements for processing and creating reports. The PC application also has facil-
ities for applying hearing protection and using a dosimeter.

7
Licences
B&K 2245 is a type-approved sound level meter (SLM). However, this basic functionality can be extended with optional
licences; it can perform frequency analysis, log broadband and spectral data, perform statistical analysis and make audio
recordings.
Licences for the instrument control the functionality of the instrument and to which applications it can connect.
BZ-7300: Noise Partner
This licence enables you to make simple, broadband measurements, to make general-purpose sound pressure level
measurements, and to make basic occupational, product and environmental measurements.
lMeasure broadband parameters.
lConnect to Noise Partner mobile app and PC application.
BZ-7301: Enviro Noise Partner
This licence enables you to measure and report on environmental noise concerns.
lMeasure broadband parameters.
lPerform spectrum analysis (1/1- and 1/3-octave).
lPerform statistical analysis of measured broadband parameters.
lAverage and log intervals of broadband and/or spectral data (logging mode).
lRecord audio.
lConnect to Enviro Noise Partner mobile app and PC application.
BZ-7302: Work Noise Partner
This licence enables you to measure occupational noise-related concerns, such as noise exposure surveys and risk mit-
igation for noise-induced hearing loss.
lMeasure broadband parameters.
lPerform spectrum analysis (1/1- and 1/3-octave).
lAverage and log intervals of broadband and/or spectral data (logging mode).
lRecord audio.
lConnect to Work Noise Partner mobile app and PC application.
BZ-7303: Product Noise Partner
This licence enables you to determine the sound power level of a device under test (DUT) according to standards.
lMeasure broadband parameters.
lPerform spectrum analysis (1/1- and 1/3-octave).
lPerform statistical analysis of measured broadband parameters.
lRecord audio.
lConnect to Product Noise Partner mobile app and PC application.
Overview

8
BZ-7304: Exhaust Noise Partner
This licence enables you to measure exhaust noise.
lMeasure broadband parameters.
lConnect to Noise Partner mobile app and PC application.
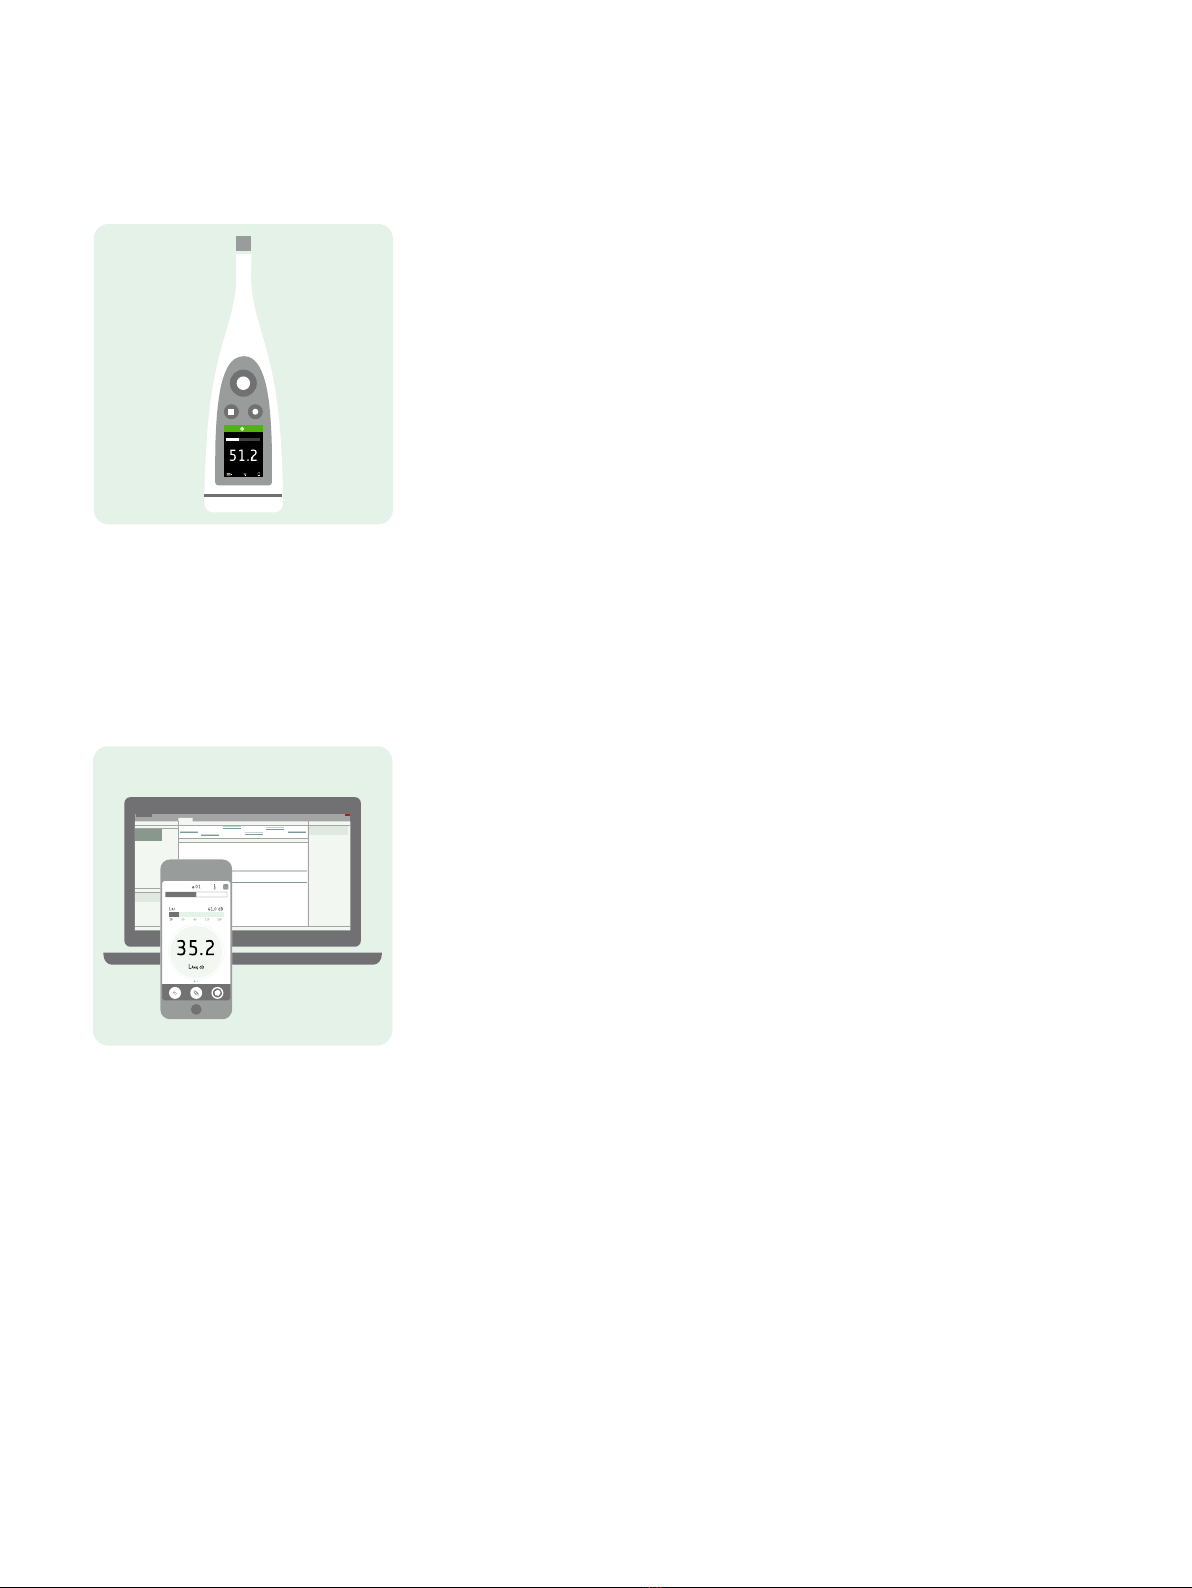
About the instrument
The instrument measures sound level meter parameters (Leq, LE, Lav, Lpeak, Lmax, Lmin, L(SPL), L) with up to two sim-
ultaneous frequency weightings (A, B, C, Z) and up to three simultaneous time weightings (F, S, I) for the exponential
averaging.
The instrument performs frequency analysis of either 1/1- or 1/3-octave spectra (Leq, Lmax, Lmin) with one of the avail-
able frequency weightings (A, B, C, Z) and time weightings (F, S).
The instrument takes single measurements. In other words, the instrument calculates a single value for each measured
parameter for the total measurement time.
The instrument takes logged measurements. In other words, it has a logging mode that can average and log intervals of
broadband and/or spectral data to obtain a profile of the total measurement with logging intervals between 1 s and 1
min.
The instrument takes audio recordings.
Standards
Go to: Menu >About >Metrology >Standards.
Here you will see the complete list of standards to which the instrument conforms.
About the mobile app
The mobile app interfaces with the instrument, making remote measurements possible and making it easier to change
settings and interact with the data. It is recommended that you use the mobile app whenever possible.
Functionality of the mobile version of Work Noise Partner:
lAdd tasks, exposure groups and jobs.
lControl the instrument remotely (make measurements).
lAnnotate measurements (add photos, videos, notes and commentary).
lSee the status of the instrument and access instrument settings.
lAdd past measurements to tasks and exposure groups.
lDisplay GUI in dark mode (set at the system level).
Overview

9
About the PC application
Functionality of the PC version of Work Noise Partner:
lImport projects created with the mobile app from the instrument.
lCreate projects from measurements stored on the instrument.
lAdd measurements stored on the instrument to an existing project.
lView measurements, annotations, calculations and results.
lCreate, view and edit tasks, exposure groups and jobs.
lUse a dosimeter:
lConnect to a dosimeter.
lAdd dosimeter measurements to a project.
lConfigure a dosimeter's settings.
lApply hearing protection.
lExport projects for use with OMEGA products (Germany).
lExport projects to another file format (for sharing or reporting).
lPlay back recorded audio (digitally gained).
System requirements
The mobile app
liOS-based phone or tablet
See supported iOS versions for current app version in the App Store®, under Work Noise Partner >Information
>Compatibility.
Overview

10
The PC application
System Requirements:
lWindows® 8.1 or 10 (64-bit) operating system
lMicrosoft® .NET 4.7.2 framework
Recommended PC:
lIntel® Core™ i5 or better
lSound card
lSolid State Drive (SSD)
l8 GB of memory
lAt least one available USB port
lMicrosoft Office 2016 or later
Data storage
The instrument
Data storage: Approximately12GB
The instrument has 16GB of built-in storage, of which approximately 12GB is available for data storage. All meas-
urement data and annotations are stored on the instrument.
Measurements and annotations are imported to the PC application from the instrument. They can then be saved to your
computer or to a location on a network.
Useful settings
lMenu >Data explorer:View past measurements or move them to trash.
lMenu >Status: See remaining storage space.
lMenu >System settings >Data management: Edit settings for data backup and retention.
Mobile app
Neither measurement data nor annotations are stored on your mobile device, everything is uploaded to and stored on
the instrument.
Overview

11
Service and support
The instrument comes with the standard product warranty for Brüel & Kjær products.
Visit www.bksv.com/Service to request a quote for or find information about services.
lHardware maintenance and repair
lCalibration
lExtended warranty contracts for hardware
Firmware updates
Update firmware over the Internet.
1. Connect the instrument to a network with access to the Internet.
See Local connections on page25 for more information.
2. Press briefly to open the menu.
3. Go to: System settings >Advanced settings.
4. Set Service mode to Enabled.
5. Go to: Check for updates.
6. Follow the prompts.
✐Note:
lWhen you return your instrument for service, the firmware will be updated to the latest version.
lFor type-approved firmware versions, you may need to return the instrument to a certified service centre to
update the firmware. Check with your type-approving authority before updating the firmware.
Application updates
Updates are handled via the application.
Contact information
For service and support, contact your nearest Brüel & Kjær Customer Care support team.
Headquarters: info@bksv.com, +45 7741 2000
China (Beijing): +86 21 6113 3674
France: service.fr@bksv.com, +33 1 69 90 71 02
Germany: bkservice.de@bksv.com, +49 421 17 87 0
Italy: it.info@bksv.com, +39 02 5768061
Japan: info_jp@bksv.com, +81 3 6810 3500
North & South America: bkservice@bksv.com, +1 770 209 6907
Spain: servicio.tecnico@bksv.com, +34 91 659 08 20
Overview

12
UK &Ireland: ukservice@bksv.com, +44 1223 389800
Go to www.bksv.com/contact for contact information to our other global offices.
Additional documentation
Product data
lB&K 2245 with Noise Partner: BP0029
lB&K 2245 with Enviro Noise Partner: BP0030
lB&K 2245 with Work Noise Partner: BP0031
lB&K 2245 with Exhaust Noise Partner: BP0032
lB&K 2245 with Product Noise Partner: BP2643
lMicrophone Type 4966: BP2536
Manuals and guides
lGetting Started Guide: BR1812
lInstruction Manual for B&K 2245 with Microphone Type4966: BE1910
lPhone / Tripod Holder UA-2237 Guide: BR8071
lWindscreen UA-1650 Guide: BR0011
Help
Help for B&K 2245 with Work Noise Partner is also available in HTML format.
Resources
lEnvironmental Noise: BR1626
lMeasuring Sound Primer:BR0047
Overview
13
THE INSTRUMENT
Hardware interface
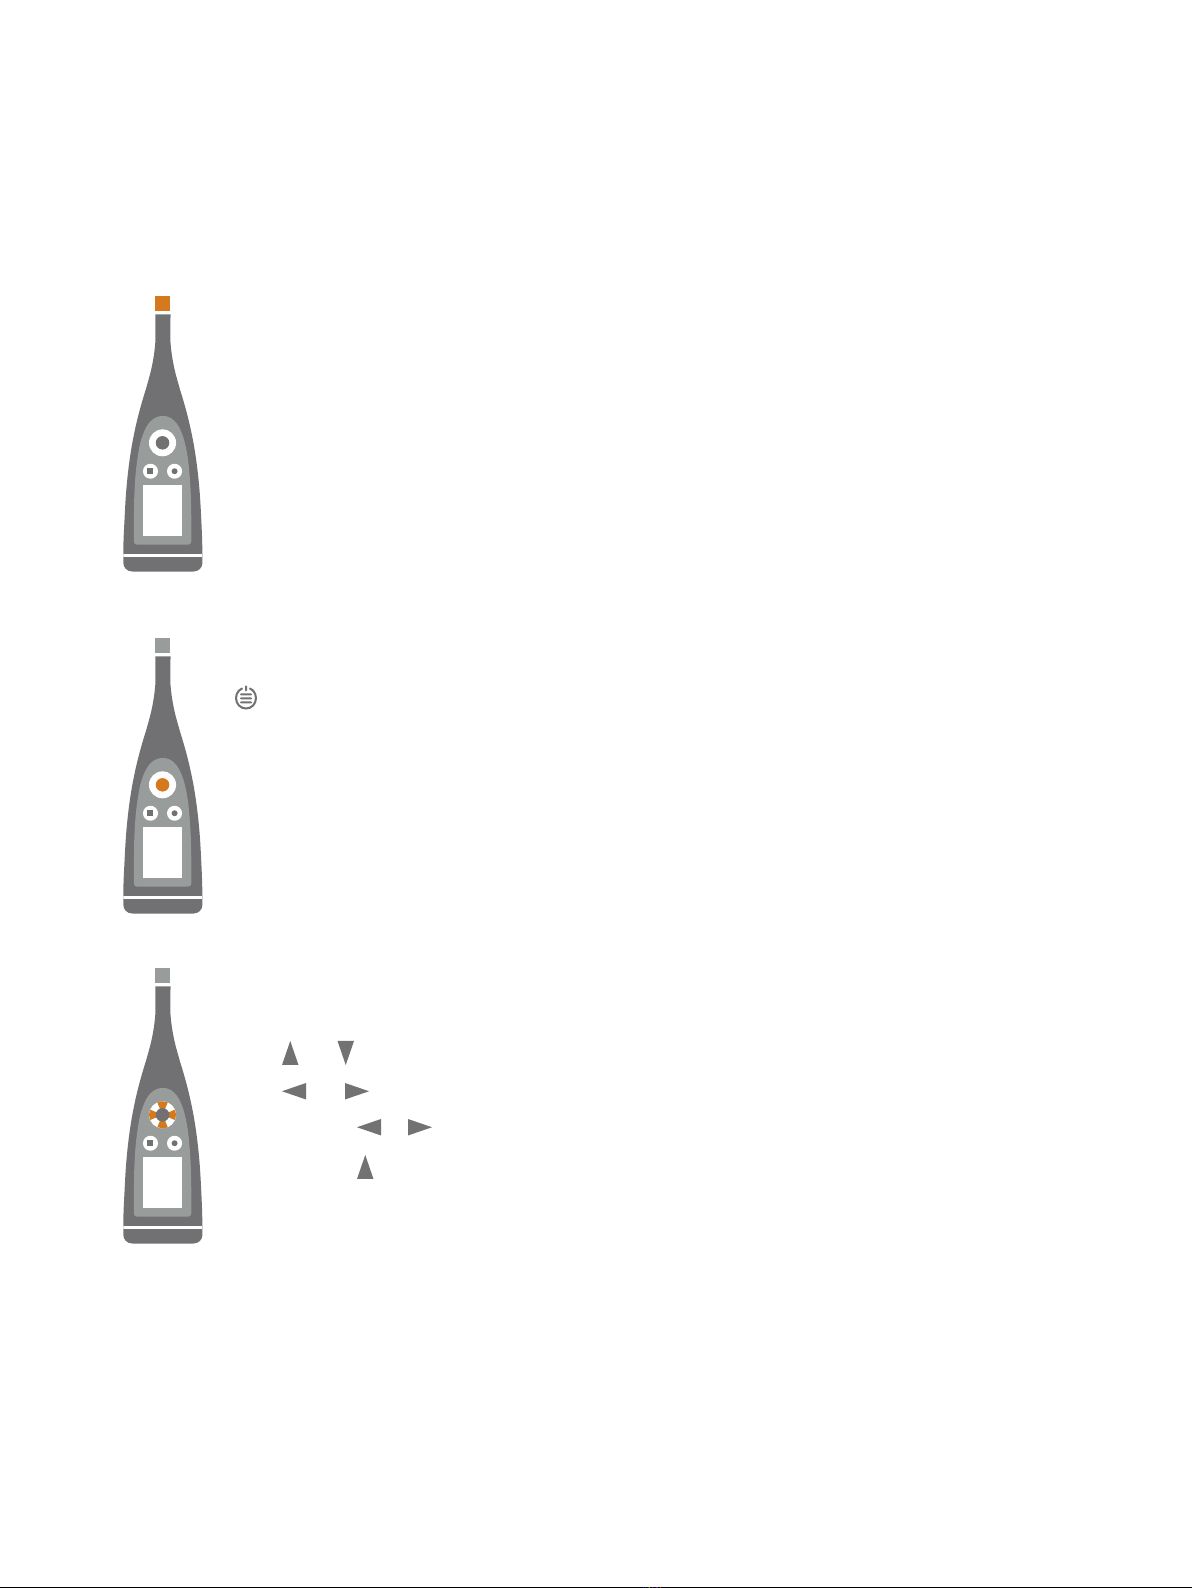
The microphone is at the top of the instrument.
is the power/menu/reboot button.
Press and hold the button to power the instrument on or off. When the instrument is on, press the but-
ton briefly to open the menu. If the instrument becomes unresponsive, press and hold the button for
approximately 40 seconds (remove cables first).
The arrow buttons scroll through measurement displays, auto-zoom graphs, move cursors and nav-
igate the menu.
Press and briefly to scroll through measurement displays.
Press and briefly to scroll through the parameters for each display.
Press and hold or to move the cursor on the Spectrum and Profile displays.
Press and hold to auto-zoom the Y-axis on the Spectrum and Profile displays.

14
is the stop/reset button.
Press the button once to stop a measurement. At this point, averaged measurement parameters will
stop updating and you can review the results. Press the button again to clear the results and reset the
instrument for the next measurement. Data is saved automatically.
is the start/pause button.
Press the button once to start a measurement, press it again to pause the measurement, press it a
third time to resume the measurement.
The screen displays sound levels and the menu.
The instrument
15
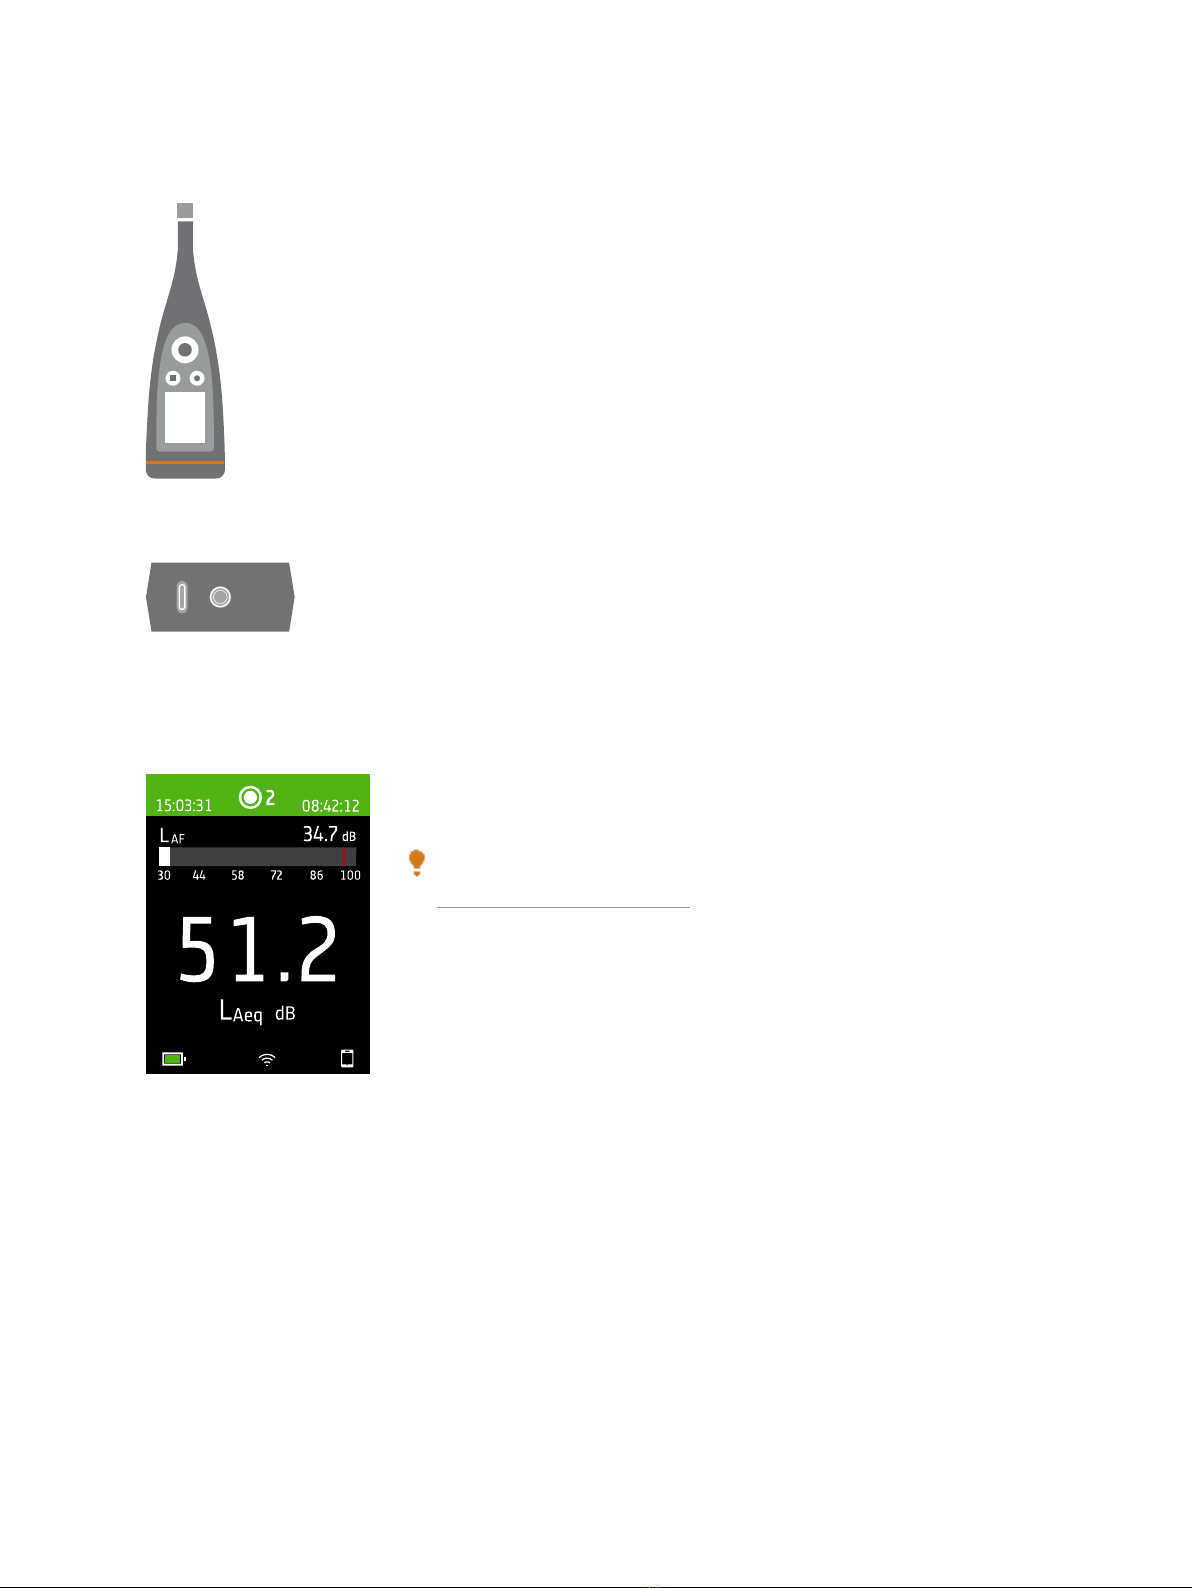
The light ring is colour-coded to reflect the status of the instrument.
The light ring is solid green while measuring.
The light ring flashes yellow slowly while idle or quickly while paused (measuring).
The light ring flashes red quickly for intermittent overloads.
The light ring is solid purple for latched overloads.
The light ring flashes white slowly when switched off and charging the battery.
The light ring flashes blue while pairing a mobile device with the instrument.
On the base of the instrument is a threaded hole for mounting the instrument on a tripod and
aUSB-C™ socket. Use the USB socket as a connector or as signal output.
Instrument GUI
This is an example of the instrument graphical user interface (GUI) in dark colour
scheme while measuring and connected to the mobile app.
Hint: You can view the GUI in a web browser via the instrument's IP address.
See Web server display on page19 for more information.
The instrument
16
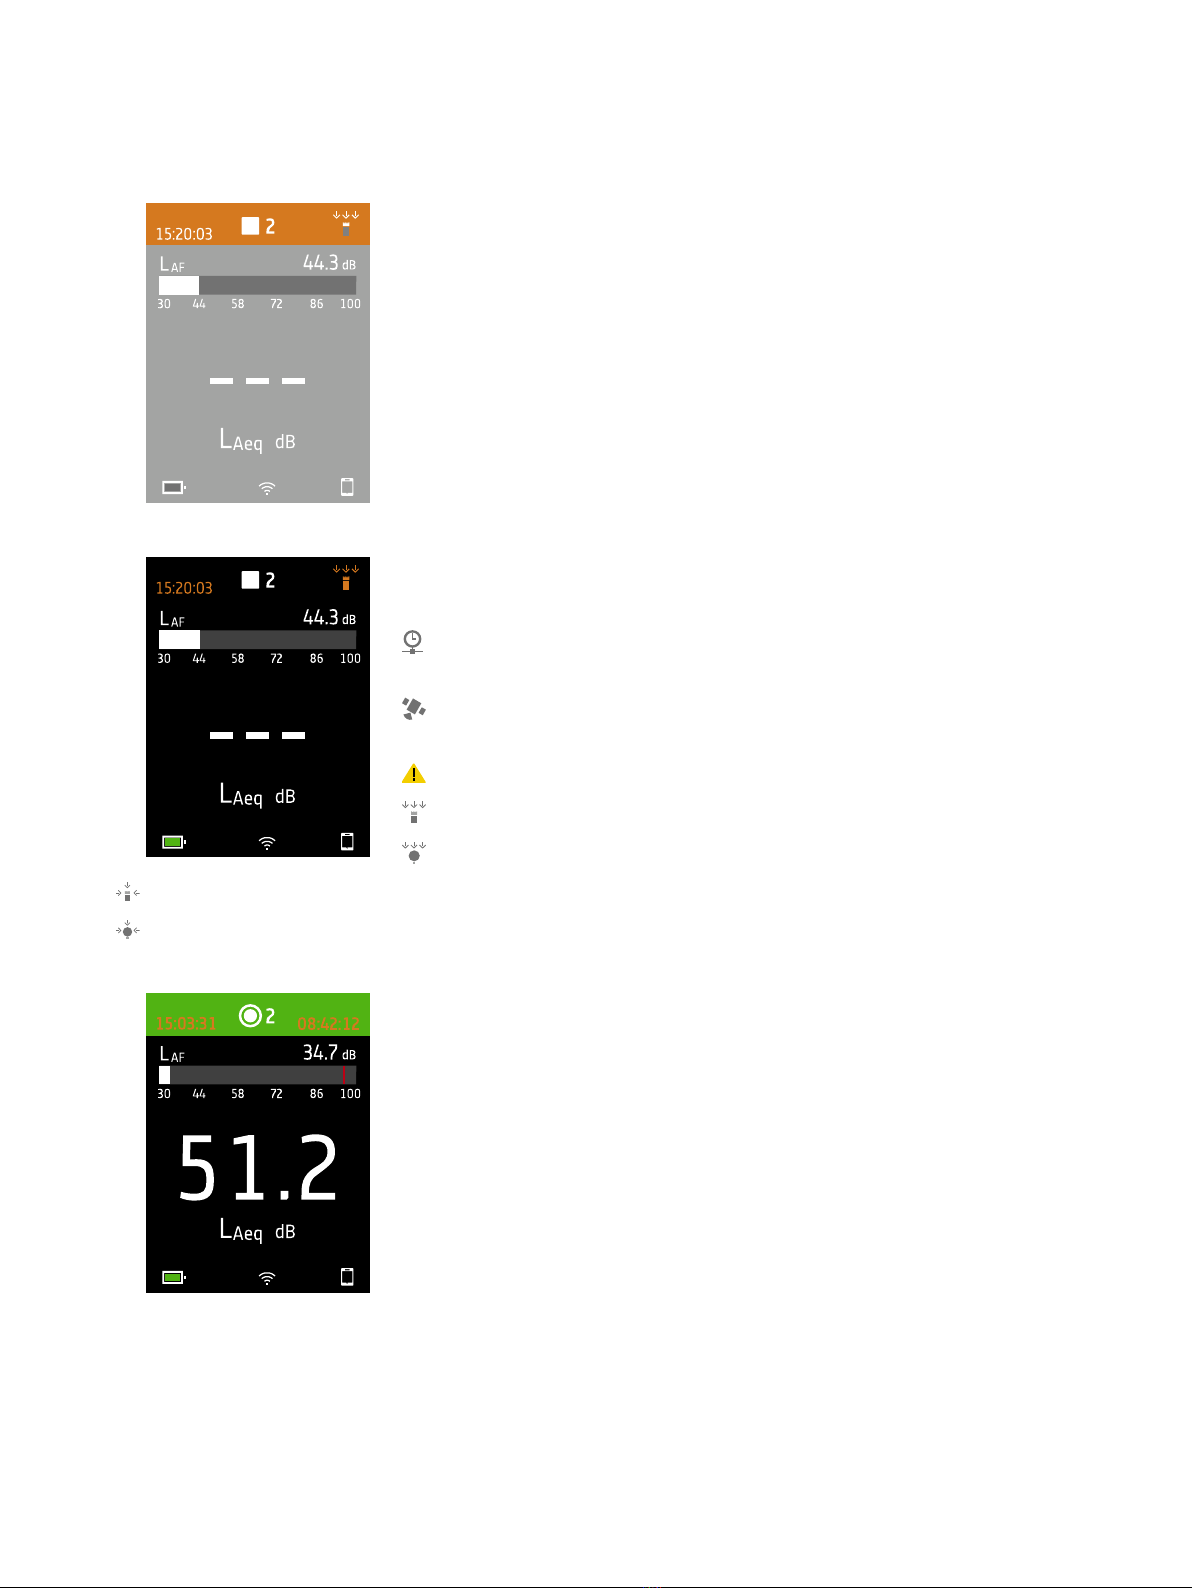
The top region shows measurement information and instrument status.
When idle, the instrument displays the current time (to the left) and input settings
(to the right).
: Indicates the clock is controlled from a network time protocol (NTP) server on
the Internet. Precision of the time is within 10ms.
: Indicates that clock is controlled from a satellite. Precision of the time is within
1ms.
:Indicates that the clock is estimated to be more than 2s wrong.
: Indicates that Sound field is set to Free-field and there is not a windscreen.
: Indicates that Sound field is set to Free-field and there is a windscreen.
: Indicates that Sound field is set to Diffuse-field and there is not a windscreen.
: Indicates that Sound field is set to Diffuse-field and there is a windscreen.
During a measurement, the instrument displays the start time (to the left) and the
elapsed time (to the right).
The instrument

17
The number in the centre is the measurement number. The first measurement of
every day is number 1. The number increments with each new measurement.
The background colour of the top region and the centre symbol change to indicate
the state of the instrument.
: Indicates that the instrument is ready to measure.
: Indicates that the instrument is measuring.
: Indicates that the instrument is paused.
: Indicates that the instrument is stopped and displaying results from the meas-
urement.
Press and briefly to scroll through measurement displays. Press and
briefly to scroll through the parameters for each display.
SLM view (left) and List view (right) are the main dis-
plays for single measurements. SLM view shows a bar
graph and one broadband parameter. List view shows a
bar graph and a list of broadband parameters.
The bar graph shows the instantaneous sound level (L) with frequency and time
weightings. This display is sometimes called the fast bar or fast display.
: Indicates the maximum instantaneous sound level during a measurement.
The instrument

18
✐Note: The bar graphs in SLM view and List view are unique, that is they can each be set to show a different para-
meter.
lGo to Menu >Display settings >SLM view >Graph parameter to set the parameter for the bar graph when dis-
playing one broadband parameter.
lGo to Menu >Display settings >List view >Graph parameter to set the parameter for the bar graph when dis-
playing a list of broadband parameters.
Profile view is the main display for logged measurements because it shows the pro-
file of logged broadband and/or spectrum parameters.
Press and hold or to move the cursor in the display. The readout above the
graph shows the location of the cursor and its decibel level. Press and hold to
auto-scale the Y-axis to fit the data.
Spectrum view displays the frequency analysis of spectrum parameters, shown as
decibel (dB) levels by Hertz (Hz).
Press and hold or to move the cursor in the display. The readout above the
graph shows the location of the cursor and its decibel level. Press and hold to
auto-scale the Y-axis to fit the data.
For very low or very high sound levels, you will see indicators.
: Indicates a signal that is under the measurement range.
Overload occurs when the signal is over the measurement range. There are two
types of overload indicators: latched and instantaneous. The latched-overload indic-
ator is triggered at the first instance of overload and persists until the instrument is
reset. The instantaneous-overload indicator is triggered every time the signal is over
the measurement range.
: Indicates instantaneous overload.
: Indicates latched overload.
The instrument

19
The bottom region provides information about the system: battery, network, and
connectivity status.
The battery icons show the status of the battery. For example, (charging) or
(full).
The network icons show the current network settings and its status. For example,
(connected to a wireless network), (acting as a hotspot), (Ethernet con-
nection) or (aeroplane mode).
The connectivity icons show you to which application the instrument is connected:
(mobile) or (PC).
indicates that a backup is in progress.
The menu
Use the buttons on the instrument to interact with the menu.
: Open / close the menu;open a response dialog;confirm a setting in a response
dialog;enable / disable parameter selection boxes.
: Navigate up a list; increment a value in a response dialog.
: Navigate down a list; decrement a value in a response dialog.
:Navigate down a level in the menu; exit a response dialog (without confirming a
setting).
: Navigate up a level in the menu;enter a response dialog.
Web server display
You can display the instrument GUI in a web browser.
You will need:
lYour instrument
lA computer or mobile device with Wi-Fi® and a web browser installed
The instrument

20
Procedure:
1. Go to: System settings >Network settings >Web server display.
2. Select Enabled.
3. Network your devices.
This is one way to network your devices:
a. On the instrument, go to: System settings >Network settings >Wi-Fi settings >Wi-Fi mode.
b. Select Act as hotspot.
c. Make note of the hotspot name (example: BK2245-000000) and password.
d. Connect your device to the hotspot as per the manufacturer's instructions.
4. On your mobile device or computer, open a web browser.
5. Type <IP address/display> in the address bar of the browser.
When acting as a hotspot, the IP address of the instrument is 10.42.0.1, so you will type <10.42.0.1/display>.
✐Note: You can find the instrument's IP address here:System settings >Network settings. Look under Wi-Fi settings
or Ethernet settings depending on your connection.
Charge the battery
The instrument has an internal Lithium-ion rechargeable battery.
Procedure
1. Connect the instrument to a power source.
indicates that the battery is charging with a readout of the percentage charged.
2. Disconnect the power source to stop charging.
Approved power sources
lMains
lBase station (the base station is powered via mains)
lComputer
lPower bank
Status
Go to Menu >Status to see the status of the battery.
lStatus: Either Full,Charging, or Discharging
lTime remaining: The approximate time left on the charge
lCharged: The percentage to which the battery is currently charged
The instrument
Other manuals for B&K 2245
1
Table of contents
Other HBK Test Equipment manuals


Popular Test Equipment manuals by other brands


Triplett
Triplett MG430 user manual

Instron
Instron 34FM-300 Preinstallation manual

Bante Instruments
Bante Instruments ECscan40 instruction manual

EXFO
EXFO FTB-7000B user guide

Agilent Technologies
Agilent Technologies 16048A Operation and service manual

MAHA
MAHA CONNECT Series Original operating instructions


