HDTV Supply HDTVMT0808140 User manual
HDTVMT0808140Usermanual
HDTV Supply, Inc. Contact:support@hdtvsupply.com
1
HDTVMT0808140 User Manual

HDTVMT0808140Usermanual
HDTV Supply, Inc. Contact: [email protected]
2
Thank you for purchasing this product. For optimum performance and safety, please read
these instructions carefully before connecting, operating or adjusting this product. Please keep
this manual for future reference.
SURGE PROTECTION DEVICE RECOMMENDED
This product contains sensitive electrical components that may be damaged by electrical
spikes, surges, electric shock, lightning strikes, etc. Use of surge protection systems is highly
recommended in order to protect and extend the life of your equipment.

HDTVMT0808140Usermanual
HDTV Supply, Inc. Contact: [email protected]
3
Table of Contents
1. Introduction.............................................................................................4
2. Features.....................................................................................................4
3. Panel Descriptions.........................................................................................................4
4. Remote Control Descriptions...........................................................................................7
5. Application Diagram........................................................................................................8
6. Specifications..........................................................................................................9
7. Package Contents.......................................................................................9
8. RS-232 Pin Assignment.........................................................................................10
9. GUI Control..............................................................................................10
10. Maintenance.................................................................................................................20
11. Warranty Policy.......................................................................................................20
12. Limitations of Warranty.........................................................................................20
13. Exclusive Remedies........................................................................................21
14. RMA Policy...........................................................................................21

HDTVMT0808140Usermanual
HDTV Supply, Inc. Contact: [email protected]
4
Introduction:
The HDTVMT0808140 8×8 Matrix routes six Hi-Def sources to any eight HDTV displays,
supporting 1080p Full HD up to 4K plus all 3D formats, along with multichannel digital audio
formats such as Dolby® True HD and DTS-HD® Master Audio™. Each source can be routed
to any display using the front-panel push buttons, IR remote control, RS-232 interface, or via
TCP/IP.
Features:
Supports resolutions up to 1080p@60HZ,48-bit deep color, 4k@30HZ
Allows any source to be displayed on multiple displays at the same time
Allows any HDMI display to view any HDMI source at any time
Dolby TrueHD and DTS-HD master audio pass through HDMI output
Advanced EDID management for rapid integration of sources and displays
Multiple switching mode, push-in button, IR remote control, RS-232 control, and TCP/IP
control
Easy installation with rack-mounting ears
Full 3D pass through.
HDCP compliant
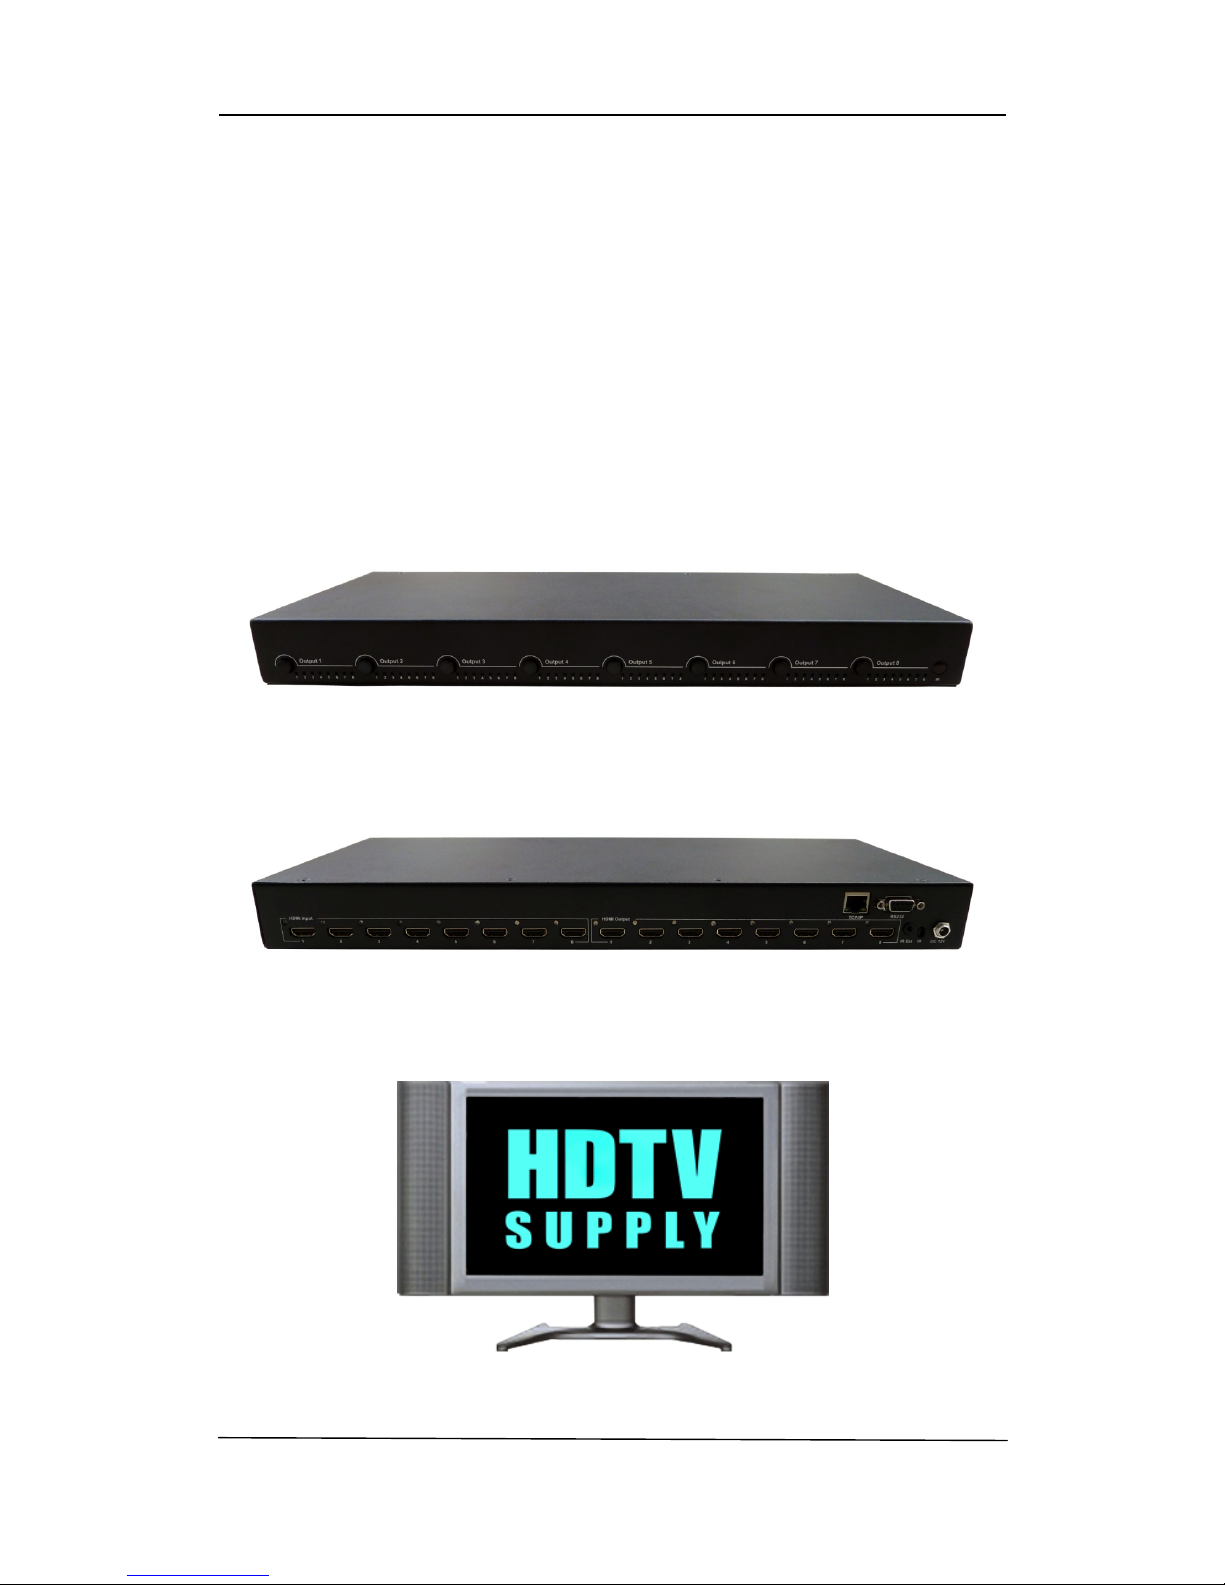
Panel Descriptions
Front Panel
1. HDMI output selection button 1 to 8---Press to select the output from 1 to 8.
2. Source LED indicator---lit when selected by the output
3. IR receiver window----Receive the IR from the remote control of MT0808-140.

HDTVMT0808140Usermanual
HDTV Supply, Inc. Contact: [email protected]
5
Back Panel
1. RJ45 ----TCP/IP control
2. RS232 port----Connect to this port for control from a computer
3. HDMI inputs 1 to 8----Connect HDMI sources
4. HDMI outputs 1 to 8----Output for displays, AVR etc.
5. IR extension receiver input ---- 3.5mm stereo phone-jack
6. IR receiver window----Receive the IR from the remote control of HDTVMT0808140.
7. Power port---Use included DC adaptor to power the matrix switcher.

HDTVMT0808140Usermanual
HDTV Supply, Inc. Contact: [email protected]
6
Remote control descriptions
Output and Input select
A. OUTPUT-X select INPUT-Y:
1. Press OUTPUT-X (X means 1 to 8 of outputs)Press INPUT-Y ( Y means 1 to 8 of
inputs )
2. Press OUTPUT-X (X means 1 to 8 of outputs)press the left and right arrow buttons
to select the input.
B. All outputs select INPUT-Y: Press ALL button in zone OUTPUTPress INPUT-Y button ( Y
means 1 to 8 of inputs ), then INPUT-Y switched to ALL OUTPUTS
C. Mirror all inputs and outputs (Ex. Input 1 to output 1, input 2 to output 2, etc): Press PTP
button in Zone OUTPUT
HDTVMT0808140Usermanual
HDTV Supply, Inc. Contact: [email protected]
7
EDID Set Up
A. Fixed EDID to INPUT-Y/ALL
Press 1080I/1080P/3D/4KPress 2.0CH/5.1CH/7.1CHINPUT-Y/ALL button in Zone
INPUT
B. Copy EDID of OUTPUT-X to INPUT-Y/ALL
Press COPY buttonPress OUTPUT-X buttonPress INPUT-Y/ALL button
C. User defined EDID to INPUT-Y/ALL
Press USER1/USER2 buttonPress INPUT-Y/ALL
NOTE: Pressing button sequence should be finished in 5 seconds, otherwise, operation
discarded.
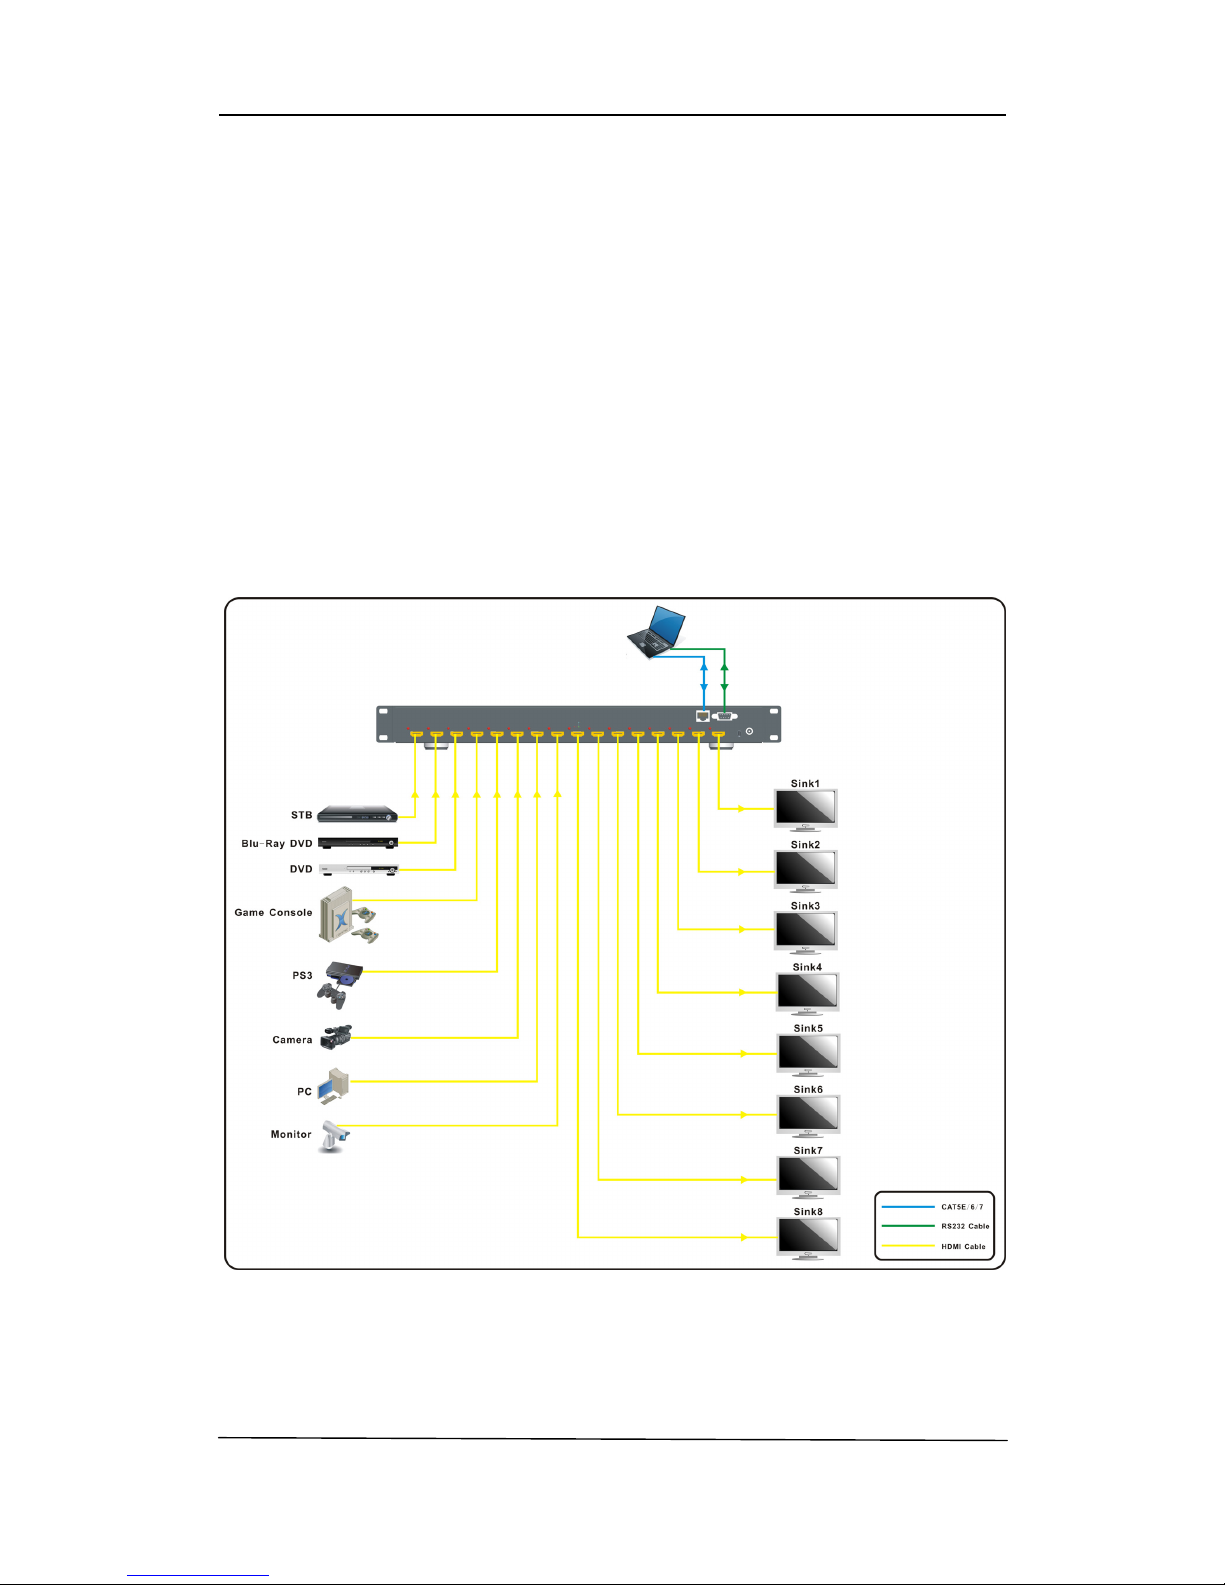
Application Diagram

HDTVMT0808140Usermanual
HDTV Supply, Inc. Contact: [email protected]
8
Specifications:
Package Contents:
1. 1x HDTVMT0808140
2. 1x 12V DC power supply
3. 1x Remote control
4. 8x IR Transmitter,
5. 9x IR Receiver.
6. 1x mounting kit.
7. 1x CD for control software.
Bandwidth: 2.97Gbps per color
Video Input Connectors: 8x HDMI Type A, 19-pin, female, locking
Video Output Connectors: 8x HDMI Type A, 19-pin, female, locking
RS-232 serial port: DB-9, female
TCP/IP Control: RJ-45, female
IR Input ports: 1x 3.5mm stereo jack
Rack-Mountable: 1 U rack height, rack ears included
Dimensions (W x H x D): 428mm x 245mm x 43mm , without feet
Shipping Weight: 2.7kg
Operating Temperature:
32°F to 104°F (0°C to 40°C)
Storage Temperature :
-4°F to 140°F (-20°C to 60°C)
Power Supply: 12V/5A DC

HDTVMT0808140Usermanual
HDTV Supply, Inc. Contact: [email protected]
9
RS-232 Pin Assignment
MT0808-140 Remote Control
Console
PIN Assignment PIN Assignment
1 NC 1 NC
2 Tx 2 Rx
3 Rx 3 Tx
4 NC 4 NC
5 GND 5 GND
6 NC 6 NC
7 NC 7 NC
8 NC 8 NC
9 NC 9 NC
GUI Control
PC System: Microsoft Windows Operation System
Installation
8x8 HDMI Matrix controller is a green software. You just need to copy “8x8 HDMI Matrix
Controller vx.x.exe” to the PC which is used to control the Matrix by RS232 COM or TCP to
complete installation.
Preparation
1. Connect PC and Matrix by RS232 cable or UTP cable
2. Power up Matrix (It will take about 5 seconds to be ready with “Di” beep sound )
3. Double click “8x8 HDMI Matrix Controller vx.x.exe” icon to run it
How to control Matrix
Common information

HDTVMT0808140Usermanual
HDTV Supply, Inc. Contact: [email protected]
10
Click to select tab page
①COM port or TCP connect status
②Control command process status
③Prompt message display area
④Date and Time display
“General” page
①Select control mode: RS232 COM mode (Auto COM ports detected) or TCP mode
②List detected COM ports
③List all Matrix devices after search operation
④Click to search all Matrix devices that connected in same subnet
⑤Click to configuration the selected Matrix’s TCP control configurations
⑥Click to connect or disconnect PC and Matrix ( Connection will be established
automatically before control commands sending )
⑦Click to refresh device status: include device information displayed in ⑨area and
Input/output port connection status in ⑩area.
12
3
7
9
8
123 4
45
6
10
Table of contents
Other HDTV Supply Switch manuals


