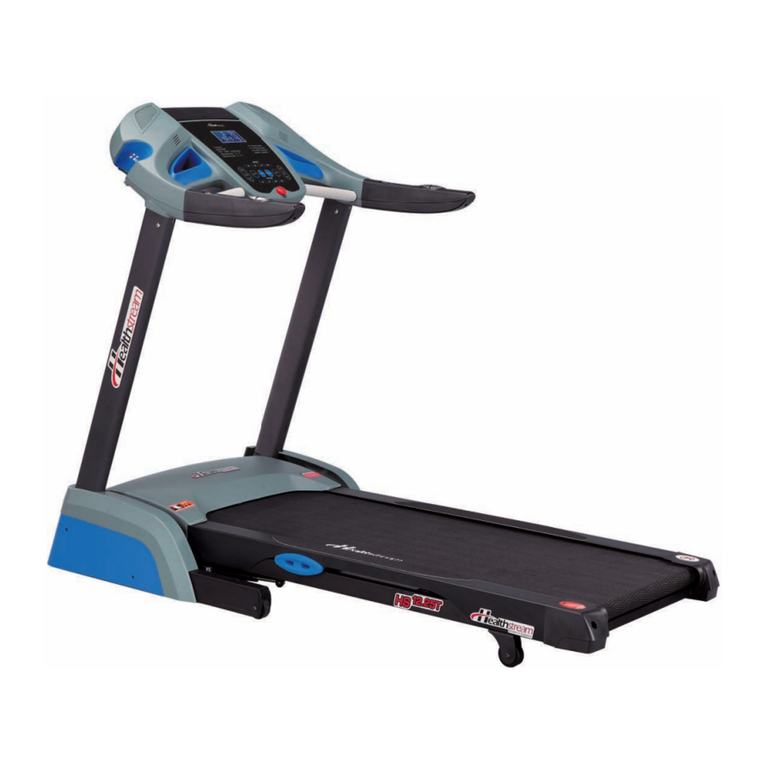
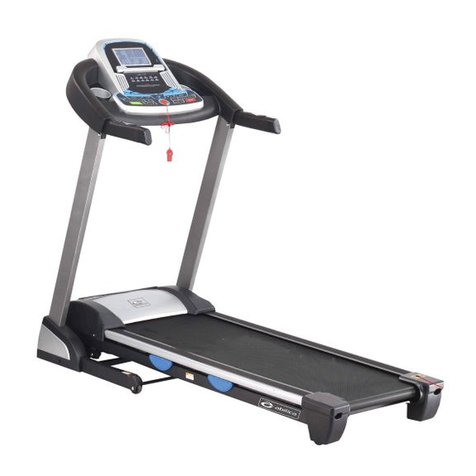
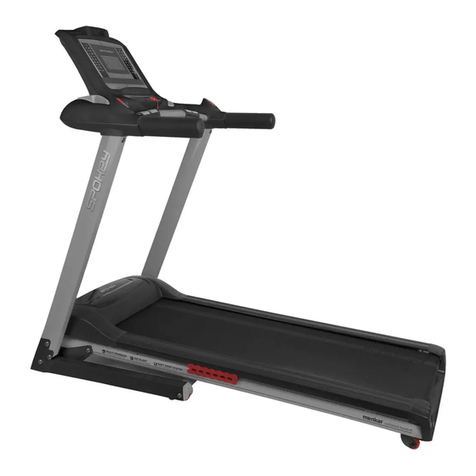
Healthstream HS3500T User manual

MELBOURNE
TFG
23 KELLETTS RD
ROWVILLE VIC 3178
PH:03 9765 9999
SYDNEY
TFG
OFFICE 4,11-13 ORION RD
LANE COVE WEST NSW 2066
PH: 02 9420 9988
BRISBANE
TFG
24-30 BLANCK ST
ORMEAU QLD 4208
PH:07 5540 7181
ADELAIDE
UNIT 3,35 JACOBSON CRES
HOLDEN HILL SA 5088
PH:08 8266 6386
PERTH
UNIT 1/100 WALTERS DRIVE
OSBORNE PARK WA 6017
PH:08 9444 6977
www.fitnessgeneration.com.au
RETAIN OWNER'S MANUAL
FOR FUTURE REFERENCE

TABLE OF CONTENTS
*SAFETY
*WARM-UP & COOL DOWN
*UNPACKING & ASSEMBLY
*ASSEMBLY DRAWING
*COMPUTER OPERATIONS
Control panel function, control panel operation
*BELT ADJUSTMENT
*CARE 7 MAINTENANCE
*TROUBLE SHOOTING
*PARTS LIST
*PARTS LIST- BOLTS 7 NUT
*EXPLODED DRAWING
---------------
---------------
---------------
---------------
---------------
---------------
---------------
---------------
---------------
---------------
---------------
P1~P2
P3
P4
P5~P6
P7~P11
P12
P13
P14
P15
P16
P17

IMPORTANT: Read all instructions and warnings before using the treadmill
IMPORTANT VOLTAGE INFORMATION !
Before plugging the power cord into an electrical outlet, verify that the voltage requirements for your area
match the voltage of the treadmill that you have received,. The power requirements for this treadmill include a
grounded, dedicated circuit, rated for one of the following: 115VAC +- 5%, 60Hz and 20amps; 208/220 VAC,
60Hz, 15amps or 230 VAC +- 5%, 50Hz and 10amps. Check with your dealer for the exact voltage
requirements of your treadmill. Use of wrong voltage will damage the treadmill.
WARNING! : Do not attempt to use this treadmill with a voltage adapter.
Do not attempt to use this treadmill with an extension cord.
GROUNDING INSTRUCTIONS
This treadmill must be grounded. If it should malfunction or break down, grounding provides a path of least
resistance for electric current to reduce the risk of electric shock. This product is equipped with a cord having
an equipment-grounding conductor and a grounding plug. The plug must be plugged into an appropriate
DANGER!
Improper connection of the equipment-grounding conductor can result in a risk of electric shock.
Check with a qualified electrician or service provider if you are in doubt as to whether the treadmill is
properly grounded.
CONSULT A PHYSICIAN IMMEDIATELY
Warning: before starting any exercise program consult your physician. This is especially important
for individuals over the age of 35 or persons with pre-existing health problems. Read all instructions
before using any fitness equipment. We assume no responsibility for personal injury damage
sustained by or through the use of this treadmill.
1
– Obtain a medical exam before beginning any exercise program.
– Keep children and pets away from the treadmill. Teenagers and disabled persons must be
supervised while using the treadmill.
– Stop exercising if you feel faint, dizzy, or experience pain at any time while exercising and consult
your physician.
– Clip the SAFETY KEY onto your clothing and carefully test it prior to using the treadmill. Safety key
is for emergency use to stop the treadmill. The runner MUST clip the safety key on the clothing
while using treadmill
– Disconnect all power before servicing the treadmill.
– Connect the treadmill to a properly grounded outlet only.
– Do not operate electrically powered treadmill in damp or wet locations.
– Use this treadmill for consumer use only.
– Remove the SAFETY KEY when not in use.
– Inspect the treadmill for worn or loose components before each use.
– Do not operate the treadmill if 1. The power cord is damaged; 2. the treadmill is not working
properly; 3. The treadmill has been dropped or damaged.
– Do not use the treadmill outdoors.
– Read and understand this owner's manual completely before using the treadmill.
– Read and understand all warnings posted on the treadmill and in this owner's manual.
– Do not wear loose or dangling clothing while using the treadmill.
– Always wear proper footwear on or around exercise equipment.
– Set up and operate the treadmill on a solid, level surface. Do not operate in recessed areas or on
plush carpet.
– Provide the following clearances: 100cm at each side, 200cm at the back and enough room for safe
access and passage at the front of the treadmill.
– Do not modify the treadmill in any way.
SAFETY
IMPORTANT SAFETY INSTRUCTIONS
outlet that is properly installed and grounded in accordance with all local codes and ordinances.

SAFETY
2
Target Heart Rate Zone
220-your age =maximum heart zone
You do not want to workout at your maximum heart
rate. The recommended Heart Rate Zone is a
percentage of your maximum heart rate. Between
60% and 75% of your maximum heart rate.
Lower limit of Target Heart Rate Zone =maximum
heart rate X 0.6
Upper limit of Target Heart Rate Zone
=Maximum heart rate X0.75
(This is recommended by American Heart
Association. Before starting exercise program,
please consult your physician to understand your
physical situation)
TARGET HEART RATE ZONE
HOW OFTEN SHOULD YOU EXERCISE:
You should exercise three to four times a week to improve your cardiovascular and muscle fitness.
HOW HARD SHOULD YOU EXERCISE:
Intensity of exercise is reflected in your heart rate. Exercise must be sufficiently rigorous to strengthen
your heart muscle and condition your cardiovascular system. Only your doctor can prescribe the targe
training heart range for you. Before starting any exercise program consult your physician.
HOW LONG SHOULD YOU EXERCISE:
Sustained exercise conditions your heart, lungs and muscles. The longer you are able to sustain
exercise within your target heart range, the greater the aerobic benefits. To begin maintain 2~3
BEGINNER TREADMILL PROGRAM
WEEK 1
WEEK 2
WEEK 3
WEEK 4
WEEK 5
WEEK 6
WEEK 7
EXERTION LEVEL
Easy
Easy
Moderate
Moderate
Moderate
Slightly higher or slightly lower
Add interval training
DURATION
6~12 minutes
10~16 minutes
14~20 minutes
18~24 minutes
22~28 minutes
20 minutes
3 minutes at moderate exertion with
3 minutes at higher exertion for
24 minutes
minutes of steady, rhythmic exercise, then check your heart rate.

WARM-UP & COOL DOWN
3
WARM- UP& COOL-DOWN
A successful exercise program consists of a warm up, aerobic exercise, and a cool down. Warming up is
an important part of your workout, and should begin every session. It prepares your body for more
strenuous exercise by heating up and stretching out your muscles. At the end of your workout, repeat
these exercises to reduce sore muscle problems. We suggest the following warm-up and cool-down
exercises:
Head rolls
Rotate your head to the right for one
count, feeling the stretch up the left side
of your neck. Next rotate your head
back for one count, stretching your chin
to the ceiling and letting your mouth
open. Rotate your head to the left for
one count, and finally, drop your head
to your chest for one count.
Shoulder lifts
Lift your right shoulder up toward
your ear for one count. Then lift
your left shoulder up for one count
as you lower your right shoulder.
Side stretches
Open your arms to the side and
continue lifting them until they are
over your head. Reach your right
arm as far upward toward the
ceiling as you can for one count.
Feel the stretch up your right side.
Repeat this action with your left
arm.
Quadriceps stretch
With one hand against a wall for
balance, reach behind you and
pull your right foot up. Bring your
heel as close to your buttocks as
possible. Hold for 15 counts and
repeat with left foot up.
Inner thigh stretch
Sit with the soles of your feet
together with your knees
pointing outward. Pull your feet
as close into your groin as
possible. Gently push your
knees toward the floor. Hold for
15 counts.
Toe touches
Slowly bend forward from your
waist, letting your back and
shoulder relax as you stretch
toward your toes. Reach down
as far as you can and hold for 15
seconds.
Calf/achilles stretch
Lean against a wall with your left
leg in front of the right and your
arms forward. Keep your right
leg straight and the left foot on
the floor; then bend the left leg
and lean forward by moving your
hips toward the wall. Hold, then
repeat on the other side for 15
seconds.
1
2
3
4
5
6
8
7Hamstring stretches
Sit with your right leg straight in
front of you. Straighten your leg
out while trying to hold on to
your outstretched leg with your
hand. Starting up with your back
straight. Slowly exhale and try
to bring your chest to the knee
of your outstretched leg. Hold,
then repeat on the other side for
15 seconds.

4
UNPACKING & ASSEMBLY
WARNING!: Use extreme caution when assembling the treadmill. Failure to do so could result in injury
NOTE: Each step number in the assembly instructions tells you what you will be doing. Read and
understand all instructions thoroughly before assembling the treadmill.
1. Unpack the carton and take off all of separated parts outside carton.
2. Tear open the carton as the picture showing, fold up the treadmill.
3. Hold on roller cover by two hands and lean back the treadmill, move the treadmill forward as the
picture showing.
Failure to follow this procedure may result in serious injury due to pinch point area on the front frame
near the motor cover.
CORRECT
PROHIBITED !
DANGEROUS !
WRONG
Check the following items are present. If any of the parts are missing, contact with the dealer.
M8X15mm hex socket head bolt 14 pcs
(base frame and console, reading rack)
Allen wrench Safety key
HARDWARE KIT
Lubricant for
running deck
Power cord
M8 washer 2pcs
(reading rack)
HARDWARE KIT
Reading rack
Main body

5
ASSEMBLY DRAWING
EZ-button
Console mast
Side rein
Motor cover
Base frame
Roller cover
Mobile wheel
Running belt
Console
Safety key
Reading rack
Foot step

6
STEP 4- Put the reading rack on STEP 5- Put the safety key on
STEP 2- Secure the bolts
A). Secure the right console mast with 12pcs of
M8X15mm bolts using Allen wrench.
(Do not tighten the bolts)
STEP 3- Tighten STEP2, STEP3 bolts
ASSEMBLY DRAWING
STEP 1- Assemble the console masts and the console
Do not hol d on thi s pl ace
whi le assem bl ing. The fingers
woul d be jam med
DANGEROUS !
A B
D
C
A).Secure the reading on console with
2pcs of M8X15mm bolts using Allen
wrench.

7
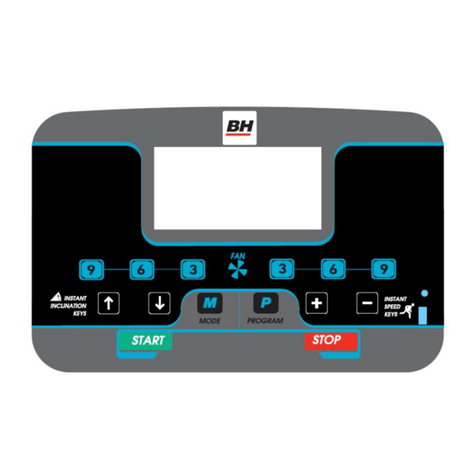
INCLINE: Indicates incline in percent of grade in 1% increments
CALORIES: indicates estimated calories
PULSE: estimated heart rate
SPEED: indicates kph in 0.1 increments
DISTANCE: indicates km travelled in 0.1 increment
TIME: indicates time you
START: Start the treadmill
FAST/SLOW: Used to adjust speed in 0.1 kph increments
To set programs-P1~P13, HRC1(HC1), HRC2(HC2), Set time to countdown
MODE: Enter programs selection, enter time setting, incline-calories, speed-
distance switch
UP/DOWN:Adjust incline
CONTROL PANEL FUNCTION
QUICK START: (P1 MANUAL)
1). Power on, put SAFETY KEY on
2). Press "START " to start exercise
3). Adjust speed using "FAST” or “SLOW"
4). Adjust incline using "UP” or “DOWN"
CONTROL PANEL OPERATION
ONE-TOUCH SPEED 2, 4, 6, 8,10,12:Used to reach ideal speed
COMPUTER OPERATIONS
PROGRAMS :
P1 : manual
P2~P13 : pre-set programs
HRC 1: HRC speed program
HRC 2 : HRC speed+incline program
ONE-TOUCH INCLINE 0, 3, 6, 9, 12, 15:Used to reach ideal incline
STOP: Stop the treadmill
1). Pow er on, put SAFETY KEY on , pr ess “ MODE” to en ter count down setting
2). Use " FAST" or " SLO W" to set ex er cise time
3). Press "START" to start exercise
4). Adj ust speed using " FAS T" or " SLO W"
5). Adj ust incline us ing " UP" or "DOWN"
COUNT DOWN SETTING(exercise time count down setting):
Maximum: 99 minutes
Minimum : 6 minutes

8
PROGRAMS(P2~P13):
1). Power on, put SAFETY KEY on
2). Press "FAST” or “SLOW" to select programs
3). Press "MODE" to enter count down setting
4). Press "FAST” or “SLOW" to set exercise time
5). Press " START" to start exercise
6). Adjust speed using " FAST” or “SLOW" , adjust incline using " UP” or “DOWN"
7). Press "STOP" to stop treadmill
COMPUTER OPERATIONS
INCLINE&SPEED: incline and speed change at same time.
3599 9 1111 9995 3
3513 13 71515 71313 5 1
1377 7 11 11 7773 1
151111 71313 711 11 5 1
11
3
1
9
7
5
15
13
P7
11
13
15
1
3
5
7
9
P2
5
7
9
3
11
1
15
13
P12
9
7
3
5
1
11
13
15
P13
5
3
1
13
7
9
11
15
P8
11
3
1
9
7
5
15
13
P3
11
3
1
9
7
5
15
13
1
9
5
7
3
13
15
11
P9
3
1
11
9
7
5
15
13
P10
5
3
1
13
7
9
11
15
P5
7
5
3
1
15
13
9
11
P11
3
1
11
9
7
5
15
13
P6
P4
SPEED
INCLINE
1133 3 553331 1
1133 1 551331 1
1355 5 775553 1
1355 3 773553 1
1377 7 997773 1
1377 3 993773 1
SPEED
INCLINE
1131 3 131313 1
1317 3 737373 1
1133 5 353533 1
1539 5 959593 1
1353 7 373733 1
15311 511 511 511 3 1
SPEED
INCLINE
3573 7 373753 3
37513 713 713 713 5 1
3575 11 511 511 75 3
39515 9 15 915 915 5 1
1331 3 313313 1
1335 3 535353 1
1553 5 535535 1
1357 5 757573 1
SPEED INCLINE
ONE-TOUCH SPEED/ONE-TOUCH INCLINE
ONE-TOUCH SPEED/INCLINE provide a comfortable and convenient operation to treadmill,
especially for professional runner.
Speed 6kilometer per hour
Speed 8kilometer per hour
Speed 10kilometer per hour
Speed 12kilometer per hour
Incline level 6
Incline level 9
Incline level 12
Incline level 15
ONE-TOUCH INCLINE
There is one set of ONE-TOUCH INCLINE
control panel on the console overlay
for user to select the ideal incline.
ONE-TOUCH SPEED
There is one set of ONE-TOUCH SPEED
control panel on the console overlay
for user to select the ideal speed.
Speed 4kilometer per hour
Speed 2kilometer per hour
6
10
12
8
4
2
Incline level 3
6
9
12
15
3
0Incline level 0
EZ-BUTTON is designed for the beginner. You can grip on handlebar and adjust speed
and incline. Also allow you to stop or start your workout while you are griping on handlebar.
You are griping on handlebar. It means this treadmill is with double safety protections,
besides safety key, EZ-BUTTON design will supply the runner much safety protection.
EZ-BUTTON:
STOP
UP
DOWN
STOP
UP
DOWN
Incline up
Incli ne down
Hand pul se
EZ
START
FAST
SLOW
START
FAST
SLOW
Speed up
Speed down
EZ

COMPU TER OPE RATI ONS
HRC OPERATION:
This is with the most advanced design, including HRC (Heart rate control). HRC is a
sophisticated program. It controls the speed or incline by runner heart rate beating. In
order to provide runner with optimum workout, the runner needs to set the target heart
rate first, and workout time. The whole program includes 3 stages.
1. Warm-up (We suggest at least 5 minutes)
2. Entering HRC program
3. Cool down
You do not want to workout at your maximum
heart rate. The recommended Heart Rate
Zone is a percentage of your maximum heart
rate. Between 60% and 75% of your maximum
heart rate.
Lower limit of Target Heart Rate Zone
=maximum heart rate X 0.6
Upper limit of Target Heart Rate Zone
=Maximum heart rate X0.75
(This is recommended by American Heart
Association. Before starting exercise program,
please consult your physician to understand
your physical situation) Target Heart Rate Zone
220-your age =maximum heart zone
TARGET HEART RATE ZONE
CHEST STRAP (TRANSMITTER)
CHEST STRAP TRANSMITTER
To operate HRC, the user needs to wear
a chest strap transmitter
TRANSMITTING AREA
The transmitting area is around 1 meter
on straight line. Please see the below
drawing for more detail for transmitting
area.
CHEST STRAP is not standard specification.
It is optional, please contact your dealer for
more details.
ATTENTION: Please use Polar belt
compatible chest strap.
9
1meter

10
COMPU TER OPE RATI ONS
DISTANCE
TIME
PULSE
CALORIES
INCLINE SPEED
DISTANCE
TIME
PULSE
CALORIES
INCLINE SPEED
HRC OPERATION STEPS
1. Wear chest strap transmitter.
Apply moisture on the electrodes before wear. Backside of chest strap transmitter
Apply moisture here
5. Press "START" to start workout and enter HRC program. It shows:
2. Press "SPEED +/-" to HRC1 program .
The screen on monitor shows:
3. Press "MODE" to enter TARGET HEART RATE setting.
Press " SPEED +/-" to set TARGET HEART RATE. (Max=190, min=90)
4. Press "MODE" to enter WORKOUT TIME setting.
Press " SPEED +/-" to set WORKOUT TIME.
Take example. on HRC 1 , set TARGET HEART RATE is 130,
.
The screen on monitor shows:
WORKOUT TIME is 32minutes
2. Press "SPEED +/-" to HRC 2 program.
The screen on monitor shows:
HRC 1(herat rate control 1) program
HRC 2(herat rate control 2) program
P.S. While in HRC setting, press “STOP” to return to P1 If do not want to finish
HRC setting
DISTANCE
TIME
PULSE
CALORIES
INCLINE SPEED
DISTANCE
TIME
PULSE
CALORIES
INCLINE SPEED
WARM-UP and EXERCISE:
After setting the "TARGET HEART RATE" and the "WORKOUT TIME", push "START" button
to start workout and enter WARM-UP. The computer will detect per 10seconds.
If your heart rate is under and more 10 than "TARGET HEART RATE", the computer will
switch to detect per 5seconds.
If the heart rate is less than “TARGET HEART RATE “,the speed will add 0.2kph.
If the heart rate is over “ TARGET HEART RATE “,the speed will reduce 0.4kph.
(Under speed reduced situation, the heart rate should be more than 5 beats of
“TARGET HEART RATE”, and can add the speed. If the heart rate is in +- 5 beats difference
from TARGET HEART RATE, the speed will maintain same speed.)
The runner can push speed +/- , incline +/- to change speed/incline. The speed
can be adjusted to maximum speed. Not limit under 12kph.
HOW HRC WORK?
HRC 1: HRC SPEED PROGRAM Initial speed limit: 12kph

11
COMPU TER OPE RATI ONS
COOL DOWN: Cool down is located at the last 2 minutes,
While entering the last 2nd minute. The speed reduces 50%, The incline returns to 0 level.
While entering last minute. The speed will reduce 50% again, The incline still is 0 level.
While the set time is over, the treadmill stops.
(Under cool down, can not be adjusted speed/incline manually)
WARM-UP and EXERCISE:
After setting the "TARGET HEART RATE" and the "WORKOUT TIME", push "START" button
to start workout and enter WARM-UP. The computer will detect per 10seconds.
If your heart rate is under and more 10 than "TARGET HEART RATE", the computer will
switch to detect per 5seconds.
If the heart rate is under “TARGET HEART RATE “,the speed will add 0.2kph.
After accumulating 10 times of 0.2kph speed up. The incline will add 1 level.
If the heart rate is over “ TARGET HEART RATE “,the speed will reduce 0.4kph.
After accumulating 5 times of 0.4kph speed down. The incline will reduce 1 level.
(Under speed reduced situation, the heart rate should be more than 5 beats of
“TARGET HEART RATE”, and can add the speed. If the heart rate is in +- 5 beats difference
from TARGET HEART RATE, the speed will maintain same speed.)
The runner can push speed +/- , incline +/- to change speed/incline. The speed
can be adjusted to maximum speed. Not limit under 12kph.
COOL DOWN: Cool down is located at the last 2 minutes,
While entering the last 2nd minute. The speed reduces 50%, The incline returns to 0 level.
While entering last minute. The speed will reduce 50% again, The incline still is 0 level.
While the set time is over, the treadmill stops.
(Under cool down, can not be adjusted speed/incline manually)
HRC2: HRC SPEED + INCLINE PROGRAM
NO HEART RATE SIGNAL:
If the computer can not detect heart rate, the heart rate shows on computer will be
seconds.
The possible reasons for no heart rate signal:
1. Improper chest strap wearing
2. Not enough moisture on electrodes
3. The distance between chest strap and computer is over 1 meter
4. Need to change battery on chest strap transmitter.
STOP:
If the runner push "STOP" button during workout, the computer will be reset
after 5 minutes without push "START" button to resume workout.
CHEST STRAP TRANSMITTER and HAND PULSE:
1. The runner still can detect heart rate by gripping hand pulse after taking off chest strap
transmitter. (Use chest strap transmitter is much accurate to detect hear rate than use hand
pulse. Some runner is hard to detect heart rate by using hand pulse. We strongly suggest to
use chest strap transmitter if you need much accurate hear rate detection while using this
treadmill.)
2. Chest strap transmitter is priority than hand pulse if you wear chest strap transmitter and grip
hand pulse at same time.
3. The runner also can use chest strap transmitter to detect heart rate even do not use HRC
program.
0 after 15
HAND PULSE

BELT ADJUSTMENT
12
You may need to adjust the running belt during the first few weeks of use. All running belts are
properly set at the factory. It may stretch or be off-center after use. Stretching is normal during
the break-in period.
ADJUSTING THE BELT TENSION
If the running belt feels as though it is "slipping" or hesitating when you plant your foot during
a run, the tension on the running belt may have to be increased.
TO INCREASE THE RUNNING BELT TENSION:
A. Place 8MM wrench on the left belt tension bolt. Turn the wrench clockwise 1/4 turn to draw
the rear roller and increase the belt tension.
B. Repeat STEP A for the right belt tension bolt. You must be sure to turn both bolts the same
number of turns, so the rear roller will stay square relative to the frame.
C. Repeat STEP A and STEP B until the slipping is eliminated.
D. Be careful not to tighten the running belt tension too much as you can create excessive
pressure on the front and rear roller bearings. An excessively tightened running belt may
damage the roller bearings that would result in bearing noise from the front and rear
rollers.
TO DECREASE THE TENSION ON THE RUNNING BELT, TURN BOTH BOLTS COUNTER-
CLOCKWISE THE SAME NUMBER OF TURNS.
CENTERING THE RUNNING BELT
When you run, you may push off harder with one foot than with another. The severity of the
deflection depends on the amount of force that one foot exerts in the relation to the other.
This deflection can cause the belt to move off-center. This deflection is normal and the
running belt will centre when no body is on the running belt. If the running belt remains
consistently off-center, you will need to centre the running belt manually.
A).Start the treadmill without anyone on the running belt, press (SPEED UP ) bottom until
speed reached 6kph.
B). Observe whether the running belt is toward the right or left side of the deck.
a. If toward the left side of the deck
Using wrench, turn the left adjustment bolt clockwise 1/4 turn and the right adjustment bolt
counterclockwise 1/4.
b. If toward the right side of the deck
Using wrench, turn the right adjustment bolt clockwise 1/4 turn and the left adjustment bolt
counterclockwise 1/4.
c. If the belt is still not centered, repeats the above steps until the running belt is on center.
C). After the belt is centered, increase the speed to 16kph and verify that it is running
smoothly.Repeat the above steps if it is necessary.
If the above procedure is unsuccessful in resolving the off-center, you may need to
increase the belt tension.
BELT ADJUSTMENT

13
CARE & MAINTENANCE
WARNING!:To prevent electrical shock, be certain the treadmill is turned off and unplugged before
cleaning or routine maintenance.
RUNNING BELT AND RUNNING DECK LUBRICATION
For maximum treadmill life, this treadmill needs a routine lubrication as part of a general maintenance
for the machine. The routine maintenance procedure will prevent premature wear of the running belt,
running deck and drive motor system. The recommended lubrication schedule as:
This schedule is the recommended application for a single user, up to 20~30 minutes per time. 3~4
times per week. For lubrication, you can contact your dealer.
CLEANING
Perspiration should be wiped from the console and treadmill surface after your workout.
You should wipe down your treadmill once a week with a water dampened, soft cloth. Be careful not get
excessive moisture on the display panel as this might cause an electrical hazard or electronics to fail.
STORAGE
Store your treadmill in a clean and dry environment. Ensure the master power switch is off and is un-un-
plugged from the electrical wall outlet.
MOVING
This treadmill has been designed and equipped with wheels for easy mobility. Before moving, ensure
the master power switch is in the off position and the power cord is unplugged from the electrical outlet.
FOR CONSUMER/HOME USE ONLY!!
This treadmill is designed for home use only. Do not use for light institutional or commercial.
It is important to take good care of your treadmill deck (the walking surface underneath the belt). A good
silicone lubrication will also improve the performance of your treadmill.
NOTE: Use the silicone that is supplied with the treadmill. Additional silicone lubricant can be
purchased from your retail store.
WARNING: STOP the treadmill and remove the safety key before lubricating the running deck.
HOW TO SPRAY SILICONE ON DECK?
A). Find the silicone bottle. It is located in the hardware kit package included with this treadmill..
B). Find a straw and put it onto the silicone bottle as the drawing shows.
C). Spray silicone evenly on treadmill deck as the drawing shows. (ATTENTION : The treadmill
MUST BE STOPPED before applying the silicone lubricant. This is to prevent injury, otherwise
the edge of the running belt may cut you or your fingers could be crushed by the rollers. )
Do not put too much silicone on the deck. Excessive lubricant may cause slippage of the belt on the
rollers.
LUBRICATION
Silicone bottle
Straw
Put on straw
A B C
USAGE
1~6kph
6~12kph
LUBRICATION
Every 3 months
Every 2 months
Every 1 months
12~16kph
Lubricant for
running deck
SPRAY AREA

14
TROUBLE SHOOTING
TROUBLE SHOOTING GUIDE
The most happened symptom is current overload protection. And show E1(error
1) on monitor. E1 is to inform the runner to examine your treadmill by yourself to
avoid the damage happened on treadmill. The runner can follow the below steps
to do the examination.
1). E1 would be happened by electricity system at your home. Sudden big current
would cause E1. Please turn off the on-off switch, then turn on the switch to
resume the using.
If it still happened, the most reason is too much friction between the running belt
and the running deck.
2). Please do lubrication according to LUBRICATION MAINTENANCE
instructions. Enough lubrication will improve the performance and maximum
the treadmill life.
3). Keep clean under running belt.
4). Check the tension between roller and running belt. (please see BELT
ADJUSTMENT)
5). The damaged running belt will increase the current and be easy to cause E1.
Wear proper footwear while using. It can avoid to damage the running belt.
If still can not solve it, please call your dealer for helps.
Scr ambl ed digi talis on
cons ole LCD
Show E1
Cons ole di sp lay LCD 's
do not illuminat e
SYMPTOM
a. RPM se nsor probl em
b. Senor wire not conne ct to
cont roller or imprope r conne ction
c. Motor wire not co nne ct ed
d. Cons ol e wires not conne ct pr ope rly
e. Cont roller dam age d
f. Overload pr otec tion is ac tiva ted
Dam age d co ns ole
a. No power to tread mill
b. Cons ol e wire conne ctor not
conne cted or inc ompl etely
conne cted
c. Overload pr otec tion is ac tiva ted
CAUSE
Service required
Service required
SOLUTION
Turn off, then turn on power.
Push START,
Check all of connected wires,
if still not illuminated, a service
is required
Check the on-off switch
Check the lubrication, running
belt tension, turn off, then
turn on power

15
PARTS LIST
DESCRIPTION
ITEM QTY DESCRIPTION
ITEM QTY
1
1
1
1
1
1
1
1
1
1
1
1
1
1
1
1
1
1
1
1
1
1
1
1
1
Monitor
Motor
Incline motor
Fixing bracket, safety key
Controller
Fixing bracket, controller
Grounded wire B
On/off switch
Fuse
Front roller
Rear roller
Drive belt
Lower console wire
Safety key set
Upper console case
Lower console case
Overlay, console
Motor senor wire
Power cord
Sensor wire, monitor
Heart rate PCB
Upper console wire
Grounded wire A
Socket
Membrane key
ST73-H08
ST06-J01
ST04-J02
ST01-H12
ST11-J03
ST08-J22
ST01-J14
ST06-J17
ST06-J18
ST28-K01
ST28-K02
ST08-K03
ST03-J15
ST01-H05
ST73-H01
ST73-H02
ST53-H04
ST01-J08
ST08-J09
ST03-H09
ST06-H10
ST01-H11
ST01-J13
ST06-J16
ST53-H08
H08
J01
J02
H12
J03
J22
J14
J17
J18
K01
K02
K03
J15
H05
H01
H02
H04
J08
J09
H09
H10
H11
J13
J16
H20
AB1
B22
B23
B25
B26
B28
B39
AC5
C13
C14
AE1
C18
E04
F08
Ag7
B33
C28
AF3
B24
B21
AF2
C16
AF5
F07
AD1
B19
B21
C11
B34
E07
F11
F12
G15
ST08-AB1
ST08-B22
ST70-B23
ST03-B25
ST08-B26
ST25-B28
ST70-B39
ST08-AC6
ST08-C11
ST01-C14
ST03-AE1
ST01-C18
ST12-E04
ST03-F08
ST73-AG1
ST08-B33
ST25-C28
ST73-F11
ST70-B24
ST08-B21
ST73-F11
ST01-C16
ST73-AF1
ST23-F07
ST08-AD1
ST01-B19
ST08-B21
ST03-C11
ST03-B34
ST03-E07
ST73-F11
ST73-F12
ST43-G15
Main fame
Running belt
Side rein
Lower motor cover
Roller cover, left
End cap, main frame
Running deck
Base frame
Mobile wheel housing
Mobile wheel
Fixing arm, folding
Spring, foot step
Air shock
Wire, hand pulse
Console mast
Roller cover, right
Fixing bracket, mobile wheel
EZ-button, speed
Upper motor cover
Rubber cushion-red
EZ-button, incline
Pad, base frame
Console frame
Reading rack
Lift arm, incline
Fixing bracket, motor
Rubber cushion-yellow
Foot step
Sleeve, wire
Sleeve, fixing arm
Upper EZ-button case
Lower EZ-button case
Connecting bracket
1
1
2
1
1
2
1
1
2
6
1
1
1
1
2
1
2
1
1
6
1
4
1
1
1
1
2
1
1
1
2
2
2
C17 ST01-C18 Spring, foot step 1
B20 ST70-B20 Side rein 2
B29 ST70-B29 Side strip footboard 2
1
Wave filter
ST01-J23
J23
1
Wave filter housing
ST01-J28
J28
1
Palpitaion receiver
ST03-H35
H35

PARTS LIST-BOLTS
Bolt M6X25mm
8
Running deck
CP
DESCRIPTION
ITEM QTY
Incline motor 1
Bolt M10x40
AB
Motor 1
BOLT M8X140mm
AD
Washer M8
Motor 1
AH
Nut M4
Upper motor cover 4
AI
Lift arm, incline 4
Nylon nut M10
AC
2
Incline motor
DESCRIPTION
ITEM QTY
2
Bolt M8X15mm
Pad, base frame
AS
Nylon nut M8
Fixing arm, folding
Rear mobile wheel
2
2
1
2
AG
Motor
Air shock
Foot step 1
Bolt M4X15mm
Ground wire
BB
1
Wave filter ground wire 1
Bolt M10X60mm
BN
Incline motor 1
Self tapping screw M4X10mm
AR
Lower motor cover 4
Bolt M6X65mm
Front & rear roller 3
CO
2
AN Bolt M5X10mm
Controller
Fixing arm, folding 1
AL Bolt M8X40mm
Rear mobile wheel 2
2
Bolt M3X10mm
Motor sensor wire
AO
2
Power card
Self tapping screw M4X 15mm
Upper motor cover 4
AJ
Fixing bracket, controller
2
Roller cover 2
EZ-button 8
Console frame 4
2
Bolt M8x25mm
Air shock
AU
3
Washer M6
Front & rear roller
AY
6
Bolt M3x6mm
Monitor
AX
Mp3 board 2
BOLT M8x115MM
Motor 1
CJ
1
AZ Wrench M5
Bolt M8X15mm
AS 14
HARDWARE KIT
Lift arm, incline 2
BOLT M10x30MM
Lift arm, incline 2
CB
1
Bolt M8X50mm
Foot step
AT
2
Mobile wheel housing
13
Upper & lower console case
Bolt M8X40mm ( set)
BR
Mobile wheel housing 2
2
Console frame
Bolt M10X70mm
2
Lift arm, folding
CQ
2
DA M8 washer
Bolt M3X6mm
Wave filter
BQ
4
4
Copper column M3X10mm
Wave filter column
BP
Rotary bracket 2
Revolving rotary bracket 2
Revolving rotary bracket 4
Rotary bracket 2
4
Loudspeaker
Revolving rotary bracket 2
EZ-button board 4
Bolt M4X10mm
Ground wire
BC
1
Motor sernsor wire 2
BOLT M3X13mm
AF
Bolt M6X30mm
AP
Side strip footboard 6
2
Bolt M6X15mm
Side rein
AQ
4
Main frame
16

B22
B39
B23
CP
EXPLODED DRAWING
AG
B21
J18 J17
AO
AB1
C14
B26
CO
AJ
AL
AG
J08
B28
AC AG
AC
J16
AO
J09
CJ
AI
K01
E07
AE1
CO
AL
B33
AR
K02
AJ
B24
J02
AB
B25
H35
AY
J22
AJ
J03 AN
H01
H05
H12
H08
H09
H10
AX
H20
H04
H02
AX
AR
AD
AH AG
K03
B19
CHEST STRAP (TRANSMITTER)
optinal
F07
AH
AS
AC
AS
AD1
BN
AT
C14
AG
AC
E04
AG
B27
C16
AU
AT
AJ
J15
Ag7
B29
BQ
J23
J28
C28 C14
AL
J01
F12
AF3
AF2
AF5
H11
BB
F08
J14
AJ
F11
G15
17
AS
C18
AC5
CB
BN
BR
AC
B20
C17
J13
Table of contents
Other Healthstream Treadmill manuals
Healthstream
Healthstream Aurora User manual

Healthstream
Healthstream T801 User manual

Healthstream
Healthstream HC10TVTM User manual
Healthstream
Healthstream T790 User manual

Healthstream
Healthstream HS312TM EQUINOX User manual
Healthstream
Healthstream T401 User manual

Healthstream
Healthstream T790 User manual
Healthstream
Healthstream T650 User manual
Healthstream
Healthstream HS16TM User manual
Healthstream
Healthstream Avenger User manual

