HealthyYOU VENDING HY2100 User manual

©2018 –HealthyYOU Vending 1 3.18
HealthyYOU VENDING
Machine Manual
Model HY2100

©2018 –HealthyYOU Vending 2 3.18
Contents
SERIAL NUMBERS ......................................................................................................................................3
PART ONE –INTRODUCTION....................................................................................................................4
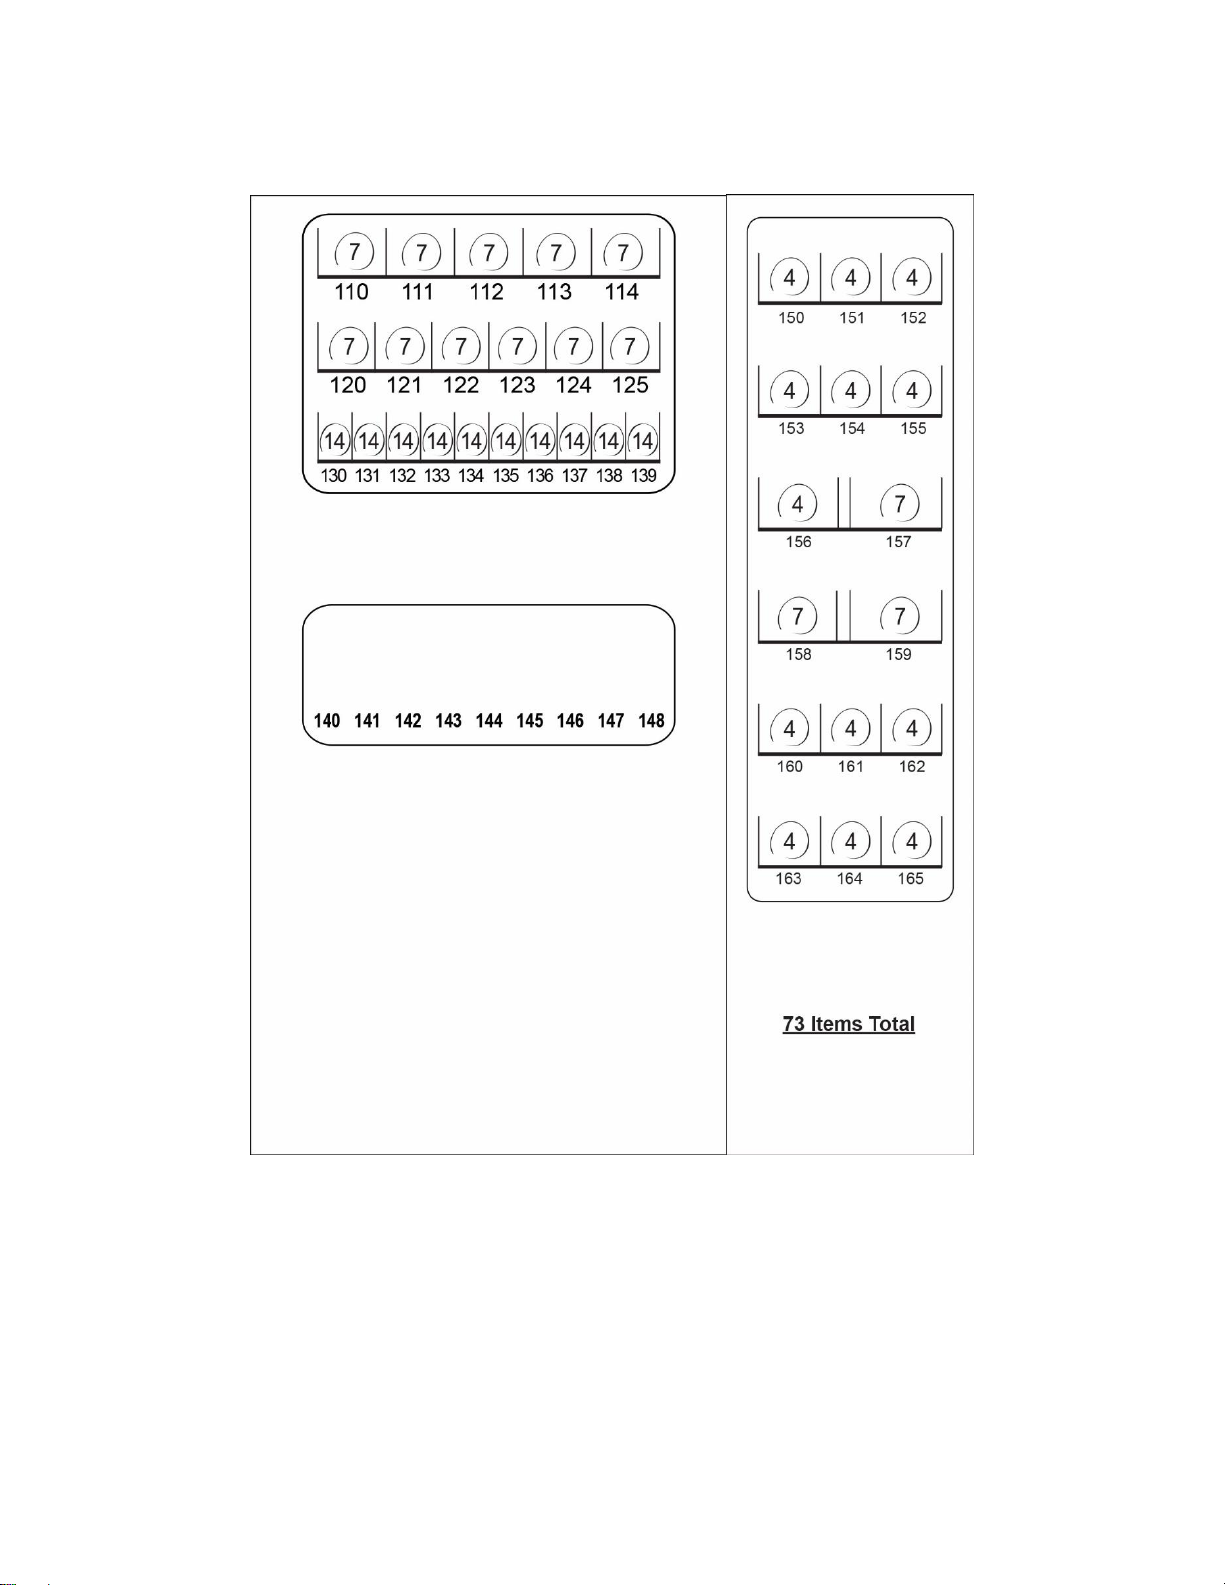
CAPACITY....................................................................................................................................................5
UNLOADING.................................................................................................................................................6
ASSEMBLY...................................................................................................................................................6
LOCATION....................................................................................................................................................6
POWER AND SURGE PROTECTION .........................................................................................................6
HARDWARE .................................................................................................................................................6
ENTERING CALORIES FOR PRODUCTS ..................................................................................................6
CREDIT/DEBIT CARD READER ACTIVATION - EPORT ...........................................................................7
FEATURES AND FACTS..............................................................................................................................7
TIPS FOR SMOOTH OPERATION ..............................................................................................................7
PART TWO –INSTALLATION......................................................................................................................8
KEYPAD AND DISPLAY...............................................................................................................................9
DISPLAY.......................................................................................................................................................9
PROGRAMMING ........................................................................................................................................10
SERVICE MODE NAVIGATION .................................................................................................................10
SERVICE MODE.........................................................................................................................................11
MENU HIERARCHY ...................................................................................................................................39
ERROR CODE MESSAGES.......................................................................................................................40
LIVE DRINK PRODUCT DISPLAY.............................................................................................................49
PAYMENT SYSTEMS.................................................................................................................................49
COIN CHANGER ........................................................................................................................................49
LOADING CHANGER.................................................................................................................................49
COIN RETRIEVAL ......................................................................................................................................50
CLEARING COIN JAMS.............................................................................................................................51
REMOVING COIN CHANGER....................................................................................................................52
BILL VALIDATOR .......................................................................................................................................53
REMOVING BILL VALIDATOR...................................................................................................................54
CLEARING BILL JAMS...............................................................................................................................55
ePORT CREDIT/DEBIT CARD READER...................................................................................................56
REFRIGERATION.......................................................................................................................................59
ENTREE UNIT INSTALLATION..................................................................................................................61
LOADING THE ENTREE UNIT...................................................................................................................62
SMARTWAREPRO™.................................................................................................................................65
FREQUENTLY ASKED QUESTIONS ........................................................................................................79
©2018 –HealthyYOU Vending –All rights reserved.
No part of this publication may be reproduced, distributed or transmitted in any form or by
any means, or stored in a database or retrieval system, without the prior written
permission of HealthyYOU Vending.
The information contained in this publication was correct to the best of the company’s
knowledge when it was produced. In the interest of development, the right is reserved to
change specifications, design or equipment at any time without notice and without
incurring any obligations.

©2018 –HealthyYOU Vending 3 3.18
SERIAL NUMBERS
Please record the Serial Numbers for your machine(s) in the spaces below. The serial numbers are located
on the left inside of the Snack area of your machines. These serial numbers are necessary to provide timely
service and detailed information on parts or service should you require it for your machines.
Serial Number
ePort Serial Number
Location
Notes

©2018 –HealthyYOU Vending 4 3.18
PART ONE –INTRODUCTION
Congratulations on investing in your new vending machine(s)! In this manual, you will find information on
how to set up, install, operate and maintain your new equipment.
Machine Description
Main Unit
Entrée Unit
Model Number
HY2100
HMT900
Height (in)
72
72
Width (in)
36
16
Depth (in)
28.5
28.5
Weight (lbs.)
476
210
Volts (V)
115
Frequency (Hz)
60
Watts (W)
360
Current (A)
3.0
•The machines are intended for indoor use only with a temperature range of 60° to 80° F and a
relative humidity of less than 45%.
•The machines require one (1) grounded 115 V power outlet and is equipped with a power cord.
•The machines are front ventilated and can be installed flush to the wall. Keep the front ventilation
area clear of obstruction and keep the condenser fins clean.

©2018 –HealthyYOU Vending 5 3.18
CAPACITY

©2018 –HealthyYOU Vending 6 3.18
UNLOADING
Note: The machine is heavy and bulky. Use extreme caution and safe practices to perform the unloading
and installation process with two people.
1. Cut vinyl straps and remove the clear plastic and cardboard corner posts from the vending machine
(use care if using a blade).
2. Using safe lifting practices and two people, “walk” the machine off the shipping skid, letting the back
of the machine touch the ground first.
3. Holding the machine steady, slide the skid away from the front of the machine.
ASSEMBLY
Open the marquee shipping box and retrieve the white envelope containing the service door keys. Remove
packing materials from the interior of your machine(s). Be aware that there is a clear strip of film down each
side of the Service Door to protect it during shipping. Both strips of film should be pulled down to remove.
Remove tape holding down tray latches and foam protecting the window from tray movement during
shipping.
LOCATION
On rare occasions, during a machine delivery or move, our customers have found it necessary to tip the
machine. IMPORTANT: Any time your machine has been tipped more than 45 degrees, you must keep
your machines upright and unplugged for at least 12 hours! The lubricants in the refrigeration unit must
settle in order to operate properly. Failing to allow settlement time could damage the refrigeration unit and
void your warranty!
Depending upon the location climate, it could take up to 24 hours for the machine to reach its ideal operating
temperature.
POWER AND SURGE PROTECTION
Your machine does not come with surge protection. We strongly recommend that a surge protection device
be used on your machine. Surge protection devices can be found at many retail hardware and other store
locations near you.
HARDWARE
The machine hardware package is located inside the marquee shipping box in a large, white envelope and
includes:
1.) Service Door Keys –Keep in a safe place!
2.) Power Cord
3.) Hardware required for installation
ENTERING CALORIES FOR PRODUCTS
New laws are asking that vending machines show the calories for each product. Currently this is required
by the Federal Government if you own 20 or more machines. This may be done through SmartWarePro.

©2018 –HealthyYOU Vending 7 3.18
CREDIT/DEBIT CARD READER ACTIVATION - EPORT
Follow the activation instructions in the enclosed USA Technologies Quick Start Guide.
FEATURES AND FACTS
Your vending machines have the following features:
Change Back
The machine default is for Multi Vend to be on, which means that the machine does not automatically give
a customer change after an item vends. It displays to the customer their credit after a purchase has been
made and will require them to press the Coin Return button before their change is dispensed. This
maximizes the transactions per customer.
WARRANTY
Your machine has a lifetime limited non-transferable warranty against manufacturer defects. Should the
machine fail to operate due to equipment malfunction for normal usage and wear, we will advise you of the
necessary steps to repair the machine and replace any parts if necessary. The first year manufacturer’s
warranty is provided by Seaga. Necessary parts during the first calendar year (from the time of delivery)
will be covered at 100%. Necessary parts in years two through lifetime will be covered with a 50%
deductible. Large or costly items where the old part needs to be returned, may require the manufacturer,
Seaga, to take your credit card number for an assurance you will send the old part back to them. Your card
may be charged for the cost of the part if the old part is not returned within a reasonable period of time.
When parts are needed, during the first year, please call Technical Support at Seaga at 1-815-297-9500,
option 1.
When parts are needed, during years two through the lifetime of the machine, they may be ordered on-line
through HealthyYOU Vending. If you have questions regarding this process please call Coaching for an
explanation.
TIPS FOR SMOOTH OPERATION
1. The snack rows have NO sold out sensors. The fact that the row is visibly empty should deter
customers from choosing that selection. If you need to empty a row of snacks, it is easy to get into
the trays and simply remove the snacks from between the coils. If you wish to empty a drink
selection, you would need to use Menu Option # 8. Enter the number of the column that you need
to empty (for example, 140) to run the motor one revolution. Continue to enter the column number
in the menu until the column is empty.
2. As change is given to the customer in coins only, it is recommended that you initially load the coin
tubes completely full when setting up your machine, with the exception of the dollar coin tubes,
which can be loaded with 30 dollar coins. In order for your VMC to keep an accurate coin inventory,
press menu button and select Menu option #3 Qty/Tube and load coins in through the front coin
slot, as if you were inserting money to purchase items. Once the coins start dropping into the coin
overflow tray, that means that the coin tubes are full and the VMC has an inventory of coins stored
and will calculate transactions accordingly. This is also known as priming the changer.
3. You can test any snack or drink selection motor to ensure it is operating properly. To test individual
selections, you will press the menu button and use Menu option #8.
4. After clearing a jammed product, either a snack or a drink, you must clear the error from the VMC
to unlock the selection and make it available for sales. If the error is not cleared, even if the jam is
cleared the selection will say Make Another Selection when chosen. To clear errors simply press

©2018 –HealthyYOU Vending 8 3.18
the menu button. If that doesn’t clear the error then press the menu button, and press Menu Option
# 7.
PART TWO –INSTALLATION
Figure 1 - Interior View and Components
VMC
Service
Door
Display
Bill Validator
Keypad
Coin Return
Button
Coin Slot
Card Reader
Coin Return
Door
Lock
Refrigeration Deck
Front Door
Product Trays
(3)
Beverage
Display
Back Panel
Vertical Drop Door Hasps (2)
Product delivery area
Optional
MediaLink
Card Reader Controller

©2018 –HealthyYOU Vending 9 3.18
KEYPAD AND DISPLAY
The Keypad is located on the front of the Service Door and is touch sensitive. Only light pressure will be
necessary to activate each number or letter. The Keypad is used by the customer to make their selection
and by the operator to set and test many functions of the machine.
Figure 2 - Keypad
The display shows the customer the amount of money entered into the machine, and the cost of their
selection. It shows the operator the Service Mode function for setting and testing the various functions of
the machine.
DISPLAY
The LCD Display (Fig. 3) is a two line, 40 character text display panel located on the front of your vending
machine. The display interacts with the customer to show the amount of money entered into the vendor
and the cost of their selection among other information as programmed. The display also shows the
operator the Service Mode functions for setting the vendor.
Fig. 3 –LCD Display in Sales Mode

©2018 –HealthyYOU Vending 10 3.18
PROGRAMMING
Enter Service Mode by pressing the MENUS Button on the VMC Circuit board. (Fig. 4)
Figure 4 –VMC and Menus Button
SERVICE MODE NAVIGATION
Use the 0 through 9 keys to access the various menus and sub-menus.
Use the “*” key on the keypad to Exit without changing or to go back (Previous).
Use the “#” key on the keypad to Save.
MENUS Button

©2018 –HealthyYOU Vending 11 3.18
SERVICE MODE
1. PRICE PROGRAM
Price Program is used to set the prices for All Items, by Row or by individual Selection. Save time
and set All Items to the most common price, going back to Row or Selection for different prices as
required.
The value for Coupons accepted by pre-programmed validators and Tokens accepted by pre-
programmed coin changers as well as Combo pricing are also set in this menu.
ALL ITEMS
STEP
DISPLAY
1.
Press Service Mode Button
Motor Count or Error Code **
2.
Press 1 for Price Program
Price Program
3.
Press 1 for All Items
All Items: $--.-- (flashes current
price)
*-Exit, no change
4.
Use number keys to enter new price
All Items: (New Price)
*-Exit, no change #-Save
Press # to Save
5.
Press *two times to exit to Sales Mode
Price Program
ROW
STEP
DISPLAY
1.
Press Service Mode Button
Motor Count or Error Code **
2.
Press 1 for Price Program
Price Program
3.
Press 2 for Row
Row: -- $--.--
Use keypad to choose Row.
*-Exit, no change
4.
Use keypad to choose Row. (Row number is first 2 numbers
of any selection in the row)
Use number keys on the keypad to set new price, including
cents.
Row: (New Row and Price)
*-Exit, no change #-Save
5.
Press *two times to exit to Sales Mode
Price Program
*NOTE:The row number would be the first 2 digits of any selection number in any row (top tray the row is
11, 2nd tray the row is 12, etc.)
SELECTION
STEP
DISPLAY
1.
Press Service Mode Button
Motor Count or Error Code **
2.
Press 1 for Price Program
Price Program
3.
Press 3 for Selection
Selection: -- $--.--
*-Exit, no change
4.
Use number keys on the keypad to set new price, including
cents.
Selection: (New Selection and
Price)
*-Exit, no change #-Save
5.
Press *two times to exit to Sales Mode
Price Program

©2018 –HealthyYOU Vending 12 3.18
COUPON
IMPORTANT: This option requires a programmed validator. Up to five different coupon values can
be set. In sales mode, once a coupon is accepted, no further coupons will be accepted until a successful
vend has been made. If no value is set, coupons will be shown as free vends. If using both coupons and
tokens, there are only five selection combinations available. For example, if Coupon1 is set for “All” items,
Token1 is also set for “All” items.
STEP
DISPLAY
1.
Press Service Mode Button
Motor Count or Error Code **
2.
Press 1 for Price Program
Price Program
3.
Press 4 for Coupons
Coupons
*-Exit, no change
4.
Press 1 for Coupon1 (or corresponding number for additional
coupons, up to Coupon5)
Coupon1
*-Exit, no change #-Save
5.
Press 1 for All Items
All Items (Current Setting)
*-Exit, no change 1-Edit
6.
Press 1 to toggle On/Off
All Items (Choice Flashing)
*-Exit, no change #-Save
7.
Press # to Save the new setting
All Items (New Setting)
*-Exit, no change #-Save
8.
Press * to return to Coupon1
Coupon1
9.
Press 4 to enter Coupon Value menu
Coupon1: $0.00
*-Exit, no change #-Edit
10.
Press # to edit Coupon1 value
Coupon1: $0.00
*-Exit/Del #-Save
11.
Enter Coupon1 value
Coupon1: $0.00
*-Exit, no change #-Save
12.
Press # to Save the Coupon1 Value setting
Coupon1: $(New Value)
*-Exit, no change #-Save
13.
Press *two times to continue to Coupon2 –5 or press * four
times to exit.
Price Program
COUPON BY ROW
STEP
DISPLAY
1.
Press Service Mode Button
Motor Count or Error Code **
2.
Press 1 for Price Program
Price Program
3.
Press 4 for Coupons
Coupons
*-Exit, no change
4.
Press 1 for Coupon1 (or corresponding number for additional
coupons, up to Coupon5)
Coupon1
*-Exit, no change #-Save
5.
Press 1 for All Items to verify Off
All Items (Current Setting)
*-Exit, no change #-Save
6.
Press 1 to toggle On/Off if necessary
All Items (Choice Flashing)
*-Exit, no change #-Save
7.
Press # to Save the new setting to Off if necessary
All Items (New Setting)
*-Exit, no change #-Save
8.
Press * to return to Coupon1
Coupon1
9.
Press 2 to enter a Row Number
Row: --
*-Exit
10.
Enter Row Number
Row: XX (Current Setting)
*-Exit/Del #-Edit

©2018 –HealthyYOU Vending 13 3.18
11.
Press 1 to toggle Row On/Off
Row: XX (Choice Flashing)
*-Exit, no change #-Save
12.
Press # to save the setting
Row: XX (New Setting)
*-Exit, no change #-Edit
13.
Press * twice to return to the Coupon1 menu
Coupon1
14.
Press 4 to enter Coupon Value menu
Coupon1: $0.00
*-Exit, no change #-Edit
15.
Press # to edit Coupon1 value
Coupon1: $0.00
*-Exit, no change #-Save
16.
Enter Coupon1 value
Coupon1: $0.00
*-Exit, no change #-Save
17.
Press # to Save the Coupon1 Value setting
Coupon1: $(New Value)
*-Exit, no change #-Save
18.
Press *two times to continue to Coupon2 –5 or press * five
times to exit.
Price Program
COUPON BY ITEM
STEP
DISPLAY
1.
Press Service Mode Button
Motor Count or Error Code **
2.
Press 1 for Price Program
Price Program
3.
Press 4 for Coupons
Coupons
*-Exit, no change
4.
Press 1 for Coupon1 (or corresponding number for additional
coupons, up to Coupon5)
Coupon1
*-Exit, no change #-Save
5.
Press 1 for All Items to verify Off
All Items (Current Setting)
*-Exit, no change #-Save
6.
Press 1 to toggle On/Off if necessary
All Items (Choice Flashing)
*-Exit, no change #-Save
7.
Press # to Save the new setting to Off if necessary
All Items (New Setting)
*-Exit, no change #-Save
8.
Press * to return to Coupon1
Coupon1
9.
Press 3 to enter an Item
Selection: --
*-Exit
10.
Enter Item Number
Selection: XX (Current Setting)
*-Exit, /Del 1-Edit
11.
Press 1 to toggle Item On/Off
Selection: XX (Choice
Flashing)
*-Exit, no change 1-Edit
12.
Press # to save the setting
Selection: XX (New Setting)
*-Exit, no change #-Edit
13.
Press * twice to return to the Coupon1 menu
Coupon1
14.
Press 4 to enter Coupon Value menu
Coupon1: $0.00
*-Exit, no change #-Edit
15.
Press # to edit Coupon1 value
Coupon1: $0.00
*-Exit, no change #-Save
16.
Enter Coupon1 value
Coupon1: $0.00
*-Exit, no change #-Save
17.
Press # to Save the Coupon1 value setting
Coupon1: $(New Value)
*-Exit, no change #-Save

©2018 –HealthyYOU Vending 14 3.18
18.
Press *two times to continue to Coupon2 –5 or press * five
times to exit.
Price Program
TOKEN
IMPORTANT: This option requires a programmed changer and allows you to set the value of tokens
accepted. Note: If Space to Sales Whole Machine is On and you are setting Tokens by Row, the Row must
be set to Row 1. If using both coupons and tokens, there are only five selection combinations available. For
example, if Coupon1 is set for “All” items, Token1 is also set for “All” items.
STEP
DISPLAY
1.
Press Service Mode Button
Motor Count or Error Code **
2.
Press 1 for Price Program
Price Program
3.
Press 5 for Tokens
Tokens
*-Exit, no change
4.
Press 1 for Token1 (or corresponding number for
additional tokens, up to Token5)
Token1
*-Exit, no change #-Save
5.
Press 1 for All Items
All Items (Current Setting)
*-Exit, no change 1-Edit
6.
Press 1 to toggle On/Off
All Items (Choice Flashing)
*-Exit, no change #-Save
7.
Press # to Save the new setting
All Items (New Setting)
*-Exit, no change #-Save
8.
Press * to return to Token1
Token1
9.
Press 4 to enter Token Value menu
Token1: $0.00
*-Exit, no change #-Edit
10.
Press # to edit Token1 value
Token1: $0.00
*-Exit, no change #-Save
11.
Enter Token1 value
Token1: $0.00
*-Exit, no change #-Save
12.
Press # to Save the Token1 Value setting
Token1: $(New Value)
*-Exit, no change #-Save
13.
Press *two times to continue to Token2 –5 or press *
four times to exit.
Price Program
TOKEN BY ROW
STEP
DISPLAY
1.
Press Service Mode Button
Motor Count or Error Code **
2.
Press 1 for Price Program
Price Program
3.
Press 5 for Tokens
Tokens
*-Exit, no change
4.
Press 1 for Token1 (or corresponding number for additional
tokens, up to Token5)
Token1
*-Exit, no change #-Save
5.
Press 1 for All Items to verify Off
All Items (Current Setting)
*-Exit, no change 1-edit
6.
Press 1 to toggle On/Off if necessary
All Items (Choice Flashing)
*-Exit, no change 1-edit
7.
Press # to Save the new setting to Off if necessary
All Items (New Setting)
*-Exit, no change #-Save
8.
Press * to return to Token1
Token1
9.
Press 2 to enter a Row Number
Row: --
*-Exit
10.
Enter Row Number
Row: XX (Current Setting)
*-Exit, no change #-Edit

©2018 –HealthyYOU Vending 15 3.18
11.
Press 1 to toggle Row On/Off
Row: XX (Choice Flashing)
*-Exit/del #-Save
12.
Press # to save the setting
Row: XX (New Setting)
*-Exit, no change #-Edit
13.
Press * twice to return to the Token1 menu
Token1
14.
Press 4 to enter Token Value menu
Token1: $0.00
*-Exit, no change #-Edit
15.
Press # to edit Token1 value
Token1: $0.00
*-Exit, no change #-Save
16.
Enter Token1 value
Token1: $0.00
*-Exit, no change #-Save
17.
Press # to Save the Token1 Value setting
Token1: $(New Value)
*-Exit, no change #-Save
18.
Press *two times to edit Token2 –5 or press * five times to
exit.
Price Program
TOKEN BY ITEM
STEP
DISPLAY
1.
Press Service Mode Button
Motor Count or Error Code **
2.
Press 1 for Price Program
Price Program
3.
Press 5 for Tokens
Tokens
*-Exit, no change
4.
Press 1 for Token1 (or corresponding number for additional
tokens, up to Token5)
Token1
*-Exit, no change #-Save
5.
Press 1 for All Items to verify Off
All Items (Current Setting)
*-Exit, no change #-Save
6.
Press 1 to toggle On/Off if necessary
All Items (Choice Flashing)
*-Exit/del #-Save
7.
Press # to Save the new setting to Off if necessary
All Items (New Setting)
*-Exit/del #-Save
8.
Press * to return to Token 1
Token1
9.
Press 3 to enter an Item
Selection: --
*-Exit
10.
Enter Item Number
Selection: XX (Current
Setting)
*-Exit, no change #-Edit
11.
Press 1 to toggle Item On/Off
Selection: XX (Choice
Flashing)
*-Exit, no change #-Save
12.
Press # to save the setting
Selection: XX (New Setting)
*-Exit, no change #-Edit
13.
Press * twice to return to the Token 1 menu
Token1
14.
Press 4 to enter Token Value menu
Token1: $0.00
*-Exit, no change #-Edit
15.
Press # to edit Token1 value
Token1: $0.00
*-Exit, no change #-Save
16.
Enter Token1 value
Token1: $0.00
*-Exit, no change #-Save
17.
Press # to Save the Token1 Value setting
Token1: $(New Value)
*-Exit, no change #-Save

©2018 –HealthyYOU Vending 16 3.18
18.
Press *two times to continue to Token2 –5 or press * five
times to exit.
Price Program
COMBO
Combos are a group of 2-5 selections that can be sold together for one price. For example, a price of $7.50
the customer will be able to purchase a bagged snack (110), a snack from the third tray (131) and a drink
(142) which will all vend when the Combo Selection is used. If the customer purchased these items
separately it would cost them more. Combos are used to encourage higher vend amounts through
discounted pricing.
Up to five Combos may be set up. Combos are product specific so when you list the Combos for a machine
you will want to list the specific products. We recommend that you show the savings with a Combo versus
buying the selections individually via some sort of signage or electronic display.
Note: Do not use Space to Sales (Sts) with the Combo setting.
STEP
DISPLAY
1.
Press Service Mode Button
Motor Count or Error Code **
2.
Press 1 for Price Program
Price Program
3.
Press 6 for Combo
Combo
4.
Press 1 for Combo1 (or corresponding number for additional
combos, up to Combo5)
Combo1: --- $0.00
*-Exit, no change
5.
Enter First Combo Item Number and Price. Press # to Save.
Press 1 to enter the Selection Ranges.
Combo1: ### $-.--
*-Exit, no change #-Edit 1-
Next
6.
Enter Range number, then enter selection numbers
Note: A Range represents the first selection(s) in the combo.
In our example, the range would be selection 110 to 110. A
second range would be set for selection 131 to 131 and the
third range for 142 to 142. This would complete the three item
Combo.
Range1: --- to ---
*-Exit, no change #-Save
7.
Press 1 to set the next Range.
Range2: ### to ###
*-Exit, no change 1-Next
8.
To continue setting Ranges, repeat step 6 and 7. There are 5
ranges available per combo. When finished press * five times
to exit.
Price Program
To delete a previously set Combo
1.
Press Service Mode Button
Motor Count or Error Code **
2.
Press 1 for Price Program
Price Program
3.
Press 6 for Combo menu
Combo
4.
Press 1 for Combo1 menu
Combo1: ### $(Price)
*-Exit, no change #-Edit 1-
Next
5.
Press # to edit the Combo
Combo1: ### $(Price)
*-Exit/del #-OK
6.
Press * three times to delete the selection number
Combo1: ### $(Price)
*-Exit, no change #-Save
7.
Press # to save the setting
Combo1: -- $0.00
*-del #-OK
8.
Press # five items to exit.
Price Program

©2018 –HealthyYOU Vending 17 3.18
CALORIES
STEP
DISPLAY
1.
Press Service Mode Button
Motor Count or Error Code **
2.
Press 7 for Calories
Calories
3.
Press 1 for All Items
Enter Calorie Value (* Exit, *
Save) * Exit
4.
Press 2 for Row
Enter Row #, Enter Calorie
Value, * Exit, # Save - *Exit, #
Next Row
5.
Press 3 for Selection
Enter Selection #, Enter
Calorie Value, * Exit, # Save -
* Exit, # Next Selection
2. CASH COUNTERS
Cash Counters displays the total vend count and the total sales value for the machine, for All Items,
by Row or by individual Selection. Note: The resettable counters can be cleared.
ALL ITEMS
STEP
DISPLAY
1.
Press Service Mode Button
Motor Count or Error Code **
2.
Press 2 for Cash Counters
Cash Counters
3.
Press 1 for All Items
All Items
4.
Press 1 for Historical Count
Hist Count --
5.
Press 2 for Historical Cash
Hist Cash $--.--
6.
Press 3 for Reset Count
Res Count --
7.
Press 4 for Reset Cash
Res Cash $--.--
8.
Press 5 for Historical Card
His Card $--.--
9.
Press 6 for Reset Card
Res Card $--.--
10.
Press 7 for Clear
Clear?
*-Exit, no change #-Clear
Display shows Cleared
ROW
STEP
DISPLAY
1.
Press Service Mode Button
Motor Count or Error Code **
2.
Press 2 for Cash Counters
Cash Counters
3.
Press 2 for Row
Row: --
Use keypad to choose Row.
4.
Press 1 for Historical Count
Hist Count --
5.
Press 2 for Historical Cash
Hist Cash $--.--
6.
Press 3 for Reset Count
Res Count --
7.
Press 4 for Reset Cash
Res Cash $--.--
8.
Press 5 for Historical Card
His Card $--.--
9.
Press 6 for Reset Card
Res Card $--.--
10.
Press 7 for Clear
Clear?
*-Exit, no change #-Clear
Display shows Cleared
SELECTION
STEP
DISPLAY
1.
Press Service Mode Button
Motor Count or Error Code **

©2018 –HealthyYOU Vending 18 3.18
2.
Press 2 for Cash Counters
Cash Counters
3.
Press 3 for Selection
Selection –
Use alpha and numeric keys
to choose an individual
Selection
4.
Press 1 for Historical Count
Hist Count --
5.
Press 2 for Historical Cash
Hist Cash $--.--
6.
Press 3 for Reset Count
Res Count --
7.
Press 4 for Reset Cash
Res Cash $--.--
8.
Press 5 for Historical Card
His Card $--.--
9.
Press 6 for Reset Card
Res Card $--.--
10.
Press 7 for Clear
Clear?
*-Exit, no change #-Clear
Display shows Cleared
3. QTY/TUBE
Enter this menu when priming the changer with coins. As you load coins from the front door in the
coin slot, this menu will keep track of the quantity and monetary amount which enables the VMC to
know that change can be made during sales transactions.
STEP
DISPLAY
1.
Press Service Mode Button
Motor Count or Error Code **
2.
Press 3 for Qty/Tube
Qty/Tube : X/$--.-- (Current
Quantity and Total)
3.
Press * two times to exit to Sales Mode
0.00
4. CONFIGURATION
The following sub-menus are included in the Configuration Menu:
•Date/Time
•Selection –Type
•Health Safety
•Auto Reinstate
•Language
•StS
•All Items –Type
•StS Custom
•Row –Type
•Advanced Config*
DATE/TIME
STEP
DISPLAY
1.
Press Service Mode Button
Motor Count or Error Code **
2.
Press 4 for Configuration
Configuration
3.
Press 1 for Date/Time
Date/Time
4.
Press 1 to change Date
MM/DD/YY current setting
*-Exit, no change #-Edit
Use number keys to enter new
date
5.
Press 2 to change Time
HH:MM current setting
*-Exit, no change #-Edit
Use number keys to enter new
time
6.
Press 3 to change DST (Daylight Savings time)
DST ON/OFF
*-Exit, no change 3 –Toggle
On/Off. Press # to Save

©2018 –HealthyYOU Vending 19 3.18
7.
Press *two times to exit to Sales Mode
0.00
HEALTH SAFETY
Not applicable. All Items should be OFF.
STEP
DISPLAY
1.
Press Service Mode Button
Motor Count or Error Code **
2.
Press 4 for Configuration
Configuration
3.
Press 2 for Health Safety
Health Safety
4.
Press 1 to change Upper Zone
Upper Zone
5.
Press 1 to change All Items
All Items ON/OFF
*-Exit, no change
1- Toggle On/Off
# to Save
6.
Press 2 to change Row
Row –
Use alpha keys to select row
ON/OFF
*-Exit, no change
2- Toggle On/Off
# to Save
7.
Press 3 to change one Selection
Selection –
Use alpha and number keys to
select row
ON/OFF
*-Exit, no change
3- Toggle On/Off
# to Save
8
Press 2 to change Lower Zone
Lower Zone
9.
Press 1 to change All Items
All Items ON/OFF
*-Exit, no change
1- Toggle On/Off
# to Save
10.
Press 2 to change Row
Row –
Use alpha keys to select row
ON/OFF
*-Exit, no change
1- Toggle On/Off
# to Save
11.
Press 3 to change one Selection
Selection –
Use alpha and number keys to
select row
ON/OFF
*-Exit, no change
1- Toggle On/Off
# to Save
12.
Press * two times to exit to Sales Mode
0.00
LANGUAGE
STEP
DISPLAY
1.
Press Service Mode Button
Motor Count or Error Code **
2.
Press 4 for Configuration
Configuration
3.
Press 3 for Language
Language English
*-Exit, no change 3 –Edit

©2018 –HealthyYOU Vending 20 3.18
3 to Toggle between English,
French and Spanish
Press # to Save
4.
Press *two times to exit to Sales Mode
0.00
ALL ITEMS: TYPE
STEP
DISPLAY
1.
Press Service Mode Button
Motor Count or Error Code **
2.
Press 4 for Configuration
Configuration
3.
Press 4 for All Items: Type
All Items: Snack, Can or Sold
Out Switch
*-Exit, no change 1 –Edit
1 to Toggle
Press # to Save
4.
Press *two times to exit
0.00
ROW: TYPE (Trays 11, 12, 13 must be set to Snack, 14 to Can)
STEP
DISPLAY
1.
Press Service Mode Button
Motor Count or Error Code **
2.
Press 4 for Configuration
Configuration
3.
Press 5 for Row: Type
Row –
Use alpha keys to enter Row
*-Exit, no change 1 –Edit
1 to Toggle Snack, Can or Sold
Out Switch
Press # to Save
4.
Press *two times to exit
0.00
SELECTION: TYPE
STEP
DISPLAY
1.
Press Service Mode Button
Motor Count or Error Code **
2.
Press 4 for Configuration
Configuration
3.
Press 6 for Selection: Type*
Selection –
Use alpha and number keys to
enter Selection
*-Exit, no change 1 –Edit
1 to Toggle Snack, Can or Sold
Out Switch
Press # to Save
4.
Press *two times to exit
0.00
AUTOREINSTATE
This feature is not applicable in this model and must be set to OFF.
STEP
DISPLAY
1.
Press Service Mode Button
Motor Count or Error Code **
2.
Press 4 for Configuration
Configuration
3.
Press 7 for AutoReinstate
Autoreinstate
5.
Press 1 to change All Items
All Items ON/OFF
*-Exit, no change
1- Toggle On/Off
# to Save
6.
Press 2 to change Row
Row –
This manual suits for next models
1
Table of contents
Popular Vending Machine manuals by other brands

American Games
American Games MAXIM 4200 Operator's manual

Unicum
Unicum NERO user manual

Beaver
Beaver Meridian Product service manual

Crane Merchandising Systems
Crane Merchandising Systems VOCE Media Operator's manual

Saeco
Saeco DA 7P Plus Instructions for installation and use

AMS
AMS Sensit 3 39 VRM Operation and service manual

Magic Play
Magic Play Lollipops instructions

Vendors Exchange
Vendors Exchange VE1020579 Quick reference guide

Necta
Necta Canto Plus Espresso Installation operation & maintenance

Sanden
Sanden Vendo SVE 100 User and maintenance manual

EVOCA
EVOCA Krea Touch Installation - use - maintenance

Automatic Products
Automatic Products SNACKSHOP 113 instruction manual