manuals.online logo
Brands
  1. Home
  2. •
  3. Brands
  4. •
  5. Heatmiser
  6. •
  7. Thermostat
  8. •
  9. Heatmiser DS1-E User manual

Heatmiser DS1-E User manual

Wiring Diagram
RCD
MAINS SUPPLY
L N
MATTING OR WIRE
FLOOR PROBE
DS1-E
230VAC
Floor
Sensor
RT+ RT- N N L LOAD
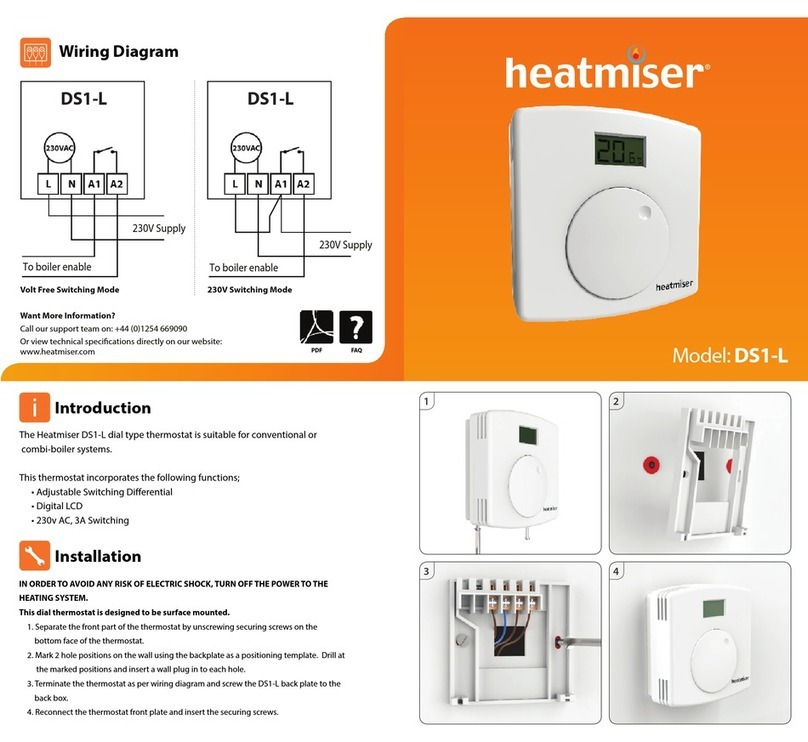
The Heatmiser DS1-E dial type thermostat is designed
specically for electric underoor heating.
This thermostat incorporates the following functions;
• Adjustable Switching Dierential
• LED Heat and Power Indication
• 230v AC, 13A Switching
Want More Information?
Call our support team on:
+44 (0)1254 669090
Or view video specications
directly on our website:
www.heatmiser.com
Introduction 1
4
Model: DS1-E
IN ORDER TO AVOID ANY RISK OF ELECTRIC SHOCK, TURN OFF THE POWER TO THE
HEATING SYSTEM.
This dial thermostat is designed to be surface mounted.
1. Separate the front part of the thermostat by unscrewing securing screws on the
bottom face of the thermostat.
2. Mark 2 hole positions on the wall using the backplate as a positioning template. Drill at
the marked positions and insert a wall plug in to each hole.
3. Terminate the thermostat as per wiring diagram and screw the DS1-E back plate to the
back box.
4. Reconnect the thermostat front plate and insert the securing screws.
Installation
PDF FAQ
2
3
Rev 2.0
Wiring Diagram
RCD
MAINS SUPPLY
L N
MATTING OR WIRE
FLOOR PROBE
DS1-E
230VAC
Floor
Sensor
RT+ RT- N N L LOAD
The Heatmiser DS1-E dial type thermostat is designed
specically for electric underoor heating.
This thermostat incorporates the following functions;
• Adjustable Switching Dierential
• LED Heat and Power Indication
• 230v AC, 13A Switching
Want More Information?
Call our support team on:
+44 (0)1254 669090
Or view video specications
directly on our website:
www.heatmiser.com
Introduction 1
4
Model: DS1-E
IN ORDER TO AVOID ANY RISK OF ELECTRIC SHOCK, TURN OFF THE POWER TO THE
HEATING SYSTEM.
This dial thermostat is designed to be surface mounted.
1. Separate the front part of the thermostat by unscrewing securing screws on the
bottom face of the thermostat.
2. Mark 2 hole positions on the wall using the backplate as a positioning template. Drill at
the marked positions and insert a wall plug in to each hole.
3. Terminate the thermostat as per wiring diagram and screw the DS1-E back plate to the
back box.
4. Reconnect the thermostat front plate and insert the securing screws.
Installation
PDF FAQ
2
3
To change the set point, rotate the dial until it points at the desired temperature.
Setting The Temperature
The Heatmiser DS1-E oers 1, 2 and 3°C switching dierential.
With a 1°C switching dierential the heating will switch on 1°C below the set
temperature and will turn o when the set temperature is reached.
A 2°C will turn the heating on 2°C below the set temperature.
3°C will switch the heating on 3°C below the set temperature.
To set the dierential, set the DIP switches according to the table below.
This setting is only required when the sensor option is set to Air and Floor mode.
The setting is used to protect the oor surface from overheating.
The oor temperature limit can be set to 20, 28 or 40°C.
To set the required oor limit temperature, set the DIP switches according to the table.
Should the oor temperature be achieved (even if the room temperature has not achieved
the set temp) the heating will turn o. The Heat Active LED will ash in this case.
The thermostat has three modes of operation. Select the desired mode,
and set the DIP switches according to the table.
The DIP switches can be accessed from the back of thermostat.
Air Sensor: Uses the built in air sensor only.
Air Sensor & Floor Limiting Sensor: Uses the built in air sensor but also uses the
remote oor sensor to ensure the oor temperature doesn’t overheat.
Floor Sensor: Uses the remote oor sensor only.
Switching DierentialFloor Temperature Limit
Sensor Option
1 °C Switching
2 °C Switching
3 °C Switching
20°C
28°C
40°C
Air Sensor
Air & Floor
Floor Sensor
1
2
3
1
2
3
1
2
3
Switch 1 & 2 OFF
Switch 1 ON and Switch 2 OFF
Switch 1 OFF and Switch 2 ON
Switch 5 & 6 OFF
Switch 5 ON and Switch 6 OFF
Switch 5 OFF and Switch 6 ON
Switch 3 & 4 OFF
Switch 3 ON and Switch 4 OFF
Switch 3 OFF and Switch 4 ON
22
2
33
3
11
1

Other Heatmiser Thermostat manuals

Heatmiser DT-TS WiFi RF User manual

Heatmiser

Heatmiser DT-TS WiFi RF User manual

Heatmiser PRT-E1 User manual

Heatmiser

Heatmiser PRT-E1 User manual

Heatmiser UH1-W Quick start guide

Heatmiser

Heatmiser UH1-W Quick start guide

Heatmiser PRT-E User manual

Heatmiser

Heatmiser PRT-E User manual

Heatmiser neoUltra User manual

Heatmiser

Heatmiser neoUltra User manual

Heatmiser PRT-UWTS User manual

Heatmiser

Heatmiser PRT-UWTS User manual

Heatmiser TouchScreen Series User manual

Heatmiser

Heatmiser TouchScreen Series User manual

Heatmiser Touch-RF User manual

Heatmiser

Heatmiser Touch-RF User manual

Heatmiser PRT-TS User manual

Heatmiser

Heatmiser PRT-TS User manual

Heatmiser neoStat User manual

Heatmiser

Heatmiser neoStat User manual

Heatmiser smartstat User manual

Heatmiser

Heatmiser smartstat User manual

Heatmiser PRTHW-TS User manual

Heatmiser

Heatmiser PRTHW-TS User manual

Heatmiser neo Stat-e User manual

Heatmiser

Heatmiser neo Stat-e User manual

Heatmiser DT-WTS1 User manual

Heatmiser

Heatmiser DT-WTS1 User manual

Heatmiser DT-ETS WiFi RF User manual

Heatmiser

Heatmiser DT-ETS WiFi RF User manual

Heatmiser UH6 User manual

Heatmiser

Heatmiser UH6 User manual

Heatmiser PRT-ETS User manual

Heatmiser

Heatmiser PRT-ETS User manual

Heatmiser Touch User manual

Heatmiser

Heatmiser Touch User manual

Heatmiser Touch-HWN User manual

Heatmiser

Heatmiser Touch-HWN User manual

Heatmiser smartstat User manual

Heatmiser

Heatmiser smartstat User manual

Heatmiser Senior User manual

Heatmiser

Heatmiser Senior User manual

Heatmiser HC User manual

Heatmiser

Heatmiser HC User manual

Heatmiser PRT-B User manual

Heatmiser

Heatmiser PRT-B User manual

Heatmiser Touch Series User manual

Heatmiser

Heatmiser Touch Series User manual
Popular Thermostat manuals by other brands

Honeywell DT92A user guide

Honeywell

Honeywell DT92A user guide

resideo Honeywell Home HR90 quick start guide

resideo

resideo Honeywell Home HR90 quick start guide

Honeywell LP916A installation instructions

Honeywell

Honeywell LP916A installation instructions

Honeywell Tradeline Chronotherm IV installation instructions

Honeywell

Honeywell Tradeline Chronotherm IV installation instructions

Danfoss ECL Comfort 210 installation guide

Danfoss

Danfoss ECL Comfort 210 installation guide

Clare Controls Honeywell Lyric Series Release notes

Clare Controls

Clare Controls Honeywell Lyric Series Release notes

ICM Controls FS1500L Installation, operation & application guide

ICM Controls

ICM Controls FS1500L Installation, operation & application guide

Honeywell RTH7500D owner's guide

Honeywell

Honeywell RTH7500D owner's guide

Trotec BN35 manual

Trotec

Trotec BN35 manual

Honeywell RTH2510Series operating manual

Honeywell

Honeywell RTH2510Series operating manual

CPI inTouch manual

CPI

CPI inTouch manual

Warmup TH115 A user guide

Warmup

Warmup TH115 A user guide

Eliwell IC 901 manual

Eliwell

Eliwell IC 901 manual

White Rodgers 1F85-277 Specifications

White Rodgers

White Rodgers 1F85-277 Specifications

Honeywell RTH5100B owner's manual

Honeywell

Honeywell RTH5100B owner's manual

KMC Controls BAC-1xx63 Series installation guide

KMC Controls

KMC Controls BAC-1xx63 Series installation guide

Kermi WFS Instructions for use

Kermi

Kermi WFS Instructions for use

OJ Electronics OSD4-1999 instructions

OJ Electronics

OJ Electronics OSD4-1999 instructions

manuals.online logo
manuals.online logoBrands
  • About & Mission
  • Contact us
  • Privacy Policy
  • Terms and Conditions

Copyright 2025 Manuals.Online. All Rights Reserved.