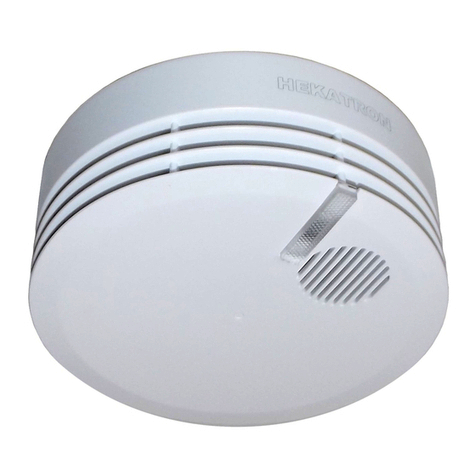
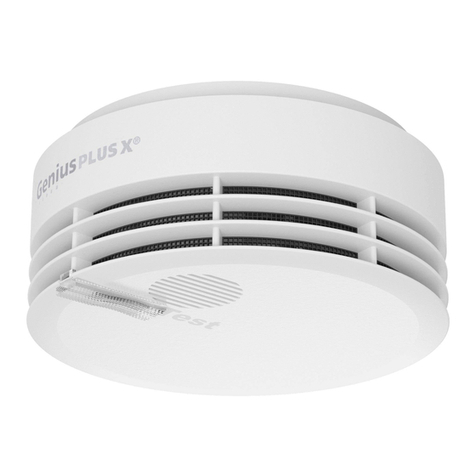
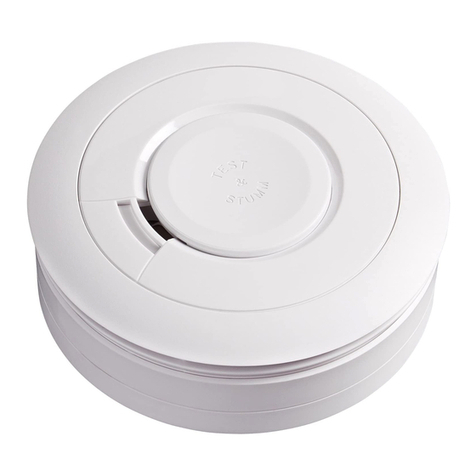
Hekatron Genius Plus User manual

1
Operang manual
Smoke alarm
Genius Plus
EN DE FR IT ES SV CSRO
Ihr 100Pro Brandschutzpartner.

2
Summary
English 4
German 32
French 60
Italian 88
Spanish 116
Romanian 144
Swedish 172
Czech 200

3

4
EN
Hole for
1-hole installa on
Smoke alarm
(including non-removable integrated ba eries)
Base
Magne c holder
An -tamper seal
opening
Acous c alarm
Test bu on with LED
Screw
Dowel
Long holes for
2-hole installa on
General informa on
G215026

5
EN
Contents
1Features of Genius Plus 6 – 8
2Installaon locaon and project planning 9 – 14
3Informaon for renovaon 15
4Smoke alarm installaon 16 – 19
5An-tamper and removal protecon (accessories) 20 – 21
6Test buon funcon 22
7Operang and warning signals 23 – 24
8Servicing and care 25 – 26
9Safety informaon 27
10 Disposal 28 – 29
11 Environment 30
12 Technical data 31

6
EN
1
Features of Genius Plus
General informaon
In case of re, deadly smoke is
spreading quickly and oen without
being noced over enre ats. The
Genius Plus smoke alarm ensures
early warning of deadly smoke from
res.
Thanks to state-of-the-art smoke
alarm technology, smoke detecon
at temperature uctuaons can
be achieved without any false
alarms. The smoke alarm is adapted
automacally to standard changes in
its environment to ensure constant
levels of sensivity.
The informaon provided in this
manual, parcularly informaon
on installaon locaon and project
planning, are generally based on
DIN 14676-1 and apply for Germany.
Before installaon and use, we
recommend checking your naonal
regulaons and guidelines and
observing them as necessary.
Automacally ready for
operaon
Aer screwing the smoke alarm into
its base, it is automacally put into
operaon.

7
EN
Suitable for bedrooms
Automac deacvaon of the LED
and suppression of status messages
between 21:00 to 07:00 MEZ1(night
mode) according to the integrated
real-me clock.
Contaminaon compensaon
funcon
The alarm sensivity of the smoke
alarm is adjusted according to its
degree of contaminaon to achieve
higher service lives than smoke
alarms without compensaon func-
on. If the maximum contaminaon
level is reached aer adjustment, this
is indicated by a fault.
Contaminaon predicon
By means of previous contaminaon
levels, the remaining safe operang
me at steady environmental con-
dions is calculated by the smoke
alarm.
Delayed deacvaon
5 minutes aer unscrewing the
smoke alarm from its base, it is deac-
vated automacally.
Smartsonic
Data transmission to the Genius
Home and Genius Pro smartphone
apps (the apps are only available in
German and not in every country).
1 CET: Central European Time (winter me)

8
EN
Acousc transmission includes all rel-
evant data of the smoke alarm.
Baery change not necessary
Thanks to the non-removable inte-
grated lithium baery with a service
life of 10 years, the baery does not
need to be changed.
Device replacement
Replacement according to the
replacement date is recommended.
The date can be found on the rear of
the smoke alarm.

9
EN
2
Installaon locaon and project planning
KitchenLiving room
Bedroom Children’s room
Oce
BasementBasement
For opmum ng, install at least
one smoke alarm each in all rooms
and hallways.
Install the smoke alarms in such
a way that they can be easily
reached by any smoke from res to
ensure early detecon.
Please observe that living
rooms are oen also used as
bedrooms and should be moni-
tored by smoke alarms.
Minimum ng Opmum ng
Observe naonal regulaons and guidelines.

10
EN
How much oor space?
up to 60 m2
(View from top)
Where?
at the ceiling
up to 6 m
room height
How high?
Centre of ceiling
Where exactly?
or furniture. Each smoke alarm
enables monitoring of a maximum
oor space of 60 m².
Smoke alarms must always be
installed at the ceiling and in the
centre of the room as possible,
however, with a minimum
clearance of 0.5 m to walls, beams
at least 0.5 m at least 0.5 m
Observe naonal regulaons and guidelines.

11
EN
If the smoke alarm is installed in
an ac, the following must be
observed regarding the inclinaon
of the roof:
Up to 20°: Installaon as at
horizontal ceilings.
More than 20°: Installaon at
ceiling/roof with a clearance of
0.5 m to 1 m to the pitch.
Aenon! Smoke alarms must
not be installed outdoors.
> 20°
0.5–1.0 m
> 20°
0.5–1.0 m
Alternave posioning of the smoke alarm
Observe naonal regulaons and guidelines.

12
EN
Under the following installaon
condions, smoke alarms can be
installed sideways at the long wall
of rooms and in the centre as
possible:
If installaon at the ceiling is not
possible, e.g. in case of texle
ceilings, overhead heang
or ceilings with insucient
load-bearing capacity.
If an increased number of false
alarms is to be expected due
to installaon at the ceiling.
However, this only applies to
rooms and hallways with a oor
space of ≤ 6 m² or kitchens that
are used as emergency escape.
2.1
Installaon of smoke alarms under special condions
Installaon locaon and project planning
Observe naonal regulaons and guidelines.

13
EN
Smoke alarm wall installaon
Clearance to ceiling:
a = 0.3 – 0.5 m
Boom clearance:
b ≥ 1 m
Minimum side clearance:
c > 0.5 m
a
c c
b
For installaon at walls, the
following clearances to furniture
must be observed from the centre
of the smoke alarm:
Observe naonal regulaons and guidelines.

14
EN
Arrangement of smoke alarms in hallways
2.2
In rooms and hallways with a width
of < 1 m, the smoke alarm must be
installed at the ceiling in the centre
between the walls.
In hallways and corridors with
a maximum width of 3 m, the
clearance between two smoke
alarms must not exceed 15 m. The
clearance to the end of the hallway
must not exceed 7.5 m.
max 7.5 m
max 7.5 m
max. 3 m
max. 3 m
max. 15 m
max 7.5 m
max. 3 m max. 3 m
max. 15 m max 7.5 mmax 7.5 m
max. 3 m
Installaon locaon and project planning
Observe naonal regulaons and guidelines.

15
EN
3
Informaon for renovaon
Install the smoke alarm aer
compleon of all other work
(conversion, renovaon, etc.).
If smoke alarms have already been
installed before the work, they
must be removed or covered.
Disassembled smoke alarms must
be protected from dust or similar
during work (e.g., store in plasc
bags).
The use of smoke alarms in envi-
ronments subject to considerable
formaon of dust and dirt may
reduce the service life of the
smoke alarms due to accelerated
contaminaon.
Aer compleon of all work, the
smoke alarms must be reinstalled
or the covers must be removed.
Smoke alarms that are not
installed or sll covered are not
funconal and thus ineecve.
Observe naonal regulaons and guidelines.

16
EN
Smoke alarm installaon
Installaon with screws/dowels
Install the smoke alarm with the
provided installaon material. If
other screws are used, the screw
heads must not reach into the base
by more than 5.0 mm.
We recommend using 3.5 x 25 mm
oval-head screws. The installaon
surface must be level.
For secure and permanent
installaon, screws/dowels are
recommended.
Installaon with adhesive pad
If the smoke alarm is to be installed
with an adhesive pad, only an
adhesive pad provided by the
manufacturer may be used. This
has to be ordered separately. The
installaon surfaces of the adhe-
sive pad must be smooth, level,
undamaged, clean and free from
dust, grease and solvents.
4

17
EN
protec on during installa on and
removal of the smoke alarm. For
installa on with 2 screws, the
fastening pad is not required.
2. A erwards, a ach the smoke
alarm to the base in such a way
that the round an -tamper seal
1. Install the base of the smoke
alarm with the provided installa-
on material at the ceiling. For
single-hole installa on, the small
fastening pad is recommended.
Pull o the protec ve foil and
apply the pad as an -rota on
Installa on with screws/dowels
4.1
Smoke alarm installa on

18
EN
opening of the smoke alarm is
posi oned ush over the magne c
holder of the base.
3. A erwards, clockwise rotate
the smoke alarm un l the base
is “lowered” in it and the smoke
alarm is engaged at the end of
rota on (approx. 15°). A er the
Fastening pad
smoke alarm is screwed into the
base, it is automa cally started and
a self-test is performed and con-
rmed by an acous c signal. If the
device is removed from the base,
it is deac vated automa cally a er
5 minutes.

19
EN
Installa on with adhesive pad (accessories) 1
No ce: Adhesive pads may leave
residues a er removal! Adhesive
pads are always used at own
responsibility.
1. Remove the protec ve foil on
one side of the adhesive pad and
a ach the pad to the base of the
smoke alarm. The fastening pad
must be posi oned precisely in the
recess.
2. Remove the second protec ve
foil of the adhesive pad and a ach
the base by pressing it (for at
least 5 seconds) on the previously
cleaned/marked posi on.
3. Install the smoke alarm at the
base as described for installa on
with screws/dowels.
4.2
1 For adhesive installa on, the adhesive pads for smoke
alarms must be ordered separately.
Smoke alarm installa on

20
EN
20
Point for breaking out
To secure the smoke alarm against
unauthorised removal, a removal
protec on seal is available sepa-
rately.
To a ach the seal, proceed as
follows:
1. Break open the dedicated point
in the base with narrow pliers.
A er installa on of the base at the
ceiling, screw the smoke alarm into
the base.
An -tamper and removal protec on (accessories)
5
Other manuals for Genius Plus
1
Table of contents
Languages:
Other Hekatron Smoke Alarm manuals
