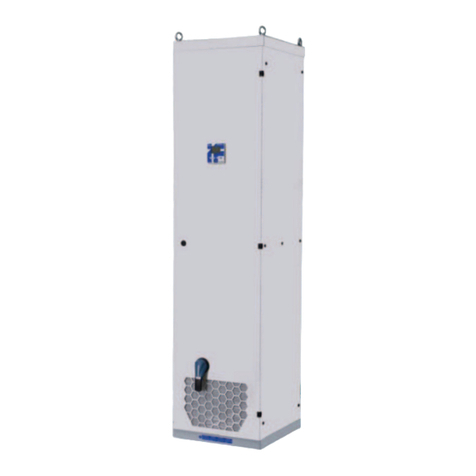
HEUTE Solamat 90 User manual

Solamat 90
Operating Manual
EN

2
Solamat 90

14
IMPORTANT - READ FIRST
Only put the machine into operation once you have read and un-
derstood the operating instructions. We shall be happy to answer
any questions you may have.
HEUTE Solamat sole cleaning machines are built and tested in ac-
cordance with the latest safety regulations. The faultless functionality
and operational assurance of the device can only be guaranteed
if the generally applicable safety precautions and device-specic
safety information in this operating manual are observed during use.
The guarantee is not valid in relation to damages caused by a failure
to observe this operating manual. The manufacturer assumes no li-
ability for personal injury or damage to property arising as a result of
this. In the event of problems please contact our service department
immediately.
Intended use
HEUTE Solamat sole cleaning machines are used to clean the soles
of closed shoes and boots by means of electrically driven brushes.
No other use is permissible!
Only use the brushes approved for use with the machines by the
manufacturer.
Operation is only permissible in closed, dry rooms whilst observing
the specications listed in the "Safety instructions" section.
Use in potentially explosive areas is not permitted.
Foreseeable erroneous use
The shoe cleaning machine is not suitable for use as follows:
- Cleaning, cleansing and care of human body parts and objects
that are not parts of a shoe.
- Use as a tool for working on surface nishes
- Use with the addition of uids
Safety instructions
The machine must not be changed or modied be-
cause this can lead to risks such as a short circuit,
electric shock, re. Maintenance and repairs must
be carried out exclusively by authorised persons
with the use of original parts.
The use of non-original replacement parts or the
implementation of unauthorised modications
to the machine will result in the declaration of
conformity issued by the manufacturer/distributor
and the sign being voided with immediate
effect.
Only use the machine in closed rooms. Direct
contact with water must be avoided!
Operation is only permissible at ambient
temperatures between 0° C and 40° C.
The product must not be allowed to fall.
Do not continue to use the machine if the cleaning
brushes are worn. This can result in damage to the
shoe. The brushes must be replaced by a qualied
person.
The design complies with protection class I. The
voltage supply is 230 V AC, 50 Hz or 115 Volt AC,
50 Hz. Observe the specic data provided on the
manufacturer's type plate!
During use, the motor can heat up to temperatures
of up to 90° C. Do not touch the motor without
wearing safety gloves.
Use by children, in particular when unattended,
must be excluded.
Ensure that any contact between (household)
animals and the machine is excluded.
Always disconnect the mains power plug prior to
service and repair work.
Do not continue to use the machine if it is dam-
aged and disconnect the mains power plug.
Excessive application pressure during use of the
brush can lead to damage to shoes/boots!
The operator is responsible for all personal
injury and damage to property that arises due to
unintended use, faulty machine connections and/
or operating errors.
Prior to cleaning, always unplug the mains
power plug and disconnect the power supply.
When cleaning the housing use of a dry or damp
microbre cloth is recommended.
Do not use cleaning products or household cleaner.
Protect the machine against moisture, spray water
and the effects of heat.
When in commercial establishments observe the
safety ordinance applicable on site as well as the
accident prevention regulations issued by the union
of professional associations for electrical systems
and equipment.
Ensure that the installation is level.

15
Welcome
Dear Customer, we would like to thank you for purchasing one of
our HEUTE industrial sole cleaning machines.
This operating manual is a constituent of the machine. It contains
important information on commissioning, operation and maintenance.
Please store this operating manual for future reference!
Scope of supply
Machine, power cable, operating manual
Declaration of Conformity
The manufacturer herewith conrms that the following machine
of type Solamat 90 complies with the directives listed below:
EC Machinery Directive (2006/42/EC)
EC EMC Directive (2004/108/EC)
Technical specications
- DIN EN 60335-1 (DIN VDE 0700-1):2012-10
- DIN EN 60335-2-82 (DIN VDE 0700-82):2009-02
- DIN EN 55014-1 (DIN VDE 0875-14-1):2012-05
- DIN EN 55014-2 (DIN VDE 0875-14-2):2009-06
- DIN EN 61000-3-2 (DIN VDE 0838-2):2011-06
- DIN 61000-3-3 (DIN VDE 0838-3):2009-06
- DIN 61000-6-2 (DIN VDE 0839-6-2):2011-06
- DIN 61000-6-3 (DIN VDE 0839-6-3):2012-11
Authorized representative Steffen Moersch.
Contact details (see address of manufacturer).
Christian Löwe, Managing Director
Maschinenfabrik HEUTE GmbH & Co. KG
Environmental protection
Disposal of transport packaging
The packaging materials in which your machine is supplied are
environmentally friendly and recyclable. Please help by disposing of
the packaging in an environmentally friendly manner. The packaging
must not be given to children to play with. There is a risk of
suffocation due to the folding box and lm.
Disposal of the product
Old devices that are no longer in use are not worthless waste.
Valuable raw materials can be recovered through environmentally
friendly disposal. Please inform yourself of the current disposal
methods by contacting the person responsible within your company
or your local authority.
Table of contents
Important – read rst 14
Intended use 14
Foreseeable erroneous use 14
Safety instructions 14
Welcome 15
Scope of supply 15
Declaration of Conformity 15
Environmental protection 14
Commissioning 16
Erection 16
Electrical connection 16
Operation 16
Switching on and off 16
Sole cleaning 16
Cleaning and care of the machine 16
Cleaning the housing 16
Coarse dirt drawer 16
Regular maintenance 16
Service and repairs 16
Disassembling the motor mounting 16
Changing the roller brushes – Solamat 90
18
Changing the disc brushes – Solamat 90
19
Belt change – SOLAMAT 90
Trouble-shooting 20
Technical data 21
Wiring diagram 19
Parts drawing – Solamat 90 22
EN
17

16
Commissioning
Erection
The erection site must be covered. The machine must be erected
such that it is level and will not slip. It must also be protected
against water spray and the effects of water. In order to guarantee
that the machine is stable, level out any uneven oor areas, e.g. by
shimming with suitable rubber strips.
Electrical connection
The machine is delivered ready for mains connection with a power
cable. Connection to the mains power supply must be established
via a standardised, fused and earthed socket. Voltage and current
must concur with the data on the type plate
(110 Volt or 230 Volt).
Operation
Switching on and off
The machine is started up via a foot sensor switch and is switched
off automatically after approx. 40 seconds via a time relay unless
the foot sensor switch is actuated once more.
Shoe and boot cleaning
When using ensure that you have established a stable position in
front of the machine and that you will not slip. The closed shoes/
boots that require cleaning must be cleaned on the machine
exclusively whilst on the foot of the user. It is prohibited to use the
machine when laces are untied or other loose parts are on the shoe.
This can result in damage to the machine and shoe, and may also
lead to serious injuries.
Caution - risk of injury!
The dirty soles and sole edges can be cleaned on the coarse
nylon brushes by lightly pressing the soles of the shoes against
the brushes. Moving the soles back and forth, up and down on the
brushes results in dry dirt being removed and this is transferred to
the dirt trap beneath the brushes.
Leather upper cleaning (SOLAMAT 100/200)
The shoe requiring cleaning is pressed lightly against the upper
roller brush. Turning the shoe to the side also allows the user
to clean the sides of the shoes.
Cleaning and care of the machine
Cleaning the housing
Prior to cleaning always unplug the mains power plug and in doing
so disconnect the power supply. When cleaning the housing we rec-
ommend use of a dry or damp microbre cloth. Dirt that has dried
onto the steps must be removed with a brush as necessary.
Do not use cleaning products or household cleaner.
Coarse dirt drawer
Coarse dirt that has been cleaned off is trapped in the drawer
beneath the brushes. The drawer must be emptied regularly.
Regular maintenance
Empty the dirt drawer regularly.
Check belt tension: The brushes must move when the belt is
moved in the direction of rotation without slippage. A round belt
that is too loose can slip due to loading by the drive pulley and
this may lead to damage.
Replace any damaged, worn or excessively loose round belts
(see chapter Service and repairs > Belt change).
Motor maintenance is not necessary.
Replace any damaged or worn brushes (see chapter Service and
repairs > Brush change). The ange bearing should be replaced
during a brush change.
Check the lter mat (only SOLAMAT 200) and replace if necessary
(see chapter Service and repairs > Filter change SOLAMAT 200)
Service and repairs
All electrical repairs must be carried out by customer service techni-
cians and electricians exclusively. Unplug the mains power plug prior
to all repair works on the machine!
When ordering spare parts please provide the following information:
Machine number
Year of manufacture
You can nd the type plate bearing this information on the back of
the housing.
Disassembling the motor mounting
In order to gain better access to the brushes, round belts or ange
bearings it may be necessary to disassemble the motor mounting as
follows.
1. Interrupt the power supply by disconnecting the mains plug.
2. Remove the dirt drawer.
3. Remove the 6 hexagon socket screws (width across ats 3 mm)
visible from above (see Fig. 1).
4. Turn the machine upside down and place it on a suitable work
surface such that it is lying on the top of the housing (see Fig. 2).
5. Remove the 2 hexagon socket screws (width across ats 3 mm)
on the front and back of the housing respectively, so that the motor
mounting is released from the housing (see Fig. 1 and Fig. 2).
6. Detach the cables: 3 earth cables, 2 mains cables (blue mains
cable = N conductor, brown mains cable = L conductor). To do
so cut through the cable ties with wire cutters (see Fig. 3).
7. Take the motor mounting out of the housing. Observe the cables
left in the housing (see Fig. 4).

17
Changing the roller brushes – Solamat 90
1. Remove round belt no. 2 (size 930V) (see Fig. 5).
2. Release the bearing rings next to both shaft ange bearings
(hexagon socket screw, width across ats 2.5 mm) (see Fig. 6).
3. Release hexagon socket screws (width across ats 3 mm) in
the brush core (2 per brush).
4. Draw the shaft out of the side of the brush (see Fig. 7).
5. Take the loose roller brush out of the motor mounting.
6. Insert new roller brush and slide in the shaft from the side once
more. Prior to inserting the shaft debur it if necessary.
7. Fasten the roller brush to the shaft once again using 2 hexagon
socket screws in the brush core. Secure the shaft using the
bearing rings next to both ange bearings.
8. Installation of the motor mounting takes place in reverse order to
the deinstallation.
9. Check to ensure electrical safety following installation.
Fig. 1
Fig. 3
Fig. 4
Fig. 2
Fig. 5
Fig. 6
Fig. 7
EN

18
Changing the disc brushes – Solamat 90
1.
Disassemble the motor mounting (see chapter Service and
repairs > Disassembling the motor mounting).
2.
Remove round belt no. 1 (710 V) and no. 3 (700 V)
(see chapter Service and repairs > Belt change -
Solamat 90). Prior to removing the belts, mark these to ensure
that they cannot be confused during installation.
3.
Set the motor mounting to the side.
4.
Loosen the self-locking nuts, which clamp the disc brush onto
the shaft. In order to do so it is necessary to secure the axle
with a tting pin to prevent it from rotating (see Fig. 9).
5.
Release the 2 bearing rings (hexagon socket screw, width across
ats 2.5 mm) (see Fig. 10).
6.
Turn out the axle until the brush is free and can be removed.
7.
Carry out installation of the new brushes in reverse order.
The disc brushes must have 1-2 mm play to the screw heads
(see Fig. 11). They must be secured on the shaft once more
using new self-locking M10 nuts.
8.
Installation of the motor mounting takes place in reverse
order to the deinstallation (see chapter Service and repairs >
Disassembling the motor mounting).
9.
Check to ensure electrical safety following installation.
Fig. 9
Fig. 10
Fig. 11

19
Belt change - SOLAMAT 90
Round belt no. 1, size 710V, Art. no. 0080085
Round belt no. 2, size 930V, Art. no. 0080070
Round belt no. 3, size 700V, Art. no. 0080080
1.
Interrupt the power supply by disconnecting the mains plug.
2.
Remove the dirt drawer.
3.
Turn the machine upside down and place it on a suitable work
surface such that it is lying on the top of the housing with the
underside is freely accessible.
4.
Remove damaged or worn round belts.
Caution - risk of crushing when tensioning
the round belt on the belt pulley!
5.
First lay round belt no. 1 on belt pulley 1a. Then lever onto belt
pulley 1b using a suitable tool (e.g. screwdriver). When doing so
observe the direction of rotation of the belt pulley (see Fig. 14).
6.
Lay round belt no. 2 on belt pulley 2a, b, c, d and lever onto belt
pulley 2e (see Fig. 15).
7.
First lay round belt no. 3 on belt pulley 3a. Then lever onto belt
pulley 3b using a suitable tool (e.g. screwdriver) (see Fig. 16).
8.
Set the machine back in its upright position and slide the dirt
drawer back in.
Fig. 14
Fig. 15
Fig. 16
1a
1b
2a 2b 2c 2d
2e
No. 1
No. 2
No. 33a
3b
EN

20
Trouble-shooting
only by qualied personnel
Machine does not run
Machine has no power supply
Check mains power cable (see chapter Service and
repairs > Belt change; in conjunction with Fig. 3)
Roller and / or disc brushes
do not rotate constantly
Round belt tension loss
or
Round belt without guide
or
Round belt torn
Check round belt guide and tension or
replace round belt.
Roller and / or disc brushes
spin during use
Round belts slip
or
Roller / disc brushes not xed on shaft.
Fix roller / disc brushes on the shaft
with screws.
Motor blocked/running unevenly
poss. foreign objects wound into brushes
Unplug the mains power plug immediately and
turn the brushes by hand in order to remove
any objects that have become wound in
Machine becomes very loud during
the cleaning process
Bearing faulty
Check bearing and replace if necessary
Fine dust is not sucked off
(only Solamat 200)
Filter is blocked
Change the lter

21
Technical Data
Solamat 90*
Dimensions: 460 x 560 x 114 mm (W x D x H)
Weight: 47 kg
Connection values:
230 Volt (110 Volt optional)
Power: 180 Watt, 750 rpm
Wiring diagram
Solamat 90/100
Sensor
Circuit board
Motor
Earth
Power connection
EN

22
Sensor - foot switch
(Sensor cap 05-059)
(Sensor 07-035)
Round belt 930 mm
08-007
Round belt 710 mm
08-0085
Round belt 700 mm
No.: 08-008
Rubber foot
04-002
Fastening screws
Fastening screws
Fastening screws
1
1
1
1
1
Edge clean.
brush
01-015
Circuit board 230V
07-031
Upper housing for circuit board
05-061
Shaft 185 mm
05-868
Nut, self-locking
M10
Motor
02-001
Roller brush
01-003
Shaft 280 mm
05-800
Ball-bearing
with retainer
05-015
Round belt pulley
54x16x20 mm
05-846
Round belt pulley
64x16x12 mm
05-844
Ball-bearing
with retainer
05-015
Ball-bearing with retainer
05-015
Round belt pulley
54x16x12mm
05-843
Solamat 90 parts drawings

EN
01-2014 | 0.5
Other manuals for Solamat 90
1
Table of contents
Other HEUTE Industrial Equipment manuals
