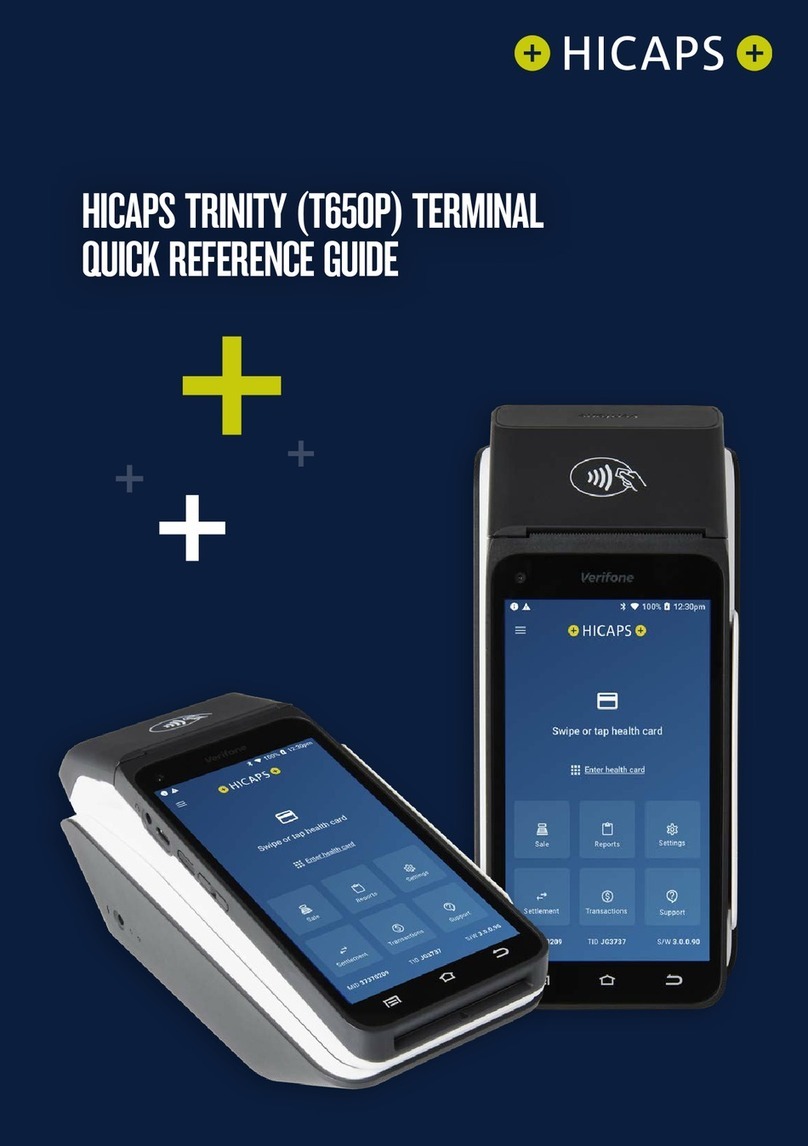
HICAPS T4200 User manual

user guide

Merchant No.
Manual Merchant No.
For Authorisations:
• Credit Card (Credit) Account
This is an Australia-wide number 3 25 5
• Debit Card (Cheque) or (Savings) Account
This is an Australia-wide number 300 650 852
Please call the above authorisation line appropriate for the card type used
(credit or debit). Call 3 25 5 and select extension 500 when calling about lost
or stolen credit cards.
Attach your rst log on receipt here!
. HICAPS help desk 4
.2 glossary 4
.3 diagram of HICAPS terminal 6
2. terminal provider setup 7
2.. adding a new provider 7
2..2 changing and deleting providers
2.2 processing a HICAPS claim 2
2.2. processing a HICAPS claim transaction (HICAPS terminal) 2
2.2.2 processing a HICAPS claim transaction (practice management system) 5
2.3 cancelling a HICAPS claim 6
2.3. cancelling a HICAPS claim (HICAPS terminal) 6
2.3.2 cancelling a HICAPS claim (practice management system) 8
2.4 manual daily transaction summary (HICAPS totals) 8
2.5 settlement transaction report (HICAPS forced settlement) 9
2.6 ordering terminal rolls 20
2.7 performing terminal sign on/logon 2
2.8 customising a HICAPS receipt (optional) 22
3. processing an EFTPOS transaction 23
3.. processing an EFTPOS transaction following a successful claim transaction 23
3..2 processing an EFTPOS transaction 25
3..3 processing an EFTPOS transaction (practice management system) 28
3.2 refunding an EFTPOS transaction 28
3.2. refunding an EFTPOS transaction 28
3.2.2 refund an EFTPOS transaction (practice management system) 3
3.3 EFTPOS settlement 32
3.3. manual EFTPOS settlement 32
3.3.2 automatic terminal settlement 34
3.3.3 merchant password 36
3.3.4 host forced settlement 36

2 3
4. the screensaver (idle screens) 37
4.2 main menu 38
4.2. logon 38
4.2.2 batch 38
4.2.3 terminal 38
4.2.4 setup 39
4.2.5 tests 39
4.2.6 reprint 39
4.3 transaction menu 40
4.3. balance / quote 40
4.3.2 refund / cancel 40
4.3.3 pre-auth 40
4.3.4 completion 40
4.3.5 cash out 4
4.3.6 sale 4
4.4 terminal function keys 42
4.4. report [] key (print EFTPOS and HICAPS reports) 42
4.4.2 setup [2] key (refer help desk) 43
4.4.3 reset [3] key 43
4.4.4 lock [4] key 43
4.4.5 sign on [5] key 43
4.4.6 quote [6] key 44
4.4.7 order [7] key 44
4.4.8 reprint [8] key (reprint EFTPOS and HICAPS transactions) 44
4.4.9 load [9] key 44
4.4.0 initialise [0] key 44
4.4. paper feed [*] key 44
4.4.2 alpha [#] key 44
4.5 changing the terminal security password 45
4.6 fallback procedure 46
7. transaction level HICAPS response codes 5
7.2 item level HICAPS response codes 53

4 5
HICAPS Help Desk phone number is .
For HICAPS Help Desk hours of operation, please refer to
Provider information section.
HICAPS fax number is .
Health Industry Claims And Payments Service. The company
responsible for the switching of transactions to health funds
from the terminal.
The date the membership card was issued. Those cards with
issue dates have them printed on the bottom right-hand
corner of the card.
The amount charged for the given item of service.
Numeric code identifying the type of service performed. Refer
to the HICAPS Quick Reference Guide or the relevant schedule
for a full list of item numbers.
A customer of a Health Fund.
The Multi-Merchant Facility. This is a feature of the HICAPS
terminal which optionally allows you to settle the EFTPOS
funds separately for each provider.
A member listed on the card which identies a given patient
within a Health Fund membership.
The PC-based system which allows a transaction to be sent
directly to the HICAPS terminal.
Practitioners who provide Health Services to patients.
Is eight characters that uniquely identify each individual
provider for a specic location. Provider numbers that HICAPS
use are issued by Medicare Australia or Medibank Private.
Provider numbers are location specic, so you must have a
provider number for each location you wish to practice at.
Refunds a previous EFTPOS or credit approved transaction.
Reverses an approved transaction on the same day the
transaction was processed.
Receipt reference number (unique 2 digit eld).
Pass the membership card through the card reader on the
right-hand side of the HICAPS terminal.
Two digit FDI numeric identifying the tooth on which the
service was performed.
Value of rebate authorised by a Health Fund.
Reverses a transaction processed through the terminal.
A membership card issued by the Health Fund or an EFTPOS or
credit card, issued by a bank.
After treatment is provided, details are sent electronically via
the terminal to the Health Fund.
When a Health Fund declines to pay the request a brief
response message will print with each declined item
and/or claim.
Either the terminal or the associated Practice Management
System prints a receipt, which must be signed by the patient to
acknowledge services and approve the transfer of payment to
the provider.
The terminal facility allowing you to start an EFTPOS
transaction using the Gap amount returned from the HICAPS
Claim.
Two digit numeric identifying the body part/primary
condition/ diagnostic intervention on which the service was
performed.
The date the specic item of service was performed – format
ddmm.
The terminal was unable to contact the bank to process an
EFTPOS transaction, but the transaction has been approved/
declined and will be sent to the bank with the next
transaction.
The amount remaining after the Health Fund has approved a
benet for the specied services.

6 7
To add providers you will need to contact HICAPS
in writing. A ‘ will
need to be completed and sent to HICAPS. This form is
available from the HICAPS website
or from the HICAPS Help Desk on . You will
receive notication from HICAPS in writing once the
providers have been registered.
Merchant is used for Provider Setup.
Press the key.
Enter and press .
Select a Not Assigned provider eld by entering the
number and pressing or by scrolling up or
down to highlight the Not Assigned provider eld
and pressing .
Enter the provider’s name by pressing ‘sel’ and using
the to keys.
To select an alpha character entry either press the ‘sel’
button on the left-hand side of the screen or press the
Alpha key on the keyboard.
SELECT PROVIDER
. Dr Smith A
2. NOT ASSIGNED
3. NOT ASSIGNED
4. NOT ASSIGNED
5. NOT ASSIGNED
6. NOT ASSIGNED
PROVIDER NAME
23
456
789
0
sel

8 9
Pressing the Alpha key again will change from upper case to lower case and symbols.
E.g.
After entering the provider’s name press the key.
Key the provider number for this location then press
. This is the 8-character number supplied
by Medicare or Medibank Private. If your provider
number is shorter than 8 characters you will need to
include leading 0’s to make up 8 characters. Alpha
character entry is entered the same as for entering
the provider’s name.
Select the Merchant name for processing EFTPOS
payments for this provider from the list presented then
press . The list can contain up to 25 merchant
details so please ensure you select the correct
merchant from the list.
This option will enable the terminal to prompt to
automatically start an EFTPOS transaction for the gap
amount. Select the appropriate option for this provider.
If a Claim to Sale is disabled the Claim Deposit
is not displayed. This option will enable the terminal
to prompt for deposits (optical only).
Select Item Memory enabled or disabled for this
provider. Item Memory enables the terminal to recall
the last amount entered for this item number.
Clear Item Memory will clear all amounts stored for
item numbers.
Conrmation that the item memory will be cleared if
Yes was selected at Clear Item Memory.
PROVIDER NAME
_QZ 2ABC 3DEF
4GHI 5JKL 6MNO
7PRS 8TUV 9WXY
0\+? CLEAR
sel
PROVIDER NAME
_qz 2abc 3def
4ghi 5jkl 6mno
7prs 8tuv 9wxy
0.,” CLEAR
sel
PROVIDER NUMBER
23
456
789
0
sel
PROVIDER SETUP
PROVIDER SETUP
PROVIDER SETUP
PROVIDER SETUP
PROVIDER SETUP
SELECT MERCHANT
. A – Smith St Practice
2. B – Dr Smith
3. C – Dr Jones
4. D – Dr Brown
5. E – Dr White
6. F – Dr A. Smith
CURRENT

0
ENTER PROVIDER TYPE
. GENERAL PRACTICE
2. OPTOMETRICAL
3. SPEC/AH/DENT
4. DIAGNOSTIC
5. PATHOLOGY
6. NOT APPLICABLE
Select if you want automatic HICAPS settlement
enabled for this provider.
Select if you want a HICAPS transaction listing to print
when automatic settlement takes place.
Key the security password for this provider then press
. It is used to protect access to the provider table.
This option will tell the terminal to prompt for either
a clinical code or tooth number, or no prompt at all.
Select whichever is appropriate for this provider, or
press to accept the highlighted option.
This option lets you select the type of provider you
are for processing Medicare Australia Easyclaim
transactions. Select whichever is appropriate for this
provider, or press to accept the highlighted
option.
If you do not want to process Medicare Australia
Easyclaim transaction section 5. Not applicable.
This option when completed pre-populates the Payee
Provider Number when completing a claim. Use the 0-9
keys to enter provider number and press or
press to bypass.
This option should be used when the servicing
provider is not the payee provider for Medicare
Easyclaim transactions.
The provider has now been added, a conrmation
receipt will be printed and the terminal will display a
provider summary, pressto nish.
To alter provider details you will need to contact HICAPS in writing. A ‘
’ will need to be completed and sent to HICAPS. This form is
available from the HICAPS website or from the HICAPS Help Desk
on .
Press the key.
Enter and press .
Select the provider that you want to change by
entering the number and pressing or by
scrolling up or down to highlight the provider and
pressing .
The password that was keyed when the provider
was originally entered into the terminal is required to
amend any of the provider details.
The Provider summary screen will be shown, use the
down arrow to go to page 2 and press to
enable you to modify the provider’s details.
Once you have entered the modify provider function
follow the steps used for adding a provider.
PROVIDER SETUP
PROVIDER SETUP
PROVIDER PASSWORD
SELECT PROMPT OPTION
SELECT PROVIDER
. Dr Smith A
2. NOT ASSIGNED
3. NOT ASSIGNED
4. NOT ASSIGNED
5. NOT ASSIGNED
6. NOT ASSIGNED
PROVIDER SUMMARY
PROVIDER SUMMARY
Press REPORTS to Print
Press CLEAR to Modify
Press ENTER To Finish
PAYEE PROVIDER NUMBER
23
456
789
0
sel

2 3
To start a HICAPS Claim transaction, simply swipe the
patient’s Health Fund card through the terminal.
When prompted to SELECT PROVIDER simply select the
appropriate screen button for the provider claiming for
the services provided, or press the relevant number on
the keypad that is displayed beside the provider’s name.
This prompt will only be displayed if more than
one provider is loaded into the terminal.
The screen will display the number of items you
are able to process in one transaction, e.g. 6.
Press to continue.
The terminal will then ask for the PATIENT ID. This is
the 2-digit number printed on the card relating to the
specic patient receiving treatment then press .
This value will default to if nothing is
entered.
Key the item number associated with the treatment
supplied then press .
Key the clinical code or tooth number on which the
treatment supplied was performed then press
or just press to use the default of.
Terminal Provider Setup prompt for Clinical code
or Tooth Number may be changed through Provider
Setup (Refer 2.) and will only be displayed if setup
(Refer to Step 5).
The date this part of the service was performed.
dd, mmm = current date. To change the date enter
DD = day, e.g. 26 and MM = 2, e.g. DEC.
To accept the default of the current date just press
.
Enter the cost to be charged for this item.
This eld will default to the last cost charged for
the same item if item amount memory is enabled.
You will be presented with a summary of the item(s)
entered. By pressing the middle left screen button
you are able to modify the item that has been
entered by repeating the steps above.
To add another item, simply press and enter the
options as above. Once all items have been added to
the claim, press .
If the summary presented is correct, simply press
and the claim will be sent to the Health Fund
for approval.
To scroll through the items use top and bottom
buttons beside the arrows at the left of the screen.
SELECT PROVIDER
. A – Smith St Practice
2. B – Dr Smith
3. C – Dr Jones
4. D – Dr Brown
5. E – Dr White
6. F – Dr A. Smith
CLAIM
CLAIM
CLAIM
CLAIM
CLAIM
CLAIM – PATIENT ID 0
Press REPORTS to Print
CLAIM
CLAIM

4 5
The claim receipt contains all of the information
relating to the claim. A second [CUSTOMER COPY] is
printed without the statutory declaration. The rst
copy is required to be signed by the Fund member and
retained for your ofce records and may be required
to be produced by the Health Fund. The second copy is
for the customer’s own records.
To start a HICAPS Claim Transaction, simply send the
transaction to HICAPS by clicking on the HICAPS icon
on your Practice Management System screen.
When the terminal receives the transaction details
from your Practice Management System, the terminal
will prompt for the customer card to be swiped. The
terminal will recognise the card type that should be
swiped by the type of transaction that is received from
the Practice Management System. The results from
the transaction will be returned directly to the Practice
Management System.
For further assistance on processing a Practice
Management System transaction please contact your
Practice Management System provider.

6 7
There are two options for cancelling HICAPS claim transactions, but for each option
a transaction can only be cancelled on the same day that it was originally processed.
Transaction was processed by the same terminal.
Press the key.
The terminal will then prompt you to swipe/insert the
card. Swipe the patient’s Health Fund card.
The terminal will then display the transaction(s)
processed for your patient for the current day. If
there is more than one transaction for that patient all
transactions can be reviewed by using the up/down
arrow buttons.
Select the transaction you want to cancel and press
the key.
You will then be asked to conrm the cancel by
pressing either the NO or YES key.
Alternatively you can use the option selection button
beside the and prompts on the screen.
The terminal will produce two copies of the
cancellation receipt. The rst copy must be signed by
the Fund member and retained for your records, the
second copy is for the member’s own records.
Transaction was processed by a different
terminal.
The transaction must still have been processed
in the same day.
Press the key.
The terminal will then prompt you to swipe/insert the
card. Swipe the patient’s Health Fund card.
The terminal will prompt for you to select a provider by
entering the provider number or scrolling down and
highlighting the provider and pressing .
The terminal will then prompt you for the 2-digit
Receipt Reference Number of the original claim.
Key the RRN and press .
The terminal will then prompt you for the Benet
amount approved by the Health Fund on the original
claim. Key the amount and press .
You will then be asked to conrm the cancel by
pressing either the NO or YES ] key.
Alternatively you can select your response using the
corresponding keys on the side of the display next to
the or prompts on the screen.
The terminal will produce two copies of the
cancellation receipt. The rst copy must be signed by
the Fund member and retained for your records, the
second copy is for the member’s own records.
CANCEL TXN? RRN:23456
Press ENTER to CANCEL TXN
REFUND / CANCEL
REFUND / CANCEL
SEND CANCEL ?
SEND CANCEL ?
SELECT PROVIDER
. A – Smith St Practice
2. B – Dr Smith
3. C – Dr Jones
4. D – Dr Brown
5. E – Dr White
6. F – Dr A. Smith
CANCEL TXN ?

8 9
To cancel a HICAPS claim transaction, simply send the transaction to HICAPS by selecting
the appropriate option from your Practice Management System screen. When the
terminal receives the transaction details from your Practice Management System
the terminal will prompt for the customer card to be swiped. The results from the
transaction will be returned directly to the Practice Management System.
For further assistance on processing a cancel transaction using your Practice
Management System transaction please contact your Practice Management System
provider.
Press the key.
Enter and press .
Select the appropriate day, TODAY or PREVIOUS DAY
by entering or or scrolling to highlighting the
option and pressing .
If you select today you will be provided with an option
for either summary or detailed report.
Select the appropriate day, SUMMARY LISTING or
DETAILED LISTING by entering or or scrolling to
highlighting the option and pressing .
If you select the previous day, only a summary
report will be provided. In both cases the reports will
be printed out by provider.
Prior to processing the rst transaction of each day,
the terminal will prompt you to print the HICAPS
Settlement details from the previous day.
Select the YES key to produce the transaction
listing.
Select the appropriate day, SUMMARY LISTING or
DETAILED LISTING by entering or or scrolling to
highlighting the option and pressing .
The summary will report on totals for each
provider, broken down by Health Fund. The detailed
listing also includes all transactions processed. For
Practice Management System users the totals are
obtained from the Practice Management System.
HICAPS TOTALS
HICAPS TOTALS
PRINT TXN LISTING
PRINT TXN LISTING

20 2
Press the key.
Enter and press .
To conrm that you wish to order stationery for your
terminal press the YES key. The terminal
will now print a receipt conrming your order with
a STATIONERY ORDER PLACED message.
Press the Key.
Enter and press .
This will send a sign on message to the host
and it must be approved. The stationery will take ve
business days for the rolls to arrive.
If you receive a transaction response code (Logon
Required) or when advised by the Help Desk, the
terminal is required to logon to HICAPS. In most cases
this is automatically done by the terminal, however,
there may be some times when you are required to
manually sign on to the switch.
Press the key.
Enter and press ].
The terminal will now communicate with HICAPS and
print a receipt conrming your sign on.
MERCHANT FUNCTION
HOSTS

22 23
To customise your HICAPS receipt for seasonal or other
messages.
Press the key.
Enter and press .
Enter to depending on where you want your
message to be printed on the receipt. You will then be
prompted to enter your message using the keypad. The
alpha entry for the receipt text is the same as that used
for entering your provider names. Refer to section 2...
.
The following screen will be displayed if the
Provider is set up to accept a deposit and also if YES
was answered to the deposit taken question
at Step .
Enter the amount of the deposit.
Conrm that the outstanding value is correct and press
YES .
Swipe or insert the credit or debit card.
ENTER RECEIPT TEXT
CLAIM
REFUND / CANCEL
CLAIM
CLAIM

24 25
The cardholder is to select their account using the
buttons beside each account option.
The terminal will then prompt for the cardholder to
enter their PIN and press .
For a Credit or Charge card transaction the cardholder
can just press if they don’t have a PIN.
The transaction will be processed by the bank and
be approved or declined. Please ensure you check
the screen and receipt to conrm the transaction was
approved or declined.
If the payment was made using a card without a PIN
you will also be asked to conrm the signature once
the transaction is approved by the bank.
If the signature matches press YES and the
transaction is complete. If the signature doesn’t match,
press NO to cancel the transaction and get
payment by another means.
To start an EFTPOS Sale transaction, simply swipe the
patient’s EFTPOS card through the terminal. This could
be Credit: Visa, MasterCard, Charge: Amex, Diners or
JCB, or Debit: Cheque or Savings as per your EFTPOS
agreement.
If the terminal has MMF active, you will then be
prompted to select the appropriate provider from the
merchant list.
Enter the amount of the sale.
The cardholder is to select their account using the
buttons beside each account option.
The terminal will then prompt for the cardholder to
enter their PIN and press .
For a Credit or Charge card transaction the cardholder
can just press if they don’t have a PIN.
SELECT ACCOUNT
PINPAD
SIGNATURE
RESPONSE
RESPONSE
SELECT MERCHANT
. A – Smith St Practice
2. B – Dr Smith
3. C – Dr Jones
4. D – Dr Brown
5. E – Dr White
6. F – Dr A. Smith
VISA PURCHASE
SELECT ACCOUNT
PINPAD

26 27
The transaction will be processed by the bank and
be approved or declined. Please ensure you check
the screen and receipt to conrm the transaction was
approved or declined.
If the payment was made using a card without a PIN
you will also be asked to conrm the signature once
the transaction is approved by the bank.
If the signature matches press YES and the
transaction is complete.
If the signature doesn’t match, press NO to
cancel the transaction and get payment by another
means.
The EFTPOS receipt contains all of the information
relating to the EFTPOS transaction. A second
is printed. The rst copy is required
to be signed by the cardholder and retained for your
ofce records. The second copy is for the cardholder’s
own records.
SIGNATURE
RESPONSE
RESPONSE

28 29
To start an EFTPOS transaction, simply send the
transaction to HICAPS by clicking on the HICAPS icon
on your Practice Management System screen.
The terminal will prompt for the customer’s EFTPOS
(Credit or Debit) card to be swiped. It will then prompt
for the remaining input: Provider (for MMF), Account,
PIN, etc. The results from the transaction will be
returned directly to the Practice Management System
and a receipt for your records will be produced for the
customer to sign, together with a copy for the customer.
For further assistance on processing a Practice
Management System transaction please contact your
Practice Management System provider.
There are two options for refunding an EFTPOS
transaction.
Press the key.
The terminal will then prompt you to swipe/insert the
card. Swipe the cardholder’s card.
The terminal will then display the transaction(s) processed
by this cardholder for the current day. If there is more
than one transaction for that cardholder all transactions
can be reviewed by using the up/down arrow buttons.
Pressing the NO to enter a different value for the
Refund for this cardholder (refer to option 2 below or the
YES key to Refund the selected transaction.
Press the key.
The terminal will then prompt you to swipe/insert the
card. Swipe the Cardholder’s card.
The terminal will prompt for you to select a Merchant
by entering the number beside the Merchant’s name
and press or scrolling down and highlighting
the Merchant name and pressing.
The terminal will then prompt you to enter the refund
password for the selected merchant. Key the Password
and press .
The terminal will then prompt you for the amount for
the Refund. Key the amount and press .
CANCEL TXN? RRN:23456
Press CLEAR to REFUND
Press ENTER to CANCEL TXN
REFUND / CANCEL
REFUND / CANCEL
SELECT MERCHANT
. A – Smith St Practice
2. B – Dr Smith
3. C – Dr Jones
4. D – Dr Brown
5. E – Dr White
6. F – Dr A. Smith
“Card Type” REFUND
REFUND

30 3
The cardholder is to select their account using the
buttons beside each account option.
The terminal will then prompt for the cardholder to
enter their PIN and press .
For a Credit or Charge card transaction the cardholder
can just press if they don’t have a PIN.
The transaction will be processed by the bank and
be approved or declined. Please ensure you check
the screen and receipt to conrm the transaction was
approved or declined.
If the payment was made using a card without a PIN
you will also be asked to conrm the signature once
the transaction is approved by the bank.
If the signature matches press YES and the
transaction is complete.
If the signature doesn’t match, press NO to
cancel the transaction and get payment by another
means.
To refund an EFTPOS transaction, simply send the
transaction to the HICAPS terminal by selecting the
appropriate option from your Practice Management
System screen.
When the terminal receives the transaction details
from your Practice Management System the terminal
will prompt for the customer card to be swiped.
The results from the transaction will be returned
directly to the Practice Management System.
For further assistance on processing a cancel
transaction using your Practice Management System
transaction please contact your Practice Management
System provider.
SELECT ACCOUNT
PINPAD
SIGNATURE
RESPONSE
RESPONSE

32 33
Settling EFTPOS simply advises HICAPS that you have
nished EFTPOS processing for that day. Anything
processed after performing the settlement will be
included with the following day’s transactions.
For Pre Settlement and Last Settlement functions
press button.
You cannot manually settle the terminal if
Automatic Settlement is programmed (as in 3.2.2
Automatic Terminal Settlement).
To settle your EFTPOS facility manually, press the
key.
If the terminal has MMF active, you will then be prompted
to select the appropriate provider from the merchant list.
Once you have selected the provider/merchant from
the list, you have 3 options.
To print your current EFTPOS settlement details and
optionally a full transaction listing, then process your
totals to your bank account.
To print a report summarising the totals for EFTPOS
transactions processed so far during the current
settlement period.
To print a report summarising the totals for EFTPOS
transactions previous settlement period.
Once you have selected an option you will be asked
to press YES or NO to print out your
selection.
SELECT MERCHANT
. A – Smith St Practice
2. B – Dr Smith
3. C – Dr Jones
4. D – Dr Brown
5. E – Dr White
6. F – Dr A. Smith
MERCHANT NAME
SETTLEMENT TXN LISTING

34 35
This option enables your terminal to settle
automatically at a pre-determined time each day.
To set up your terminal to settle automatically:
Press the key.
Enter and press .
The terminal provides you with 3 options:
. Settlement allows you to enable or disable
settlement for all providers/merchants or by each
provider/merchant.
Once you have selected settlement for all merchants
you will be asked to enable or disable settlement by
using the buttons beside each option.
2. Auto Settle NAB allows you to set up the automatic
settlement time by all providers/merchants or by each
provider/merchant.
Select auto settle for all merchants by pressing
and or for a selected merchant by pressing
and. If you selected option 2 for a selected
merchant you will be asked to select the merchant.
Once you have selected auto settle NAB you will be
provided with 3 options. Select the appropriate Auto
settle by entering or scrolling to highlight the
option and pressing .
Press YES to conrm that auto settle is to be
enabled for all providers/merchants.
The terminal will ask if you wish to print a complete
transaction listing when each auto-settle is performed.
Select YES to print the listing, or NO
to produce only totals.
The terminal will ask you to enter the time you wish to
settle in 24 hour clock time.
The terminal will ask you to conrm the time entered.
Select YES if the time displayed is correct, or
NO to re-enter the time.
SETTLEMENT
AUTO SETTLE
AUTO SETTLE
SETTLEMENT NAB
AUTO SETTLE NAB
EFTPOS SETUP
AUTO SETTLE NAB
EFTPOS SETUP
AUTO SETTLE
AUTO SETTLE

36 37
You will be asked to conrm the number of times the
terminal will retry to perform the settlement. To accept
the default of 0 attempts, simply press . You
may increase the number of retries to 2 or 3. Simply
key or and press .
The terminal is able to have a known password, a
password that is set up when your terminal is installed
or a scrolling password.
If you know your password you can change your
password using this option.
If you don’t know your password you will need to
contact the HICAPS Helpdesk on 300 650 852 and they
will tell you how to change your password.
The terminal automatically settles at 2:30EST each
day. The automatic settlement time can optionally
be moved. See Automatic Terminal Settlement 3.2.2.
If the terminal is not settled then it will be automatically
settled by the HICAPS switch at the relevant time.
If the HICAPS switch settles then no receipt is
printed. To obtain Totals please use Last Settle Enquiry,
refer to 4.2.3.
All times are Melbourne/Sydney times.
The HICAPS T4200 has a built in screensaver function.
While the terminal is not in use it will display the
following screens. The screensaver will scroll between
these screens until you start to use the terminal, either:
> from your integrated Practice Management System,
> by swiping a card,
> by using any key including the clear key.
AUTO SETTLE
EFTPOS SETUP
Table of contents
Other HICAPS Touch Terminal manuals
