manuals.online logo
Brands
  1. Home
  2. •
  3. Brands
  4. •
  5. Hideaway
  6. •
  7. Indoor Furnishing
  8. •
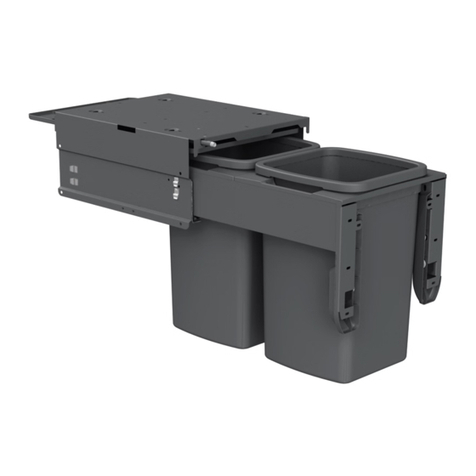
  9. Hideaway Compact Series User manual

Hideaway Compact Series User manual

IMPORTANT INFORMATION
• Do not over ll your bin as contents could scratch your
friction-tted lid (Deluxe & Soft Close ranges only).
• Refrain from pushing down on rubbish inside your bucket/s as
this creates extra pressure on the screw xings inside the cabinet.
How to keep your Hideaway Bin clean
• It is recommended you use warm soapy water to clean your
Hideaway Bin.
• Avoid hard abrasive cleaners.
• When cleaning, try to avoid getting the runners wet, however,
if this happens ensure you dry the runners well and then regrease
with a small amount of petroleum jelly, such as Vaseline, or a clear
silicone grease.
How to care for, remove and replace
runners for cleaning
TO CARE FOR YOUR RUNNERS (all bin models):
• Over time you may need to lubricate your runners for continued
free movement. To do this, lube with a small amount of petroleum
jelly, such as Vaseline, or a clear silicone grease. For Deluxe and
Compact models, the runners can be separated, which makes it
easier to clean and lubricate. See instructions below for separating
runners.
• Your Hideaway Bin has ball bearing runners which gain a
memory over time. This occurs due to the bin usually being opened
partially during everyday use. This can make it dicult to open the
How to care for and maintain
your Hideaway®Bin
(Compact, Deluxe, Soft Close Ranges)
NOTE: Diagrams indicating the dierent bin components can be found in the downloadable installation
instructions for each bin model. This is located on our website in the INFO / DOWNLOADS section.
bin fully. To ensure your bucket/s will always come clear of your
bench top, every so often place a rm grip on either side of your
handle/door bracket and slowly, but rmly, pull the unit towards
you. Continue to pull the runners towards you until they reach
their maximum extension. Then close your unit fully again.
TO SEPARATE RUNNERS FOR CLEANING (all Deluxe models and
Compact KC240 &KC235 models):
• Remove the buckets from your unit. Fully extend the runners. To
do this, nd the black levers located on the outer side of both the
left and right runner.
Runners engaged - push left lever
down and right lever up
Runner Outer Runner
Inner
Black lever
on runners Runner Outer Runner Inner
Pull the inner runner out until
it separates from the unit
Runners disengaged - pull the runner
inner clear of the outer
• Simultaneously, push the left lever down and the right lever
up and pull inner of the runners towards you until it separates
completely from the unit. Set runner inner with collar, handle/door
bracket attached aside in a safe location.
• Push the outer runners attached to the top mounting panel
back inside the unit.
TO SEPARATE RUNNERS FOR CLEANING
(all other Compact models):
• Remove the buckets from your unit. Fully extend the runners.
• Press the yellow runner release latches on both sides.
• Holding the mounting panel securely, pull the handle or door
bracket to separate the inner components from the mounting
panel.
TO CLEAN AND REATTACH RUNNERS
(Deluxe and Compact models only):
• Ensure the outer runners attached to the top mounting panel
are pushed all the way inside the unit. With the outer runners,
ensure the inner slider is pulled all the way towards the front of
the unit.
• Wipe runners with a clean cloth, cotton bud or toothbrush.
Apply a small amount of petroleum jelly, such as Vaseline, or a
clear silicone grease to the runners.
• Line up the inner runners (with collar attached) to the outer
runners that are attached to the top mounting panel (which is
installed in your cupboard).
• Push the inner runners all the way in until the unit closes to
engage the runners. Pull unit open again. The runners should
move with ease indicating correct positioning.
Mounting Panel
Runner
Yellow Runner Release Latch
Questions? See the FAQ section of our website
NEW ZEALAND
09 426 7456 / inf[email protected] / www.hideawaybins.co.nz
AUSTRALIA
1800 042 642 / [email protected] / www.hideawaybins.com.au
Front lid support
The unit should look like this with the friction-
tted lid removed (Soft Close model shown
with door bracket removed for illustration).
CONTACT
How to remove the friction-tted lid from a Deluxe
or Soft Close Bin (for cleaning)
NOTE: Compact Bin models DO NOT have
removable lids.
• If you have a Deluxe model: Remove and separate the runners as
explained in the above instructions.
• If you have a Soft Close model: remove the buckets from your unit. The
runners on the Soft Close range do not seperate.
• Both ranges: you need to clear the hooks at the back of the lid. Place
your hand at the back of the lid and then push up and pull forward in the
same motion. This will release the lid. Remove the lid clear of the main
unit. This will then allow you to clean the lid.
How to reinstall the friction-tted lid into your
Deluxe or Soft Close Bin
• Rest the foam on top of the friction-tted lid. NOTE: the plastic sleeve
stays on the foam to protect it.
• Slide the friction-tted lid and foam inside the top mounting panel,
stopping just before the rear hooks. NOTE: the large fold on the friction-
tted lid sits at the front of the unit, the rear of the lid has the slots which
reconnect with the hooks located on the top mounting panel.
• Check that the foam is behind the front lid support.
• Simultaneously, with one hand, push rmly up on the back of the
friction-tted lid, push the lid above the hooks and drop into location.
Whilst this is happening, with the other hand push the front of the lid
upwards to ensure it rests on the front lid support - located at the front of
the top mounting panel.
• The lid should move up and down a small amount, with ease indicating
correct installation.
• If you have a Deluxe model: reattach the runners as explained in the
above instructions.
Replacement parts and compostable bin liners for your Hideaway Bin can also
be purchased via our website!
Lid coming free
of hook
Hook
Push rmly on the back of the unit to ensure the
lid clears the hooks located on the right and left
hand sides of top mounting panel

This manual suits for next models

2

Other Hideaway Indoor Furnishing manuals

Hideaway Concelo Maintenance manual

Hideaway

Hideaway Concelo Maintenance manual

Hideaway Deluxe KK3H User manual

Hideaway

Hideaway Deluxe KK3H User manual

Hideaway Concelo CR350-213 User manual

Hideaway

Hideaway Concelo CR350-213 User manual

Hideaway Deluxe Series User manual

Hideaway

Hideaway Deluxe Series User manual

Popular Indoor Furnishing manuals by other brands

Weber Torino 92-AE122 Assembly instructions

Weber

Weber Torino 92-AE122 Assembly instructions

LDI Safco Scoot 1600 Assembly instructions

LDI

LDI Safco Scoot 1600 Assembly instructions

Songmics VASAGLE LSC089 manual

Songmics

Songmics VASAGLE LSC089 manual

Desert S188-LAW/4/11 Assembly instructions

Desert

Desert S188-LAW/4/11 Assembly instructions

SEI CK982000TX Assembly instruction

SEI

SEI CK982000TX Assembly instruction

Julian Bowen COTBED CAM020 Assembly instructions

Julian Bowen

Julian Bowen COTBED CAM020 Assembly instructions

Coaster 800222 Assembly instructions

Coaster

Coaster 800222 Assembly instructions

LAURA JAMES RAT22 instruction manual

LAURA JAMES

LAURA JAMES RAT22 instruction manual

NABBI BREMEN GP100 Assembly instructions

NABBI

NABBI BREMEN GP100 Assembly instructions

VIPACK SCMRX200K Assembly instructions

VIPACK

VIPACK SCMRX200K Assembly instructions

Otto 536547 Assembly instructions

Otto

Otto 536547 Assembly instructions

FLEXI STORAGE Clever Cube Storage Unit 01418 Assembly instructions

FLEXI STORAGE

FLEXI STORAGE Clever Cube Storage Unit 01418 Assembly instructions

OLG Luxe Standing Desk Assembly instructions

OLG

OLG Luxe Standing Desk Assembly instructions

Coaster 223521KW Assembly instructions

Coaster

Coaster 223521KW Assembly instructions

Alice's Home BIANCA manual

Alice's Home

Alice's Home BIANCA manual

Circo Kids Night Table DPCI 249-20-0200 Assembly instructions

Circo Kids

Circo Kids Night Table DPCI 249-20-0200 Assembly instructions

Fontanot Oak90 Xtra B90 manual

Fontanot

Fontanot Oak90 Xtra B90 manual

Wedi Bathbox Assembly instructions

Wedi

Wedi Bathbox Assembly instructions

manuals.online logo
manuals.online logoBrands
  • About & Mission
  • Contact us
  • Privacy Policy
  • Terms and Conditions

Copyright 2025 Manuals.Online. All Rights Reserved.